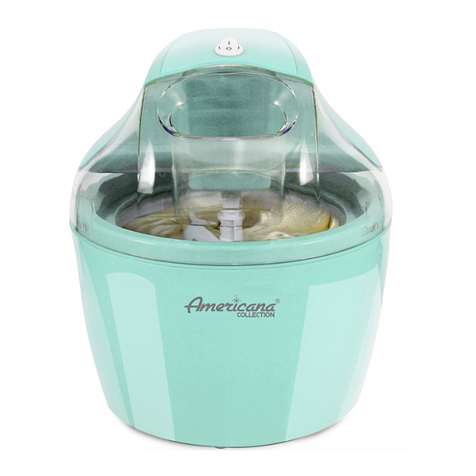
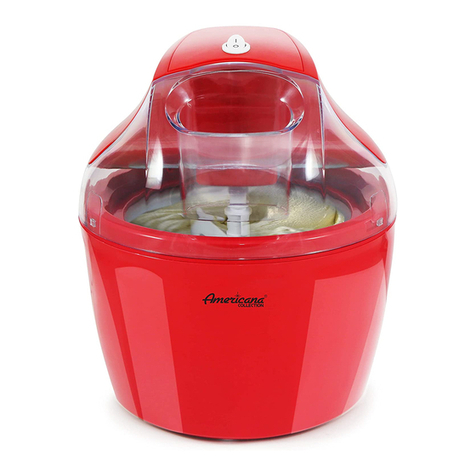
AMERICANA EIM520M User manual

1QT. ELECTRIC
ICE CREAM MAKER
INSTRUCTION MANUAL
Before operating your new appliance, please read all instructions carefully and keep for
future reference.
MODEL: EIM520M
Questions? Elite's customer service team is ready to help.
For more Elite products, visit us at shopelitegourmet.com.
Recipes are included in this manual.

JOIN
the community on Facebook
facebook.com/elitebymaximatic
EXPLORE
our yummy recipes
shopelitegourmet.com/blogs/news
FOLLOW
our instagram to stay updated
@shopelitegourmet
VISIT
our website for support
shopelitegourmet.com
Cook Real Food • Homemade with

TABLE OF CONTENTS
IMPORTANT SAFEGUARDS
SHORT CORD PURPOSE
POLARIZED PLUG
PARTS IDENTIFICATION
BEFORE FIRST USE
HOW TO USE
HELPFUL HINTS
CLEANING AND MAINTENANCE
RECIPES
WARRANTY POLICY
RETURN INSTRUCTIONS
2
4
4
5
5
6
7
8
9
15
16

2 Questions? We’re here to help!
Visit: shopelitegourmet.com for support on this product.
IMPORTANT SAFEGUARDS
The Elite Brand takes consumer safety very seriously. Products are designed and
manufactured with our valued consumers’ safety in mind. Additionally, we ask that
you exercise a level of caution when using any electrical appliance by following all
instructions and important safeguards.
READ ALL INSTRUCTIONS BEFORE USE AND SAVE FOR FUTURE
REFERENCE
WARNING: When using electrical appliances, basic safety precautions should
always be followed as below:
10. This appliance is not a toy.
11. Do not place on or near a hot gas or
electric burner, or in a heated oven.
12. Do not let cord hang over edge of
table or counter, or touch hot
surfaces.
13. Never leave unit unattended while in
use or when plugged into an outlet.
14. Extreme caution must be used when
moving an appliance containing hot
food.
15. Always attach plug to appliance rst,
then plug cord in the wall outlet. To
disconnect, turn any control to “off,”
then remove plug from wall outlet.
16. Never operate the unit dry. Always
have ice cream mixture inside of the
container while plugged in.
17. Do not put hands or any foreign
objects into this appliance while it is
plugged in and operating.
18. Avoid contact with moving parts.
Keep hands, hair and clothing, as
well as spatulas and other utensils,
away during operation to reduce the
risk of injury and/or damage to the
appliance.
19. Do not operate your appliance in
an appliance garage or under a wall
cabinet. When storing in an
appliance garage always unplug the
unit from the electrical outlet. Not
doing so could create a risk of re,
especially if the appliance touches
the walls of the garage or the door
touches the unit as it closes.
1. Do not touch the hot surfaces. Use
handles or knobs. Always use hot
pads or potholders until unit cools.
2. Unsupervised young children and
cognitively challenged individuals
should never operate this
appliance.
3. Close supervision is necessary
when any appliance is used by or
near children.
4. To protect against electrical shock
do not immerse cord, plug or any
part of this appliance in water or
other liquids.
5. Unplug from outlet when not in
use, before removing parts and
before cleaning. Allow to cool
before putting on or taking off any
parts, and before cleaning.
6. Do not operate any appliance with
a damaged cord or plug, or after
the appliance malfunctions, or if
the appliance has been dropped
or damaged in any manner. Return
the appliance to the nearest repair
shop for examination, repair or
adjustment.
7. The manufacturer does not
recommend the use of accessory
attachments other than what is
provided by the manufacturer. Use
of attachments may cause injuries.
8. Do not use the appliance for other
than its intended use.
9. Do not use outdoors. For
household use only.

3Questions? We’re here to help!
Visit: shopelitegourmet.com for support on this product.
20. Do not use hot oil or liquids in the
bucket. Always chill mixture before
churning.
21. Do not use the freezer bowl on
ames, hot plates or stoves. Do not
expose to heat source.
22. Do not wash in dishwasher; doing so
may cause risk of re, electric shock
or injury.
23. Keep hands and utensils out of
freezer bowl while in use to reduce
the risk of injury to persons or to the
appliance itself. DO NOT USE SHARP
OBJECTS OR UTENSILS INSIDE THE
FREEZER BOWL! Sharp objects will
scratch and damage the inside of
the freezer bowl. A rubber spatula or
wooden spoon may be used when
the appliance is in the OFF position.
24. This appliance is not intended for use
by persons (including children) with
reduced physical sensory, or mental
capabilities, or lack of experience
and knowledge, unless they are
closely supervised and instructed
concerning use of the appliance
by a person responsible for their
safety. Close supervision is necessary
when any appliance is used by or
near children. Children should be
supervised to ensure that they do
not play with the appliance.
25. Turn the appliance OFF, then unplug
from the outlet when not in use,
before assembling or disassembling
parts and before cleaning. To
unplug, grasp the plug and pull
from the outlet. Never pull from the
power cord.
IMPORTANT SAFEGUARDS (cont.)
SAVE THESE INSTRUCTIONS.
THIS PRODUCT IS FOR
HOUSEHOLD USE ONLY.

4 Questions? We’re here to help!
Visit: shopelitegourmet.com for support on this product.
SHORT CORD PURPOSE
POLARIZED PLUG
be arranged so that it will not drape
over the counter top or tabletop where
it can unintentionally be pulled on or
tripped over by children or pets. If an
extension cord is used: (1) the marked
electrical rating of the extension cord
should be at least as great as the
electrical rating of the product; (2) the
extension cord should be arranged so
that it will not drape over the counter
top or tabletop where it can
unintentionally be pulled on or tripped
over by children or pets.
If the plug still does not t, contact a
qualied electrician. Never use the plug
with an extension cord unless the plug
can be fully inserted into the extension
cord. Do not alter the plug of the
product or any extension cord being
used with this product. Do not attempt
to defeat the safety purpose of the
polarized plug.
Note: A short power cord is provided
to reduce the risk of personal injury
resulting from becoming entangled in or
tripping over a long cord.
Longer power-supply cords or
extension cords may be used if care
is exercised in their use.
If an extension cord is used: (1) the
marked electrical rating of the
extension cord should be at least as
great as the electrical rating of the
product; (2) the extension cord should
If this appliance is equipped with a
polarized plug (one blade is wider than
the other), please follow the below
instructions:
To reduce the risk of electrical shock,
this plug is intended to t into a
polarized outlet only one way. If you
are unable to t the plug into the
electrical outlet, try reversing the plug.

Questions? We’re here to help!
Visit: shopelitegourmet.com for support on this product.
5
PARTS IDENTIFICATION
1. Electric Motor Head
2. ON/OFF Switch (I/O)
3. Connecting Axis
4. Lid
5. Mixing Paddle
6. Freezer Bowl
BEFORE FIRST USE
• Clean the Transparent Cover (not the Electric Motor Head), Paddle, Freezer
Bowl with warm soapy water before you use for the rst time. See “CLEANING
AND MAINTENANCE”.

6 Questions? We’re here to help!
Visit: shopelitegourmet.com for support on this product.
HOW TO USE
To prepare:
• It is recommended to chill the whole Freezer Bowl in a
freezer set to 0˚F/-18˚C for at least 24 hours before using
your ELECTRIC ICE CREAM MAKER.
• Find a stable surface near an electrical outlet. Make sure
cord is away from any water source.
• Select your favorite recipe and prepare the recipe per
instructions. Place recipe mixture in refrigerator until ready
to use.
Assembly:
• Always ensure that the unit is unplugged prior to
assembly. Fit the Electric Motor onto the Lid. The motor
will click into place when secure.
• Align the Connecting Axis with the Mixing Paddle, then t
the Paddle assembly into the hole on the bottom of the
Motor.
• Position the Electric Motor/Lid/Mixing Paddle assembly
over and onto the Freezer Bowl. Turn the assembly
clockwise to lock into position.
• You can now operate your ice cream maker by using the
On/Off power switch.
1. Remove the Freezer Bowl from the freezer.
2. Retrieve ice cream or sorbet recipe mixture from the
refrigerator.
3. Attach the Electric Motor/Lid/Mixing Paddle assembly
according to Assembly Instructions.
4. Turn the Electric Motor to the “ON” position and the
Mixing Paddle will begin to churn.
5. Pour mixture into the Freezer Bowl through the Lid
Opening. When pouring mixture, always stop at least 1.5
inches (4 cm) from the top, as the mixture will expand in
volume during the freezing process.
6. Allow the mixture to churn until frozen or desired
consistency is reached. This can take up to 15 to 30
minutes, but some recipes may be ready in less time.
7. Once ice cream has reached desired consistency, turn
the Electric Motor to the “OFF” position, and unplug the
Electric Motor.
8. Turn the Electric Motor/Lid/Mixing Paddle assembly
clockwise to remove it from the Freezer Bowl. Remove the
Mixing Paddle and scrape off any excess ice cream with a
spatula.
9. Transfer ice cream to a freezer-safe container and freeze, or
serve straight from the Freezer Bowl!
NOTE:
To determine if the
Freezer Bowl is frozen
enough to start
making ice cream,
shake the Freezer
Bowl slightly after
freezing. If you hear
liquid moving inside
of it, the Freezer Bowl
will need more time to
freeze.
-
The Freezer Bowl must
be placed in upright
position in the freezer.
Mix-in ingredients
such as chocolate
pieces, cookie dough
chunks, nuts, or other
candy may be added
through the
Ingredient Chute as
the mixture starts to
freeze. Usually
towards the middle of
the freezing process.
The maximum
operation time is 30
minutes.
-
-
-

7Questions? We’re here to help!
Visit: shopelitegourmet.com for support on this product.
HELPFUL HINTS
TEXTURE
To ensure that ice crystals do not form in ice cream
mixture, DO NOT stop the churning process until the ice cream is ready.
Recipes with high amount of salt can cause the mixture to freeze too quickly, which
can also cause ice crystals to form in the ice cream.
SWEETNESS
Homemade ice cream will usually have a less sweetened avor than the initial
recipe mixture. It is recommended to adjust the amount of sugar in the recipe to
suit your preference.
Articial sweeteners may be used in place of sugar. Use the following
measurements for reference:
• 1 packet of sweetener = 2 tsp. of sugar
• 6 packets of sweetener = ¼ cup of sugar
• 8 packets of sweetener = ¹/3 cup of sugar
• 12 packets of sweetener = ½ cup of sugar
*Follow the measurements on the packaging for Stevia or other Natural
Sweeteners.
CONSISTENCY
Homemade ice cream generally has a thick, milkshake texture. If you prefer a thicker
or more rm consistency, try one of the following:
• Place ice cream mixture in freezer to harden.
• Recipes that call for alcohol may inhibit the freezing process. Be sure to add
any alcohol during the last few minutes of the freezing cycle.
JAMMING
If the Mixing Paddle gets jammed and does not revolve properly, try the following:
• Check to make sure that the Mixing Paddle is properly attached to the
Connecting Axis, that cord is plugged into outlet and that the unit is ipped to
the “ON” position.
• Ice Cream recipes that include hard ingredients like nuts or chocolate chips may
cause the Mixing Paddle to become lodged in the Freezer Bowl. It is best to add
hard ingredients during the last few minutes of the churning process.
• DO NOT stop the churning process until ice cream is nished. Stopping in the
middle of the process can cause the ice cream to harden and restrict the
movement of the Mixing Paddle.
7

8 Questions? We’re here to help!
Visit: shopelitegourmet.com for support on this product.
HELPFUL HINTS (cont.)
FREEZING
DO NOT operate the unit longer than required. If the mixture has not yet achieved
the slush consistency or has thawed again after 30 minutes, do not continue.
Possible reasons for mixture not chilling or freezing:
• The Freezer Bowl was not cold enough.
• The mixture was too warm. Make sure that the ingredients that you add are
chilled and not warm, lukewarm or of room temperature before adding to the
Freezer Bowl.
CLEANING & MAINTENANCE
1. Make sure the Electric Motor is turned off and the unit is unplugged.
2. Remove Electric Motor/Lid/Mixing Paddle by turning clockwise and lifting from
Freezer Bowl.
NOTE: The Electric Motor separates from the Lid for cleaning.
3. Remove Mixing Paddle and Connecting Axis, and scrape off any excess ice
cream.
4. Wash Freezer Bowl, Mixing Paddle, Connecting Axis and Lid using warm, soapy
water and dry thoroughly. DO NOT replace Lid with Electric Motor until the
Freezer Bowl is completely dry.
5. Wipe Electric Motor with a soft cloth moistened with mild soap, then dry
thoroughly. NEVER immerse Electric Motor in water or other liquid.
6. DO NOT use harsh or abrasive cleaners.
7. DO NOT use an abrasive sponge, cloth or scouring pad on the unit.
8. DO NOT freeze the Freezer Bowl when it is wet.
9. ONLY wash unit by hand. DO NOT place parts in the dishwasher.

9Questions? We’re here to help!
Visit: shopelitegourmet.com for support on this product.
QUICK & EASY VANILLA ICE CREAM
1. In large bowl, combine ingredients; mix well. Then follow the “HOW TO USE YOUR ICE
CREAM MAKER” instructions.
1 1/2 cup half-and-half or light cream
3/4 cup sweetened condensed milk
3 tsp vanilla extract
RECIPES
BANANA ICE CREAM
1. Purée the bananas rst and then place in a mixing bowl. Pour in the milk/cream and
sugar, mix well. Then follow the “HOW TO USE YOUR ICE CREAM MAKER” instructions.
1 4/5 cups milk or cream or a mixture
of both
*Before following these recipes, be sure to read complete Instruction Manual prior to use and do
not over-ll the Ice Cream Maker.
*NOTE: Not all recipes will yield 1qt. You may need to adjust recipe to yield desired amount.
1/2 cup sugar
1/2 to 1 ripe banana
CHOCOLATE ICE CREAM
1. Combine all ingredients in a mixing bowl, except for the chocolate chips.
2. Transfer ingredients carefully into the canister.
3. Follow the operational instructions of the ice cream maker. Add chocolate chips to
mixture after 30-45 minute to prevent ingredients from settling to the bottom or
jamming the spatula.
1 3/4 tbsp unsweetened cocoa
5/6 cup mini chocolate chips (optional)
5/6 cup half-and-half
1 3/4 cup heavy cream
5/6 cup sugar
COOKIES & CREAM ICE CREAM
1. Combine all ingredients in a mixing bowl, except for the crushed cookies.
2. Transfer ingredients carefully into the canister.
3. Follow the operational instructions of the ice cream maker. Add crushed cookies to
mixture after 30-45 minute to prevent ingredients from settling to the bottom or
jamming the spatula.
3 1/2 tsp vanilla extract
1/2 cup oreo cookies; crushed
5/6 cup half-and-half
1 3/4 cup heavy cream
5/6 cup sugar

10
Questions? We’re here to help!
Visit: shopelitegourmet.com for support on this product.
RECIPES (cont.)
PEACH ICE CREAM
1. Purée the peach rst and then place in a mixing bowl. Pour in the milk/cream and sugar,
mix well. Then follow the “HOW TO USE YOUR ICE CREAM MAKER” instructions.
1 1/2 cupmilk or cream or a
mixture of both
6 tbsp sugar
1.5 ripe peach (peeled, pitted & sliced)
MINT CHOCOLATE CHIP ICE CREAM
1. Combine all ingredients in a mixing bowl, except for the chocolate chips.
2. Transfer ingredients carefully into the canister.
3. Follow the operational instructions of the ice cream maker. Add chocolate chips to
mixture after 30-45 minute to prevent ingredients from settling to the bottom or
jamming the spatula.
1 3/5 tsp mint extract
5/6 cup chocolate chips; coarsely
chopped
5/6 cup half-and-half
1 3/4 cup heavy cream
5/6 cup sugar
GINGERBREAD ICE CREAM
1. Combine all ingredients in a mixing bowl, except for the gingerbread cookies.
2. Transfer ingredients carefully into the canister.
3. Follow the operational instructions of the ice cream maker. Add gingerbread cookies
to mixture after 30-45 minute to prevent ingredients from settling to the bottom or
jamming the spatula.
5/6 cup sugar
1/2 cup gingerbread cookies; crushed
5/6 cup half-and-half
1 3/4 cup heavy cream
STRAWBERRY ICE CREAM
1. Combine the sugar and mashed strawberries and mix well.
2. Mix the strawberries with the rest of the ingredients in a mixing bowl.
3. Transfer ingredients carefully into the canister.
4. Follow the operational instructions for serving and cleaning of the ice cream maker.
1 3/4 cup heavy cream
1 3/4 tsp vanilla extract
3 drops red food coloring
5/6 cup sugar
5/6 cup fresh strawberries, mashed
5/6 cup half-and-half

11Questions? We’re here to help!
Visit: shopelitegourmet.com for support on this product.
TOFFEE ICE CREAM
1. In a medium bowl, use a hand mixer or whisk to combine the milk, granulated sugar,
espresso powder, and cocoa until dissolved, about 1 - 2 minutes on low speed. Stir in
the heavy cream and vanilla. Then follow the “HOW TO USE YOUR ICE CREAM MAKER”
instructions. Add the toffee bits and mini chocolate morsels as the ice cream begins to
thicken.
1 cups heavy cream
1 tsp vanilla extract
3 3/4 tbsp english toffee bits
3 3/4 tbsp mini chocolate chips
1/2 cup whole milk
1/5 cup granulated sugar
1 tbsp instant espresso
1 tbsp unsweetened cocoa powder
RECIPES (cont.)
CHEESECAKE ICE CREAM
1. Place the cream cheese into a mixing bowl and beat until soft and smooth. Slowly add
the sugar and then beat in the sour cream followed by the double (heavy) cream.
2. Add the vanilla extract and lemon juice and mix until thick and smooth. Cover and chill in
the refrigerator for 2-3 hours. Take the chilled mixture and beat until creamy. Then follow
the “HOW TO USE YOUR ICE CREAM MAKER” instructions.
1 1/3 tbsp fresh lemon juice
1/3 cup granulated sugar
1/8 tsp vanilla extract
2/5 cup double/heavy cream
2/5 cup sour cream
1/3 cup cream cheese
PUMPKIN PIE ICE CREAM
1. Combine all ingredients in a mixing bowl.
2. Transfer ingredients carefully into the canister.
3. Follow the operational instructions for serving and cleaning of the ice cream maker.
1 3/4 tsp pumpkin pie spice
5/6 tsp vanilla extract
1 1/3 cup heavy cream
5/6 cup pumpkin puree
COOKIE DOUGH ICE CREAM
1. Combine all ingredients in a mixing bowl, except for the cookie dough clumps.
2. Transfer ingredients carefully into the canister.
3. Follow the operational instructions of the ice cream maker. Add cookie dough clumps
to mixture after 30-45 minute to prevent ingredients from settling to the bottom or
jamming the spatula.
5/6 cup sugar
5/6 cup instant chocolate chip cookie dough;
separated into small ½ inch clumps/balls
5/6 cup half-and-half
1 3/4 cup heavy cream
1 3/4 tsp vanilla extract

12
Questions? We’re here to help!
Visit: shopelitegourmet.com for support on this product.
RECIPES (cont.)
APPLE PIE ICE CREAM
1. Combine all ingredients in a mixing bowl, except for the apple pie lling and caramel.
2. Transfer ingredients carefully into the canister.
3. Follow the operational instructions of the ice cream maker. Add apple pie lling to
mixture after 30-45 minute to prevent ingredients from settling to the bottom or
jamming the spatula.
4. When ice cream is nish, gently fold in the caramel or serve on top of ice cream.
5/6 cup apple pie lling
3 1/2 tbsp caramel topping/sauce
5/6 cup sweetened condensed milk
1 3/4 cup heavy cream
BLUEBERRY CHEESECAKE ICE CREAM
1. Combine the sugar with the mashed blueberries and mix well. Fold in the cream cheese.
Sprinkle with the graham crackers.
2. Mix the rest of the ingredients in a mixing bowl.
3. Combine the blueberry cream cheese mixture with the cream mixture.
4. Transfer ingredients carefully into the canister.
5. Follow the operational instructions for serving and cleaning of the ice cream maker.
1/2 cup graham crackers; crushed
5/6 cup half-and-half
1 3/4 cup heavy cream
5/6 cup sugar
1/2 cup fresh blueberries; mashed
5oz. cream cheese; softened
ROCKY ROAD ICE CREAM
1. Combine all ingredients in a mixing bowl, except for marshmallows and chopped nuts.
2. Transfer ingredients carefully into the canister.
3. Follow the operational instructions of the ice cream maker. Add marshmallows and
chopped nuts to mixture after 30-45 minute to prevent ingredients from settling to the
bottom or jamming the spatula.
5/6 cup mini marshmallows
3 1/2 tbsp walnuts or almonds; chopped
3 1/2 tbsp unsweetened cocoa
5/6 cup half-and-half
1 3/4 cup heavy cream
5/6 cup sugar
CHERRY COLA SORBET
1. Puree the slightly thawed cherries until smooth.
2. Mix in the remaining ingredients.
3. Transfer ingredients carefully into the canister.
4. Follow the operational instructions of the ice cream maker.
1 1/3 tbsp lemon juice
2 2/3 tbsp sugar
1 1/3 cup frozen pitted dark cherries,
slightly thawed
1 cup cola

13Questions? We’re here to help!
Visit: shopelitegourmet.com for support on this product.
RECIPES (cont.)
PINEAPPLE MANGO SORBET
1. Puree all ingredients together until smooth.
2. Transfer ingredients carefully into the canister.
3. Follow the operational instructions of the ice cream maker.
3/4 cup water
1/3 cup lemon juice
1 cup frozen pineapples; mashed
3/4 cup frozen mangos; mashed
3/4 cup sugar
LEMON RASPBERRY SORBET
1. Puree all ingredients together until smooth.
2. Transfer ingredients carefully into the canister.
3. Follow the operational instructions of the ice cream maker.
3/4 cup water
1/3 cup lemon juice
1 1/3 cup frozen raspberries
3/4 cup sugar
HONEYDEW SORBET
1. Puree all ingredients together until smooth.
2. Transfer ingredients carefully into the canister.
3. Follow the operational instructions of the ice cream maker.
1 1/3 tbsp lemon juice
2 2/3 tbsp honey
3/4 cup water
1 1/3 cup frozen chopped honeydew;
slightly thawed
1/3 cup sugar
COCONUT LIME SORBET
1. Mix all ingredients together until smooth.
2. Transfer ingredients carefully into the canister.
3. Follow the operational instructions of the ice cream maker.
1/3 cup coconut water
1/3 cup lime juice
1 1/3 cup canned coconut cream
3/4 cup sugar

14
Questions? We’re here to help!
Visit: shopelitegourmet.com for support on this product.
RECIPES (cont.)
PEACH SORBET
1. Puree all ingredients together until smooth, except for the peaches.
2. Transfer ingredients carefully into the canister.
3. Follow the operational instructions of the ice cream maker. Add peaches to mixture after
30-45 minute to prevent ingredients from settling to the bottom or jamming the spatula.
1 1/3 tbsp lemon zest
2 2/3 tbsp honey
1 1/3 cup fresh peaches; chopped
3/4 cup almond milk
PEANUT BUTTER FROZEN YOGURT
1. Puree all the ingredients, except the chocolate chips, until smooth.
2. Transfer ingredients carefully into the canister.
3. Follow the operational instructions of the ice cream maker. Add chocolate chips to
mixture after 30-45 minute to prevent ingredients from settling to the bottom or
jamming the spatula.
3/4 cup frozen chopped banana; slightly thawed
1/3 cup mini chocolate chips
1 1/3 tbsp sugar
1 1/3 cup plain or vanilla yogurt
1/3 cup milk
1/3 cup smooth peanut butter
STRAWBERRY CHEESECAKE FROZEN YOGURT
1. Combine the sugar with the mashed strawberries and mix well. Fold in the cream cheese.
Sprinkle with the graham crackers.
2. Mix the rest of the ingredients in a mixing bowl.
3. Combine the strawberry cream cheese mixture with the cream mixture.
4. Transfer ingredients carefully into the canister.
5. Follow the operational instructions of the ice cream maker.
1/3 cup graham crackers; crushed
1 1/3 cup plain or vanilla greek yogurt
1/3 cup milk
3/4 cup sugar
3/4 cup fresh strawberries; mashed
4oz. cream cheese; softened
FROZEN YOGURT
1. Combine the sugar with the mashed fruit and mix well.
2. Mix the rest of the ingredients in a separate mixing bowl.
3. Combine the sugar and fruit mixture with the cream mixture.
4. Transfer ingredients carefully into the canister.
5. Follow the operational instructions of the ice cream maker.
3/4 cup sugar
3/4 cup fresh fruit of your choice; mashed
1 1/3 cup plain or vanilla greek yogurt
1/3 cup milk

15Questions? We’re here to help!
Visit: shopelitegourmet.com for support on this product.
RECIPES (cont.)
PEACH GELATO
1. Cut the peaches into very small pieces. The smaller you cut them, the faster they will
freeze and the ner the nal texture will be. Arrange the peach pieces in a single layer on
a rimmed cookie sheet and freeze solid, about 2 hours.
2. Put the frozen peach pieces in a food processor or blender with the sugar and blend
briey. Add the mascarpone and pulse until the mixture is smooth.
3. Transfer into ice cream maker and freeze according to the instructions.
2 cans of pears in syrup (16oz size)
1/2 cup fresh lemon juice
3/4 cups of sugar
2 lbs fresh peaches (peeled and pitted)
3/4 cup of mascarpone cheese or plain
yogurt (unavored)
STRAWBERRY GELATO
1. In a food processor or blender combine the strawberries, sugar and whole milk and
puree until smooth.
2. Add in the heavy cream and mix just enough to combine (you do not want to whip the
cream). Add in the lemon juice.
3. Refrigerate mixture for at least 4 hours. Refrigerate overnight if possible.
4. Transfer the mixture into ice cream machine and freeze according to the instructions.
3/4 cups of heavy cream
1 tsp fresh lemon juice
0.75 lbs of fresh strawberries (hulled)
3/4 cups of sugar
1 1/4 cups whole milk

16
Questions? We’re here to help!
Visit: shopelitegourmet.com for support on this product.
LIMITED WARRANTY* ONE (1) YEAR
WARRANTY IS VALID WITH A DATED PROOF OF PURCHASE FROM AN
AUTHORIZED RETAILER
1. Your small kitchen appliance is warranted to the original purchaser to be free from any
manufacturing defects under normal use and conditions for one (1) year, cord excluded.
This Warranty applies only to the original purchaser of this product.
2. Retail stores/merchants selling this product do not have the right to alter, modify, or in any
way revise the terms and conditions of the warranty.
3. If you use your appliance for household use and according to instructions, it should give
you years of satisfactory service.
4. At its sole discretion, Maxi-Matic USA will either repair or replace the product found to be
defective during the warranty period.
5. The repaired or replacement product will be in warranty for the remaining balance of the
one-year warranty period and an additional one-month period.
6. Consumer’s remorse is not an acceptable reason to return a product to our Service Center.
7. This limited warranty covers appliances purchased and used within the 50 U.S. states plus
the District of Columbia and does NOT cover normal wear of parts or:
- Product Purchases that were listed as USED, LIKE NEW, OPEN BOX, or REFURBISHED
from Outlet Shops or Online Retailers.
- Damages caused by unreasonable use, neglect, normal wear and tear, commercial
use, improper assembly or installation of product.
- Damages caused in shipping.
- Damages caused by replacement or resetting of house fuses or circuit breakers.
- Defects other than manufacturing defects.
- Breakage caused by misuse, abuse, accident, alteration, lack of proper care
and maintenance, or incorrect current or voltage.
- Lost or missing parts of the product. Parts will need to be purchased separately.
- Damages of parts that are not electrical; i.e. cracked or broken plastic/glass,
scratched/dented inner pots.
- Damage from service or repair by unauthorized personnel.
- Extended warranties purchased via a separate company or reseller.
- Acts of nature such as re, oods, hurricanes, tornadoes, etc.
8. This warranty does not apply to re-manufactured merchandise.
Maxi-Matic, USA shall not be liable for any incidental or consequential damages caused by the
breach of any express or implied warranty. Apart from the extent prohibited by applicable law,
any implied warranty of merchantability or tness for a particular purpose is limited in time to
the duration of the warranty.
*One Year Limited Warranty valid only in the 50 U.S. states plus the District of Columbia,
excluding Puerto Rico and the Virgin Islands.
This warranty is effective only if the product is purchased and operated in the USA; product us-
age which is in violation of the written instructions provided with the unit will void this warranty.
For international warranty, please contact the local distributor.
This warranty gives you special legal rights and you may also have other rights to which you are
entitled which may vary by state, province, and/or jurisdiction.
**Any instruction or policy included in this manual may be subject to change at any time.
MAXI-MATIC, USA
18401 E. Arenth Ave. City of Industry, CA 91748
Visit: shopelitegourmet.com to contact us for support

17Questions? We’re here to help!
Visit: shopelitegourmet.com for support on this product.
RETURN INSTRUCTIONS
RETURNS:
A. Any return of defective merchandise to the manufacturer must be
processed accordingly by rst contacting customer service to obtain an
RA # (Return Authorization Number). We will not accept any returns of
merchandise without an applicable RA #.
B. IMPORTANT RETURN INSTRUCTIONS. Your Warranty depends on your
following these instructions if you are returning the unit to Maxi-Matic,
USA:
1. Carefully pack the item in its original carton or other suitable
box with sufcient cushioning to avoid damage in shipping.
2. Before packing your unit for return, be sure to enclose:
a) Your name, full address with zip code, daytime tele
phone number, and RA#,
b) A dated sales receipt or PROOF OF PURCHASE,
c) The model number of the unit and the problem you
are having (Enclose in an envelope and tape directly to
the unit before the box is sealed,) and
d) Any parts or accessories related to the problem.
3. Maxi-Matic, USA recommends that you ship the package via UPS
ground service for tracking purposes. We cannot assume
responsibility for lost or damaged products returned to us
during incoming shipment. For your protection, always carefully
package the product for shipment and insure it with the carrier.
C.O.D shipments cannot be accepted.
4. All return shipping charges must be prepaid by you.
5. Once your return has been received by our warehouse, Maxi-Matic,
USA will repair or replace the product if it is defective in material or
workmanship, subject to the conditions in paragraph B.
6. Maxi-Matic will pay the shipping charges to ship the repaired or
replacement product back to you.

18
Questions? We’re here to help!
Visit: shopelitegourmet.com for support on this product.
Elite Customer Service Center
Elite is a registered trademark of Maxi-Matic, USA.
Copyright Elite by Maxi-Matic.
Actual product may vary from the images/illustrations in this manual due to continual product improvement.
Mail:
Website:
Maxi-Matic, USA
18401 E. Arenth Ave
City of Industry, CA
91748-1227
shopelitegourmet.com
Visit our website to contact us for support
Register your product online
elitebymaximatic @elite_by_maximatic
To better serve our customers, we’ve included this QR code to scan with
your mobile device and easily download helpful product tools. The link
will direct you to the item page on the Elite Gourmet website so you can
download the Instruction Manual, view product videos, tasty recipes,
and other great Elite Gourmet products.
It’s simple, just access your camera, point at the QR code & your mobile
device will do the rest.
MODEL: EIM520M
Table of contents
Other AMERICANA Ice Cream Maker manuals