AmeriWater Centurion Plus Heat Manual

Operation & Maintenance Manual
AmeriWater
The Water Purification Specialists
3345 Stop 8 Rd, Dayton, OH 45414 | 800 535 5585 | www.ameriwater.com 098-0007 Rev B
Manufactured With Pride in The USA
Centurion Plus Heat
Disinfection System


1098-0007 Rev B
Table of Contents
1GENERAL INFORMATION ..................................................................................................................... 3
1.1 Preface............................................................................................................................................ 3
1.2 Intended Use ................................................................................................................................... 3
1.3 Contact Information.......................................................................................................................... 3
2HEALTH & SAFETY ................................................................................................................................4
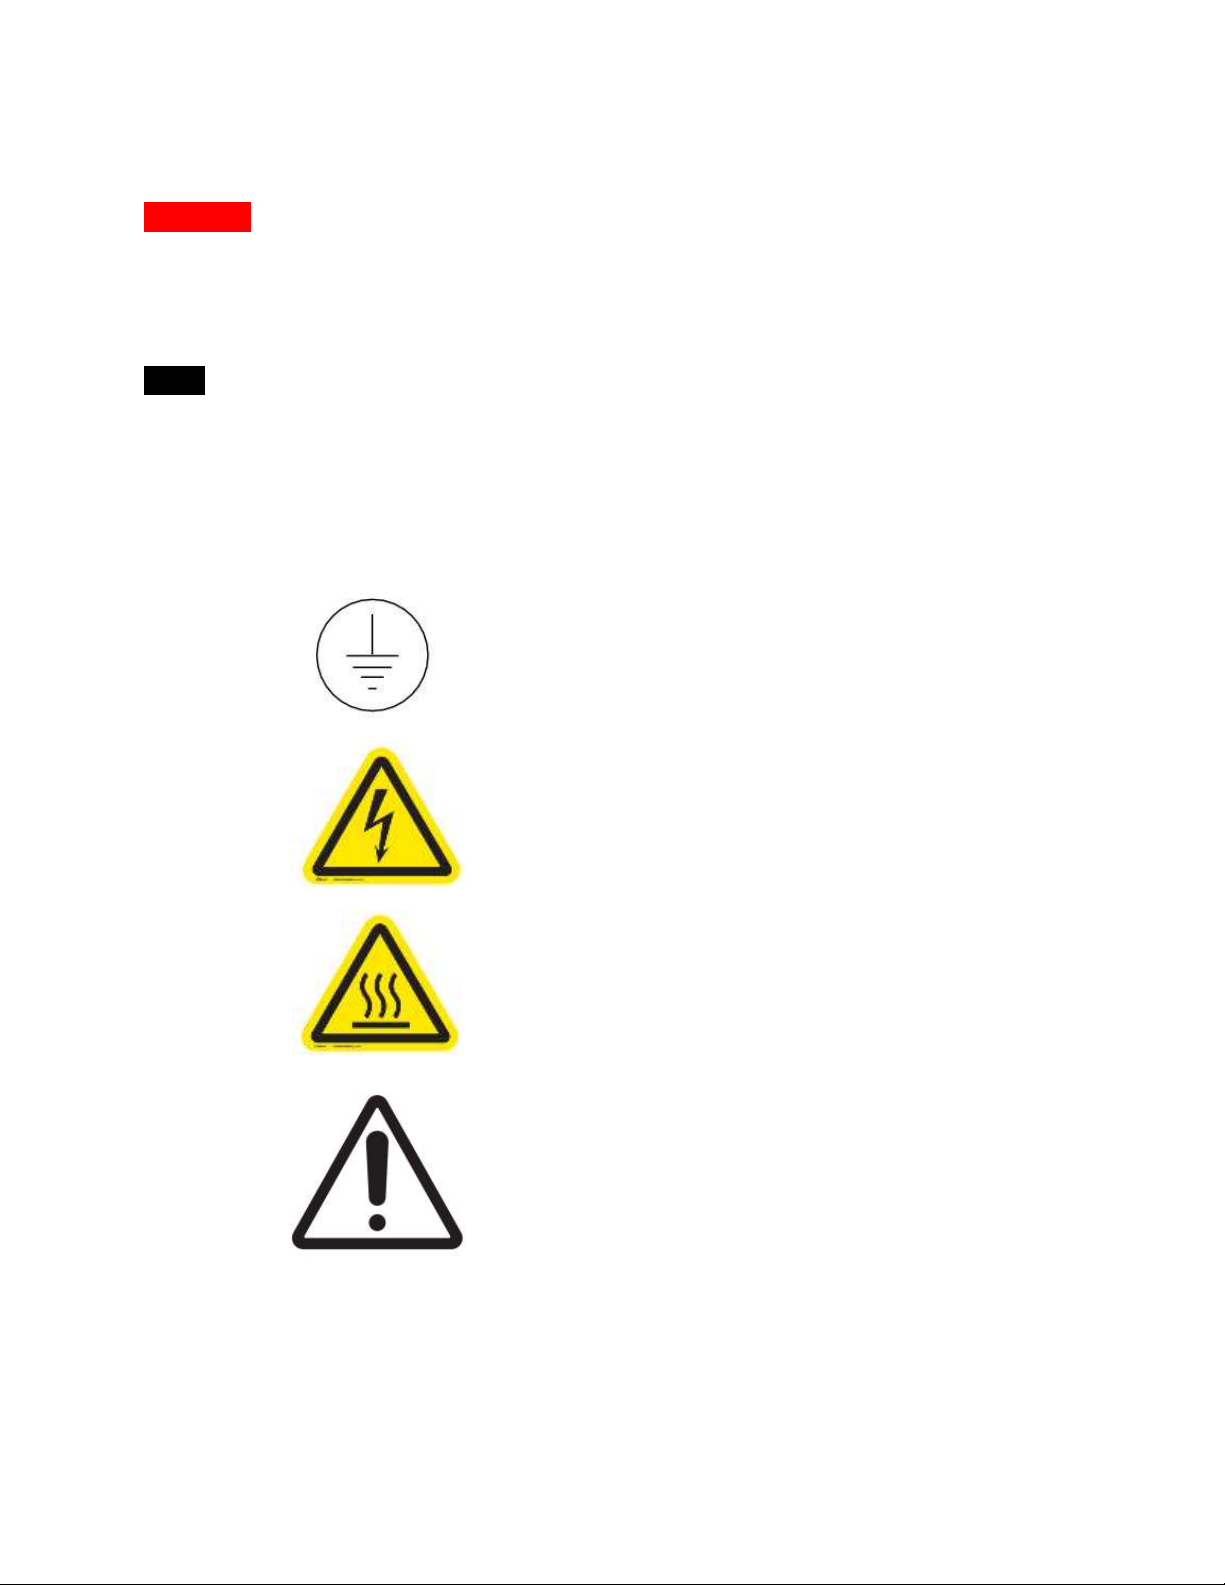
2.1 Cautionary Labeling .......................................................................................................................... 4
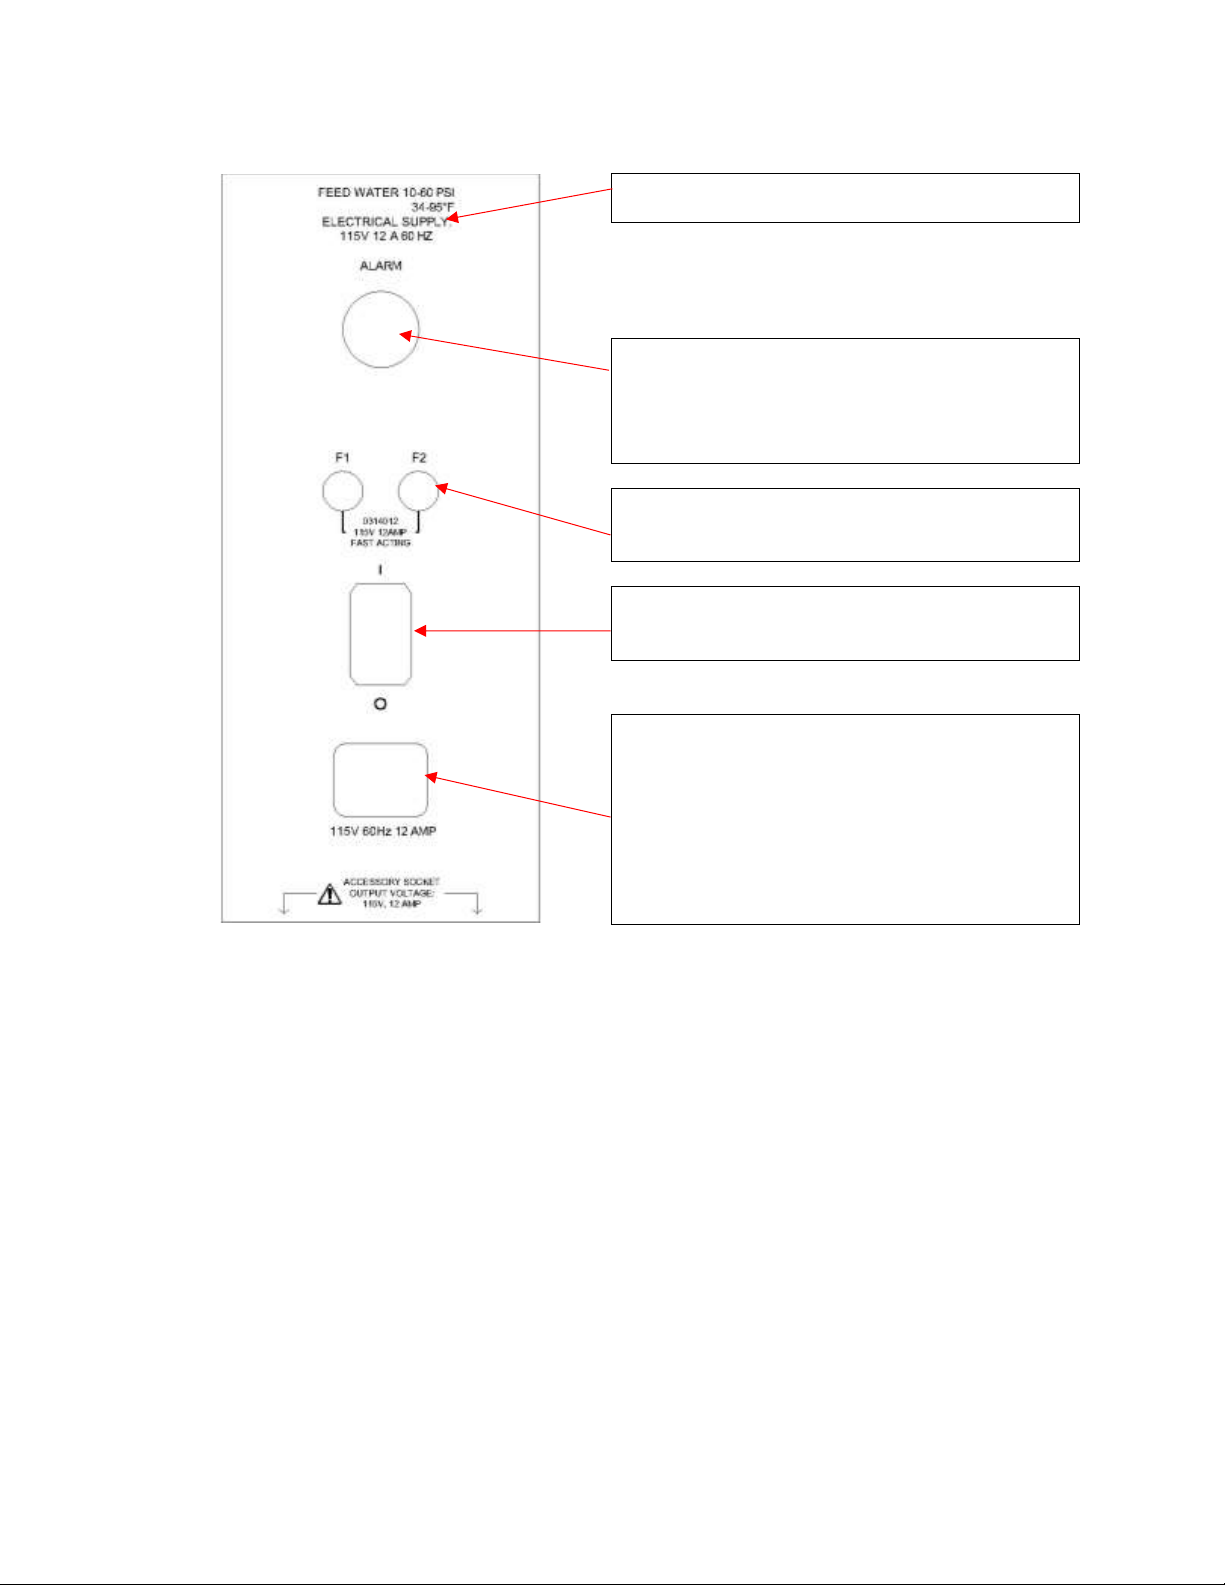
2.2 Rear Panel Labels ............................................................................................................................. 5
2.3 Safety Considerations ....................................................................................................................... 6
2.4 Residual Dangers.............................................................................................................................. 7
2.5 Handling.......................................................................................................................................... 7
2.6 Bringing the unit to an Immediate STOP............................................................................................. 7
2.7 Dealing with leaks from the unit ........................................................................................................ 7
2.8 Unauthorized conversion and manufacturing replacement parts ............................................................ 7
2.9 Warranty claims and liability .............................................................................................................. 8
3ABOUT YOUR CENTURION PLUS HEAT DISINFECTION DEVICE .........................................................8
3.1 General Views .................................................................................................................................. 8
3.2 Overview ......................................................................................................................................... 9
3.3 Detailed description of disinfection process ......................................................................................... 9
4INSTALLATION & COMMISIONING...................................................................................................... 9
4.1 Checklist.......................................................................................................................................... 9
4.2 Packing List.................................................................................................................................... 10
4.3 Installation on Centurion Pretreatment cart....................................................................................... 11
4.4 Environment .................................................................................................................................. 14
4.5 Checking Water Services ................................................................................................................. 14
4.5.1
Water connection detail .............................................................................................................. 14
4.6 Checking Electrical Services ............................................................................................................. 15
4.7 Setting Time and Date .................................................................................................................... 15
4.8 Connection to RO ........................................................................................................................... 16
4.9 Performing first disinfection cycle..................................................................................................... 17
4.10 Pre Dialysis Checks ......................................................................................................................... 17
4.11 Decommissioning for Relocation....................................................................................................... 17
5TECHNICAL INFORMATION................................................................................................................18
5.1 Theory of Operation ....................................................................................................................... 18
5.2 Specifications ................................................................................................................................. 18
5.2.1
Feed Water Specifications ........................................................................................................... 18
5.2.2
Drain Specifications .................................................................................................................... 19
5.2.3
Electrical Specifications ............................................................................................................... 19
5.2.4
Fuse Specification....................................................................................................................... 19
5.2.5
Water services connections ......................................................................................................... 19
5.2.6
RO Product Water Storage Tank .................................................................................................. 20
5.2.7
Weights and Dimensions ............................................................................................................. 20
5.2.8
SD Card Specification.................................................................................................................. 20
5.3 Environmental/Transport................................................................................................................. 21
6COMPONENTS IDENTIFICATION AND SCHEMATICS.........................................................................21
6.1 Component Identification ................................................................................................................ 21
6.2 Electrical Schematic ........................................................................................................................ 24
6.3 Flow Schematic .............................................................................................................................. 25
6.3.1
Standby Mode ............................................................................................................................ 25
6.3.2
Preheat Mode............................................................................................................................. 26
6.3.3
Dispensing Mode ........................................................................................................................ 27
6.3.4
Drain Mode ................................................................................................................................ 28
7CONTROLLER ......................................................................................................................................29
7.1 User Interface ................................................................................................................................ 29
7.2 Levels of Access ............................................................................................................................. 30
7.3 Controller Inputs/Outputs................................................................................................................ 31
7.4 Modes of Operation ........................................................................................................................ 31

2098-0007 Rev B
7.4.1
Standby..................................................................................................................................... 31
7.4.2
Storage Mode............................................................................................................................. 31
7.4.3
Preheat ..................................................................................................................................... 32
7.4.4
Dispensing ................................................................................................................................. 32
7.4.5
Manual Tank Drain ..................................................................................................................... 32
7.5 Operation ...................................................................................................................................... 32
7.5.1
Start-Up..................................................................................................................................... 32
7.5.2
System Operational Controls........................................................................................................ 33
7.6 Settings Descriptions and Defaults ................................................................................................... 41
7.7 Controller Detail View ..................................................................................................................... 41
8HEAT DISINFECTION..........................................................................................................................42
8.1 What is being disinfected?............................................................................................................... 42
8.2 Frequency...................................................................................................................................... 42
8.3 Heat Disinfection Sequence ............................................................................................................. 42
9MONITORING .....................................................................................................................................44
9.1 On board data logging .................................................................................................................... 44
10 MAINTENANCE................................................................................................................................45
10.1 Planned Routine Checks .................................................................................................................. 45
10.2 Electrical Safety Inspection.............................................................................................................. 45
10.3 Planned Preventative Maintenance Schedule ..................................................................................... 46
10.4 Cleaning External Surfaces .............................................................................................................. 46
10.5 PLC Battery Replacement ................................................................................................................ 47
10.6 External Fuse Replacement ............................................................................................................. 50
10.7 How to format SD card ................................................................................................................... 51
11 ALARMS...........................................................................................................................................53
11.1 Fault Conditions Display .................................................................................................................. 53
11.2 Resetting Alarm Condition ............................................................................................................... 55
12 TROUBLESHOOTING .......................................................................................................................57
12.1 Mechanical/Electrical Failures........................................................................................................... 57
12.2 Valve Position................................................................................................................................. 61
12.3 Pump/Heater Status ....................................................................................................................... 61
12.4 Float Switch Status ......................................................................................................................... 61
12.5 Setting Current Switch .................................................................................................................... 62
13 SPARE PART LISTING .....................................................................................................................66
13.1 Exploded View................................................................................................................................ 66
13.2 Consumables ................................................................................................................................. 76
14 Appendix .........................................................................................................................................76
14.1 How to use push-fit connectors........................................................................................................ 76

3098-0007 Rev B
1GENERAL INFORMATION
1.1 Preface
This
Operation & Maintenance Manual
provides information required for trained renal technicians to
use the device and perform the basic service and maintenance required on the Centurion Plus Heat
disinfection device.
Please read and understand all of the instructions carefully prior to using the device or carrying out any
service or repairs.
CAUTION: No person should attempt to operate or service the AmeriWater Centurion Plus Heat
Disinfection System without prior authorization, instruction, and training from AmeriWater
and/or your medical facility director.
1.2 Intended Use
The AmeriWater Centurion Plus Heat disinfection system is an optional accessory that can be paired with
compatible portable reverse osmosis (RO) systems intended for use in hemodialysis applications to
disinfect the hose between the RO and the hemodialysis machine. The AmeriWater Centurion Plus Heat
disinfection device is designed to heat water received from the portable RO to 185 degrees Fahrenheit to
disinfect the hose. The AmeriWater Centurion Plus Heat disinfection device is intended for use in
hospitals, clinics, or dialysis centers to provide heat disinfection of the hose resulting in total viable
microbial counts below 50 CFU/ml.
NOTE: All patients must be offline and removed from the general area prior to beginning the disinfection
cycle. The RO water supply for the hemodialysis machine will be interrupted for approximately 10
minutes at the beginning of the cycle as the storage tank fills.
1.3 Contact Information
Please read the Operations Manual before using the system. Contact AmeriWater Customer
Service with any questions at 1-800-535-5585 Monday through Friday 8:00 a.m. to 5:00 p.m. eastern
standard time. For after hours emergencies call 1-800-535-5585 and follow the instructions on the
recorded message. Our on-call technician will return your call as soon as possible. This entire Operations
Manual should be read before operating or servicing the system. This Operations Manual should then be
kept near the system and used as a reference and troubleshooting guide.

4098-0007 Rev B
2HEALTH & SAFETY
WARNING: This symbol is used to alert the user not to take a certain action, which if taken could cause
a potential hazard and result in a serious adverse reaction, injury or even death. The
warning symbol may also be used to alert the user to take a certain action to avoid a
potential hazard. In all cases within this document, where this symbol is used it is
important that you familiarize yourself with the nature of the potential HAZARD and any
action that needs to be taken.
NOTE: A reminder or useful information that can be used to help explain a command or action or give
guidance
2.1 Cautionary Labeling
There are a number of labels applied to the Centurion Plus Heat disinfection device which identify
potential hazards to a user or service technician. See the list below for information regarding each label
found on the device.
Earth Ground Terminal
Risk of electrical shock. Authorized service
personnel only
Hot Surface: This label is used to warn users that
the surface may be hot to the touch during a
disinfection cycle. Caution should be used when
using the system with the side covers removed
Caution: This symbol is used to warn user to take
caution when using the device. The user should
refer to this manual to understand how to
responsibly use the device

5098-0007 Rev B
2.2 Rear Panel Labels
Feed Water and Electrical Supply information is
listed at top of label.
Alarm will sound when an alarm condition is
detected by the system controller.
The label identifies the location of the Mains fuses
for the system. Detailed information about the
fuses can be found in Section 5.2.4.
Mains ON/OFF Rocker Switch
I=Power On
O=Power Off
The mains power cord will be connected at this
point. This will supply the power for the Centurion
Plus Heat disinfection device as well as the any
system connected to the Power outlet located
behind the block off plate on the rear panel. See
Section 5.2.3 for more information on the
electrical requirements for the device.

6098-0007 Rev B
From RO
Connection for product water
outlet from RO
To RO
Product water recirculation
connect for Centurion. If
connected to an RO which does
not recirculate Product water,
plug this connection
RO Drain
Connect the RO reject line.
Reject water will pass through
Centurion Plus to common drain
outlet
Product Outlet
RO product water outlet to HD
machine
Product Return
Unused RO product water return
from HD machine
System Drain
Common drain outlet for RO and
Centurion Plus Heat disinfection
device
2.3 Safety Considerations
Requirements, standards and regulations specific to the country in which the unit is used must be
observed. Contact the local regulatory body for confirmation of these regulations and standards.
WARNING: The device is not intended to be used in the following situations:
Oxygen rich environments
Intended for indoor use and must not be washed down
Must not be allowed to freeze
Always operate in well ventilated area and ensure the rear fan is not blocked during operation
DO NOT sit or stand on the device
Do not remove the side covers from the device while it is connected to a mains power supply
unless you are properly trained to service or repair the system
The system shall only be serviced by AmeriWater or suitably trained/authorized technician
Failure to observe the instructions provided in this manual may compromise the safety
performance and reliability of the system and may void any warranty
The system must only be used as described in the “Intended use” description located in
Section 1.2

7098-0007 Rev B
2.4 Residual Dangers
WARNING: The following dangers may be present if operating the system with the side covers removed.
Electrical Shock: With the side covers removed, the control system for the device will be
exposed. 120 VAC, 24 VDC and 12 VDC power supplies are all contained within the device. Take
necessary precautions to avoid shock when servicing the or maintaining the system.
Mechanical Force: With the side covers removed and the system operating, some parts of the
system may be under pressure up to 70 PSI.
Hot Surfaces: During heat disinfection, some of the internal surfaces will become hot to touch.
Take extra care if performing a disinfection cycle with the side covers removed.
2.5 Handling
This device is intended to be used as a stationary device. Do not move the device while in operation.
Prior to moving the device, refer to the decommissioning procedure listed in Section 4.11,
Decommissioning for relocation. The dry weight of the system is 57 lbs. Take care when lifting the
system on or off of the transport cart.
When moving the system, be sure the water tank is empty. To manually drain the water tank if full, refer
to Section 7.5.2.
2.6 Bringing the unit to an Immediate STOP
If you need to stop the unit immediately at any time, switch the rocker switch located at the rear of the
system off at any time. As a precaution, shut the RO system down to shut off the water supply to the
Centurion Plus Heat disinfection device. Refer to the RO manual for detailed information on bring the RO
to an immediate stop.
DO NOT restart the unit until it has been verified to be safe for operation. If the original fault that
required the unit to be shut down cannot be resolved, contact AmeriWater for assistance. Contact
information can be found in Section 1.3.
2.7 Dealing with leaks from the unit
In the event that a leak forms inside the unit, shut the system down using the rocker switch on the rear
of the unit. If the leak occurs while the unit is in “Standby” mode, the RO can be disconnected from the
Centurion Plus Heat disinfection device to continue patient treatment until a certified technician can
address the leaking component.
If water leaks outside of the system, the water should be cleaned immediately. If the water cannot be
cleaned immediately, it is strongly recommended that a “Caution Wet Floor” sign is placed near to device
to warn people of a potential slip hazard.
2.8 Unauthorized conversion and manufacturing replacement parts
DO NOT under any circumstances modify, or replace parts inside of the device with unauthorized parts
or attempt to change or alter the functionality of the device. Installation of unapproved components may
void the warranty of the device
WARNING: The Centurion Plus Heat disinfection system should be used in accordance with Section 1.2,
Intended Use. The device is to be maintained and operated according to this operation

8098-0007 Rev B
manual. AmeriWater will not accept liability for any damage or injury resulting from
improper use, maintenance, unauthorized repair or use of any unapproved parts.
2.9 Warranty claims and liability
This product is covered under the standard AmeriWater warranty policy. For specific terms and conditions
contact your AmeriWater sales Representative.
3ABOUT YOUR CENTURION PLUS HEAT DISINFECTION DEVICE
3.1 General Views
Front View
Side View
Rear View
*Refer to Section 6.1 for component identification

9098-0007 Rev B
3.2 Overview
The
Centurion Plus Heat Disinfection Device
has been designed to pair with a portable RO system in
order to heat disinfect the Hemodialysis machine feed water hose. This section of hose is typically not
included in the disinfection of the RO system or Hemodialysis machine. The device will act as a pass
through unless the user enables a disinfection. The device is capable of heating 11 L of water to 185 °F
and dispensing that water @ 1 L/min. A disinfection cycle is typically 1 hr from start to finish.
The device contains an internal storage tank, pump and series of valves to fill its internal tank and heat
the water up to the desired disinfection temperature. Upon reaching the disinfection set-point, the device
will send hot water to the Hemodialysis machine which should be in rinse mode. The Hemodialysis
machine will rinse with hot water for at least 10 min to complete a disinfection. If the
Centurion Plus
Heat disinfection
device detects that water is being used at a rate greater than expected (i.e. the user
did not connect the Hemodialysis machine) an alarm condition will occur stopping the disinfection cycle to
prevent 11 L of hot water to leak from the device.
3.3 Detailed description of disinfection process
The
Centurion Plus Heat Disinfection Device
is intended to act as a pass through device while a
disinfection cycle is not in process. The RO product water enters the Centurion Plus Heat disinfection
device through the inlet connection on the rear of the system. The RO product water then passes
through a Normally open valve and 3 way valve. The RO product water then leaves the device through
the product water outlet connection to feed the Hemodialysis machine. Water that is not used by the
Hemodialysis machine is then recirculated back into the Centurion Plus Heat disinfection device then back
to the RO system. The RO reject water is connected to the reject water inlet on the rear of the device.
The RO reject water passes through the system and then to a common system drain.
The Centurion Plus Heat disinfection device contains a 120 VAC outlet which is located behind the block
off plate at the rear of the device. This plug is intended to be used to power an AmeriWater Centurion
system. The Centurion Plus Heat disinfection device monitors the current draw from the AmeriWater
Centurion device to prevent both systems from performing a heat disinfection at the same time. A current
switch will open when the current draw exceeds 10 A. this current switch will prevent the heating
element inside the Centurion Plus Heat disinfection device to turn on.
When a disinfection cycle is initiated, the Centurion Plus Heat disinfection device will activate the tank fill
solenoid valve (SV1) to fill the storage tank with 11 L of water. This water will then begin to heat to the
disinfection temperature set-point. The feed RO can remain in operation during a Centurion Plus Heat
disinfection. When the disinfection set-point is reached, the device will turn the pump output on and
dispense the hot water to the Hemodialysis machine @ 1 L/min. During the dispensing mode, the
Hemodialysis machine must be in a suitable rinse mode to accept the hot water. Upon completion of the
dispensing mode, the system will enter drain mode to purge any remaining water. Then the system will
return to standby and display a “Disinfection Complete” message on the display. If an alarm condition
is detected, the device will automatically return to standby and shutoff all outputs.
NOTE: Reference flow schematic in Section 6.3.
4INSTALLATION & COMMISIONING
4.1 Checklist
Step
Item
Section
Ref
1
Verify all items are included
0
2
Place on cart with RO
4.3

10 098-0007 Rev B
3
Check Operating Environment
4.4
4
Check Water Services
4.5
5
Check Electrical Services
4.6
6
Check default settings/adjust as required
7.6
7
Set/Check time and date
4.7
8
Connect to RO
4.8
9
Perform disinfection cycle
4.9
10
Electrical Safety Check
10.2
11
Pre-dialysis checks
4.10
12
End user Training
N/A
4.2 Packing List
Part Number
Item
QTY
Notes
000-HS120
Centurion Plus Heat disinfection
Device
1
000-090-
00012
Extended pretreatment cart-complete
with filters
1
090-00322
Extended pretreatment cart-bare (no
filters)
1
Only included with the existing Centurion
retrofit kit. Reuse filter assembly from
existing Centurion cart
001-999-
00091
Installation kit
1
Includes items shown below
055-0002
VALVE, CHECK, 35 PSI CRACKING,
20-65 PSI ADJUSTABLE, 1/4" FNPT,
SS, GENERANT (Centurion P17 valve)
1
Only included with the existing Centurion
retrofit kit
055-0001
VALVE, CHECK, 25 PSI CRACKING,
20-65 PSI ADJUSTABLE, 1/4" FNPT,
SS, GENERANT (Centurion P18 valve)
1
Only included with the existing Centurion
retrofit kit
66-0181
Mains Power cord
1
010-0175
PLUG IN ELBOW,5/16" STEM X 5/16"
T, LIQUIFIT
6
08-0025
TUBING, FEP 8MM O.D X 6MM I.D.
CLEAR
3
3 individual labeled sections should be
included.
1Install kit is included with Centurion Plus Heat disinfection device
2Cart assembly may be purchased as a complete assembly with pretreatment filters installed or as a bare cart which
requires the user to reuse the filter assembly from an existing MROC pretreatment cart.

11 098-0007 Rev B
4.3 Installation on Centurion Pretreatment cart
The Centurion Plus Heat Disinfection Device is designed to be installed onto a cart with the AmeriWater
MROC Heat Disinfection RO system. The Cart contains the sediment and carbon filtration required for the
RO system to perform as intended. The following steps are required to install the Centurion Plus Heat
disinfection device onto the Cart along with the MROC.
a) Remove the right hand side cover on the MROC and check the P17 and P18 check valves that are
installed in the device. If the valves are stamped ACV-4FFSS-V-15 and ACV-4FFSS-V-20, proceed
to the next step, if the valves are stamped ACV-4FFSS-V-25 and ACV-4FFSS-V-35, proceed to
step d.
b) Disconnect the tube connections shown and remove the existing check valves. Water will leak
from the Y connector when disconnected. Be sure to drain water out of lower pan of Centurion
after removing the valves.
c) Install the check valves included with the install kit. The valve labeled ACV-4FFSS-V-35 must be
installed on the permeate return to tank line as shown. Failure to do this will cause the RO
product water to be diverted to the break tank on the RO.

12 098-0007 Rev B
d) With the check valves installed, reinstall the side cover ontop the MROC .
e) Place the Centurion Plus Heat disinfection device onto the pretreatment cart in the location
shown. Align the feet of the device with the slots on the cart and slide the device into the slots.
See figure below
f) Install the locking pin as shown below.

14 098-0007 Rev B
4.4 Environment
The device should be used indoors on a firm, flat level surface in a clean and dry environment. The
device should be operated in a well ventilated area. Take care when making water and power
connections to the rear of the device as to not create tripping hazards. Refer to Section 2.3 for safety
considerations when installing the Centurion Plus Heat disinfection device.
4.5 Checking Water Services
The Centurion Plus Heat disinfection device will use a portable RO system as the feed water supply. The
RO system must be capable of being connected to an 8mm/5/16” push-fit connection. It is recommended
that the RO have a recirculation line back from the Hemodialysis machine.
The Centurion Plus Heat disinfection system will accept the reject water from an RO using an 8mm/5/16”
push-fit connection. The reject water will pass through the Centurion Plus Heat disinfection device to a
suitable drain. The Reject water will require a suitable drain. See Section 5.2.2 for drain requirements.
WARNING: The drain must be capable of handling water that could be up to 203 °F.
4.5.1
Water connection detail
NOTE: Water connections should be placed such that they are not facing the operator during disinfection
cycle.
CENTURION PLUS

15 098-0007 Rev B
4.6 Checking Electrical Services
WARNING: To reduce the risk of electric shock, this equipment must only be connected to a supply main
with protective earth connection. Always refer to local code for electrical connections. Refer to
Section 5.2.3 for details on the electrical requirements for the device.
Once the proper electrical supply for the device is in place, plug the device into the wall outlet using the
supplied detachable mains power cord. Power the device on using the rocker switch at the rear of the
device. The splash screen shall appear for 10 seconds and then the device will display the home screen.
WARNING: Only use the included mains power cord or an AmeriWater approved alternative. Use of an
inadequate mains power cord may result in damage to the equipment.
4.7 Setting Time and Date
The Centurion Plus Heat disinfection device will arrive set to Eastern Standard Time. The device will
NOT auto update for daylight savings time. To adjust the date and time displayed, use the following
steps:
On the home screen, press the time in the upper left hand corner of the display.
Pressing the time will prompt the user with the following “clock adjust” menu. Pressing the “+”
and “-“ buttons will adjust the current time.
NOTE: Time will be shown in 24 hr format.
Press the arrow in the lower left hand corner to return to the home screen.
From the home screen press the date located in the upper right hand corner.
+ 1 hour
- 1 hour
+ 1 minute
- 1 minute

16 098-0007 Rev B
Pressing the date will prompt the user with the following “date adjust” menu. Press the date in
the middle of the display and enter the current date.
Press the arrow in the lower left corner of the display to return to the home screen.
4.8 Connection to RO
All of the fittings required to connect the Centurion Plus Heat disinfection device to an AmeriWater
Centurion RO system are included in the installation kit for the device. The tubing sections included with
the installation kit will be labeled with the connection location for ease of install. The Centurion Plus Heat
disinfection device will be placed on the extended Centurion pretreatment cart as shown in Section 4.3.
Use the 10” sections of clear tubing (AmeriWater PN 08-0025) and plug-in elbow fittings (010-0175) to
connect the Product outlet, product water recirculation and drain connection from the Centurion to the
Centurion Plus Heat disinfection device as shown below:

17 098-0007 Rev B
4.9 Performing first disinfection cycle
Prior to commissioning the Centurion Plus Heat disinfection device for dialysis use, an initial disinfection
cycle shall be preformed to ensure the system functions as intended. All Centurion Plus Heat disinfection
devices are functionally tested by AmeriWater prior to shipment. Refer to Section 8.3 for detailed
information on performing a disinfection using the Centurion Plus Heat disinfection device.
4.10 Pre Dialysis Checks
Prior to using the device for dialysis treatment, it is recommended that the following checks are
preformed to verify the device will function as designed:
Check that the electrical mains lead is securely inserted in place on the unit and at the wall
socket. Verify that the lead is not damaged or likely to cause anyone to trip over it.
All the water connections are in place, not kinked and show no signs of leaks.
The “Blue” water tubing is connected to the “In/Entreé” port (Centurion), the “Black” water
tubing is connected to the “System Drain” port (Centurion Plus Heat disinfection device).
The water supply is turned on to the Centurion.
There are no warning messages displayed on the touch-screen. (Refer to Section 11, if any
alarm or warning messages are displayed.
Water should pass through the Centurion Plus Heat disinfection device as if it were not installed
while the Centurion is operating and the Centurion Plus Heat disinfection device is not in a
disinfection cycle.
Check that the Centurion is operating properly before attempting to use the RO with the
Centurion Plus Heat Disinfection device.
4.11 Decommissioning for Relocation
Prior to moving the Centurion Plus Heat disinfection device, the following steps should be followed to
ensure the device is safely transported.
Ensure the device is in “Standby Mode” and on the Home Screen.
RO reject
water outlet
RO product
water return
RO product
water outlet
Feed water inlet (From
pretreatment outlet)
RO water inlet
(From RO)
RO water
return (To RO)
RO water outlet to
HD machine (Product
Outlet)
RO water return from
HD machine (Product
Return)
Common Drain Outlet
(System Drain)
RO drain inlet
(RO Drain)

18 098-0007 Rev B
Verify that the tank is empty by activating the “Manual Drain” mode (refer to Section 7.5.2
for entering the manual drain mode).
Turn off the Centurion following the shutdown procedure listed in Operation manual 98-2022.
Turn off the Feed water supply to the RO system.
Turn off the Centurion Plus Heat disinfection device using the rocker switch at the rear of the
system.
Disconnect tubing from all water connections located at the rear of the device (only
recommended if shipping the device to another building). Refer to Section 14.1 for details on
removing push-fit connections.
5TECHNICAL INFORMATION
5.1 Theory of Operation
The Centurion Plus Heat disinfection device heats RO product water using a 1000 W heating element
located in an atmospheric break tank to >176 °F to disinfect a single Hemodialysis machine feed water
hose. The preheat time required shall be approximately 1 hr. Once the water reaches the disinfection
temperature, the hot water is pumped from the tank at a rate of 1 L/min (approx. 0.25 GPM) for at least
10 minutes. This provides 10 minutes of contact time with water @ >176 °F to disinfect the Hemodialysis
feed water hose. The device is intended to be paired with a hot water disinfect reverse osmosis system
(AmeriWater Centurion) to provide a complete Centurion Plus Heat disinfection using no chemicals. See
the following diagram:
5.2 Specifications
5.2.1
Feed Water Specifications
Quality
RO Permeate
Inlet Pressure
10-60
PSI
Temperature
34-95
°F
Continuous Free Chlorine
<0.1
ppm
NOTE: Centurion Plus Heat disinfection device shall only be fed by a reverse osmosis system. Do not
connect the device to a tap water supply.
This manual suits for next models
1
Table of contents
Other AmeriWater Water Filtration System manuals
Popular Water Filtration System manuals by other brands

Cillit
Cillit Galileo 100 mm Series Installation and operating manual

Speedaire
Speedaire 4ZL96 Operating instructions & parts manual

Frizzlife
Frizzlife PD600-TAM3 owner's manual

Chungho
Chungho EDGE CHP-3990DL user manual

Oase
Oase Filtoclear operating instructions

Water Right
Water Right ECLIPSE WRO-35 Installation, operation & service manual