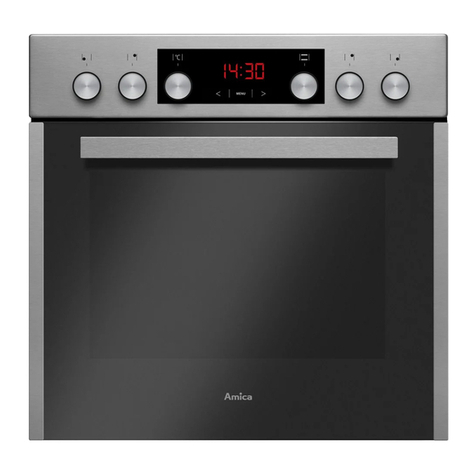
Amica EHEG 933 101 E User manual

IO-CBI-2245 / 8512034
(06.2021 / v1)
2022G(G)2.33eEZpDpScVpAQX / EHEG 933 101 E
EN INSTRUCTION MANUAL
NL GEBRUIKERSHANDLEIDING

2
DEAR CUSTOMER,
The cooker is exceptionally easy to use and extremely ecient. After reading the instruction
manual, operating the cooker will be easy.
Before being packaged and leaving the manufacturer, the cooker was thoroughly checked
with regard to safety and functionality.
Before using the appliance, please read the instruction manual carefully.
By following these instructions carefully you will be able to avoid any problems in using the
appliance.
It is important to keep the instruction manual and store it in a safe place so that it can be
consulted at any time.
It is necessary to follow the instructions in the manual carefully in order to avoid possible
accidents.
Caution!
Do not use the cooker until you have read this instruction manual.
The cooker is intended for household use only.
The manufacturer reserves the right to introduce changes which do not aect the
operation of the appliance.

3
TABLE OF CONTENTS
Safety instructions ............................................................................................................. 4
Description of the appliance ........................................................................................... 10
Installation......................................................................................................................... 12
Operation........................................................................................................................... 18
Baking in the oven – practical hints ............................................................................... 24
Test dishes..........................................................................................................................27
Cleaning and maintenance.............................................................................................. 29
Technical data................................................................................................................... 35

4
SAFETY INSTRUCTIONS
Warning: The appliance and its accessible parts become hot
during use. Care should be taken to avoid touching heating
elements. Children less than 8 years of age shall be kept
away unless continuously supervised.
This appliance can be used by children aged from 8 years
and above and persons with reduced physical, sensory or
mental capabilities or lack of experience and knowledge if
they have been given supervision or instruction concerning
use of the appliance in a safe way and understand the ha-
zards involved. Children shall not play with the appliance.
Cleaning and user maintenance shall not be made by chil-
dren without supervision.
Warning: Unattended cooking on a hob with fat or oil can
be dangerous and may result in re.
NEVER try to extinguish a re with water, but switch o
the appliance and then cover ame e.g. with a lid or a re
blanket.
Warning: Danger of re: do not store items on the cooking
surfaces.
During use the appliance becomes hot. Care should be taken
to avoid touching heating elements inside the oven.
Accessible parts may become hot during use. Young children
should be kept away.

5
SAFETY INSTRUCTIONS
Warning: Do not use harsh abrasive cleaners or sharp metal
scrapers to clean the oven door glass since they can scratch
the surface, which may result in shattering of the glass.
Warning: Ensure that the appliance is switched o before re-
placing the lamp to avoid the possibillity of electric shock.
You should not use steam cleaning devices to clean the
appliance.
Danger of burns! Hot steam may escape when you open the
oven door. Be careful when you open the oven door during
or after cooking. Do NOT lean over the door when you open
it. Please note that depending on the temperature the steam
can be invisible.
Caution: The cooking process has to be supervised. A short
term cooking process has to be supervised continuously.
Warning: Use only hob guards designed by manufacturer
of the cooking appliance or indicated by the manufacturer of
the appliance in the instructions for use as suitable or hob
guards incorporated in the appliance. The use of inappro-
priate guards can cause accidents.

6
SAFETY INSTRUCTIONS
Please pay attention to children whilst the cooker is in operation, as children do
not know the rules of cooker use. In particular, hot surface burners, the oven
chamber, grates, the door pane, and pans containing hot liquids standing on the
hob may cause burns to children.
Mind that electrical connection leads from other home appliances (e.g. of a food
mixer) do not touch hot parts of the cooker.
Do not place ammable material into the drawer whilst using the oven, as it may
catch a re.
Do not leave the cooker unattended when frying. Oils and fats may catch re due
to overheating.
At the point of boiling, mind to avoid spills on the burner.
If the cooker is damaged, it may be used again only after the fault has been xed
by a specialist.
Do not open the tap on the gas connection or cylinder valve before checking that
all burner knobs are closed.
Do not allow the burners to be soiled or liquids to spill on the burners. If soiled,
clean and dry burners immediately after they have cooled down.
Do not put pans directly onto burners.
Do not place pans with a weight greater than 10 kg onto the grate over one burner,
or pans with a total weight of over 40 kg on the whole grate.
Do not hit the knobs and burners.
Do not put objects with a weight greater than 15 kg onto the open oven door.
Alterations and repairs carried out by an unqualied person are not allowed.
Do not open the cooker knobs before already having a lighted match or a gas
lighter in your hand.
Do not put out a burner ame by blowing.
Before opening the cover, cleaning it of any dirt is recommended. The cooker
hob surface should be cooled down before closing the cover.
A glass cover may crack when heated. Switch o all the burners before lowering
the cover. (Cookers with a glass cover).
Do not make your own alterations to the cooker in order to adapt it to a dierent
type of gas, move the cooker to another place or make changes to the power
supply. These operations may only be carried out by an authorised electrician or
tter.

7
SAFETY INSTRUCTIONS
Do not use harsh cleaning agents or sharp metal objects to clean the door as
they can scratch the surface, which could then result in the glass cracking.
Keep young children and people not acquainted with the instruction manual away
from the cooker.
IN CASE OF ANY SUSPICION OF GAS LEAKAGE YOU MUST NOT:
light matches, smoke cigarettes, switch electrical receivers (door bell or light
switch) on and o, or use other electric and mechanical devices that create elec-
trical or percussive sparks. In such a case, immediately close the cylinder valve
or tap cutting o gas supply, air the room, and then call a person authorised to
repair the source of the leakage.
In the event of any incident caused by a technical fault, disconnect the power (ap-
plying the above rule) and report the fault to the service centre to be repaired.
Do not attach any antenna cords (e.g. radio) to the gas supply.
In a case of gas escaping from leaky piping and catching re, close gas supply
immediately using a cutting-o valve.
In a case of gas escaping from a leaky cylinder and catching re: throw a wet
blanket over the cylinder to cool it down and turn o the cylinder valve. After it has
cooled down, take the cylinder out to an open space. Do not use the damaged
cylinder.
When the cooker is not to be used for several days, close the main valve on the
gas piping; when using a gas cylinder, close it after each use.
Using the appliance for cooking and baking results in the emission of heat and
moisture in the room in which it is installed. Make sure that kitchen is well ven-
tilated. Natural ventilation openings or forced mechanical ventilation (exhaust
hood) should be available.
Prolonged intensive use of the appliance may require additional ventilation, for
example, opening a window or a more eective ventilation, such as increasing
eciency of mechanical ventilation, if applicable.
The appliance has been designed only for cooking. Any other use (for example
for heating) does not comply with its operating prole and may cause danger.
8
HOW TO SAVE ENERGY
Using energy in a respon-
sible way not only saves
money but also helps the
environment. So let’s save
energy! And this is how you
can do it:
Use proper pans for cooking.
A saucepan should never be smaller than a
burner crown.
Always remember to cover and pans.
Ensure burners, the grate the hob are
clean.
Soils can prevent heat transfer – and repeat-
edly burnt-on spillages can often only be
removed by products which cause damage
to the environment.
In particular, ensure that ame openings in
the rings under caps, and openings of burner
nozzles are clean.
Do not uncover the pan too often (a
watched pot never boils!).
Do not open the oven door unnecessarily
often.
Only use the oven when cooking larger
dishes.
Meat of up to 1 kg can be prepared more
economically in a pan on the cooker burner.
Make use of residual heat from the
oven.
If the cooking time is greater than 40 minutes
it is recommended to switch o the oven 10
minutes before the end time.
Make sure the oven door is properly
closed.
Heat can leak through spillages on the door
seals. Clean up any spillages immediately.
Do not install the cooker in the direct
vicinity of refrigerators/freezers.
Otherwise energy consumption increases
unnecessarily.

9
Old appliances should not sim-
ply be disposed of with normal
household waste, but should
be delivered to a collection and
recycling centre for electric and
electronic equipment. A symbol
shown on the product, the
instruction manual or the packaging shows
that it is suitable for recycling.
Materials used inside the appliance are
recyclable and are labelled with information
concerning this. By recycling materials or
other parts from used devices you are making
a signicant contribution to the protection of
our environment.
Information on appropriate disposal centres
for used devices can be provided by your
local authority.
During transportation, protec-
tive packaging was used to
protect the appliance against
any damage. After unpack-
ing, please dispose of all
elements of packaging in a
way that will not cause dam-
age to the environment.
All materials used for packaging the appli-
ance are environmentally friendly; they are
100% recyclable and are marked with the
appropriate symbol.
Caution! During unpacking, the packag-
ing materials (polythene bags, polystyrene
pieces, etc.) should be kept out of reach of
children.
UNPACKING DISPOSAL OF THE APPLIANCE

10
DESCRIPTION OF THE APPLIANCE
[2] Oven function
selection knob
[13] Oven door
handle
[1] Temperature
control knob
[7] Temperaturere-
gulatorsignal light L
[8] Cooker opera-
tion signal light R
[9] Large burner
[10] Medium burner [11] Medium burner
[12] Auxiliary burner
Spark
ignitor
Burner safety valve
[3,4,5,6] Gas burn-
er control knobs

11
*optional
SPECIFICATIONS OF THE APPLIANCE
Cooker ttings:
Baking tray* Grill grate
(drying rack)
Roasting tray*
Siderack

12
INSTALLATION
Cooker positioning and installation
● Kitchen should be dry, airy and have
efficient ventilation. Positioning of
the cooker in the kitchen should
guarantee unrestricted access to all
controls.
●Worktop must be made of materials, inclu-
ding veneer and adhesives, resistant to a
temperature of 100°C. Otherwise, veneer
could come o or surface of the worktop
become deformed.
●Furniture unit, which houses the oven
should be securely fastened.
●Furniture adjacent to the cooker, which
protrudes above its cooking surface sho-
uld be placed at least 110 mm from the
edge of the burner plate.
●Hoods should be installed in accordance
with the instructions in the accompanying
instruction manual.
1.1 Installation.
Procedure:
1. Prepare an opening to install the cooking
surface according to Figure 1.
2. Prepare an opening in furniture unit
(cabinet) with dimensions shown in Figure
2, to t oven.
3. Loosen the screws No. 2, Figure 3
4. Carefully insert in the oven into previously
prepared opening in furniture unit
(cabinet), protect against sliding out
using four screws in the locations shown
in Figure 4.
5. Lift the burner plate to the furniture
worktop, expand the plate mounting
brackets to a maximum size of the
opening in the worktop and tighten the
screws No. 2 maintaining equal distance
on all sides of the opening.
Fig.1
6. Position the burner plate to achieve 90
mm distance (Fig. 5) and using screws
No. 1 (Fig. 3) fix the burner plate in
worktop opening.
7. CONNECT THE APPLIANCE TO THE
GAS LINE AND ELECTRICITY MAINS
according to the following chapter.
8. Place cooking surface on the burner
plate and fasten it to the burners using
8 screws with M-3 washer (Fig. 5).
9. Place burner caps and pan supports.
Fig.2

13
INSTALLATION
Fig.4
Fig.5
Fig.3
1.2 Installation of a cooker with pre-stres-
sed glass cooking surface.
Procedure:
follow steps 1-5 as in paragraph 1.1, then,
6. Position the burner plate to achieve 90
mm distance (Fig. 6) and using 4 screws
No. 1 (Fig. 3) x the burner plate in work-
top opening.
7. CONNECT THE APPLIANCE TO THE
GAS LINE AND ELECTRICITY MAINS
according to the following chapter.
8. Place pre-stressed glass plate on the
burner plate, then place decorative rings
on the pre-stressed glass plate and the
burners. Fasten pre-stressed glass plate
and decorative rings with 8 screws and
M3 washers, starting with rear middle
burners followed by large and small
burners.
9. Place burner caps and pan supports.
Fig.6
Blat meblowy
Ramazpalnikami
Wkrêt 2Wkrêt 1
Uchwyt mocuj¹cy
ramê
Screw 1 Screw 2 Burner plate
Furniture worktop Mounting bracket
90
Wkrêt
Podk³adka aluminiowa
Screw
Aluminium washer
90
Wkrêt
Podk³adka aluminiowa
Nak³adka ozdobna
Screw
Aluminium washer
Decorative ring

14
Gas connection
Caution!
The cooker should be connected to a
gas supply of the particular type of gas
that the appliance is manufactured to
function with. Information about the
type of gas that the cooker has been
adapted to by the factory is shown on
the data plate. The cooker should be
connected exclusively by an appropri-
ately authorised tter and only he or
she has the right to adapt the cooker
to a dierent type of gas.
INSTALLATION
Fitting guidelines
A tter should:
have a gas tter’s authorisation,
be acquainted with the information in-
cluded on the data plate of the cooker
about the type of gas to which the cooker
is adapted; the information should be
compared with gas supply conditions at
the place of installation,
check:
- airing eciency, that is eciency of air
exchange in the rooms,
- tightness of gas tting connections,
- eectiveness of all functional elements of
the cooker,
- if the electricity supply is adapted to func-
tion with a safety ground lead (zero).
provide the user with a connection cer-
ticate and give him or her instructions
in cooker use.
Connection with a exible steel hose.
If the cooker is connected according to the
class 2 specications, sub-class I, only ex-
ible metal hose can be used which meet the
valid national regulations. Gas feeding con-
nector must be G ½” threaded coupling.
Use only pipes and ttings that meet the
requirements of the valid standards. Maxi-
mum admissible length of the exible hose
is 2000 mm.
Make sure the connection is not touching
any mobile elements which could damage
the hose.
Connection with a stable pipework.
The cooker comes with a G ½” threaded
coupling.
The connection to gas supply must be done in
a manner that excludes stresses in any point
of the pipework or parts of the appliance.
Make sure you do not exceed the torque
when making the connection (maximum
torque is 20 Nm). Otherwise, the connection
may be faulty or leaks may occur.
The gas hose should not touch metal ele-
ments of the cooker back shield.
Caution!
The cooker may only be connected
to a liquid gas cylinder or the existing
gas supply by an authorised tter,
observing all safety rules.
Caution!
On completion of the cooker installa-
tion, the tightness of all connections
should be checked, e.g. applying
water with soap.
Do not use re to check tightness.
Important!
Each time you replace a reducer
carry out technical inspection of the
cooker that covers gas valves and
proper operation of the ame failure
cut-o device.
The gas connection can be located on the
right or left side of the appliance. Gas sup-
ply valve on the gas connection must be
easily accessible.

15
INSTALLATION
The oven is manufactured to work with
a one-phase alternating current (230V
1N~50 Hz) and is equipped with a 3
x 1,5 mm2connection lead of 1.5 mm
length with a plug including a protection
contact.
A connection socket for electricity supply
should be equipped with a protection
pin and may not be located above the
cooker. After the cooker is positioned, it is
necessary to make the connection socket
accessible to the user.
Before connecting the oven to the socket,
check if:
- the fuse and electricity supply are able to
withstand the cooker load,
- the electricity supply is equipped with an
ecacious ground system which meets
the requirements of current standards
and provisions,
- the plug is within easy reach.
Electrical connection
Adapting the cooker to another
type of gas.
This operation may only be carried out by an
appropriately authorised tter.
If the gas the cooker is to be supplied with
diers from the gas provided for the cooker
by the manufacturer, that is G20 20 mbar,
burner nozzles must be exchanged and the
ame needs to be adjusted.

16
INSTALLATION
In order to adapt the cooker to burn a dierent
type of gas, you should:
exchange nozzles (see tables below),
adjust the “economical” ame.
Caution!
The cookers provided by the manufacturer
have burners which are factory-adapted to
use the gas specied on their data plates and
guarantee cards.
Burner ame Re-arming from liquid
gas
to natural gas
Re-arming from natural
gas
to liquid gas
Full
1. Exchange a burner noz-
zle for the appropriate type
according to the nozzle
table.
Economical
1. Exchange a burner
nozzle for the appropriate
type according to the noz-
zle table.
2. Unscrew an adjusting
bolt slightly and adjust the
ame size.
2. Screw in an adjusting
bolt slightly and check the
ame size.
In order to perform adjusting operations, take o the knobs.
Burner of SOMIPRESS type (according to the “Somipress” symbol on burner components)
Type of gas
Burner
auxiliary
gas injector
diameter
[mm]
medium
gas injector
diameter [mm]
large
gas injector
diameter [mm]
nominal
thermal power
1,00 kW
nominal
thermal power
1,80 kW
nominal
thermal power
2,80 kW
G20 2E - 20mbar
G25 2L - 25mbar 0,72 0,98 1,17
G30 3B/P - 50mbar 0,45 0,58 0,75
G30 3B/P - 30mbar 0,52 0,67 0,83

17
Surface burners applied do not require adjust-
ment of primary air. A correct ame has dis-
tinct internal cones of blue and green colour.
A short, humming ame or long, yellow and
smoking one, without clearly outlined cones,
shows improper quality of gas in the house-
hold piping or a damaged or soiled burner.
In order to check a ame, heat a burner for
around 10 minutes with a full ame, and next
turn the valve knob to the economical ame
position. The ame should not go out or jump
onto the nozzles.
INSTALLATION
Caution!
Adapting the appliance to a dierent
type of gas than that indicated by the
manufacturer of the cooker on the
data plate, or purchasing a cooker for
a dierent type of gas than supplied to
the house, is exclusively the responsi-
bility of the user and the tter.
Exchange of a burner noz-
zle – unscrew the nozzle
with special socket span-
ner No 7 and replace with
a new one according to a
type of gas (see tables).
In cookers with a safety device, a knob with
a surface burner safety valve is used, g.
Knobs should be adjusted with the burner
switched on and set to the economical ame
position, using an adjustment screwdriver of
the 2.5 mm size.
Caution!
After adjustment is completed, place
a label indicating the type of gas to
which the cooker is now adapted.

18
OPERATION
Before using the oven for the rst time
Remove packaging, clean the interior of
the oven,
Take out and wash the oven ttings with
warm water and a little washing-up liqu-
id,
Switch on the ventilation in the room or
open a window,
Gently press the knob and turn it right to
position or (see section: elec-
tronic programmer operation and oven
control),
Heat up the oven (to a temperature of
250°C for approximately 30 minutes),
remove any stains and wash the interior
carefully.
Important!
To clean the oven, only use a cloth
well rang out with warm water to
which a little washing-up liquid has
been added.

19
OPERATION
How to use surface burners
Choice of cookware
Mind that the diameter of a pan base is always
larger than the burner ame crown, and that
the pan itself is covered. The recommended
pan diameter is around 2.5 to 3 times larger
than the burner diameter, that is, for:
an auxiliary burner – a pan with a diameter
of 90 to 150 mm,
a medium burner – a pan with a diameter
of 160 to 220 mm,
a large burner – a pan with a diameter of
200 to 240 mm, and the pan height should
not be greater than its diameter.
Ignition without an ignitor*
light a match,
press in the knob to the end and turn it
left to the “large ame” position
ignite gas with a match,
set required ame size (e.g. “economical”
),
switch off the burner after finishing
cooking, turning the knob right (to the o
position).
Gas burner control knobs
Knob ignition
press in the knob to the end and turn it left
to the “economical ame” position ,
hold until gas is lit,
after the ame is lighted release the pres-
sure on the knob and set a required ame
size.
WRONG
RIGHT
●Position burner “switched o”
Position “large ame”
Position “economical ame”
*optional

20
OPERATION
Selection of the appropriate ame
A correctly adjusted burner has a light blue
ame with a clearly visible internal cone. Se-
lection of ame size depends on the position
of the burner knob which has been set:
large ame
small ame (“economical ame”)
burner switched o (gas supply is cut o)
Depending on requirements, ame size can
be set in a continuous manner.
Caution!
In cooker models equipped with a
surface burner safety valve, hold the
knob pressed down to the end when
igniting for 10 seconds at the “large
ame” position to activate the safety
device.
Caution!
Do not adjust the ame between the
o position and the large ame
position .
Operation of the burner protection valve
Some models are equipped with an automatic
system that cuts o gas supply to a burner
when the ame has disappeared.
This system protects the cooker against gas
leakage when the ame on a burner goes out
e.g. in case of spillage.
The user’s intervention is needed to re-ignite
the burner.
RIGHT
WRONG
This manual suits for next models
1
Table of contents
Languages:
Other Amica Range manuals

Amica
Amica SHI Series User manual

Amica
Amica 507EE1.21eP User manual

Amica
Amica EHEG 934 111 E User manual

Amica
Amica SHC 903 001 E User manual

Amica
Amica 507CE1.30e User manual

Amica
Amica SHCX 913 100 E User manual

Amica
Amica SHCX 914 110 E User manual

Amica
Amica SHC Series User manual

Amica
Amica SHC 913 011 W User manual

Amica
Amica 508CE Series User manual