DASH CAMERA INSTALL QUICK START GUIDE
Windshield plate: Align the camera with the windshield
plate and push into slot; the camera should fit snug in
place. Remove adhesion backer and install the plate and
camera to your vehicle windshield. NOTE: Do not install
camera to your dashboard, the video will record upside
down. Do not place camera blocking driver’s view.
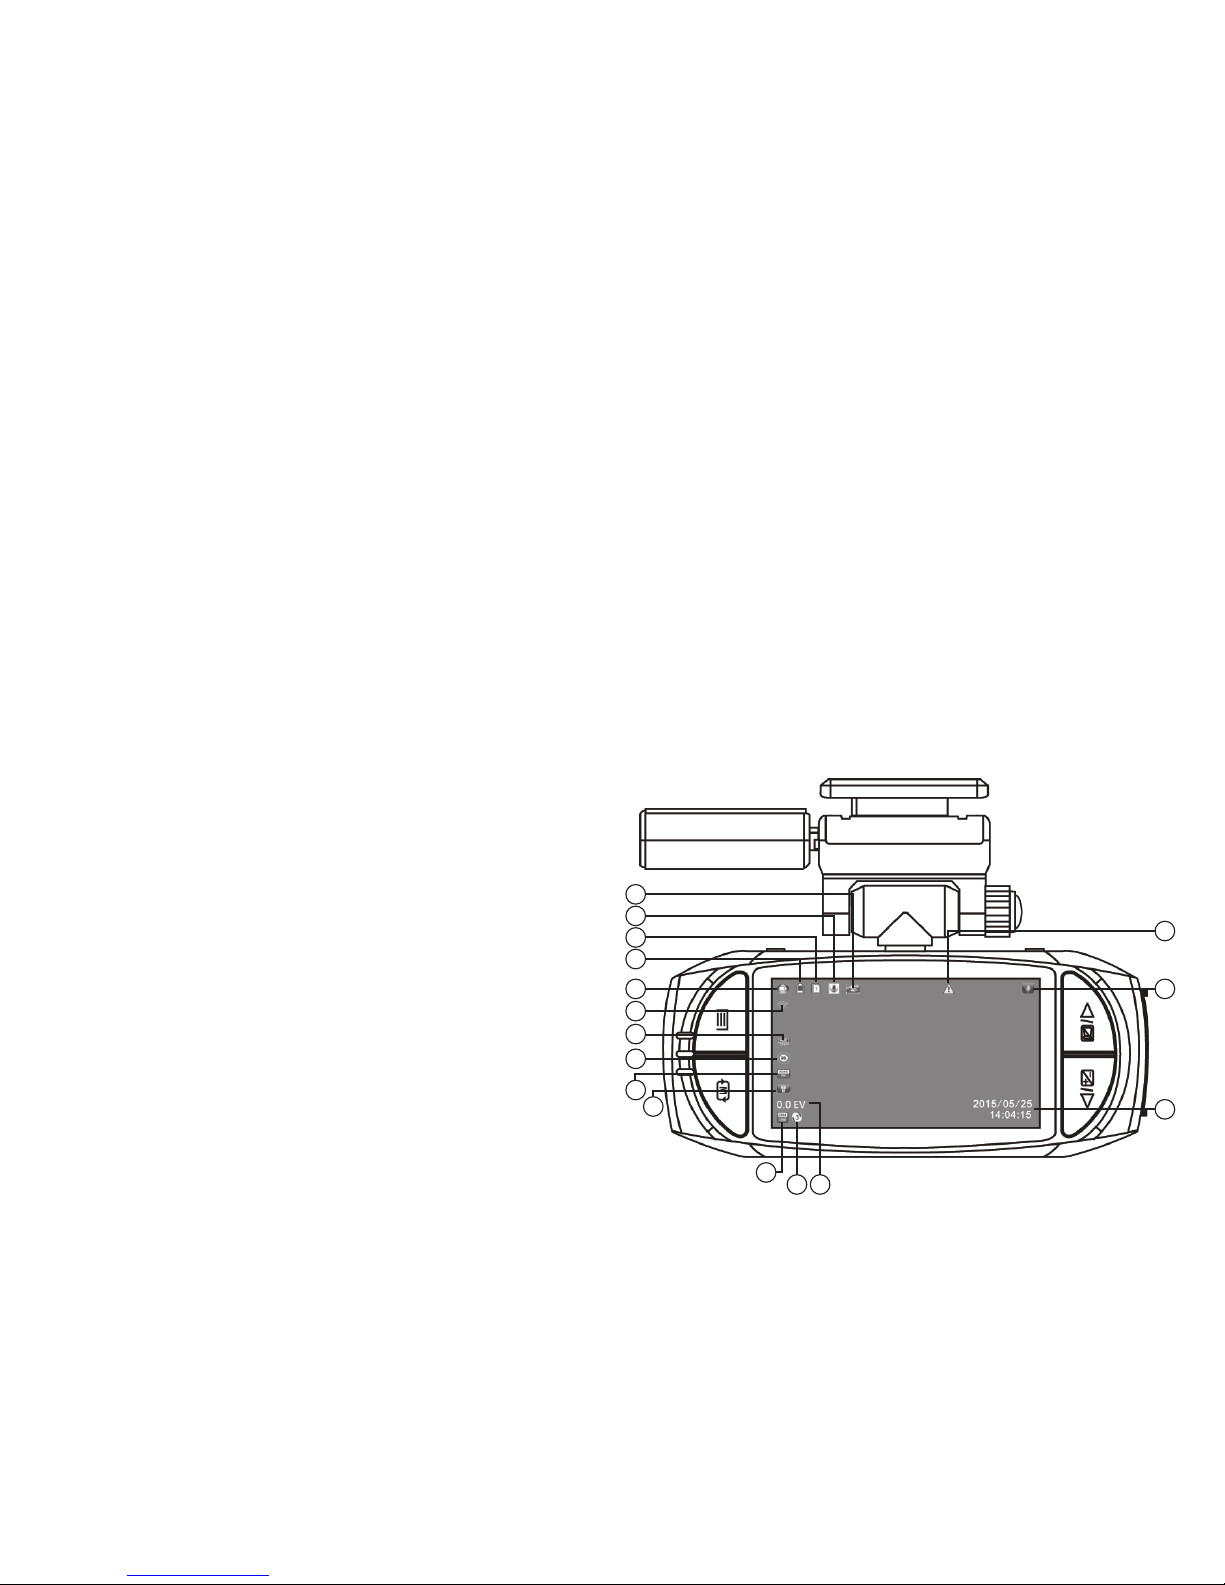
Front of
camera
Windshield plate: Align the camera with the windshield
plate and push into slot; the camera should fit snug in
place. Remove adhesion backer and install the plate and
camera to your vehicle windshield. NOTE: Do not install
camera to your dashboard, the video will record upside
down. Do not place camera blocking driver’s view.
This process can also be replicated with the supplied
Windshield Suction Cup.NOTE: Be sure to remove the
clear, protection backer from the cup before installation.
Do not install suction cup and camera to your dashboard
as the video will record upside down. Do not place camera
blocking driver’s view.
Installation: Camera installation
Windshield
plate
Front of
camera
! IMPORTANT !
TIME ZONE & DATE/TIME SETTINGS
This dash camera is pre-set for -5 Time Zone (Eastern
Standard Time). You must change this setting to your local
Time Zone to accurately record the correct time. If the time
is off, the included Dashcam Viewer software may not work
correctly. To change the Time follow these steps:
Pacific
-8
-7
Mountain
-7
-6
Central
-6
-5
Eastern
-5
-4
US Time Zone
Daylight Saving Time Off
Daylight Saving Time On
Turn the camera on
Press Menu > TimeZone then adjust with the Up and Down
arrows based on the TimeZone table below.
Confirm with the OK button.
Set the date/time: Press Menu > Dash Camera Settings
(gear icon) > Time Setup then adjust the time accordingly.
The GPS module will auto-correct any minor
time errors upon finding a signal.
1.
2.
3.
4.
DC710
amiGO!
dash cam
4