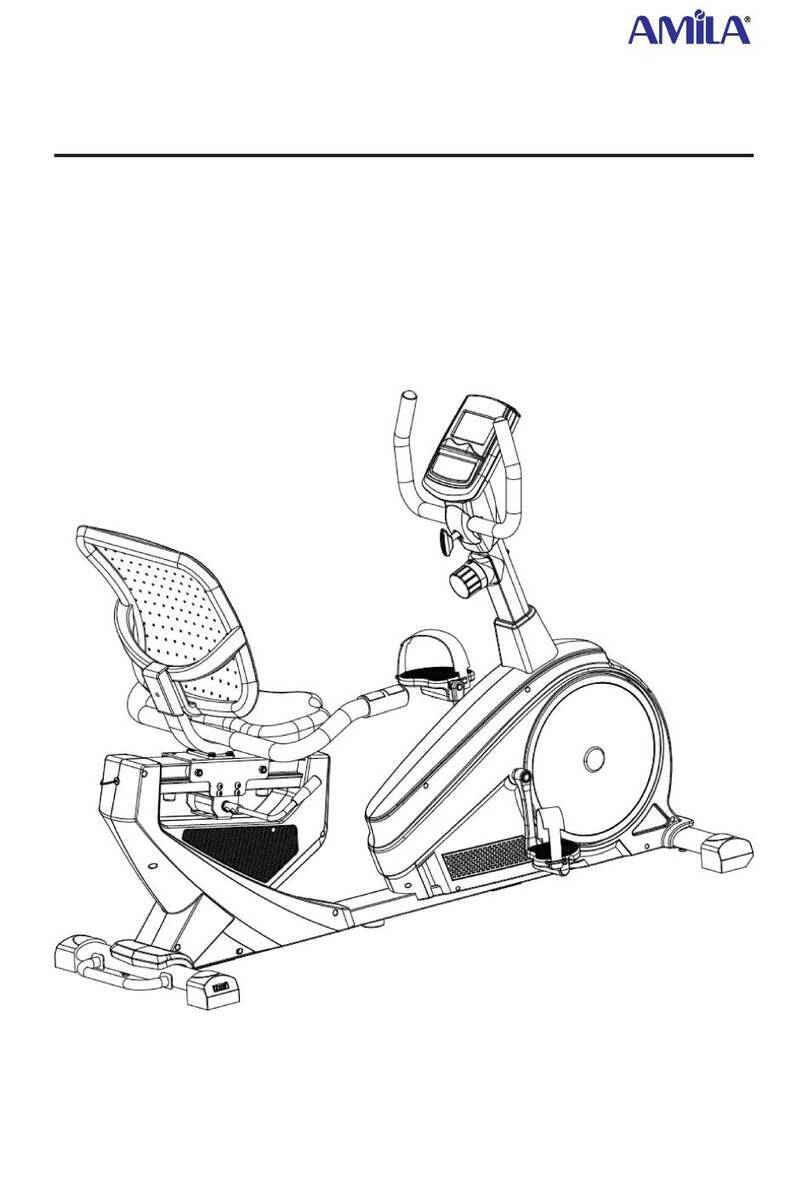
Amila 5105B Owner's manual

5105B upright Bike
(Code: 92400)
Assembly instructions & User manual
IN ORDER FOR THE WARRANTY TO BE VALID,
PLEASE, BEFORE YOU BEGIN
ASSEMBLING AND USING THE BIKE,
READ THIS INSTRUCTIONS.

— 2 —
5105B upright bike (#92400)
Assembly instructions & User manual
IMPORTANT SAFETY INFORMATION
1. Before starting any exercise program, you should consult your physician to determine if you have
any medical or physical conditions that could put your health and safety at risk, or prevent you from
using the equipment properly. Your physician’s advice is essential if you are taking medication that
aects your heart rate, blood pressure or cholesterol level.
2. Be aware of your body’s signals. Incorrect or excessive exercise can damage your health. Stop exercis-
ing if you experience any of the following symptoms: pain, tightness in your chest, irregular heart-
beat, shortness of breath, lightheadedness, dizziness or feelings of nausea. If you do experience
any of these conditions, you should consult your physician before continuing with your exercise
program.
3. Keep children and pets away from the equipment. The equipment is designed for adult use only.
4. Use the equipment on a solid, at level surface with a protective cover for your oor or carpet. To
ensure safety, the equipment should have at least 2 feet (60 CM) of free space all around it.
5. Ensure that all nuts and bolts are securely tightened before using the equipment. The safety of the
equipment can only be maintained if it is regularly examined for damage and/or wear and tear.
6. Always use the equipment as indicated. If you nd any defective components while assembling
or checking the equipment, or if you hear any unusual noises coming from the equipment during
exercise, discontinue use of the equipment immediately and do not use until the problem has been
rectied.
7. Wear suitable clothing while using the equipment. Avoid wearing loose clothing that may become
entangled in the equipment.
8. Do not place ngers or objects into the moving parts of the equipment.
9. The maximum weight capacity of this unit is 100 KG.
10. The equipment is not suitable for therapeutic use.
11. To avoid bodily injury and/or damage to the product or property, proper lifting and moving is re-
quired.
12. Your product is intended for use in cool, dry conditions. You should avoid storage in extreme cold,
hot or damp areas as this may lead to corrosion and other related problems.
13. This equipment is designed for indoor and home use only, it is not intended for commercial use!
PARTS LIST
DESCRIPTION DRAWING
Allen wrenceh #6, 1 pc
Philips screwdriver and spanner, 1 pc.

— 3 —
ASSEMBLY
Remove all parts from the box and place them on the oor to get aquainted with them. The assem-
bly procedure is not dicult. Follow the instructions and you will be able to nish in about 15-20
minutes.
Step 1
•Screw the adjustment legs (32) to the front (2)
and rear (3) stabilizers.
•Attach the front stabilizer (2) to the main frame
of the bike (1) using bolts (30) and washers (31).
•Attach the back stabilizer (3) to the main frame
of the bike (1) using bolts (30) and washers (31).
Step 2
•Insert the seat post (4) into the hole on the top part
of the main frame and secure it with a knob (36).
•Remove the nuts (27) and washers (39) from the
underside of the seat and get the bolts through
the holes of the seat sliding tube (5), replacing and
tigtening the washers (39) and nuts (27).
•Guide the bold under the seat sliding tube (5)
through the hole on the top part of the seat post (4)
and secure it with washer (41) and knob (42).

— 4 —
Step 3
•Remove 4 bolts (24) and 4 washers (23)
from the main frame (1).
•Slide the handlebar post cover (21) to the
handlebar post (6).
•Insert the tension wire (16) into the bot-
tom hole of the handlebar post (6) and
pull it out from the square hole near the
top.
•Connect the sensor wire (22) from the
main frame (1) to the other sensor wire
(10) from the handlebar post (6).
•Place the handlebar post (6) on the tube
of the main frame (1) and secure it with
the 4 bolts (24) and 4 washers (23) you
removed a while ago.
•Pull the handlebar post cover(21) all the
way down.
•Remove the bolt (19) and washer (18)
from the tension knob (17).
•Insert the ball end of the wire of the ten-
sion knob (17) into the spring hook of the
tension cable (16) (Fig. Α).
•Pull the wire of the tension knob (17) and
push it into the gap of the metal bracket
of the tension cable (16) (Fig. Β).
•Secure the tension knob (17) to the handlebar post (6) with the bolt (19) and washer (18) you re-
moved a while ago.
Step 4
•Insert the hand pulse sensor wires (13) in the hole on the
handlebar post (6) and pull them out from the top.
•Secure the handlebars (7) on their post (6) with the clamp,
making sure that the hear rate sensors are facing the seat.
•Fix the handebars (7) to the desired position by placing
the clamp cover (43), spacer (15) and tigetening with the
knob (20).

— 5 —
Step 5
•Remove the bolts (9) from the back of the console (8).
•Connect the wires (13 & 10) coming out from the top of
the handlebar post (6) to the ones on the back of the
console (8), and tuck them inside the handlebar post (6).
•Place the console (8) on the top of the handlebar post (6)
and secure it with the bolts (9) you previously removed.
•Screw the pedals (34 & 35) on the axles. WARNING: The
right pedal (R) must be screwed clockwise, while the left
pedal (L) counterclockwise.
•Tighten them securely using the supplied spanner.
CONSOLE BUTTONS
•MODE: — Select between TIME, DISTANCE and CALORIES when setting the target value for your
workout.
— While exercising, change the parameter displayed on the screen between TIME, SPEED,
DISTANCE, CALORIES, ODOMETER, PULSE and SCAN (automatically changing between
the other values every 4 seconds).
•SET: To set the target values for your workout.
•RESET: Resets the value you are currently setting.
CONSOLE FUNCTIONS
Choosing Parameters
Select the parameter according to which you want to exercise using the MODE button and change it
with the SET button.
Begin your workout. You can use the MODE button to change the parameter displayed on screen.
The parameter you have set as target for your workout will perform a countdown and, when reaches
zero, you will hear an alarm sound.
Heart rate
Hold both hand pulses sensors for a few seconds; your hear rate will be displayed on the screen.
Please hold the sensors rmly, but not too tightly.

1. Quadriceps stretch: Lean against the wall using your right
hand while bending your left leg backwards and holding it
with the other hand. Try to bend the leg as much as you
can. Hold this position for 15 seconds. Repeat for the right
leg.
2. Adductor exercise: Sit down pulling your feet towards
you, knees bent and the soles pressed together. Then use
your elbows to press your knees towards the oor. Perform
15 repetitions.
3. Touch the toes: Bend your waist slowly forward with your
knees slightly bent and your hands trying to grip the toes.
Hold this position for 15 seconds.
4. Biceps exercise: Sit with your right leg outstretched
towards the front and the left one tucked in with the
sole touching the right leg. Lean forward trying to grab
the toes of the outstretched foot. Perform 15 repeti-
tions. Rest for a while and repeat with the other leg out-
stretched.
5. Neck stretching (Head rolling): Tilt your head to the right,
feeling the stretching of the left side of the neck. Then tilt your
head towards the other side. Finally, tilt the head once forward
and once backwards.
6. Shoulder lift: Raise your right shoulder as close as you can
to your ear. Repeat with the left shoulder. This exercise should
be performed at a slow pace.
7. Tension of the Achilles tendon: This exercise is performed
by leaning on a wall, which you press with your hands. The
right foot should be bent at the knee and the left one stretched
backwards, the soles of both feet touching the ground. Repeat
the exercise by reversing the feet.
8. Side stretching: Stretch your hands upwards and try to lift
your left outstretched hand as high as possible, so that you
feel your left side being pulled. Repeat for the right hand.
WARM-UP EXERCISES
A proper workout consists of warm-up, aerobic exercise and relaxation. Repeat the program 2 or,
preferably, 3 times a week, relaxing one day in between. After a few months you will be able to in-
crease the frequency of your workouts to 4 or 5 times per week. Warming up should be a key part
of your exercise, something not to be missed. It prepares your body for more strenuous exercises by
warming and stretching your muscles, increasing blood circulation and heart rate and sending more
oxygen to your muscles. Repeat these exercises after your workout to minimize muscle soreness. We
suggest the following exercises:
3
4
5
6
7
8
2
1
This manual suits for next models
1
Table of contents
Other Amila Exercise Bike manuals
Popular Exercise Bike manuals by other brands

BH FITNESS
BH FITNESS H8705L Instructions for assembly and use

ICON Health & Fitness
ICON Health & Fitness Pro-Form 440 ES PFEX15917.1 user manual

FIT BIKE
FIT BIKE Race 8 user manual

NordicTrack
NordicTrack Gx 3.1 Bike Manual Del Usuario

FYTTER
FYTTER RACER RC MSR user manual

ICON Health & Fitness
ICON Health & Fitness Pro-Form CBC PFEX39420.0 user manual