Amundson Opticam User manual

1
User Manual
Full HD 1080p

2
ITEM CHECK LIST
Before starting, check that all of the following items have been included
with your camera. If anything is missing, contact your retailer.
Opticam Full HD 1080p headset
Storage case
Micro-bre
cleaning cloth
Neck strap
100-240V AC adapter
USB Cable
4 gb Micro-SD card
3 sets of interchangeable lenses
(smoked-polarized, yellow and clear)
Micro-SD card
adapter

3
KNOWING THE OPTICAM
Power/Video Record ON/OFF
USB Port
1080P/720P selector
Micro SD slot
Reset
Power/
Recording light
Battery
indicator
light
Reset
Frame status light
Opticam
Full HD 1080p

4
Before the rst use, charge the battery fully. Let the battery drain
completely before recharging to ensure peak performance.
Make sure the device is OFF before charging. The typical charge time
is 3-4 hours. To protect the battery and prolong its life, do not charge for
longer than 8 hours continuously.
There are 2 ways to charge your Opticam:
A) 100-240 AC ADAPTER
Plug the USB cable (A) into the AC adapter (B) and into the Opticam (C),
then plug the AC Adapter into a wall socket (D). On charging mode, the
battery indicator light (E) shows a steady RED light. Once the battery is
fully charged the RED light will turn off.
B) COMPUTER USB PORT
Plug the USB cable (A) into the Opticam (C), then plug the USB into a
computer USB port (F). On charging mode, the battery indicator light
(E) shows a steady RED light. Once the battery is fully charged the RED
light will turn off.
When charging in the computer, the power/recording light (G) will blink
a BLUE light showing that your Opticam is connected to a computer.
This way you can manage your videos and charge the Opticam at the
same time.
BEFORE USING YOUR OPTICAM
G
E
C
A
Charging the battery

5
INSTALLING THE MICRO-SD CARD
With the Opticam turned OFF, insert the Micro-SD card into the slot (A)
with the printed side facing the outside of the frame until you hear a click.
To extract the Micro-SD card, make sure the Opticam is turned OFF then
push the card in until you hear a click so the Micro-SD card automatically
pops-up.
A
F
B
D
A
AC Adapter Computer USB Port

6
GENERAL CONTROLS
Power ON/OFF Recording
Press and hold the Power/Video Record ON/OFF button (A) for 2
seconds to turn ON the Opticam. The Battery indicator light (B) will
turn GREEN, the Power Indicator light (C) will blink a BLUE light and
you will hear 3 alert chimes.
After a few seconds the Frame status light (D) will blink a BLUE light
indicating that the Opticam is recording a video.
Power OFF /Stop Recording
To stop recording and to turn OFF the Opticam press and hold the
Power/Video Record ON/OFF button (A) for 2 seconds. You will hear a
steady 3 seconds chime as the camera saves the recording le and turns
the Opticam OFF.
B
CA
D
File Saving
The Opticam records videos up to 25 minutes of duration automatically
saving a new le once it reaches the time limit. The camera will
automatically stop recording when it is low in power or when the SD
Card is full.
Make sure you copy the les from the Micro-SD card to your computer
and delete them afterwards, this will ensure you are keeping enough
space in the Micro-SD card to record new videos.

7
CONECTING THE OPTICAM
There are 2 ways to connect your Opticam:
A) USB Cable
Make sure the Opticam is turned OFF, and then plug the USB cable
(A) into the Opticam (B) and into a computer USB port (C). The Power/
Recording light (D) will blink a BLUE light showing that your Opticam is
connected to a computer.
Now your Opticam will appear on your computer as a mounted disk
where you can access, play, move, copy and delete your videos.
G
D
B
A
F
B) Micro-SD to SD Adapter
Extract the Micro-SD card from the Opticam
and insert on the Micro-SD to SD adapter (A)
with the printed faces matching.
Insert the adapter into the SD port on your
computer. Now your Opticam will appear
on your computer as a mounted disk where
you can access, play, move, copy and delete
your videos.
NOTE: Some computers may not offer the
SD card port.
USB Cable - Opticam Computer USB Port

8
Connect the Opticam to your computer and create a TEXT le (.txt)
named setdate.txt in the SD-Card volume that is mounted.
Open the new setdate.txt le, type 20151108090828 and save it in the
SD-Card volume. Change the numbers to set the date of your choice.
The inputted text 20151108090828 means:
Year / Month / Day / Hour / Minute / Second
2015 11 08 09 08 28
SET DATE & TIME
PC & MAC CONNECTION
BASIC AND ADVANCED CAMERA SETTINGS
• Operating system: PC -
Windows XP or higher / Mac –
Mac OS 10.6 or higher required.
• USB Port required.
• SD Card Port is optional.
• Minimum 2.0GHz Dual-core
processor required.
• Minimum 4GB free hard disk
memory required.
• Minimum 2GB RAM required.
• Graphic minimum 512M memory
and support 720p resolution or
higher required.
A
1080P 720P
A) Basic Camera Settings
You can select the quality of the video using the selector located on the
right arm of the Opticam (A). Slide the button to select between 720p
and 1080p Full HD video.

9
B) Advanced Camera Settings
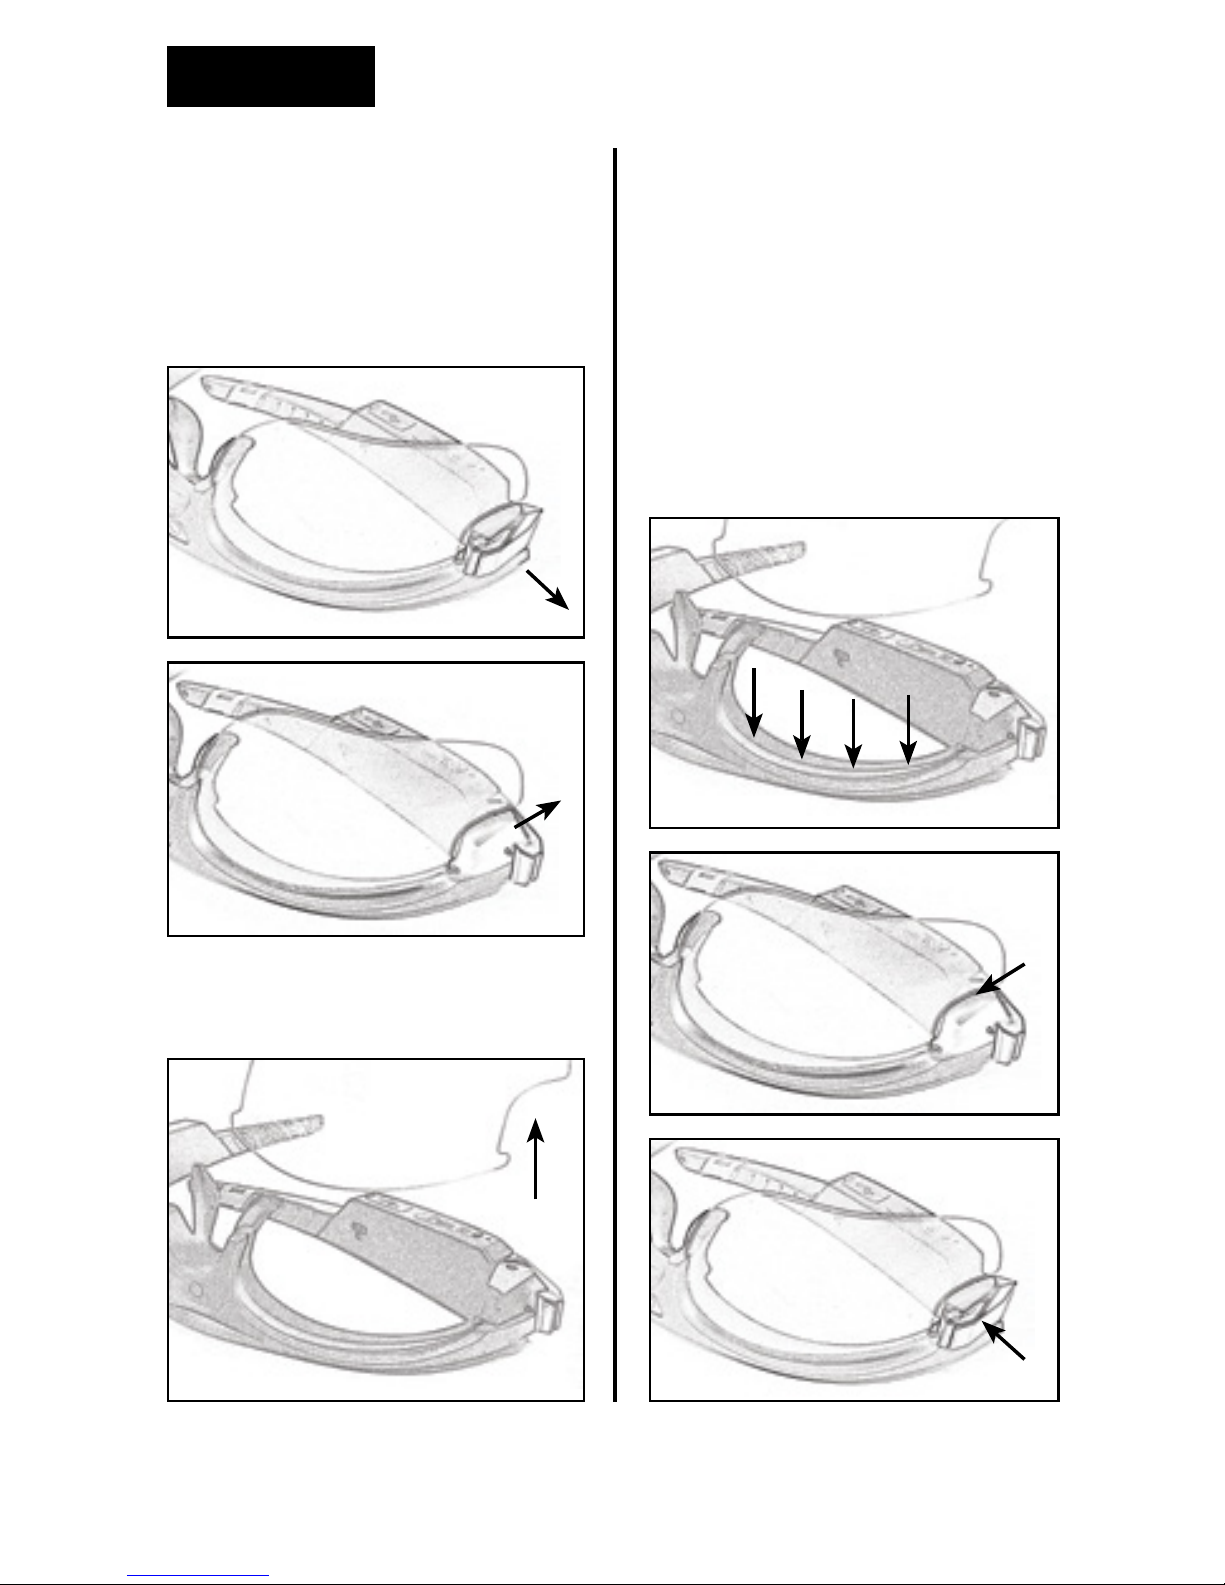
The Opticam gives you the option
of controlling different camera
settings like Exposure, Sharpness,
Quality, Audio Volume, Light
Frequency, RTC Display (Date and
Time), Video/Photo, Buzz Alert and
Led Lights.
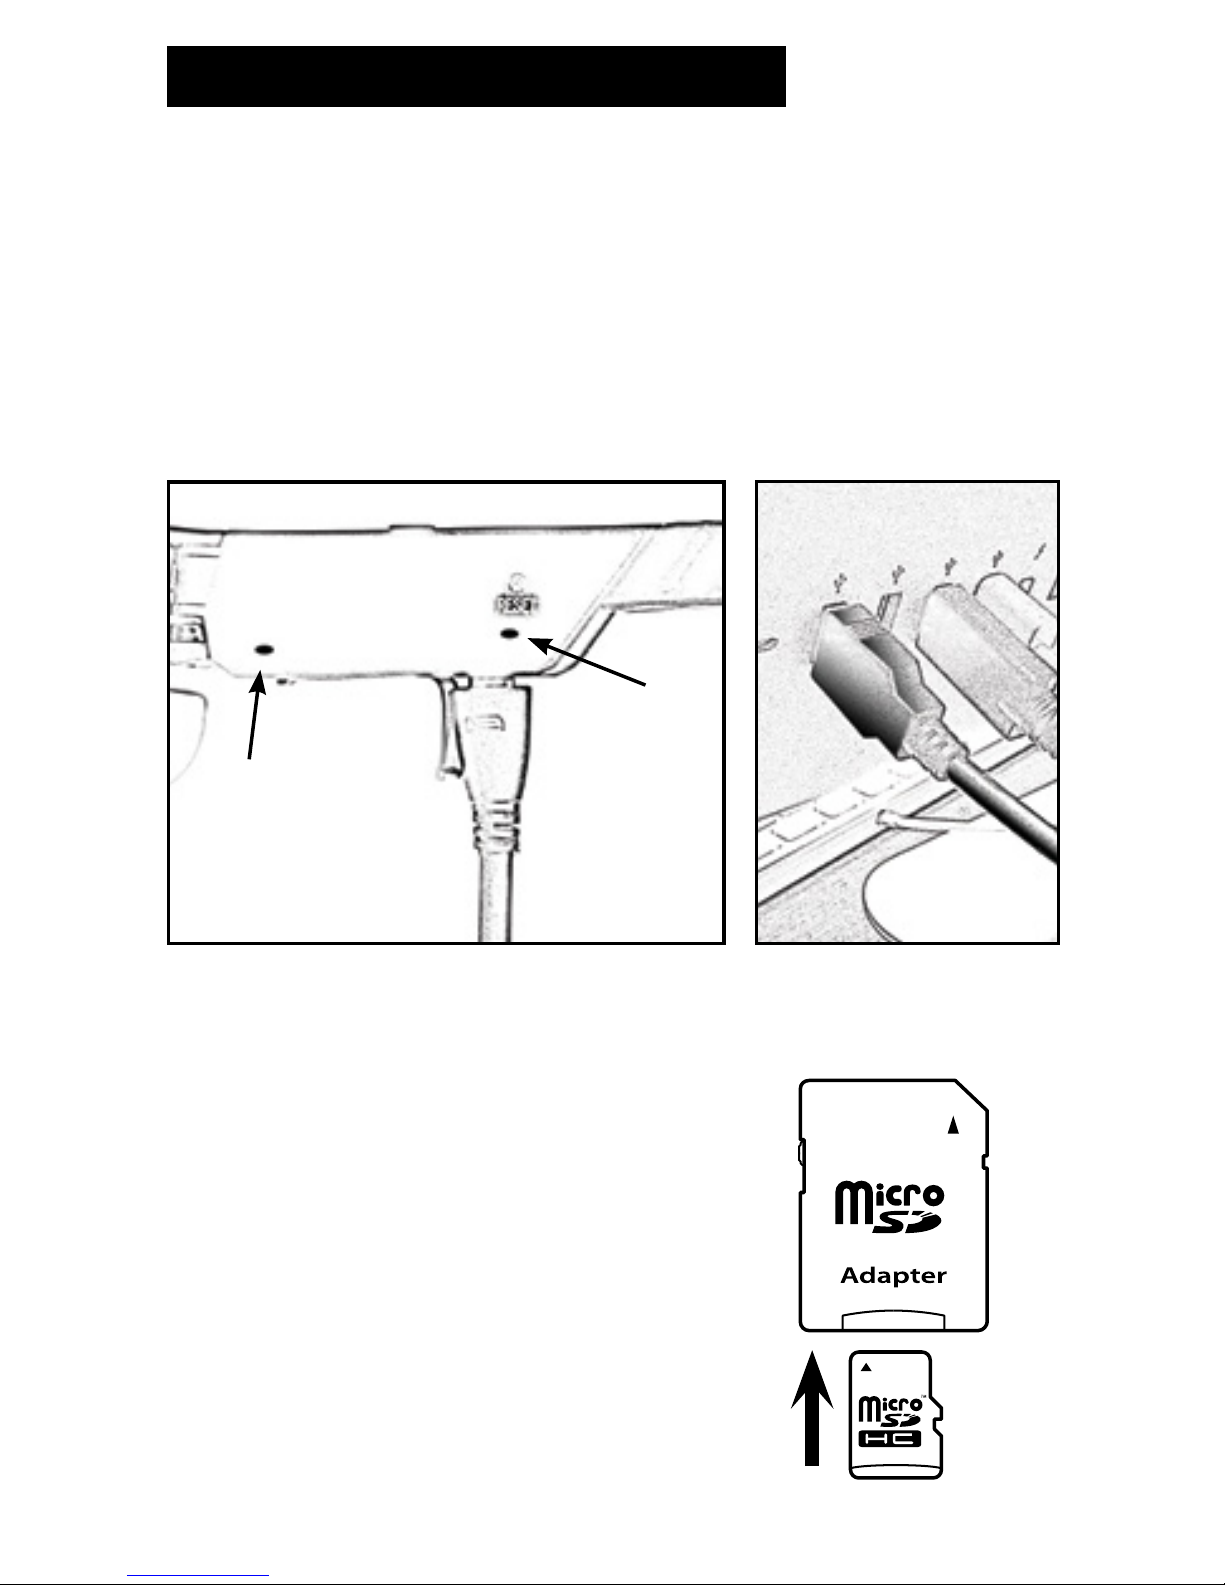
In order to change any of these
settings you have to connect the
Opticam to your computer and
open the le named Setting.txt
located on the SD-Micro volume.
Change the setting by typing the
desired number/words following
the table below and save the le.
NOTE: After typing the new
settings, please change the words
“UPDATE: N” to “UPDATE: Y”, then
save and exit the “setting.txt” le.
Camera REV1.0
UPDATE: N
FORMAT
EV: 6
SHARPNESS: 100
QUALITY: 1
AudioVol: 1
LIGHTFRE: 0
RTCDisplay: 1
VideoSwitch: 0
BuzzerAlert: 1
LED:1
-------------------------------
Function
EV
QUALITY
AUDIO
LIGHT FREQ
RTC DISPLAY
VIDEO/PHOTO
BUZZER ALERT
LED
HIGH
MAX
60
OFF
VIDEO
OFF
OFF
MIDDLE
MID
50
ON
PHOTO
HIGH
ON
MIDDLE LOW
MIDDLE
MID
60
ON
VIDEO
HIGH
ON
LOW
MIN OFF
SHARPNESS
6
100
1-12
Adjustable
1-1200
Adjustable
0 1 2 3 Default Remarks
ADVANCED CAMERA SETTINGS TABLE

10
LENSES
Removing lenses
To remove the lenses, support the
eyewear frame with one hand,
fold the frame arm and pull the
lock up (A) (B).
Pull the lens out and do the same
procedure on the other side.
Replacing lenses
To replace lenses, support the
eyewear frame with one hand
and slide the lens into the support
notches towards the top of the
frame (D).
Close the lock in until you
hear a click (E) (F). Repeat the
procedure on the other side.
AD
E
F
C
B

11
LIGHT STATUS
Status Blue LightGreen Light Red Light Sound Alert
Power ON
Charging
Charging Full
Recording
Power OFF
No Micro-SD
Card / Card Full
Low Power
Stay ON
OFF
OFF
Stay ON
1 sec then OFF
5 sec ash
then OFF
10 sec ash
then OFF
5 sec ash
then OFF
10 sec ash
then OFF
OFF
Stay ON
OFF
OFF
OFF
OFF
OFF
3 Chimes
OFF
OFF
1 chime every
25 minutes
3 chimes then
4 sec chime
4 sec chime
4 sec chime
3 sec then ash
OFF
OFF
Flash
1 sec then OFF
TROUBLESHOOTING
Problem
Fail to start
Data not saving
Camera not
recognized when
connected to
computer
Unit powers OFF
immediately
after power ON
Connection occurs when
device is turned ON
Ensure camera is OFF before
connecting to PC
Dead battery / Device Frozen
Memory Full Delete unwanted les
USB cable fails
USB port disabled
Computer does not support USB
PC system frozen
Micro SD-Card error
Battery low
Memory full
No Micro-SD Card
Recharge battery
Delete unwanted les
Insert Micro-SD card
Replace USB cable
Ensure USB port is enabled
Update computer to support USB
device
Restart computer
Format Micro SD-Card
Recharge battery
Press the RESET button
Potencial Reason Solution

12
SPECIFICATIONS
Operating System
Memory
Camera
Video
Power
USB/Interface
Use / Storage
Windows XP or higher / Mac OS 10.6 or higher required.
Support TF/Micro SD Card up to 32GB
5.0 MP / View angle: 63º
Resolution 1920x1080 P @30fps / 1280x720 P @60fps
Video Format H.264 / .MOV / Compression Ratio 12Mbps
Buit-in 550mAh Li-polymer Battery / Power Consumption <1.5W
2.0, Mini 5 Pin to USB
Working Temperature -10ºC to 40ºC / Storage Temperature -20ºC to 50ºC
OPTICAM FULL HD 1080p
CAUTION
USEFUL TIPS
DO NOT expose to rain or moisture.
DO NOT remove Micro SD card while the device is ON, it may damage
device and/or card.
Avoid dropping the device.
Lenses are impact resistant but are not to be used as safety glasses.
The Opticam Full HD 1080p is not waterproof. The rubber aps system
tolerate a moderate amount of humidity on the USB and Micro-SD slots
area but is necessary to avoid direct contact with water.
When lming always look directly to the object or to the area of interest
that you want to show.
The human eye peripheral vision is wider than the camera lens range
and its position on the glasses frame is slightly above the eye level.

13
What Do Our Warranties Usually Cover?
All Amundson products have unconditional warranty under the specied
period. Only consumers purchasing Amundson products from authorized
dealers or resellers may obtain coverage under our warranties. Proof of
purchase is necessary.
How Long Does The Coverage Last?
The Opticam products have a 12 month limited warranty period.
What happens after my warranty period expires?
Don’t worry; Amundson will replace broken or damaged cameras or
components at a cost. Please note that a shipping cost is also applied.
What do you have to do? The process to use your warranty is very
simple; you just have to follow these steps:
1. Fill out the form telling us who you are, where do you live, the product
name/number and then cut the form on the doted line.
2. Send the product back to us with a proof of purchase and the form.
Purchasers are responsible for shipping warranty products to Amundson.
Check our Specic shipping section bellow before sending the product.
Our shipping address is:
Amundson Outdoor Products Ltd.
#188-1538 Cliveden Ave, Delta, BC, V3M 6J8
3. We will get in touch with you as soon as we receive your package to
continue with the warranty process. If you need to talk to us at any moment,
just call our toll free number: 1-877-437-1805 (English and French) from
9am to 5pm (PT); or send us an e-mail to [email protected]
Made in China Amundson Outdoor Products Ltd.
WARRANTY

14

15
HD Intégrale 1080p
Manuel d’instructions

16
LISTE DE CONTRÔLE DES ACCESSOIRES
Avant de commencer, assurez-vous que tous les accessoires ci dessous
ont été inclus dans votre boite à lunette. S’il manque des pièces, veillez
contacter votre détaillant.
Des oreilletes Opticam
HD Intégrale 1080p
Un étui
Tissu de nettoyage
en microbre
Sangle pour le cou
100-240V
Adaptateur AC
Câble USB
Carte microSD de 4 Go
3 paires de verre changeables
(fumés, jaune, incolor)
Adaptateur
microSD/SD

17
CONNAISSEZ VOS LUNETTES
Commutateur/enregistrement
vidéo marche-arrêt
USB
Sélecteur 1080P/720P
Fente pour carte
microSD
Bouton de
réinitialisation
Bouton de
réinitialisation
Voyant
d’alimentation/
enregistrement Indicateur
de charge
de la pile
Voyant d’état de la monture
Opticam HD
Intégrale 1080p

18
Avant d’utiliser l’Opticam pour la première fois, chargez complètement
la pile. Attendez que la pile soit complètement déchargée avant de la
recharger pour vous assurer qu’elle fonctionne à plein rendement.
Assurez-vous que l’appareil est HORS TENSION avant de le charger.
Le temps de charge moyen est de trois à quatre heures. An de protéger
la pile et de prolonger sa durée de vie, ne la chargez pas pendant plus
de huit heures de suite. Vous pouvez charger votre Opticam de deux
façons :
A) ADAPTATEUR C.A. 100-240 V
Branchez le câble USB (A) dans l’adaptateur c.a. (B) et dans l’Opticam
(C) et branchez ensuite l’adaptateur c.a. dans une prise murale (D).
Lorsque votre appareil est en mode de chargement, l’indicateur de
charge de la pile (E) s’allume en ROUGE de façon continue. Une fois
que la pile est entièrement chargée, la lumière ROUGE s’éteint.
B) PORT USB D’UN ORDINATEUR.
Branchez d’abord le câble USB (A) dans l’Opticam (C) et ensuite dans
le port USB d’un ordinateur (F). Lorsque votre appareil est en mode de
chargement, l’indicateur de charge de la pile (E) s’allume en ROUGE de
façon continue. Une fois que la pile est entièrement chargée, la lumière
ROUGE s’éteint.
Lorsque le chargement est effectué à l’aide d’un ordinateur, le voyant
d’alimentation/enregistrement (G) sera BLEU et clignotera, ce qui
indique que votre Opticam est connecté à un ordinateur. Ainsi, vous
pouvez gérer vos vidéos et charger l’Opticam en même temps.
AVANT D’UTILISER VOTRE OPTICAM
G
E
C
A
Chargement de la pile

19
INSTALLATION DE VOTRE CARTE MÉMOIRE «MICRO-SD»
Une fois l’Opticam HORS TENSION, insérez la carte microSD dans la
fente (A) prévue à cet effet face imprimée vers l’extérieur de la monture
jusqu’à ce vous entendiez un déclic.
Pour retirer la carte microSD, assurez-vous que l’Opticam est HORS
TENSION et poussez la carte jusqu’à ce que vous entendiez un déclic.
La carte microSD sortira automatiquement.
A
F
B
D
A
Adaptateur AC Port USB d’un ordinateur

20
CONTRÔLES GÉNÉRAUX
Marche/enregistrement vidéo
Appuyez sur le bouton Commutateur/enregistrement vidéo marche-
arrêt (A) et maintenez-le enfoncé pendant deux secondes pour mettre
l’Opticam SOUS TENSION. L’indicateur de charge de la pile (B)
deviendra vert, le témoin lumineux de mise sous tension (C) deviendra
bleu, il clignotera et émettra trois carillons.
Après quelques secondes, le voyant d’état de la monture (D) deviendra
bleu et clignotera, ce qui indique que l’Opticam enregistre une vidéo.
Arrêt/arrêt de l’enregistrement vidéo
Pour arrêter l’enregistrement et mettre l’Opticam HORS TENSION,
appuyez sur le bouton Commutateur/enregistrement vidéo marche-arrêt
(A) et maintenez-le enfoncé pendant deux secondes.
Vous entendrez un carillon continu pendant trois secondes pendant que
l’appareil photo enregistre le chier et s’éteint.
B
CA
D
Enregistrement de chiers
L’Opticam enregistre des vidéos d’une durée allant jusqu’à 25 minutes
et sauvegarde tout nouveau chier dès qu’il atteint la durée maximale.
L’appareil photo cesse automatiquement tout enregistrement dès que la
pile est faible ou que la carte SD est pleine.
An que votre Opticam soit toujours prêt à l’utilisation, nous vous
recommandons de bien gérer vos chiers vidéo. Assurez-vous de
transférer les chiers de votre carte microSD à votre ordinateur et de
les supprimer de votre carte par la suite. Ainsi, votre carte microSD
contiendra assez d’espace pour enregistrer de nouveaux vidéos.
Table of contents
Languages: