Anie Jooltool User manual

1-888-337-1230 WWW.JOOLTOOL.COM INFO@JOOLTOOL.COM
by
OWNER’S MANUAL

!
POWER TOOL SAFETY RULES
Please read and understand all instructions
before using your JOOLTOOL® System
Failure to follow instructions listed below may result in serious
personal injury, electric shock and / or fire.
WORK AREA
Always secure the machine unit to a bench top
with two (2) screws using the two integrated
mounting holes, located on opposite sides of
the base of the unit.
Always work in a clean, well-lit, distraction-free work environment. Keep work
area clean and clutter free. Never work in dark areas.
Always keep bystanders, children, visitors, and all pets (animals) away from
work area while operating unit. Distractions can cause you to lose control.
Never operate tool in explosive atmospheres, such as in the presence of gases,
dust, or flammable liquids. Unit can create sparks and may ignite fumes or
dust.
Avoid vacuuming grinding debris into a canister containing wood or plastic
dust/shavings when working on any metal parts or material that can cause
sparks. Sparks can ignite inside the canister and cause fire. Disconnect vacuum
from hood/shroud when performing such work.
2

!
POWER TOOL SAFETY RULES
PERSONAL SAFETY
Avoid accidental starting. Make certain speed control switch is“OFF”before
plugging in. Leaving the speed control switch“ON”can lead to accidents.
Do not leave unit unattended. Always turn the unit “OFF” regardless of the
situation or circumstance. A running motor that is left unattended invites
accidents.
Remove all adjusting tools (keys and/or wrenches) from unit before turning
“ON.” A key or wrench that is left attached on a rotating part can cause
personal injury.
Always use common sense and pay attention to what you are doing when
using this unit. Stay alert at all times, do not use tool while tired or under the
influence of medication, drugs, or alcohol. A lack of concentration may result in
serious personal injury.
Always dress appropriately. Do not wear loose articles such as clothing,
jewelry. Hair should be contained properly. Keep loose clothes, long hair, or
jewelry away from rotating parts.
Use safety equipment: always wear eye, hand and finger protection and/or full
safety shield & fitted long sleeve clothing. A respirator is strongly
recommended for all grinding and finishing applications.Wear non-skid shoes.
Always keep proper footing and balance at all times.
Do not reach over the machine while the wheel or disc is in motion. A rotating
wheel or disc can grab any object in its path, potentially resulting in injury.
3

!
POWER TOOL SAFETY RULES
ELECTRICAL SAFETY
Always use a properly grounded 110 / 240V electrical outlet.
Always use approved electrical outlet adaptors when using the unit outside of
the U.S.A.
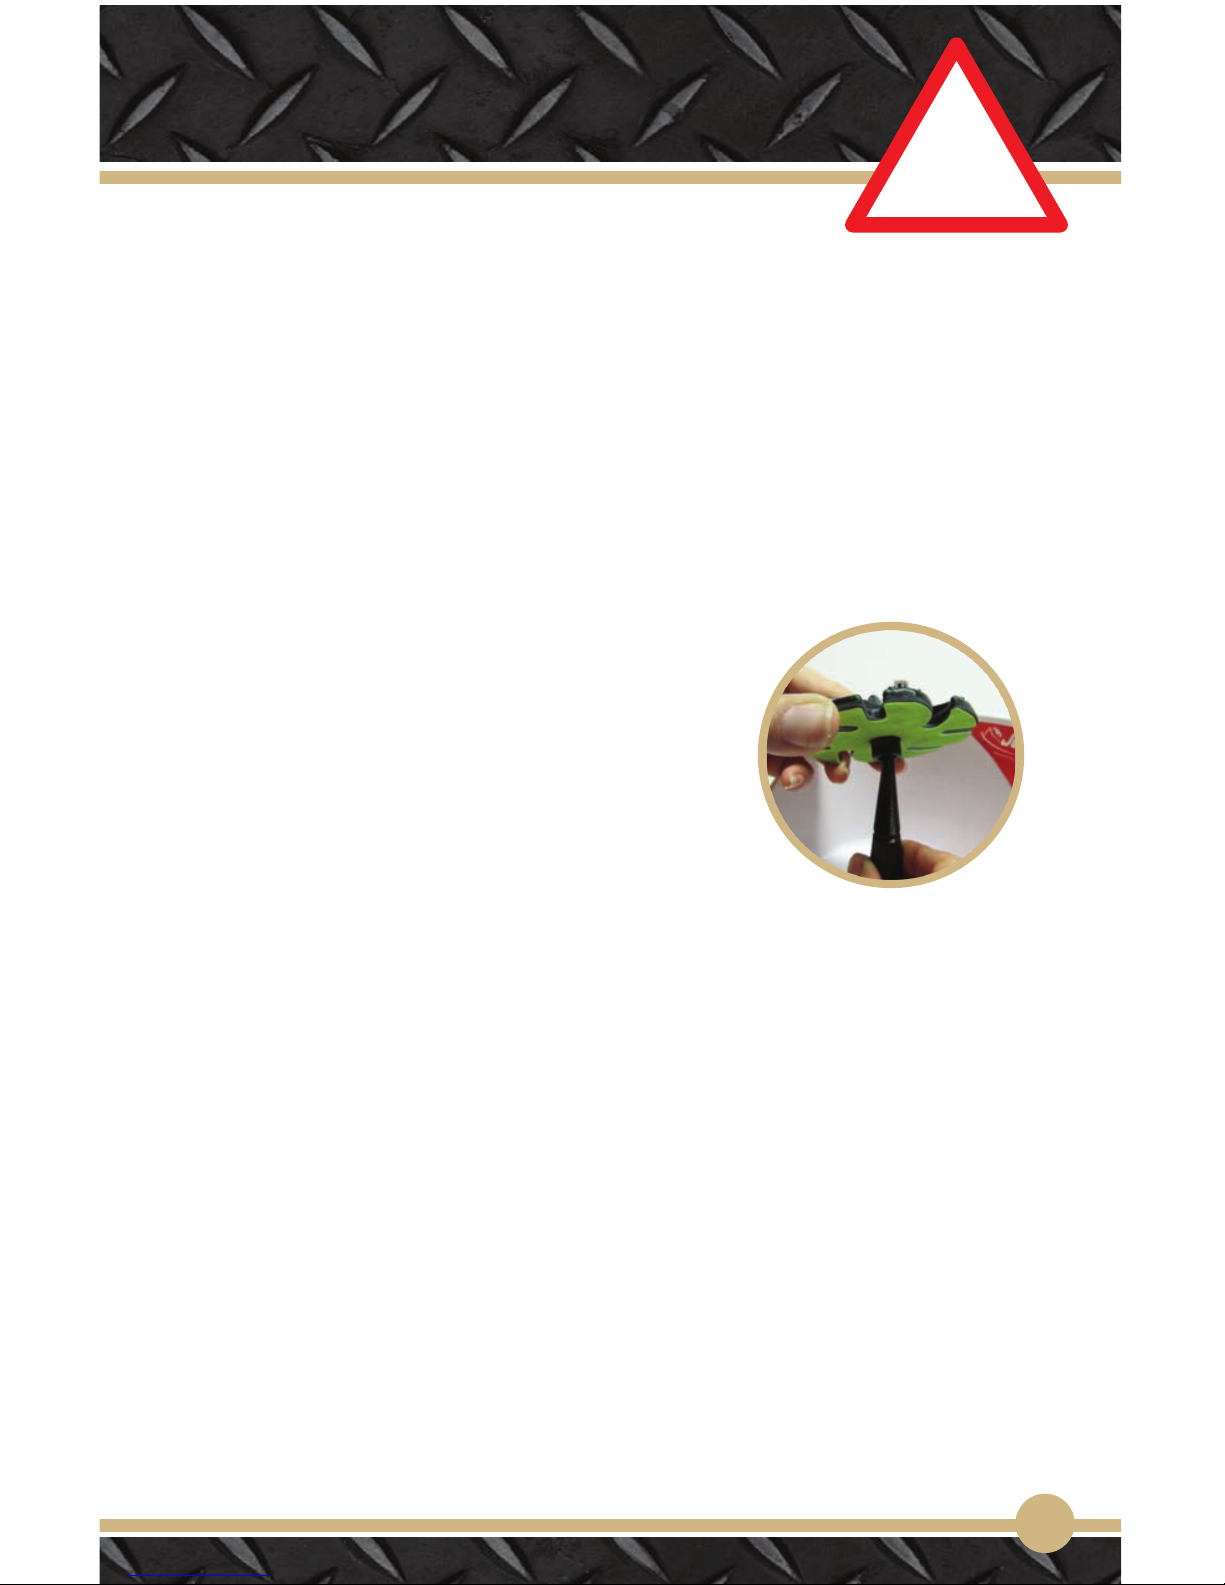
Never alter the plug or tamper with the converter
box in any way to fit into an electrical outlet other
than the ones described above.
Serious electrical shock and injury can occur.
Always routinely inspect the power cord for any nicks, cracks, cuts or damages.
(Make sure unit has been un-plugged prior to inspection.) If any visual or
physical damages are found, contact the manufacturer or an authorized
service center for information on replacement or repair. Refer to the warranty
page for correct instructions on returning your product, regardless if it is under
warranty or not. Do not continue to use the tool in its damaged condition,
electrical shock and injury may occur.
Never expose unit or its accessories to rain or use in damp or wet conditions.
Water or moisture entering a power tool increases the risk of electrical shock.
To avoid accidental starting, be sure switch is“OFF” before plugging in.
Plugging tool that has the switch “ON” can result in accidents.
If an extension cord is necessary, an adequate UL approved cord no longer
than 8 feet in length is recommended.This will prevent any damage to the
power adaptor or power tool unit.
SERVICE
Your JOOLTOOL System will give you great results without much maintenance.
Should it require some, it should only be performed by an authorized service
center or by the manufacturer, JOOLTOOL®. Do not attempt to repair or service
any part of the tool yourself. Doing so may result in electric shock, injury or
irreparable damage to the unit.
4

!
POWER TOOL SAFETY RULES
CLEANING
Always disconnect power from the tool before cleaning.
Always wear safety goggles when using compressed dry air for cleaning.
Ventilation openings and switch levers must be kept clean and dry.
Do not attempt to clean by inserting pointed objects through openings.
Certain cleaning agents and solvents may damage plastic parts. Some of these
are carbon tetrachloride, gasoline, chlorinated cleaning solvents, ammonia and
household detergents that contain ammonia.
GENERAL TOOL SAFETY
Staying within the tool’s designed limits will give you great results as well as a
safe & enjoyable time fulfilling your projects.Treat your JOOLTOOL™ with care.
NOTE: Always hold the workpiece with BOTH HANDS.
It is safer and will provide better control of your work.
Use only light pressure when working. Never apply excessive pressure or
torque on the disc, the spindle or any attached accessory while using the tool.
NOTE:Your JOOLTOOL™ may have an automatic “power-down”safety feature.
When excessive pressure is detected, the disc speed is reduced. If this happens,
reset your JOOLTOOL™ : turn the switch to“OFF”, unplug & replug the cord.
Always use accessories and attachments for their intended applications.
Use only Jooltool-approved accessories with this JOOLTOOL® unit.
Never use the tool with any accessories that seem damaged or excessively
worn. If in doubt, turn the tool“OFF”immediately and inspect carefully. Replace
any badly worn or broken accessories.
Always pay close attention around rotating wheels or discs. Fingers can
get hit by the spinning disc.
Never try to stop the wheels with your hands or with any object.
Allow the tool to come to a complete stop before changing attachments or
accessories.
5

!
POWER TOOL SAFETY RULES
NINJA SEE-THRU™ BACKPAD SAFETY RULES
NOTE: The rotation of the disc is COUNTER CLOCKWISE.
The motor should be completely stopped
and the switch“OFF”before installing the BACKPAD.
The BACKPAD should always be installed
with abrasive side down.
Always hold the work piece directly UNDERNEATH the disc.
Always change abrasive when there is a tear in it or if it is excessively worn.
Never reuse an abrasive once it’s been removed from the BACKPAD.
Never place workpiece on top or the side of spinning disc.The disc can eject
workpiece and may cause loss of control.
Always stop the disc if vibrating or wobbling occurs during use.
Wobbling or vibration of the disc could be caused by a damaged or
incompatible (non-JOOLTOOL™) spindle. Foreign spindles may also cause
damage to the BACKPAD. Avoid using damaged or cracked BACKPADS as they
may break apart.
Always use JOOLTOOL™ BACKPADS on your JOOLTOOL™ System with its
original spindle.This will guarantee that your discs will always be perfectly
centered and give you optimal results.
Always tighten your BACKPAD snuggly onto the spindle before use.
Never install BACKPADS while the motor is“ON”. This can cause personal injury.
6

!
POWER TOOL SAFETY RULES
ABRASIVE SAFETY - INSTALLATION & OPERATION
Always remove all protective backing film off abrasive disc before applying
onto the BACKPAD.
Always make sure all adhesive residue from used abrasive and/or dust particles
have been completely removed from the BACKPAD before applying a new
abrasive.
Always place abrasive on flat (BOTTOM) surface of BACKPAD.
Never use abrasive disc if it is not adhering
to the BACKPAD.
Never place abrasives on BACKPAD when wet.
Never cut, change, or distort the shape of the NINJA SEE-THRU ™ design on the
abrasive.
Always install abrasives on the BACKPAD by aligning correctly with the NINJA
SEE-THRU ™ design. Apply pressure to promote sufficient adherence between
abrasive and BACKPAD.
Never use disc if the abrasive has been installed incorrectly onto the BACKPAD.
Misaligned abrasive disc can increase chances of abrasive disc“catching”
during rotation.This can lead to loss of control of the workpiece and potential
damage to the BACKPAD.
7

STARTING UP
UNPACK YOUR JOOLTOOL™ SYSTEM
Make sure everything you need is there:
JOOLTOOL™ Unit
Power Cord & Adaptor
Abrasive Kit*
Instructional DVD*
Disc Retainer
HOW TO USE BACKPADS & ABRASIVES
Know what you want to accomplish and what abrasives will be required.
Always make sure the correct abrasive is used for the task. Using the right
abrasives increases your productivity, the longevity of your JOOLTOOL™ and
its abrasives as well as your workpiece.
NOTE: Always start off with a finer grit, you can go coarser later.
NOTE: Once an abrasive has been removed off the BACKPAD regardless of
condition and wear, it cannot be reused. It is recommended that all abrasives
used for a project be mounted on their own dedicated BACKPADS.This will
ensure that you get the longest life & efficiency out of your abrasives and your
JOOLTOOL™. If you require additionnal BACKPADS, please contact your nearest
JOOLTOOL™ retailer, order directly from us at 1-888-337-1230 or online at
www.jooltool.com.
8
* Your kit may be different from picture

STARTING UP
NOTE: Do not overtighten.This can cause thread to strip.
INSTALLING ABRASIVES
INSTALLING BACKPADS
INSTALLING NINJA™ CUSHION BACKING
If applied onto backpad before abrasives, these give incredible performance!
STEP 1:
Place BACKPAD
on the spindle
with abrasive
side down.
STEP 2:
Screw BACKPAD
tightly on
(clockwise) while
holding the
spindle for a
snug fit.
TURNING YOUR JOOLTOOL “ON”
Your JOOLTOOL’s power switch is also the
speed control. (Located at the bottom of unit)
To turn“ON”, simply twist the knob clockwise
to the desired speed.
To turn“OFF”, twist the knob counter-clockwise
till the motor completely stops.
STEP 1:
Remove
protective film
backing off
your 3M NINJA
Cushion.
STEP 2:
Apply firmly onto
the flat surface of
your BACKPAD,
aligning Cushion
Backing with the
NINJA Design.
STEP 1:
Remove
protective film
backing off
your 3M NINJA
Abrasive.
STEP 2:
Apply firmly onto
the flat surface of
your BACKPAD,
aligning the
abrasive with the
NINJA Design.
9

OPERATION
HOLDING THE WORKPIECE
Hold the workpiece directly UNDERNEATH the disc.
Apply the workpiece to the BOTTOM of the SPINNING
disc GENTLY and with EVEN pressure.
STAY WITHIN THE SEE-THRU AREA OF THE DISC!
DO NOT WORK OR SLIDE OFF THE EDGE OF THE DISC!
The tool’s sharp edge or tip can trim the outer edge of
disc causing damage to the disc & kick back of the tool.
When possible, work on the 3 to 6“o-clock“ portion
of the disc.This will ensure that any dust or sparks
are projected toward the vacuum port, away from you.
FINDING THE CORRECT ANGLE
!
REMEMBER!
ROTATION OF THE DISC
IS COUNTER-CLOCKWISE
DO NOT POINT ANY EDGE OR TIP TO THE
OPPOSITE OF DIRECTION OF ROTATION!
STEP 1:
Lightly make contact
with the“back”of the
tool’s edge to the disc.
STEP 2:
Lift the entire width of
the edge flat against
the disc. Hold in place.
STEP 3:
When the desired
result is achieved.
DROP TOOL DOWN.
To maintain the angle of your flat tools. Follow these steps.
10

OPERATION
THESE ARE GENERAL RULES OF OPERATION INTENDED AS GUIDELINES ONLY.
FOR MORE INFORMATION, CONSULT THE PROVIDED INSTRUCTIONAL DVD.
FOR LONG FLAT-EDGED TOOLS
RULE OF THUMB:
Follow the steps described on the previous page
while GRADUALLY & EVENLY moving/gliding
the tool’s edge from RIGHT to LEFT under the disc.
You may stop anytime by simply lowering the tool
as described previously in STEP 3.
AVOID“TEETER-TOTTERING”THE TOOL ON THE DISC!
DO NOT SLIDE TOOL OFF THE EDGE OF THE DISC!
FOR ROUNDED ANGLES/BEVELS:
RULE OF THUMB:
The same steps apply as stated previously.
Keep the edge held against the abrasive.
Then, in a GRADUAL (LEFT to RIGHT )
MOTION, slowly FOLLOW the ROUND surface
of the tool by twisting it or moving the handle.
For lathe gouges with a fingernail shape:
Move the handle of the tool like a pendulum.
PLEASE REFER TO THE PROVIDED ABRASIVE QUICK REFERENCE CHART OR SEE
NEXT PAGE FOR THE DIFFERENT APPLICATIONS OFFERED BY YOUR ABRASIVES.
!
REMEMBER!
PLEASE OBEY ALL SAFETY RULES!
See POWER TOOL SAFETY RULES section of this manual.
11

COLOR ABRASIVE GRADE APPLICATION
PLEASE SEE BELOW FOR ADDITIONAL ACCESSORIES
THAT BROADEN YOUR JOOLTOOL EXPERIENCE
CONTACT US FOR INFO ABOUT MORE GREAT PRODUCTS!
Felt Disc Depends on
Compound
Buffing & Polishing
Metal, Glass, Stone
Polishing Film
Kit
Makes Grit Switching Faster and Simpler!
Have One for Each Grit: “TWIST ON - TWIST OFF”!
Stick onto the BACKPADS to Absorb Chatter &
Provide the Smoothest Grind with Any Abrasive!
Sharpens Carbide, Cobalt, Tungsten & Other Metals
Excellent Results when Combined with NINJA™ Cushion!
Available Grades: 125, 74, 45, 30 & 20 Micron
Grinds & Polishes Stone to a Luster!
Sharpens & Polishes Carbide
Excellent Results when Used with NINJA™ Cushion!
Available Grades: 220, 1200, 1800, 3000, 8000, 50 000 Grit + Cerium Oxide
Hones & Polishes Metals to an Ultra-Fine Finish!
Available Grades: 60, 30, 15 & 9 Micron
NINJA™
BACKPADS
NINJA™
CUSHIONS
Diamond
Abrasive Kit
Pro-Diamond
Polishing Kit
Cubitron™
Purple Ceramic
Cubitron™
Purple Ceramic
Cubitron™
Purple Ceramic
Trizact™
Green Film
Trizact™
Red Film
Trizact™
Blue Film
Trizact™
Orange Film
80 Grit
120 Grit
220 Grit
35 Mic
400 Grit
20 Mic
500 Grit
10 Mic
1500 Grit
5 Mic
3000 Grit
Coarse Grinding
Wood & Metal
Medium Grinding
Wood & Metal
Light Grinding
Wood & Metal
Coarse Honing / Sharpening
Metal, Glass, Stone
Medium Honing / Sharpening
Metal, Glass, Stone
Fine Honing / Sharpening
Metal, Glass, Stone
Finest Honing / Polish
Metal, Glass, Stone
ABRASIVE REFERENCE CHART
Abrasives by
Exclusively for JOOLTOOL
12

OPERATION
THESE ARE GENERAL RULES OF OPERATION INTENDED AS GUIDELINES ONLY.
FOR MORE INFORMATION, CONSULT THE PROVIDED INSTRUCTIONAL DVD.
USING THE NINJA SEE-THRU™ FELT WHEEL
IMPORTANT! MOUNT YOUR FELT DISC ONTO A BACKPAD BEFORE USE!
ONLY when using the FELT DISC for the VERY FIRST time, you should charge the
wheel HEAVILY with POLISHING COMPOUND to a high saturation.
Always apply compound from UNDERNEATH of wheel.
Never attempt to use FELT DISC WITHOUT compound.
To charge the felt disc for the first time, follow these steps.
NOW YOU ARE READY TO POLISH WITH YOUR FELT DISC!
Use the FELT DISC just like other abrasives; PLEASE OBEY ALL SAFETY RULES!
DO NOT FORCE TIP OF SHARP TOOLS DIRECTLY INTO FELT DISC!
You will create a deep groove in the disc, having to redress the wheel
to regain a flat surface. If this happens, see below.
If the disc has developed GROOVES, you can remove
them by applying a SANDING BLOCK to the BOTTOM
of the SPINNING disc. Make full contact with the wheel,
hold the block stationary under the spinning disc and
apply firm pressure until the wheel is SMOOTH and EVEN.
STORE IN A DRY PLACE & KEEP AWAY FROM WATER! DO NOT USE IF WET!
Felt disc can distort and swell if exposed to water.
STEP 1:
Apply compound
from UNDERNEATH
of the spinning
FELT DISC.
STEP 2:
Dress with a solid,
smooth & flat piece
of metal or wood.
!
13

INSTALLING THE DISC RETAINER
The retainer prevents backpads from ejecting should you forget to tighten
them onto the spindle. NOTE: Removing it does not affect tool performance.
To install the retainer, simply follow these steps. (Reverse steps to remove)
REMOVING THE FRONT LIP
Your JOOLTOOL’s removable front lip allows additional clearance for larger
items or near-perpendicular grinding.
To remove the lip, simply follow these steps. (Reverse steps to re-install)
REMOVING THE SPINDLE
Your JOOLTOOL’s spindle is removable for cleaning or installing accessories.
To remove the spindle, simply follow these steps. (Reverse steps to re-install)
STEP 2
Move the loose lip
away from the unit
for more clearance.
STEP 1
Slide the lip
upward until it
undocks from the
JOOLTOOL unit.
STEP 2
Remove the
tapered spindle by
sliding it upward.
STEP 1
Loosen the hex
screw (Allen) from
the tapered
spindle.
STEP 2
Backpads can be
installed onto the
spindle even with
retainer in place
by lifting it.
STEP 1
Slide retainer onto
the tab located on
the unit’s hood.
14
JOOLTOOL FEATURES

REMOVING THE HOOD
Your JOOLTOOL’s hood (or shroud) is removable for full clearance around the
spindle and cleaning. NOTE: Removing hood renders airflow less controlled.
First remove the FRONT LIP and the SPINDLE (see previous page),
then simply follow these steps to remove. (Reverse steps to re-install)
INSTALLING THE FLEX-SHAFT ATTACHMENT
You can take your JOOLTOOL experience to the next level by installing the
FLEX-SHAFT attachment! The FLEX-SHAFT is fully compatible with most rotary
handpieces and allows freehand sanding, polishing and countless advantages.
To install the FLEX-SHAFT, remove the SPINDLE (see previous page),
then simply follow these steps. (Reverse steps to remove)
REMEMBER: Align the FLEX-SHAFT set-screw with the dip on the motor shaft.
STEP 2
Tighten the
FLEX-SHAFT
set-screw.
STEP 1
Slide the FLEX-
SHAFT input
connector onto
the unit’s motor
shaft.
STEP 2
Lift hood off the
JOOLTOOL unit.
Reinstall spindle if
needed.
STEP 1
Gently pry out the
front snap-tab of
the hood while
lifting hood off the
unit. Rear wall of
hood can be used
for leverage.
STEP 3
Connect the
output end of the
FLEX-SHAFT to
your favorite
handpiece.
15
JOOLTOOL FEATURES

THESE ARE GENERAL RULES OF OPERATION INTENDED AS GUIDELINES ONLY.
FOR MORE INFORMATION, CONSULT THE PROVIDED INSTRUCTIONAL DVD.
USING THE 3M™ SCOTCH-BRITE™ CLUSTER
This Scotch-Brite™ Cluster is one of the most versatile wheels in the JOOLTOOL
accessory line. It can be used on a variety of tasks and in a variety of ways:
Removing rust, smoothing of wood grain, matte finishing, paint stripping,
deburring, etc.You can also recondition auto parts, golf clubs, wood carvings,
home hardware, tools, etc.
Perfect for Jewelry and Crafts:
Easily achieve brushed, satin finishes
on precious metals, stainless steel,
aluminium & others.
Excellent for Tools & Woodworking:
Sand,“smooth” and“blend”wood,
deburr tools and remove rust quickly & easily.
NOTE: Available in tapered-core or shaft-mounted versions.
To use, simply follow these steps.
REMEMBER: Do not apply excessive pressure! Hold workpiece parallel
to the wheel rotation! Failure to do so can cause the object to catch.
STORE AWAY FROM WATER & HUMIDITY
STEP 1
Hold the
workpiece parallel
to the wheel
rotation.
Apply firm but
light pressure.
STEP 2
Apply even strokes
in a horizontal
motion.
Stop when desired
result is achieved
!
16
Abrasives by
Exclusively for JOOLTOOL
JOOLTOOL ACCESSORIES

THESE ARE GENERAL RULES OF OPERATION INTENDED AS GUIDELINES ONLY.
FOR MORE INFORMATION, CONSULT THE PROVIDED INSTRUCTIONAL DVD.
USING 3M™ SCOTCH-BRITE™ BRISTLE BRUSHES
The perfect alternative to wire brushes.
They are excellent on any metal and
wood for sanding, cleaning, texturing
and polishing. Ideal uses include jewelry
polishing, satin finishing watch bands &
bracelets, deburring turning tools and
serrated knives, cleaning wood carvings
or golf clubs among many others.
Use them on the JOOLTOOL or
HANDPIECE of your choice. Brushes are available in the following
sizes: 9/16”, 3/4”, 1”, 2”and 3”diameter.
To use, simply follow these steps
Install brushes so that the spinning bristles“sweep”, not “grab”!
NEVER OVERTIGHTEN brush on spindle.
Center core can become damaged & unsafe.
STORE IN A COOL AND DRY PLACE, AWAY FROM WATER & WET SURFACES.
STEP 2
Hold the workpiece
parallel to the wheel
rotation. Apply only
LIGHT pressure.
STEP 3
Apply even strokes from
right to left or hold
workpiece in place until
desired result is achieved.
!
STEP 1
Screw brush onto the
spindle.
Make sure it is
CENTERED and EVEN.
17
Abrasives by
Exclusively for JOOLTOOL

BRISTLE BRUSH CHART
Abrasives by
Exclusively for JOOLTOOL
18
BRUSHES APPLICATIONS
ON WOOD
STEP
1
STEP
2
STEP
3
STEP
4
STEP
5
STEP
6
GRIT
80
GRIT
120
GRIT
220
GRIT
400
MICRON
6
MICRON
1
STEP
4.5
PUMICE
YELLOW
WHITE
MAROON
BLUE
PINK
PEACH
GREEN
CLEANS FIRESCALE, HEAVY RUST &
METAL CASTINGS, REMOVES DEEP
SCRATCHES, DEBURRS
REMOVES LIGHT RUST
REMOVES MEDIUM SCRATCHES
DEBURRS, TEXTURIZES
LIGHTLY CLEANS & BLENDS METAL
REMOVES LIGHT SCRATCHES
TEXTURIZES TO BRUSHED FINISH
LIGHTLY CLEANS & BLENDS METAL
GIVES BRUSHED FINISH,
PRE-POLISHES & SEMI-FINISHES
REMOVES & SETS WOOD GRAIN
SANDS, REMOVES STAIN, IDEAL
FOR WOOD CUTS & CARVINGS
LIGHTLY DEBURRS
(GOUGES & V-TOOLS)
PRE-POLISHES
PRE-POLISHES
LIGHTLY DEBURRS
(GOUGES & V-TOOLS)
POLISHES JEWELRY TO
A HIGH LUSTER WITHOUT
REMOVING METAL,
SAFE ON STONES & PLATING
LIGHTLY SANDS WOOD CARVINGS,
SMOOTHENS WOOD TEXTURE
BURNISHES WOOD,
SMOOTHENS WOOD CARVINGS
SMOOTHENS &
BURNISHES WOOD
GIVES A HIGH LUSTER ON
BURNISHED WOOD SURFACES
GIVES A VERY HIGH LUSTER ON
BURNISHED WOOD SURFACES
GIVES A HIGH LUSTER ON
BURNISHED WOOD SURFACES
ON METAL

WARRANTY INFORMATION
JOOLTOOL LIMITED WARRANTY
The JOOLTOOL® company makes the following limited warranty to original
consumers in the United States.
Limited One (1) Year Warranty on Parts and Labor
This limited warranty extends to the original consumer purchaser or any
person receiving this power tool as a gift from the original consumer
purchaser and to no other purchaser or transferee.
JOOLTOOL® warrants this power tool and its parts against any defects in
materials and workmanship for a period of one (1) year after the date of
original retail purchase. DURING THIS PERIOD, JOOLTOOL WILL, AT JOOLTOOL’S
OPTION, REPAIR OR REPLACE A DEFECTIVE PART OR UNIT WITHOUT CHARGE TO
YOU FOR PARTS OR LABOR.
Your Responsibility
The above warranty is subject to the following conditions:
(1) You must retain your original bill of sale or provide proof of purchase.
(2) This warranty does not extend to any JOOLTOOL power tool unit or parts
that have been lost or discarded by you or to damage to the power tool unit or
parts caused by fires, misuse, accident, Acts of God (such as lightning or
fluctuations in electric power), improper installation, improper maintenance, or
use in violation of instructions furnished by the JOOLTOOL company; use or
malfunction through simultaneous use of this power tool unit and connected
equipment; or to units that have been modified or had the serial number
removed, altered, defaced, or rendered illegible.
(3) Units used and/or sold outside the U.S.A. and returned to the manufacturer
for repair or replacement are subject to a restocking fee of $30.00 as well as
any applicable shipping fees. Packages must also be insured for their full value.
19

1-888-337-1230 WWW.JOOLTOOL.COM INFO@JOOLTOOL.COM
© 2012 Jooltool. 3M is a trademark of the 3M Company and used under license. All Rights Reserved
THANK YOU FOR YOUR PURCHASE!
IF YOU WOULD LIKE ADDITIONAL ACCESSORIES FOR YOUR JOOLTOOL
Your nearest JOOLTOOL retailer will most likely carry our full line of
products. If you are looking for an authorized source or would like to
purchase directly from JOOLTOOL, please contact us!
Web: www.jooltool.com
Toll-Free: 1.888.337.1230
Abrasives by
Exclusively for JOOLTOOL
by
Table of contents
Popular Accessories manuals by other brands

Satco
Satco NYVO S11269 Installation and safety instructions

Sonoff
Sonoff SNZB-04 user manual

Sure Electronics
Sure Electronics Surebell quick start guide

SOMFY
SOMFY Sunis RTS Operating and installation guide

ATC Electrical & Mechanical
ATC Electrical & Mechanical atc.ie HANDSU Installation and operation manual

Marquant
Marquant 444-004 User instructions