3
PUMP AND FOUNTAIN SPECIFICATIONS MS-3000 MS-5200 MS-6100 MS-8000
Pond Size (surface acres) Up to ¼ Up to ½ Up to ½ Up to ¾
Range of Fountain Pattern Heights (feet) 4-12 7-16 7-18 10-20
Range of Fountain Pattern Widths (feet) 8-20 10-25 10-28 10-32
Minimum Operating Depth 20" 20" 20" 20"
Max Flow (gph) 3,000 5,200 6,100 8,000
Watts (120v) 192 294 354 520
Amps 1.6 2.45 2.95 4.5
Volts 120 120 120 120
Cord Length (ft.) 100 100 100 100, 200
Dimensions l x w x h 8" x 6" x 6" 9" x 7" x 7" 11" x 6.5" x 6.5" 11" x 8" x 8"
Pump Weight (lbs.) 9 11 13 16
Please read all instructions thoroughly and understand them
prior to installation or use. If you have any questions or are
missing pieces, do not contact or return to place of purchase;
please call 1-800-553-5605.
CONTENTS PAGE
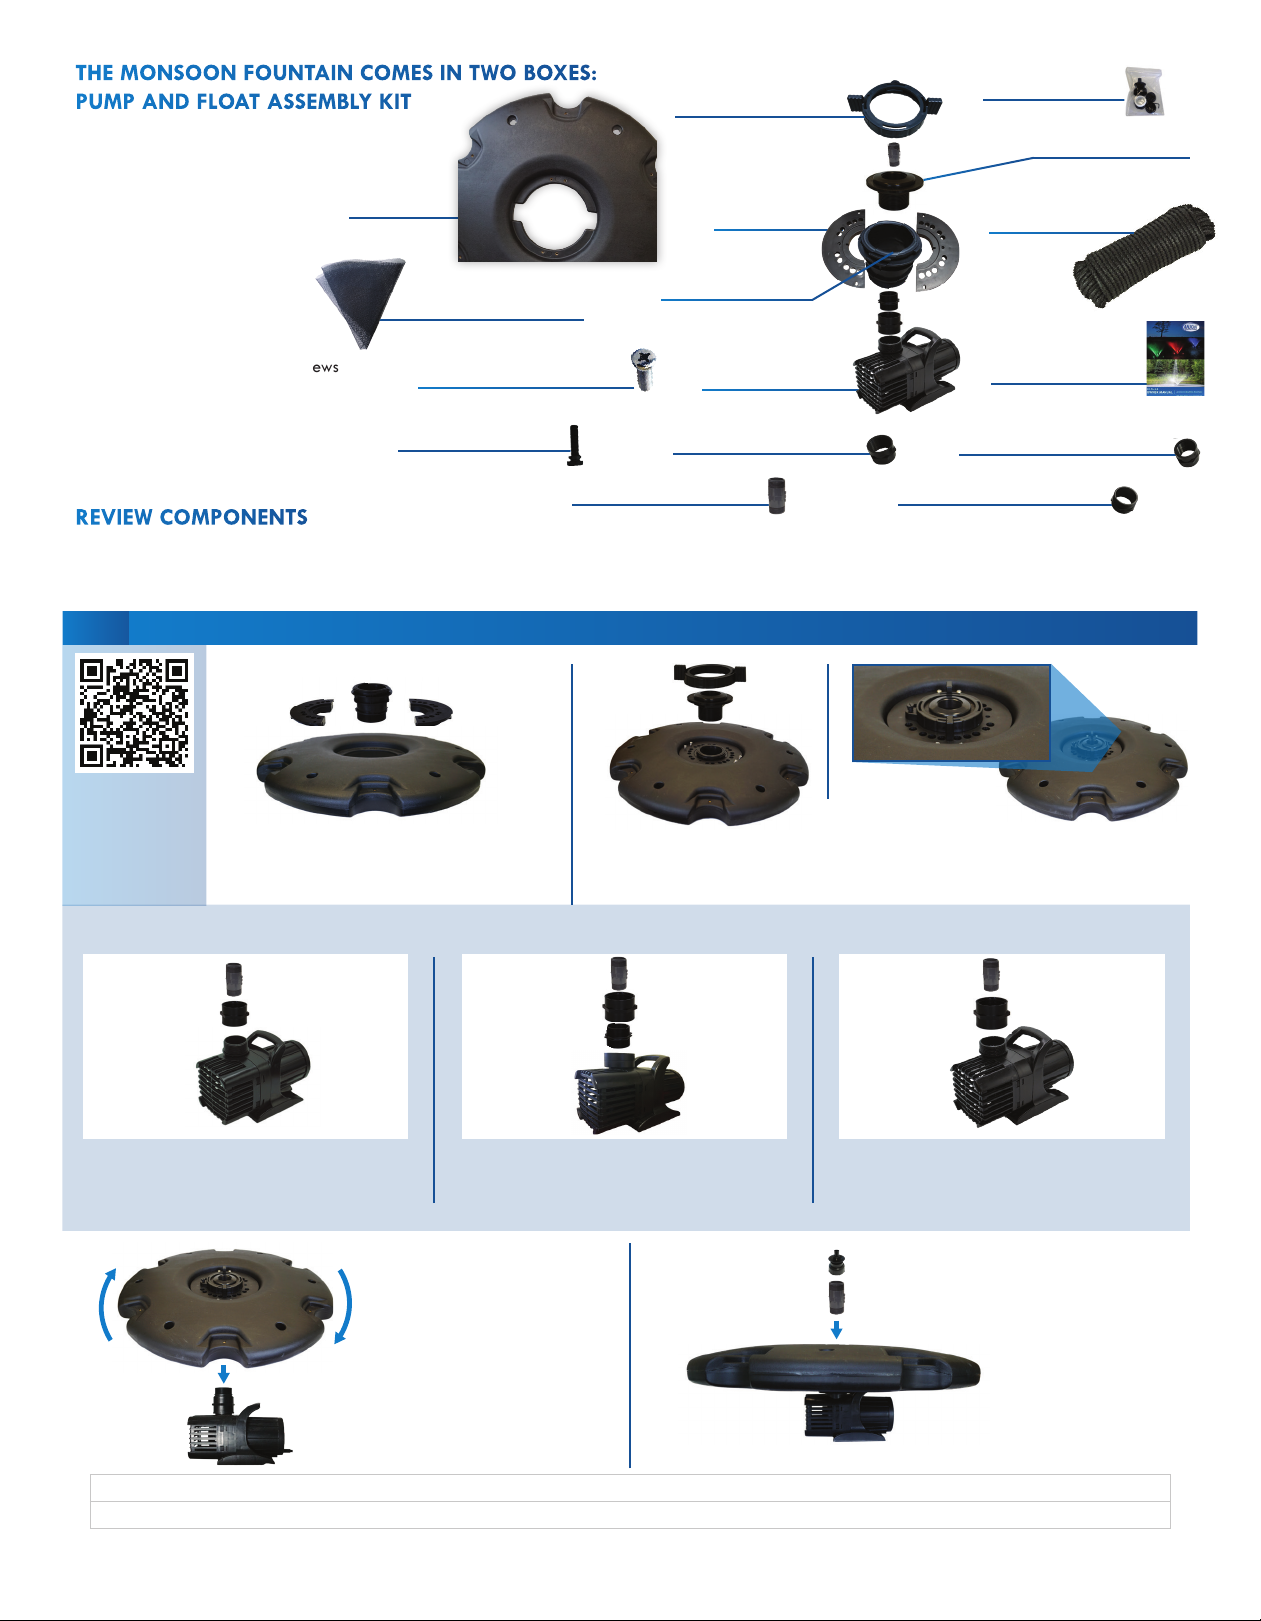
Components 4
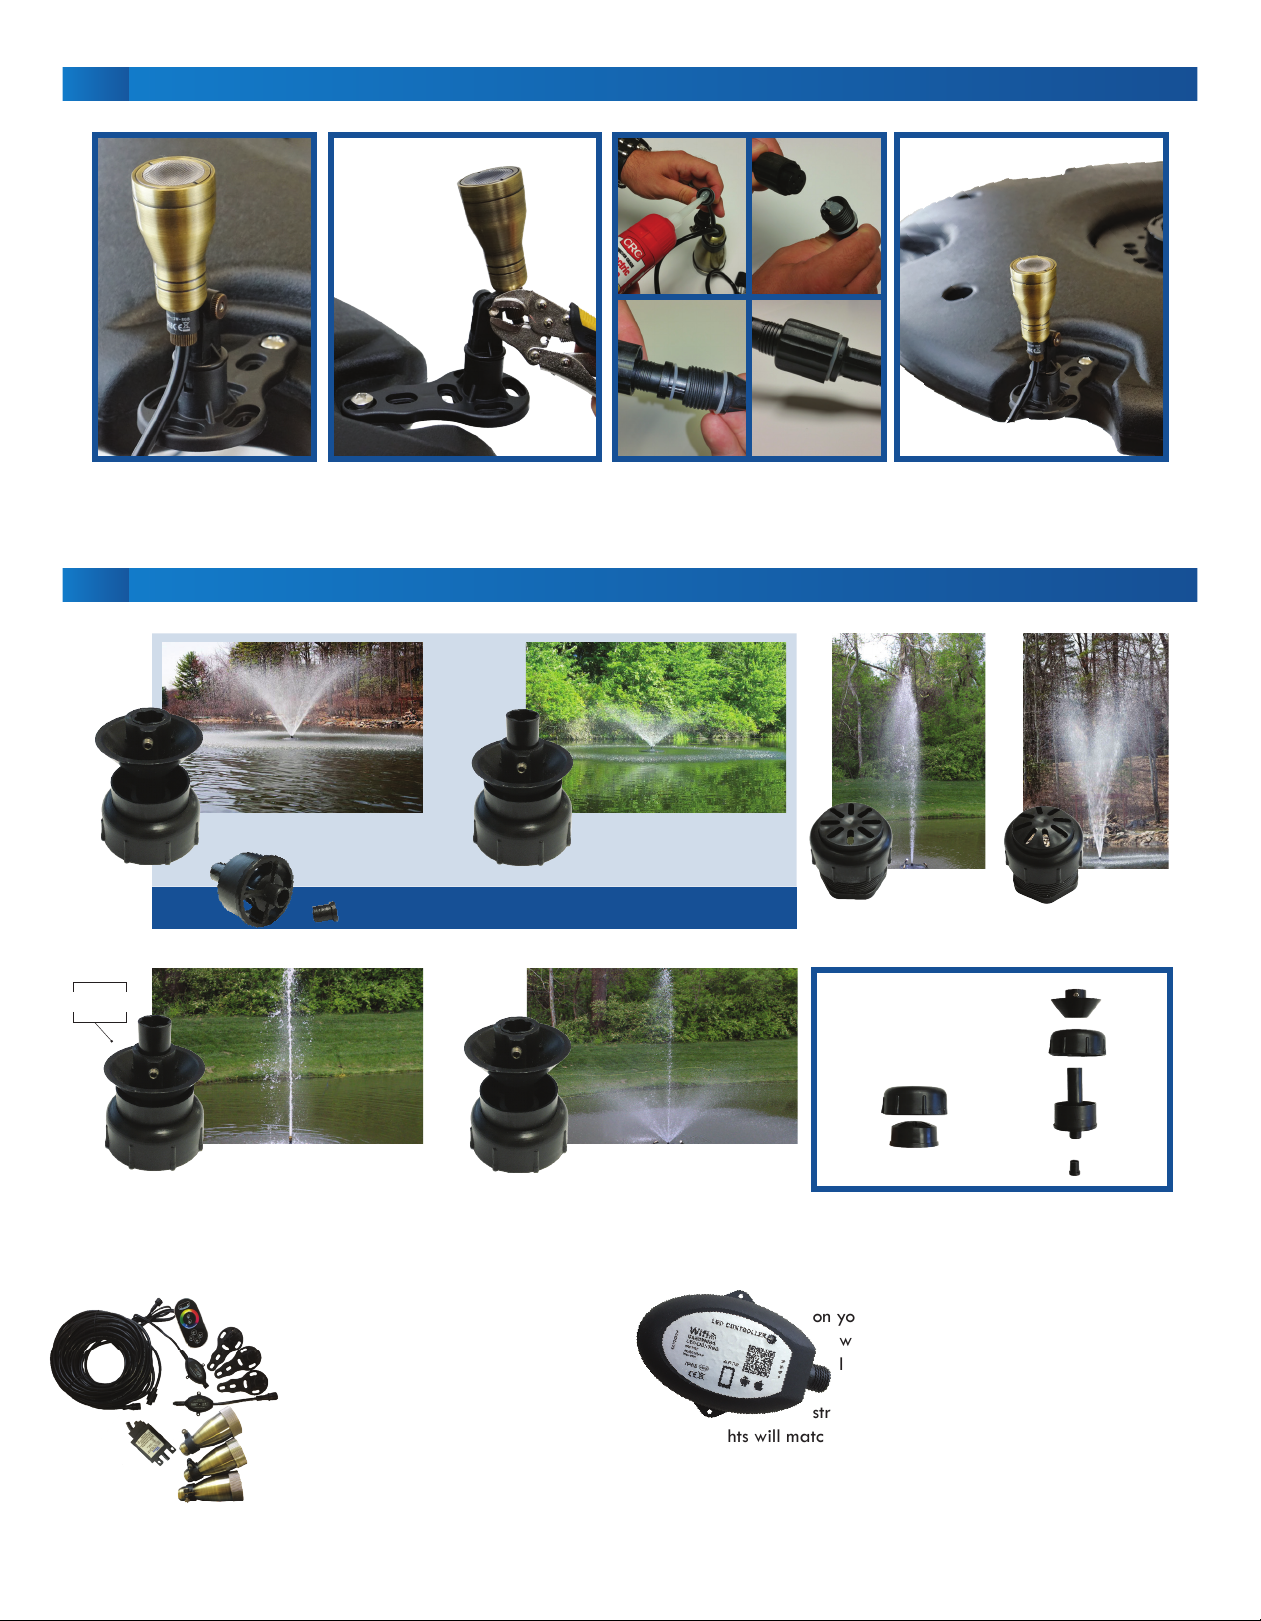
Nozzle Assembly 4
Optional Light Assembly 5
Optional Accessories 5
Mooring Rope Assembly 6
Warranty Info 7
SAFETY INSTRUCTIONS
• Read and observe all the supplied instructions.
• Make sure your outlet voltage corresponds to those stated on the rating label of the pump(s).
• Make sure the pump is securely installed before operating it.
• The electrical connection should be in a waterproof area and should be at least 6 feet away from the edge of the pond. (see g. 3)
• Keep the electrical connections dry! Hang the electrical cord below the electrical outlet to form a "Drip Loop". This will prevent water from
running down the cord into the electrical outlet.
• Always unplug the pump when not in use, before putting on or taking off parts, before cleaning the pump and before doing any work
for the fountain or pond.
• The pump must not be used when people are in the water. Please disconnect the pump from power supply rst.
• Do not operate any appliance with a damaged cord or plug, or in an abnormal state. The supply cord of the pump cannot be replaced.
• If the cord is damaged, the pump should be discarded. Replacement pumps are readily available.
• Do not cut the plug end off the cord for any reason. Cutting the cord voids the warranty and creates an electrical hazard.
• For safety reasons, routine cleaning, maintenance or repair work should only be performed with the power cord disconnected from
the power source.
• Never hang or transport the pump by means of pulling the power cord!
• Close supervision is necessary when the pump is used by or near children.
• To disconnect the pump from the power source, pull the plug by the molded end; never pull the plug by the wire.
• Never use any accessories which are not recommended by the pump manufacturer. This may result in re, electric shock, personal injury
and/or voided warranty.
• The pump is to be supplied through a Ground Fault Circuit Interrupter (GFCI) with a rated residual operating current not
exceeding 30mA.
• To protect against the risk of electrical shock, do not immerse the plug in water or other liquid.
• Do not plug the pump in out of water, doing so damages the pump and voids the warranty
• The pump power cable needs to be ran through conduit from your water feature to the GFCI.
• Do not sh around the fountain, this can damage the power cord.
• If operating in winter, be careful of thin ice; the fountain will keep the ice thin and unsafe for walking.
• Use extreme caution when operating fountain in cold weather and cold water. Do not walk on ice. Thin ice could break, creating the
risk of hypothermia or drowning.
800-553-5605 • www.anjonmfg.com
Making a Difference 800-553-5605 • www.anjonmfg.com
Thank You and Congratulations!