ANTONUS STEP BROTHER User manual

USER MANUAL
STEP BROTHER

This project is not something static and this manual will not too, so
any suggestion that help improve it in future revisions will be wel-
come. For any suggestion or doubt you can contact us through the
following channels:
Email: [email protected]
Web: www.antonus-synths.com
Facebook: Antonus
Instagram: @antonus_synths
First edition: November 2018.

Thanks to:
Nalini Voges for her work in all illus-
trations and most of tasks of this manual.
Ernesto Romeo for his invaluable con-
tribution both in this manual and de-
velopment and conception of the Step
Brother.
Luis Callegari for the big help and
support, for the energy and for his great
ideas.
“Argensynth” Facebook community,
for all the support since the beginning
of the Antonus project activities until
the development and pulish of the Step
Brother as well as the trust and direct
support from certain members of the
group have given at the time of manufac-
turing the first units. Without their sup-
port this would not have been possible.
Special thanks to Alan Richard Pearl-
man for his work, vision and contribu-
tion to the synthesizer history. His work
and his design philosophy are the basis
and motivation of all this development.

3
Introduction .......................................................................... 4
I Where we come from........................................................... 5
II Describing the
Step Brother
............................................... 8
III Power requirements .......................................................... 10
III.1. Precautions ................................................................. 10
IV Panel description ............................................................... 11
IV.1. Front panel................................................................... 11
IV.2. Rear panel .................................................................... 14
V
Step Brother
parts, descriptions and uses.................... 15
V.1. The sequencer............................................................... 15
VI Using the sequencer........................................................... 18
VI.1. Tuning a sequence...................................................... 18
VI.2. Using the step switches ............................................ 19
VI.3. FM Clock ...................................................................... 19
VI.4. Using GATE assign for accents ................................. 20
VI.5. Clock pulse width....................................................... 20
VI.6. TRIG/GATE switch ...................................................... 21
VI.7. Position 1 OUT jack .................................................... 22
VI.8. CV Input jack .............................................................. 22
VI.9. Sequencer outputs ..................................................... 22
VI.10. Clock divider ............................................................. 23
VI.11. Envelope generator .................................................. 26
VI.12. Oscillator ................................................................... 27
VI.13. VCA ............................................................................. 29
VI.14. MIDI interface........................................................... 30
VII Advanced techniques ........................................................ 32
VII.1. Stacking two sequencers ......................................... 33
VIII Troubleshooting.................................................................. 37
IX Specifications...................................................................... 39
X Patch sheet .......................................................................... 41
Index

4
If you are reading this manual is because you have bought
a
Step Brother
, which I want to thank, but you can also to be
reading this just for the interest or curiosity in the instru-
ment, in that case also thank too, more in today times where
the sequencers catalogue is so large and varied.
In this manual I will try to explain and show what you can
start to create with Step Brother, and I say “start” because the
idea of the
Step Brother
is to be more than just a simple ana-
log sequencer and it would be almost impossible to describe
in this manual all the creative possibilities that will be given
when the Step Brother starts to interact with voltage contro-
lled modular systems.
I don’t pretend it will be a simple guide with only defini-
tion of terms and collection of adjustments. First I want reader
understand a little of the “why” of this instrument, from its
first idea and concept. I also want, while we are explaining the
concepts of the Step Brother, that illustrations and practical
examples help to the instrument understanding while reading
this manual.
Toni Gutiérrez
Introduction

5
When setting the origin of the inspiration who motivate
the development Antonus
Step Brother
is convenient to ex-
plain what is the concept of the sequencer as such (center-
piece of our instrument).
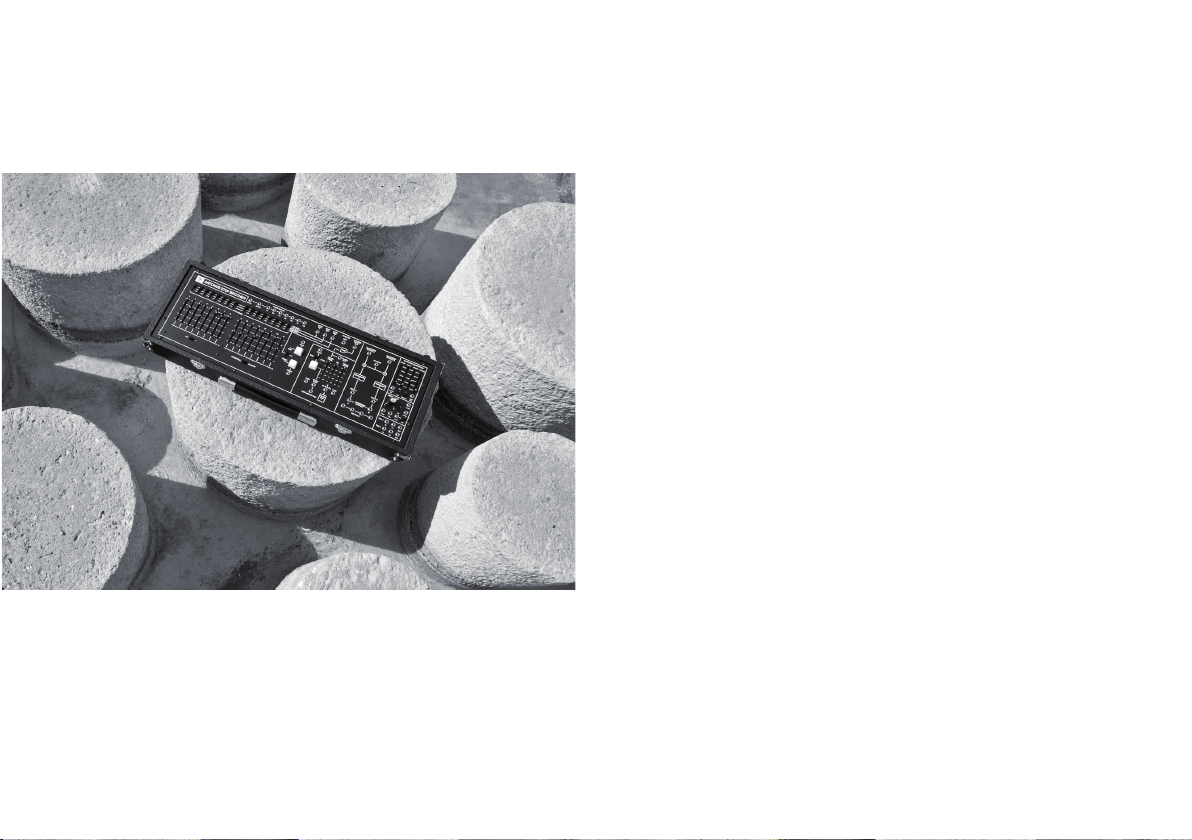
The
Step Brother
is founded around the classic design of
the ARP Sequencer, one of the first analog sequencers com-
mercialy manufactured.
We will begin by describing what an analog sequencer
means to musical electronics. The first step sequencer de-
signs, like any pioneering development, presented some of
innovative features (and exotic even to this day), which on
the one side was something totally inspiring and fresh in
regarding originality of processes and results, but at same
time were accompanied by certain difficulties by aparent
manufacture precariousness as well as discomfort due to its
logic design or interface, very different from what could be
the lenguaje used by musician accustomed to music figures
(beat, notes, silences ...); an image that has to do more with a
common score more than with all the new language provide
by an instrument such as the analog step sequencer.
Moog was right to propose a very musical design -espe-
cially controls and interface- on the Moog 960, while presen-
ting certain features which allows you to enter at experi-
mentation fields as well as a remarkable live manipulation
character, distancing the idea that a sequencer is something
for program and let it just work running alone in a repeti-
tive way. Is precisely with addition of others modules like
the 962 sequential switch when live perfomance capabilities
and composition possibilities begins to rise exponentially.
And is with the ARP Sequencer design when you can define
a series of characteristics with more friendly relation with
the traditional musician, but at the same time offering very
interesting functions for example to define a tuned pitch ad-
just thanks to the quantizer where the voltage output is sca-
led to allow 12 semitones steps when is applied to the con-
trol of the oscillator frequency at volt/octave relation, which
no longer has the difficulties of defining tuning present in
other sequencer designs where you have to tune every step
with certain precision to avoid detuned notes. With the ARP
Sequencer you could set a wrong note, but you couldn’t be
detuned while using the quantizer output. However, it had
outputs without quantizer allowing path free for microto-
nal scales or outside the tempered scale. And that’s just one
part, also including three GATE BUS, a RESET function, ran-
dom mode ... all in a very clear and intuitive interface, where
is easy to see in each step the note position literally talking,
slider potentiometers are used instead of rotative ones, so
just by a fast look at panel you can see the notes easily. Also
a remarkable feature of this sequencer is the wide range
of operation speed. Although the internal clock just reach
a little more than 100hz, nothing prevents it from moving
forward with a high frequency oscillator to move it in a ge-
nerous audible range, where we can jump from working in
the control field to give it the task of generating audio by
itself. Later will detail in this manual these experimental
functions, among many others.
I. Where we come from...

6
But the
Step Brother
is not simply an ARP Sequencer re-
plica and no more. The idea of the
Step Brother
was also de-
veloped from a deep admiration for the design of the classic
ARP model 2600 synthesizer. Despite the enormous benefits
that have made the 2600 a mythical instrument is remarka-
ble that a considerable number of users agree that there
are only a couple or three of elements that in case of being
implemented in the original design they can exponentially
raised the already huge sound palette of the instrument.
Combining the 2600 with the ARP Sequencer allowed to take
advantage of much of the potential of both instruments, but
as it was mentioned it was common to miss a couple of extra
functions for advanced programming. Also visually the 2600
had a different design and intention than the Arp Sequencer.
The 2600 had a design based on a Tolex transport case with a
strong sound laboratory idea and transportable synthesizer.
The ARP Sequencer, on the other hand, had a look with woo-
den sides and absence of carry options (neither protective
cover, nor grabs) as well as differences in proportions of the
size and shape of one instrument to other. It was remarkable
not only aesthetics differences, but also “places” where to
use it. It does not mean that the ARP Sequencer could not be
taken from one place to another, but the 2600 design being
somewhat larger is much friendly for “on the road” perfor-
mance and the aesthetics in the style of the amplifier guitar
combo is more “Rock And Roll”.
After lot of time using these two instruments we were
a large number of users who dreamed of filing and polis-
hing those details to be able to approach it to an ideal and
that way I started to develop the piece that would fit the
2600 both in function and aesthetics and even adding MIDI
communication. And is not only made to complete the mo-
del 2600 even can interact perfectly with the classic and
modern modular systems all without sacrificing features of
the ARP Sequencer as is the clarity, comfort and ability of
inspiration that has its interface. All presented in a cabinet
style 2600, with lid and grip prepared for continuous tra-
vels to play on stage.
Later will detail the elements that surround the sequen-
cer, which were conceived in such a way that their contri-
Arp sequencer 1601 with ARP Odyssey MK2 color scheme Arp sequencer 1621 with ARP Odyssey MK3 color scheme

7
bution is, instead of adding, is multiplying the whole range
of uses that can be provided not only to the sequencer itself,
but to the 2600 or any modular system.
However, the new features can be summarized from to the
Arp Sequencer previous design:
1. ADSR envelope with two time multiplier.
2. VCO / LFO
3. Two VCA units
4. Frequency or clock divider
5. MIDI Clock Interface
With all this and to close, it is important to emphasize the
intention of designing a sequencer that both in its aesthetics
and in its functions is a self-sufficient instrument, with a lot
very real-time composing and live perfoming intention, a se-
quencer to play pleasantly and, far from the idea of being
the typical sequencer that simply plays preprogrammed se-
quences for repetitive accompaniments. A sequencer to play,
compose and improvise.

8
The
Step Brother
is a design made with analog technolo-
gy and logical CMOS, no digital processors or a microcon-
trollers are involved. The only exceptionwould be the MIDI
clock converter which makes use of a microcontroller for
managing only the incoming MIDI messages.
Choose this kind of technology today where the most sim-
ple and economic would have been to design everything con-
trolled by digital processors or CPU, has been motivated by
several reasons important issues that concern the persona-
lity of the instrument.
Using this technology at sequencer and clock divider parts
gives us an special function stability avoiding any type of
instructions failure or CPU hang, as well as a wide range
when forcing certain parameters beyond preset limits.
This case is very particular when you experiment with gra-
phic wave generation or subharmonic division using clock
divider function at really high frequencies.
On the side of oscillator, envelope and VCA functions this
technology greatly influences the temperament and color
characteristic of these elements. When working with audio,
the ear is specially sensitive to these qualities and details.
The completely analog design was from the beginning the
preferred option and also the most sincere with the spirit of
the instrument.
Furthermore, as far as components are concerned, exclu-
sive components or custom manufactured have been avoi-
ded, all parts are comercially available during production.
In the type of internal design has been taken into account
the longevity and the possibility of finding answers with the
passing of many years, the idea is to avoid like some clas-
sic equipment when maintaining becomes an expensive and
painful task due to exclusive components difficult to obtain
over the years.
Interface and distribution are presented on a surface that
allows to show all the connection options without wires hin-
dering the operation, with your view you can locate controls
at all times, without having to remove annoying amount of
cables with your hands.
All functions are accessible through a single function or
panel control, there are no key combinations, sub menus or
hidden functions that consume mental time and use of both
hands. An important premise is to maintain all time the clear
and intuitive interface that allows a quick and comfortable
use even in cases where the user is using it for the first time
and has not read the manual yet.
The different blocks are presented within the set in a di-
fferentiated way and although there are certain normalized
internal connection functions, they are not many and effec-
tive, leaving the user the option to connect according to his
need and his creative capacity.
Unlike other sequencers, the
Step Brother
may seem it
lacks some functions at first place, such as swing, feeling,
ratcheting ... and we say at first place because thanks to the
functions of the different elements that surround the sequen-
cer we can “build” this functions or generate new effects,
making the created effect a creative stimulus rather than a
II. Describing the
Step Brother

9
fixed preset function. Of course, if you also use interconnec-
tions of these functions with external equipment, the range
extends hugely in terms of resources.
The intention with all this is
Step Brother
becomes an ins-
trument that remain for a long time in the equipment of the
musician, that its use is intense and not superficial, that mu-
sician manages to develop a technique and a language of his
own at the same time that the instrument inspires surprises,
as well as something to always trust despite the passage of
time and be able to keep it at setup, without problems and
not be forced to replace it following the frenetic program-
med obsolescence path.

10
The
Step Brother
is equipped with a 3-pin IEC connector
which incorporates the On/Off switch and the main fuse as
well as you can see at the following drawing:
This unit can work at 110 / 120V AC or 220 / 240V AC de-
pending on the requested configuration. This configuration
is done with a switch located inside the equipment, specifi-
cally next to the transformer, where it shows the following
picture:
III. Power requirements
AC outlet with On-Off switch and main fuse located at rear of the instrument.
110V - 220V selector
III.1. PRECAUTIONS
The Antonus
Step Brother
is a device designed with a good
series of protection measures. Even with this, is recommen-
ded that user must take care like usually most electronic au-
dio gear need.
Use the recommended supply voltage for the unit (110v-
120v or 220v-240v depending on the requested configuration).
To prevent damage avoid to be used in places where water
or rain can acces inside the unit. You have to be careful with
using or putting the
Step Brother
in places where there is a
lot of dust floating. The dust is one of the main enemies of
potentiometers, switches and buttons in music gear. That is
why is recommended not to place a gear of these characte-
ristics near a place that is source of dust, hair or particles
in suspension, such as outside windows or air systems. It is
also recommended that in case of long periods of inactivity
will proceed to cover the front of the equipment well with
some kind of cover or with the lid included with the Antonus
Step Brother
.

11
IV.1. FRONT PANEL
MULTIPLE
CV INPUT
INPUT A INPUT B
AB
GATETRIG
CLOCK
FREQ
CLOCK
OUT
PULSE
WIDTH
FM
STOP PWM
START/
STOP CLOCK FM
START
FOOT SWITCH OUT
16/1 8/2 SEQUENTIAL RANDOM
9 10 11 12 13 14 15 161 2 3 4 5 6 7 8
GATE BUS 1
GATE BUS 2
GATE BUS 3
AND
A B
GATE
BUS
1
GATE
BUS
2
GATE
BUS
3
POSITION
1
OUT
CLOCKED
GATE 1
OUT
QUANTIZED
OUTPUT A
QUANTIZER
A
SEQUENCER
OUTPUTS
QUANTIZER
B
QUANTIZED
OUTPUT B
ATTACK
GATE
IN
100
ENV
OUT
SYNC
PW
CV IN
INPUT RESET
CLOCK DIVIDER
OSCILLATOR
VCA 2
ENVELOPE GENERATOR
1/3 1/4 1/5 1/6 1/7 1/8
1/2
X 1
X 10
HI
LO
MANUAL
DECAY SUSTAIN RELEASE
GATE ASSIGN
SKIP
RESET
OFF
STEP
RESET
GATE
BUS
1
OUTIN CV
VCA 1
OUTIN CV
ANTONUS STEP BROTHER
++
1
2
3456798
11 10
131415 12
18
17
16
IV. Panel description

12
GATE assignment switches. These switch the step GATE
signal to one of three output buses. These outputs can
be connected (using patch cables) to control filters,
amplifiers or to create accents, ratchets... etc.
POSITION TUNING SLIDERS. Use these sliders to fine-
tune each step of the sequence, in 2 octaves range at
the quantized output or 10v at non quantized outputs.
Each slider have its own status led.
16/1 AND 8/2 MODE SWITCH. Allows the sequencer to
step 16 times and then reset automatically; or step the A
bank 8 times in parallel with the B bank, for harmonies,
sequences of two-note intervals and other uses.
SEQUENTIAL/RANDOM SWITCH. Allows clock to ad-
vance to each successive position or sets clock “strike”
positions randomly, much like a sample and hold on a
synthesizer.
Skip / reset switch . Define an automatic function for
BUS GATE 3, can be step skip, do nothing, or restart the
sequence every time each active step is with at GATE 3
position.. This function can be complemented with any
external control either by patch cable connection or by
pressing button.
Clock control. Controls clock start or stop functions,
speed and pulse width. Can be controlled both by the
slider controls, buttons and the connection points for
patch cables.
Quantizer inputs. When a patch cord is plugged into
these jacks, the connection from the sequencer outputs
is temporarily disconnected. The quantizer can then
be used separate from the sequencer. The ranges are
equal 2 octaves from 0v to 2v.
Multiple. It allows to divide signals for example an ori-
gin to three different destinations with the same sig-
nal. It also allows when using Gate signals to function
as a simple mixer. It is not recommended to use it to
mix audio or CV signals.
Sequencer outputs. Unquantized output, useful for
controlling VCF or VCA or VCO tunning up to 10 octaves.
Being not quantified it can be useful to control oscilla-
tors that do not use a V/octave standard.
CV input. Set a floor reference voltage for the sequence.
Connect CV signal from a keyboard or other sequencer
to transpose the base sequence.
Quantized outputs. Output quantized in semitone
steps with a range of 2 octaves, useful for controlling
voltage-controlled oscillators, in Volt/Octave standard.
Clocked Gate 1 out. Gate Bus 1 Output that responds to
the pulse width of the clock. To define legatto or staccato.
Position 1 output. Generates a pulse every time step 1
is active, independently of the gate bus selected in it.
Useful for accents or synchronizing to other sequencers.
1
6
7
8
9
10
2
3
4
5
11
12
13

13
Gate bus outputs. Individual output of each Gate bus.
Clock divider. Clock input (normalized with sequencer
clock output) with division outputs and reset counter
input. More details in chapter VI.10.
Envelope generator, envelope trigger input and signal
output. Control of attack, decay, sustain and final re-
lease, time factor multiplier for short/long times. Also
have manual trigger button and led for visual control.
More details in chapter VI.11.
Oscillator. Voltage control input, initial frequency ma-
nual control, synchronization / restart input, different
waveform outputs and pulse width control. More de-
tails in chapter VI.12.
Voltage controlled Amplifier(double). Signal inputs,
voltage control input and output of each VCA. More de-
tails in chapter VI.13.
18
14
15
16
17

14
YES
CLOCK
OUT
CLOCK
ADJ.
FOOTSWICH
RUNSTOPCONTINUE
Antonus Step Brother Designed and made in Barcelona
START
MIDI THRUMIDI IN
INTERNAL
START/STOP
NO
1 2 3 4 5 6 7 8 9 10 11
IV.2. REAR PANEL
IEC power input socket. With general fuse and on / off
switch.
MIDI Input.
MIDI Thru output to link devices.
Pulse output corresponding to start of sequence / MIDI
song.
Pulse output corresponding to resume of sequence / MIDI
song.
Pulse output corresponding to stop or pause of sequence /
MIDI song.
Status output 5v for playback and 0v for stop.
Pedal input.
Midi clock division manual adjustment.
Playack mode for midi clock according to the active com-
mands (PLAY/STOP).
Always active MIDI clock output.
For more details recommended to read chapter VI.14 for
MIDI interface.
1
2
3
4
5
6
7
8
9
10
11

15
V.1. THE SEQUENCER
A sequencer conceptually is simply a control device. Like
other control devices (LFO’s, pedals, etc.), the sequencer
can not produce sound by itself, it must be connected to a
synthesizer (at least in theory, with the
Step Brother
we will
see that we can go beyond that concept).
When the sequencer has been properly connected to a
synthesizer, can be used to replace the keyboard. While the
sequencer has literally hundreds of musical applications,
its primary use is to create “sequences” of predetermined
pitches. The way he creates sequences of pitches is creating
sequences of control voltages, which in turn control the VCO
oscillators in a synthesizer.
The
Step Brother
Sequencer is essentially a 16-step auto-
matic stepping switch. For each step, the sequencer can pro-
duce a control voltage that can be adjusted with one of the
16 sliders. Therefore, a series of 16 tones can be programmed.
Various gate signals, used to trigger the envelope genera-
tor in your synthesizer, are also available from the sequen-
cer. The sequencer contains its own VCO which is used to
determine the stepping speed of the sequencer. The speed of
this VCO will determine how fast the sequence of notes you
have set up will be played back.
Before you hook your sequencer up to your ARP synthesi-
zer, it will help to try a few silent experiments and familia-
rize yourself with several of the sequencer’s features. Plug
in your sequencer and turn on the power switch. The red
pilot light on the switch should go on and other panel lights
may go on also. Set the controls on the front panel exactly as
shown in Diagram 1 (look at page 16).
Find the area of the front panel that has the three slide
controls and push button (A) for the Clock Oscillator. Push
the Clock Start/Stop button (A) and notice that you can start
and stop the sequencing. With the clock running, move the
CLOCK FREQ control (B) up and down and observe that the
stepping speed changes with the position of the slider.
Stop the clock again by pressing the CLOCK START/STOP
button (A), and observe which of the 16 position lights is
on. Now press the RESET button (C) and note that the se-
quencer jumps to position 1. Press the STEP button (D) a
few times and the sequencer will advance one stop each
time. Experiment with the STEP, RESET, and CLOCK START/
STOP push buttons until you thoroughly understand their
operation.
Next, locate the SKIP/OFF/RESET slide switch (E). Move
this switch to the skip position and start the clock. Now
move the first GATE ASSIGN (F) switch from the center po-
sition to the bottom position. Notice that the sequence now
skips position 1 and goes directly from position 16 to posi-
tion 2. Move the GATE ASSIGN switch 2 down also, and the
sequencer will skip both the first and second positions. Try
V.
Step Brother
sections,
descriptions and uses

16
moving other GATE ASSIGN switches down to get a feeling
for the SKIP function.
Return all the GATE ASSIGN switches to the middle posi-
tion. Change the setting of the SKIP/OFF/RESET switch to RE-
SET. With the clock running, drop GATE ASSIGN switch 9 to
the bottom position. Note that the sequencer counts up to 8,
then resets. Drop GATE ASSIGN switch 5 and notice that the
count shortens to 4 steps. Notice that if more than one GATE
ASSIGN switch is in the lower position, the sequencer will
reset upon encountering the first switch in the series. Move
the SKIP/OFF/RESET switch back to OFF, and the sequencer
will resume normal 16 step operation.
Return all the GATE ASSIGN switches to the middle posi-
tion. Next, find the SEQUENTIAL/RANDOM switch (G). With
the sequencer clock running, move this switch to the RAN-
DOM position. Notice that the normal sequential stepping
changes to random jumping from one position to another.
Observe, however, that the stepping is still very rhythmi-
cal and still determined by the CLOCK FREQ control. If you
watch the lights for a while, you will see that the sequence
of stepping does not follow any pattern and is truly ran-
dom. Try skipping a few positions as you did earlier and
notice that this function still works in the random mode.
When you try to reset the sequencer using the ASSIGN swit-
ches, you’ll note that the sequencer will return to position 1
instead of any position where the GATE ASSIGN switch has
been put in the lower position. When you have finished ex-
perimenting with the RANDOM mode, return the switch (G)
MULTIPLE
CV INPUT
INPUT A INPUT B
AB
GATETRIG
CLOCK
FREQ
CLOCK
OUT
PULSE
WIDTH
FM
STOP PWM
START/
STOP CLOCK FM
START
FOOT SWITCH OUT
16/1 8/2 SEQUENTIAL RANDOM
9 10 11 12 13 14 15 161 2 3 4 5 6 7 8
GATE BUS 1
GATE BUS 2
GATE BUS 3
AND
A B
GATE
BUS
1
GATE
BUS
2
GATE
BUS
3
POSITION
1
OUT
CLOCKED
GATE 1
OUT QUANTIZED
OUTPUT A
QUANTIZER
A
SEQUENCER
OUTPUTS
QUANTIZER
B
QUANTIZED
OUTPUT B ATTACK
GATE
IN
100
ENV
OUT
SYNC
PW
CV IN
INPUT RESET
CLOCK DIVIDER
OSCILLATOR
VCA 2
ENVELOPE GENERATOR
1/3 1/4 1/5 1/6 1/7 1/8
1/2
X 1
X 10
HI
LO
MANUAL
DECAY SUSTAIN RELEASE
GATE ASSIGN
SKIP
RESET
OFF
STEP
RESET
GATE
BUS
1
OUTIN CV
VCA 1
OUTIN CV
ANTONUS STEP BROTHER
++
A
C
D
E
F
HG
B
Diagram 1

17
to SEQUENTIAL. Return all other switches to their original
positions.
Now locate the switch labeled “16/1 - 8/2” (H). With the clock
running, move this switch to the “8/2” position. You’ll see that
two lights go on for each step. If you slow the CLOCK FREQ
down for a closer look at what is happening, you should see
that the two lights move in parallel and that one is always in
the first eight positions and the other in positions 9 through
16. You’ll notice from the panel graphics directly above the
lights that the first 8 positions are grouped together by a long
arrow indicated by the letter A. Similarly, positions 9 through
16 are grouped together and called B.
Essentially, the “8/2” mode has broken your 16 step se-
quence into two separate 8 step sequences. Move the SKIP/
OFF/RESET switch to RESET and lower GATE ASSIGN switch
5. Notice that both sections of the sequencer count only four
steps. Raise GATE ASSIGN switch 5, and lower switch 13.
You’ll see that this has exactly the same effect. Try experi-
menting with the RESET and SKIP functions until you are
completely familiar with the operation of the “8/2” counting.
Be sure to keep the CLOCK FREQ low enough so that you can
observe what is going on. When you have finished, return all
the switches to the original position.
Now that you have learned a little about the operation of
your sequencer’s stepping controls and functions, it’s time
to connect the sequencer to your synthesizer and begin ma-
king music.
Even for the simplest patch, you’ll need two connection
cables (see diagram 2). Connect from QUANTIZED OUTPUT A
to the connector labeled CV IN from your Synthesizer. Con-
nect the other cable between the sequencer CLOCK OUT con-
nector and the GATE IN from your synthesizer.
++
MULTIPLE
CV INPUT
INPUT A INPUT B
AB
G
ATE
CLOCK
FREQ
CLOCK
OUT
PULSE
WIDTH
FM
PWM
START/
STOP CLOCK FM
O
T SWITCH OUT
AND
G
ATE
BUS
3
POSITION
1
OUT
CLOCKED
GATE 1
OUT
QUANTIZED
OUTPUT A
QUANTIZER
A
SEQUENCER
OUTPUTS
QUANTIZER
B
QUANTIZED
OUTPUT B
ATTACK
GATE
IN
100
ENV
OUT
SYNC
PW
CV IN
OSCILLATOR
VCA 2
ENVELOPE GENERATOR
X 1
X 10
HI
LO
MANUAL
DECAY SUSTAIN RELEASE
GATE
BUS
1
VCA 1
OUTIN CV
CV INPUT
Connection Panel
ANTONUS 2600
AC IN
CV IN GATE IN
GATE OUT AUX CV
MIDI IN
C
L
OCK
OUT
P
ULSE
WIDTH
FM
Q
UANTIZER
A
Q
UANTIZER
B
GATE
IN
ENV
O
U
T
C
V I
N
OS
CI
LLAT
OR
X
1
X 1
0
H
I
MAN
U
A
L
X1
GA
TE
O
UT
AU
X
CV
MI
I
D
DI
DI
DI
I
I
I
I
I
I
NN
M
Diagram 2

18
The first series of experiments is designed to get you fami-
liarwith the tuning of a repetitive sequence.
VI.1. TUNING A SEQUENCE
Start by setting all the controls of your sequencer as shown
in diagram 1 and connect the cables to your synthesizer as in
diagram 2, but we will use the GATE BUS 2 output instead of
the CLOCK OUT. Stop the CLOCK and press RESET so that the
sequencer is waiting in position 1. Slowly raise the position 1
slide control on the sequencer. You will hear the pitch of the
tone rise in precise chromatic semitones. You will notice that
the range of this control is exactly two octaves from the bottom
to the top. Bring the Position 1 slider back down when you have
finished experimenting. Now advance the sequencer to posi-
tion 2 by depressing the STEP button once. Notice that the po-
sition 2 slider is now active and that it behaves exactly as the
position 1 did. You will note that the position 1 slider does not
have any effect when the sequencer is not in position 1.
Starting at the bottom, raise the position 2 slider until the
tone has gone up a major 3rd (4 semitones). Press the RESET
button and the STEP button alternately to hear the two no-
tes of the major third. Now advance the sequencer to posi-
tion 3, and counting from the bottom of the slider, advance
the position 3 slider 7 semitones to make a major 5th. Hit RE-
SET and then STEP twice to hear all three notes of the major
triad you have just tuned.
Continue tuning all 16 steps to play the sequence shown in
this musical example:
When you have finished, step through the whole sequence
manually to check it against the music.
Now close the VCF FREQ control so that the sound disap-
pears. Now start the sequencer CLOCK and the 16 notes you
programmed should be played back automatically. Try ad-
justing the CLOCK FREQ control on the sequencer to make
the sequencer go faster and slower. Try hitting the RESET
button in the middle of the sequence. Notice that the sequen-
cer will return to position 1 at any time. Notice also that hit-
ting the STEP button will cause the sequencer to advance
one position, even when the CLOCK is also running.
VI. Using the sequencer
RRRRRRRR
RRRRRRRR
Diagram 3

19
VI.2. USING THE POSITION GATE SWITCHES
Set the SKIP/OFF/RESET switch to SKIP. Move various
GATE ASSIGN switches to the lowest position and notice
how the rhythmic and melodic effect of the sequence chan-
ges as you skip different notes of the sequence. By elimina-
ting all the major thirds from the sequence, for instance, you
can change the modality of the sequence so that it can be
considered either major or minor. When you have finished
experimenting with the SKIP function, change to RESET and
observe the effect of the sequence when it is shortened. Noti-
ce, for instance, that by resetting after 3 steps (GATE ASSIGN
switch 4 down) you create triplets. By raising switch 4 and
lowering 5, you change to a 4/4 rhythm.
When you have finished experimenting with the RESET
function, change the SEQUENTIAL/RANDOM switch to RAN-
DOM. You will now be hearing the same 16 notes, but in ran-
dom order. Change to the SKIP function and you can elimi-
nate any notes from the sequence using the GATE ASSIGN
switches.
VI.3. CLOCK FM
As you will recall from earlier discussions, the CLOCK
in the sequencer is actually a VCO similar to the VCOs in
your synthesizer. It is designed, however, to operate only at
subaudio frequencies. The CLOCK FM input on the sequencer
works in much the same way as the FM inputs on the VCO
in your synthesizer. The CLOCK FM input on your sequen-
cer is normally connected through the jack to the output of
GATE BUS 1. The output of GATE BUS 1 will be 11either zero
volts or +10 volts, depending on whether the GATE ASSIGN
switch for each position is set to GATE BUS 1 or not. In other
words, if the sequencer is in position one and the GATE AS-
SIGN switch for position one is up, then a +10 volt signal will
appear on GATE BUS 1. If the GATE ASSIGN switch is in any
other position, then GATE BUS 1 will show zero volts.
Start with all the GATE ASSIGN switches in the middle
position. Raise the CLOCK FM slide attenuator half-way up.
Start the CLOCK and set the CLOCK FREQ for a fairly slow
tempo. Move the first four GATE ASSIGN switches up to
GATE BUS 1. Notice that the sequencer steps through those
positions about twice as fast as through the others. Try to
adjust the CLOCK FM slider so that the first four positions
are exactly twice as fast as the others. Then move different
combinations of GATE ASSIGN switches to the GATE BUS 1
position to get different rhythmic effects.
Using the method described above, try modifying the se-
quence you have tuned to create the following rhythm:
>2'2'2'2'
2
yy2
yy22'2''2
>
Diagram 4
Table of contents