WWW.APART-AUDIO.COM
4
12
3
4
5
6
7
8
9
10 12 14 15 16
11 13
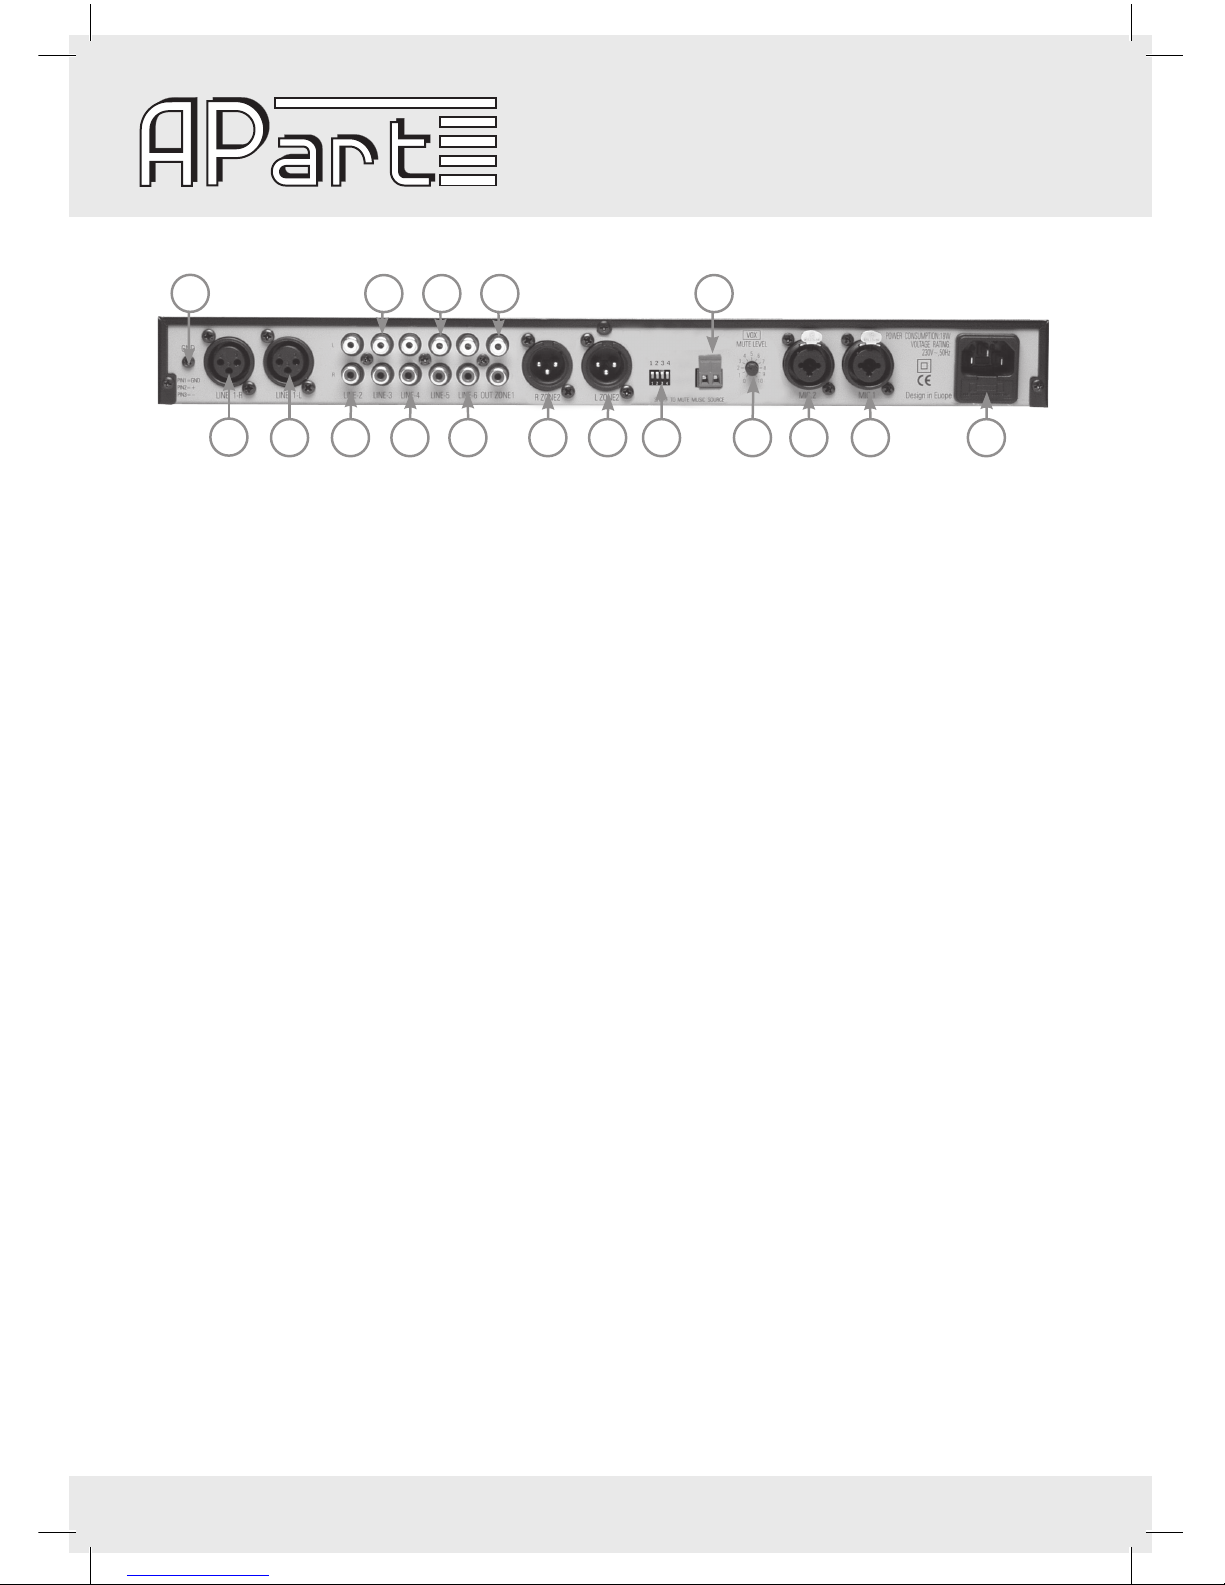
1)Microphone1input:balancedjackinput.Thisisthesameinputasthemicrophone1comboXLR/
jackattheback.Thismichasaswitchablevoxcircuitwithadjustablemusicmutelevel.Thisway,a
spokenmessagewillsuppressthemusic.Alternatively,youcanusetheprioritycontactsattheback.
Closingthecontactswillmutethemusic.Phantompowerisavailable.Thereforeyouneedtoclosethe
phantompowerdipswitchatthebackoftheunit.Phantompowerisswitchedoffbydefault.Mic1will
beheardinbothoutputzones.
2)Mutemodeswitch:bypressingthisswitchin,thevoxmodeisactiveonmic1only.Thevoxmutelevel
canbesetviaapotmeteronthebackoftheunit.
3)Mic1volumecontrol:thisvolumecontroladjuststhemic1level.
4)Mic2volumecontrol:thisvolumecontroladjuststhemic2level.
5)Microphone2input:balancedjackinput.Thisisthesameinputasthemicrophone2comboXLR/jack
attheback.Youcanusetheprioritycontactsatthebacktomutethemusicwhilespeaking.Closing
thecontactswillmutethemusic.Phantompowerisavailable.Thereforeyouneedtoclosethephan-
tompowerdipswitchatthebackoftheunit.Phantompowerisswitchedoffbydefault.Mic2willbe
heardinbothoutputzones.
6)Microphonebasstonecontrol:forbetterspeechintelligibility,turnthemicrophonebasscontroldown
alittle.
7)Microphonemidtonecontrol:forbetterspeechintelligibility,turnthemicrophonemidcontrolupa
littleifnecessary.Ifyouexperiencefeedback,turnthetonecontroldown.
8)Microphonetrebletonecontrol:forbetterspeechintelligibility,turnthemicrophonetreblecontrolupa
littleifnecessary.Ifyouexperiencefeedback,turnthetonecontroldown.
9)Powerswitch:fliptheswitchtopoweron/offtheunit.TheblueLEDlightsupwhenthepowerison.
10)Lineinputs(music)basstonecontrol.
11)Lineinputs(music)midtonecontrol.
12)Lineinputs(music)trebletonecontrol.
13)Lineinputs(music)volumecontrol.Normally,setthiscontrolfullyopen.Ifyouwanttoadjustthemusic
levelrelativetothemicrophonelevel,usethiscontrol.Caution:whenthelineinputvolumecontrolis
settothe0position,nomusicwillbeheard.
14)Lineinputselector:turnthisknobtoselectlineinputs1to6.
15)Zone1volumecontrol:adjustthevolumeofzone1.Thegreenledslightupwhenasufficientlystrong
signalispresent.
16)Zone2volumecontrol:adjustthevolumeofzone2.Thegreenledslightupwhenasufficientlystrong
signalispresent.