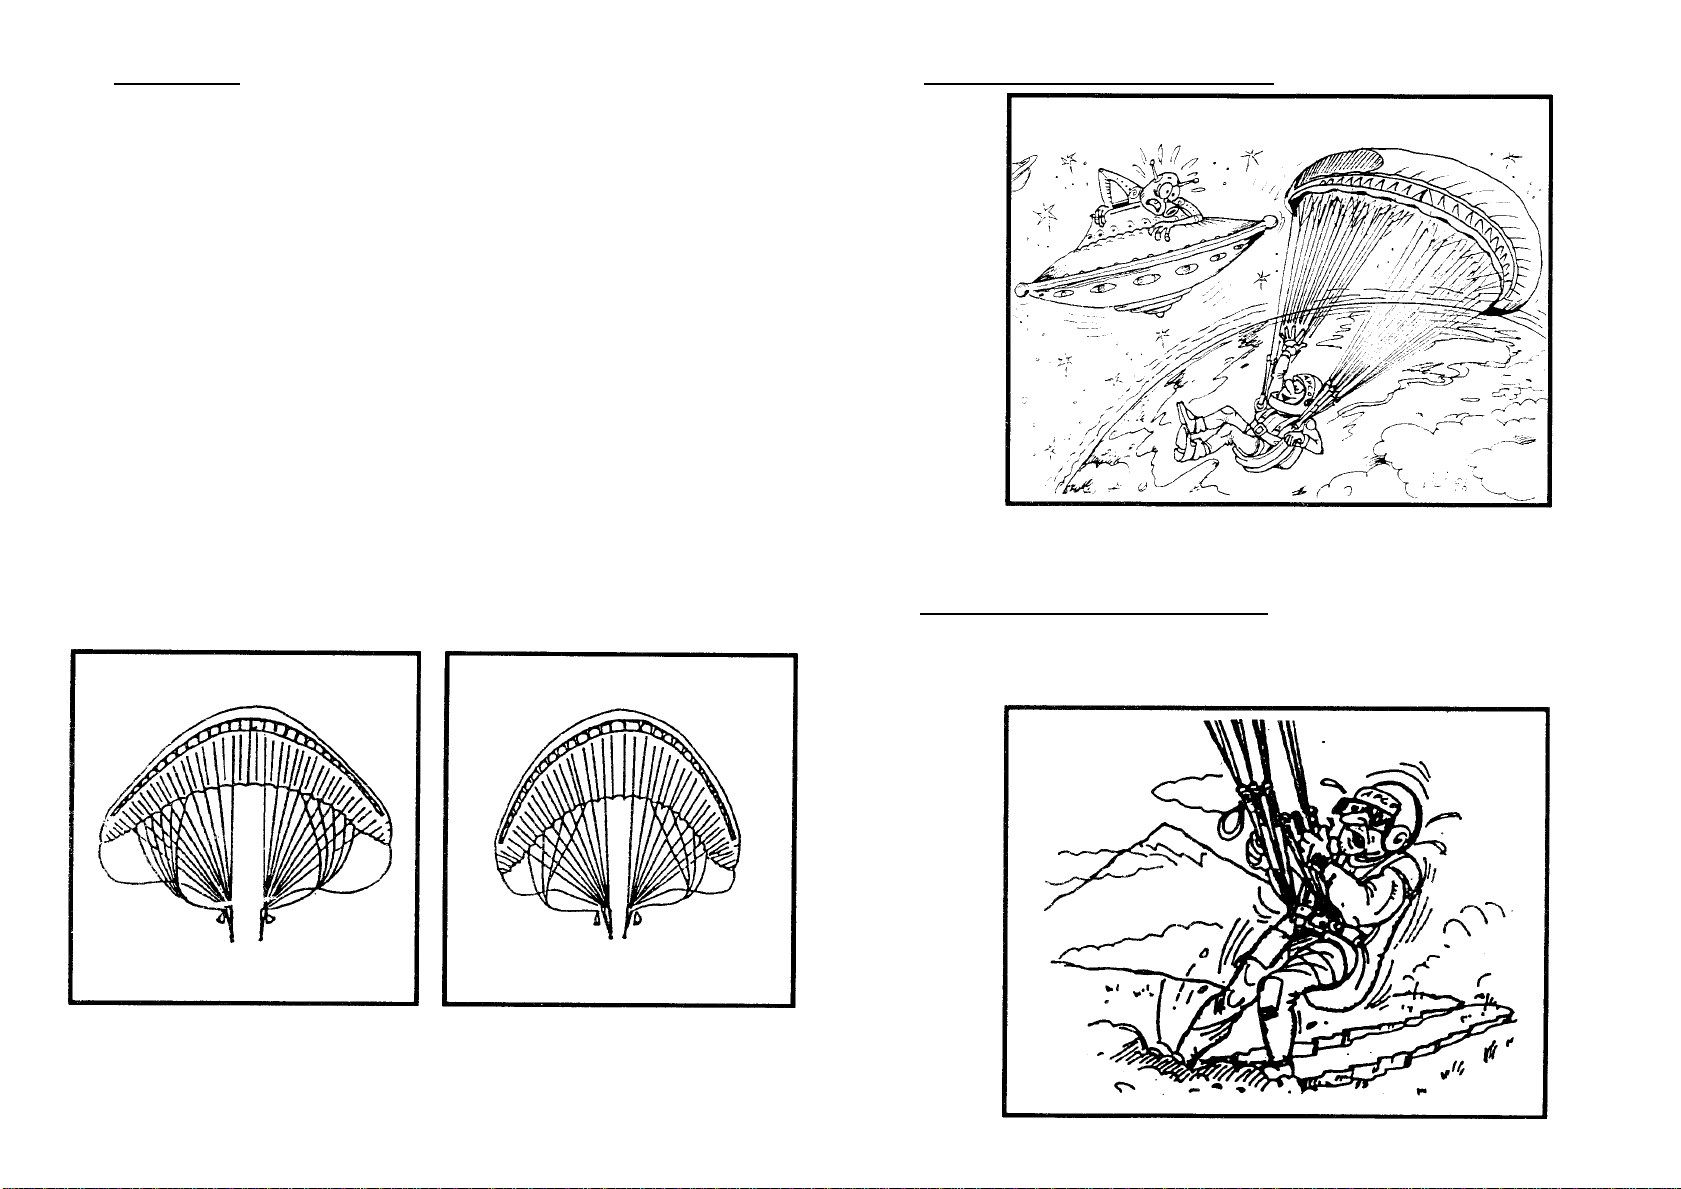
APCO Aviation Futura User manual


APCO Aviation Ltd.
OWN ERS MAN UAL
APCO AVIATION LTD.
NEW TEL
NEW FAX
972-4-6273727
972-4-6273728
7 CHALAMISH ST. IND. PARK
CAESAREA 38900 ISRAEL
P.O.BOX 3049
SIZES: 27, 28, 30, 32
1.
GENERAL DESCRIPTION AND TECHNICAL DATA
1
2.
CONSTRUCTION
3
3.
MATERIAL
3
4.
FIRST CHECK and PREFLIGHT INSPECTION
3
5.
UNE MAINTENANCE
5
6.
TRIMMING
6
7.
HARNESS
6
8.
SPREADING
7
9.
TAKE- OFF, REVERSE LAUNCH
8
10.
FLIGHT
9
11.
LANDING 12
12.
PACKING
13
13.
MAINTENANCE
13
14.
GENERAL ADVICE
14

GENERAL DESCRIPTION AND TECHNICAL DATA
OF LINE OF "FUTURA" PARAGLIDERS
CONGRATULATIONS UPON YOUR CHOICE OF
APCO AVIATION'S FUTURA PARAGLIDER
THE RIGHTTO ('IIA.NGF SPE('IFIC.ATIONS AND DATA AT ANY TIME WITHOUT NOTICE IS RESERVED.
-
1
-
WARNING: This is sot a training manual. It is extremely dangerous to yourself
and others to attempt to fly this or any paraglider without completing a flying
course given by a qualified instructor.
The gliders are carefully manufactured and inspected by the factory. Please use
the glider only as described in this manual.
Do sot make any changes to the
glider.
AS WITH ANY SPORT - WITHOUT TAKING THE APPROPRIATE PRECAUTIONS,
PARAGLIDING CAN
BE DANGEROUS.
DISCLAIMER OF LIABILITY
Taking into consideration the risk inherent in paragliding , it must be expressly
understood that the Manufacturer and seller do not assume any responsibility for
accidents, losses, direct or indirect damage following the use or misuse of this
product.
APCO AVIATION
LTD. is
engaged in the manufacture and sale of hanggliding ,
paragliding, motorized hang gliding and ultralight equipment. This equipment
should be used under proper conditions after proper instruction
from an
experienced instructor.
APCO AVIATION LTD. has no control over the use of
this equipment and persons using this equipment assume all risks of damage or
injury.
APCO AVIATION LTD. disclaims any liability or responsibility for injuries or
damages resulting from the use of this equipment.
The glider is designed to perform in the frame of the Performance Class
requirements as set by AFNOR / ACPULS.
Type of glider:
Production No.:
Production Date:
Colours:
Dealer narre:
Date of sale:
Date of inspection:
Type of inspection: Inflated, Floor check, Test flown
Inspected by:
2
SIZE
27 28 30 32
Cells
(
41x2)+6
(42x2)+6 (45x2)+6
(48x2)+6
Ar
-
ec,
rn2
-
26.6
27.3
1
29.5
)
31.7
Arec
(projected)
m2
I
23 66
24.0
25.87
27-22
Spon
(
;r
-,
.
ci
-stabilizer)
m
1
i,62
1
1.87
-
-
1
265
1
3.42
Span
(projected)
m
I
9_76
9.81
1
0.43
1
0.7
A/ R
b.07
5.16
j
5.42
5.68
A/R
Pilot
projected)
weight,
ka
(hook
i
ris
4.02
65-80
t
4.01
75-9j
(
4-2
85-105
1
00-120
4.2
i
Weight of Canopy
7 C
7.0
7-5
8.0
Root cord mrn
2830 2830
2830 2830
----
-
Tip
cord
mm 574
574
574
574
V--min
km/h -
---
- -
2
22 22 22
V-trim, km/h
34 34 34
34
max, km/h incl, speed system
--
50
50
I
50 50
Min sink,
m/s
op" pilot
weight
t
1 1
Total lises iength, m
352.4
366
382.9 '
416.6
L.i
nes top Dyneerria 0
8 rnm
200 Ibs
200 lbs
200 Ibs
200
l
bs
Medium
fioor Kevlar 1.1
mm
80 kg
1
80 kg
80 kg 80 kg
Bottom
Bottom
Kevior
Kevlar
1.7
mm
2.2
mm
1
50 kg
220 kg
1
50 Kg
220 kg
1
50 kg
220
kg
1
50
220
kg
kg
Length
of lises on B,
without V-lises
m
7.27 6.97
7.27
7.57
Soi!
cloth:
Rib reinforcement
Ripstop 46 gr/m2 "zera porosity", nylon
Trilam 80 gr/m2
Certification
-
PERFORMANCE
Warranty:
Three years/250 hours

2.
CONSTRUCTION
The Futura is constructed from a top and bottom surface which are connected hy
ribs.
One top and bottom panel, together with the connecting rib is called a cell.
Secondary ribs are of a diagonal design and sewn between the main ribs.
Each tell has an opening on the front lower part.
The tells fill with air under
pressure forcing the panels to take the shape dictated by the airfoil section of the
ribs.
On either side, the Futura has a stabilizer which provides some straight fine
stability and produces an outwards force to help keep the canopy rigid.
The front part of the ribs are made from mylar to keep the leading edge in the
correct shape at high speeds and in turbulent air it also improves the takeoff
characteristics of the glider.
The fine hook up points are made of Dyneema and embedded in the sail for low
drag.
3.
MATERIALS
The glider is made from high tear resistant Ripstop Nylon cloth, which is P.U.
coated to zero porosity and siliconized to make the fabric greatly resistant to the
elements.
The cloth for the top, bottom panels and ribs are of different types due to their
different functions.
The fines are made of Superaramid covered with a polyester sheath for protection
against wear and abrasion and the bottom section of the brake lines are made of
Polyester because of its better mechanical properties to resist bending around the
steel ring of the brake fine guide.
The carabiners that attach the fines to the v-fines are made of high corrosion
resistant stainless steel.
4.
FIRST CHECK AND PREFLIGHT INSPECTION
With a new glider, the following points should be checked:
-
the connection points between the harness and glider.
- that there are no twisted fines.
-
brake (steering fine) adjustment.
The way the fine should be adjusted is to
have not less than 10 cm of movement before activation of the brake when the
paraglider is inflated above your head. It should not be adjusted so that it starts
to pull the trailing edge down when in a state of hands off .
On the Futura an additional brake fine is installed to activate the stabilizer for
i
mproved handling. The 27 does not have this feature as the lower aspect-ratio
allows quicker handling. The stabilo brake works on a 3:1 slider to give less input
on the stabilizer than on the brake fine. The 28, 30 and 32 ail activate at different
brake settings to insure the right response on all the sizes. The correct point to
knot the stabilo brake and normal brake is 200 mm from the line ends. It is
i
mportant to shorten the stabilo brake by the saure amount as your normal brake
fine if you make any changes from the factory settings. The glider was certified
with this setting and changing them could change the behavior of your glider
significantly.
The glider must be checked regularly. In order not to overlook anything, we
always recommend checking in a systematic manner following the same
procedure from bottom to top.
These are the points to look for
a.
Damage to fines, webbing and thread
on the stitching of the harness and the
v-fines.
The pulleys of the speed system
are free to rotate and are not twisted.
b.
The condition of the brake lines,
stainless steel ring and security of the knot
attaching the brake handle to the brake
line.
c.
Thet the stainless steel carabiners are
not damaged and fully closed and covered
by clear shrink to prevent the boit of the
carabiner from self opening.
d.
The sewing and condition of the fines
and convection of the fines.
e.
Damage to the hook up points on the
glider.
f.
Internai damage to the ribs.
g.
Damage to the panel material and
stitch fines on the panels.
-
4-
AI (() Avtnlion
i'rn
I
U I
U

5.
UNE MAINTENANCI,
Four groups of fines are connected by the v-fines to the harness on each side,
A,B,C and the brake fines, which are also called "steering fines"
or "control
fines".
Superaramid fines are known to be sensitive to the influence of the elements.
They must be carefully inspected periodically. The pilot in their own interest
must observe the following points to ensure maximum performance and safety
from the glider.
-
Avoid sharp bending and squeezing of the fines.
-
Do not step on the fines.
-
Take care of your fines in crowded take off areas.
-
Do not pull on the lines if they get caught on rocks or vegetation.
-
Avoid getting the fines wet. Dry as soon as possible at room temperature.
1. It is mandatory to change the bottom fines on every paraglider once a year
or every 100 hours of flight, whichever cornes first. The rest of the fines must
be checked yearly and replaced if necessary.
2.
Every six months one A or B bottom line must be tested for minimum 50% of
the rated strength. if the fine fails - all the corresponding lines must be replaced.
3.
Towing, schooling and tandem flights: Our paragliders are manufactured for
recreational flying.
Professional use of gliders, towing, schooling and tandem
flying requires more frequent fine inspection and replacement of A B fines with
heavier fines.
5
6.
TRIMMING
The Futura has fixed v-fines which combine the best glide angle and best launch
behavior, equipped with accelerator foot stirrup.
Trimming of the brake fine on a new glider: Before the first flight, steering
(control) fines should be checked for correct length and trimmed if necessary. A
secure knot should join the brake line to the brake handle. See chapter 4 for
brake fine adjustment.
It is important to shorten the secondary stabilizer brake
fine by the same amount as you shorten the brake fine to maintain the same
handling.
7.
HARNESS
There are several types of harnesses.
Only a harness of standard design or with
certification should be used.
We recommend one of our harnesses which have
been developed to obtain the optimum performance from our range of paragliders.
The Futura speed system can be used with a certified harness if it is equipped with
two or four pulleys. The two upper pulleys should be close to the hook-up point of
the harness (see fig 1). The two lower pulleys should be placed near the front of
the seat board. The length of the main ropes must be individually adjusted to the
type of harness and the pilots legs. Caution must always be taken that the speed
system cannot be activated in normal flight ( for example by adjusting the main
ropes too tightly).
The aluminium stirrup should be
assembled in a way that it is as
close as possible to the seat board
of the harness when it is not
activated.
This will ensure that
the full range of the accelerator
system
can
be
employed,
achieving
maximum speed from
the glider.
When the accelerator is
fully
stretched, the v-line should
be pulled down all the way until
the top and bottom pulleys in the
v-line
meet.
A two step ladder
type stirrup should be fitted if the
pilot
has difficulty in using the
standard type.
The glider is certified with APCO
harness
of
ABS type (Top
Harness,
Top Secura
and
Contour).
The
distance
between
the
carabiners on the harness is 40 cm.
6

8.
SPREADING
To check the glider before every flight.
a.
Spread the glider on the ground. The air openings should point to the uphill
side. Place the harness downhill lined up with the center of the gliden.
b.
Spread the lines. Divide the unes into eight groups. A,B,C,D and brake unes:
l
eft and right. Place the rear lines at the back of the glider. Place the front lines
on the center and rear lines.
Place the brake lines in a curve, separated from the other lines.
-
Do not twist the harness and lines around each other.
-
Take care that the lines do not lie under the glider.
c.
Place the rear sides of the glider partially together. The glider should appear
horse-shoe shaped. This method of radius-like spreading of the canopy ensures
equal tension to the front lines and enables easier lifting. In strong winds, push
the glider Gloser together, see fig. 2 and 3.
The most common reason for a poor start is a badly spread glider.
7
9. TAKE-OFF. REVERS LAUNCII
As there are several methods of launching it is advisahle to use the method that
you feel comfortable with and which was taught to you by your insrctor.
ALPINE AND FRONTAL LAUNCH
It is advisahle to only use the A risers during this launch so as to get a fast
acceleration on the wing to get it above your head.
8

10. FLIGHT
Flight speed is dependent on the amount of brake the pilot uses and the position of
the speed system. At 0% brake: The brake lines without tension - The Futura will
fly at a trim speed of 34 km/h with a pilot in the middle of the weight range. At
25%
brake : The glider will fly at the minimum sink speed of 30 km/h.
At 80% brake: The glider will fly at the minimum flight speed of 22 km/h.
Beware
of flying at such low air speeds. There is no reason to apart from when
landing. The sink rate of the glider is excessive and there is a possibility of going
i
nto a full stall or deep stall situation.
When using excessive brake aiways release
the brakes slowly and smoothly until the last 30% to stop any tendency for the
canopy to rotate forwards and collapse. Release the last 30% faster to help
accelerate the glider to horizontal speed and aiways release the brakes
symmetrically so no spin will develop.
In extreme situations the glider can possibly enter into a negative spin.
When
flying the glider please be aware of such an eventuality.
We highly recommend
that the pilot receives proper training and explanation of how to handle such
situations by joining an advanced training course.
Thermal flying:
In a narrow lift " band " it is important to fly slowly and make
as short a turn as possible. To reduce speed and to obtain an optimum sink rate,
the brakes should be pulled about 30%. Using this method of flying the pilot can
make very short, flat turns by releasing the outside brake while at the came time,
pulling on the inside one.
Soaring:
The lift in front of a hill or mountain, when there is wind, is usually
quite strong. The pilot can fly more dynamically and faster.
High wind flying:
Do not launch in winds stronger than 30 km/h and take
more tare in strong gusty conditions. In extreme weather conditions or by flying
-
9-
too slowly the glider can possibly enter into an unstable sinking flight, known as
deep stall.
This can be recognized by almost vertical descent and very low air
speed.
The glider will recover automatically.
To recover quickly from such a
stall, the pilot must brake sharply on both sides to make the glider surge over the
pilot"s head. It is important to accelerate the glider forwards. A more effective
method of obtaining normal flight would be to pull the A risers down by 4 to 5
cm, but tare must be taken net to induce a front collapse. Pushing the accelerator
will also give the same results.
Asymmetric collapse:
When one ride of the glider partially folds together it is
i
mportant to maintain direction by using the brake on the opposite side
i
mmediately and then pump the folded side free.
With a large collapse of more
than 50% it is important to react very quickly but be careful net to pull the brake
too much as this could cause a spin to the uncollapsed side. If the tip folds and
stays inside the tip lines it is possible to take hold of the stabilizer line and pull
the tip out of collapse using one line and then recover in the normal way.
The glider has a strong tendency to reopen after a collapse. If no input is given
after a 55% collapse the glider will dive and turn 90 to 180 degrees before
opening on its own. If the stabilizer reinflates first, the collapsed wing will
generally reopen fast with a lot of energy which could collapse the tip on the
opposite side, but it will reinflate immediately. If the pilot gaves input after a
collapse and stops the dive and rotation the reinflation is generally very soft and
gentle.
Front stail or Front collapse:
If the glider suffers a frontal collapse the glider
will automatically reinflate after 1 to 3 seconds. The reinflation could be speeded
up by the pilot pulling both brakes down 70% and releasing them as soon as the
glider is reinflated.
There is a possibility that the glider could enter a deepstall after such a deflation,
if the glider does not start flying within 2 to 3 seconds the pilot could pull both
brakes sharply, speed up the wing by pushing the accelerator or pull the A riser
down gently (net more than 4 cm) to get the wing flying normally again.

"B" Stail:
To lose height quickly so as to avoid had weather or land in a
restricted area the Futura can be "B" stalled by gripping the "B" riser at the
attachment shackle of the "B" unes. Pull down slowly for the first 10 cm. There
will be strong resistance at first.
The canopy chape will distort and fall a little
behind the pilot's head. Pulling a further 8 cm will stabilize the glider above the
pilot's head . Pull down equally or a turn may develop. Vertical descent rates of
10 meters per second can be safely achieved
To recover release both v-unes slowly at first and fast for the last 10 cm to
accelerate the glider to flying speed.
Big Ears:
Height can also be lost in a controlled way by collapsing both tips. To
do this take no more than the last one "A" line from the tips and pull 10 cm
down sharply. This will collapse 20% of the wing at each tip. This can give sink
rates of up to 5 meters per second. In certain circumstances the tips will remain in
without holding the "A" unes. Steering control can be maintained by weight
shifting with the harness.
To recover, let go of the "A" unes and pull the brakes
down 50 % on both the collapsed sides until the wing is fully inflated.
Do not
do any extreme maneuvers with the tips collapsed as this puts an
excessive load on the tenter unes which may lead to failure of old or damaged
unes.
Spiral Dives:
By progressively applying the brake on one side, the glider can be
put into a spiral dive. Safe, high sink rates can be achieved if done with tare.
High speeds and excessive loads result from strong spiral dives caused by using
too much brake. Recovery must be done by slowly releasing the brake, otherwise
strong forward to rear surges will result in the canopy losing air pressure and large
collapses occurring. Take tare that you have enough height to safely exit the
spiral.The Futura will need 1 to 2 turns to exit neatly from very deep spirals.
11. LANDING
Before landing, the pilot should check the wind direction, which can be seen by
smoke, flags etc., or the speed of the glider in comparison to the ground.
At a
height of forty to seventy meters the final part of the flight must begin. The pilot
should head straight into wind towards the landing field by gently braking or by
making s-turns the exact point can be chosen.
At a final height of twenty meters, descent should, preferably be made at trim
speed.
At a height of one to two meters the landing should be achieved by using
full brake.
Steering not functioning.
If the pilot cannot reach the steering unes for any
reason or if they are not functioning properly, (for example: if they are broken
after damage ), use the alternative method of steering by pulling the rear v-line.
Steering in this way is much slower than normal. Care should be taken when
landing this way to avoid stalling too high.
Strong turbulence.
Continue flying by pulling the brakes down 20% in order to
increase the air pressure inside the canopy.
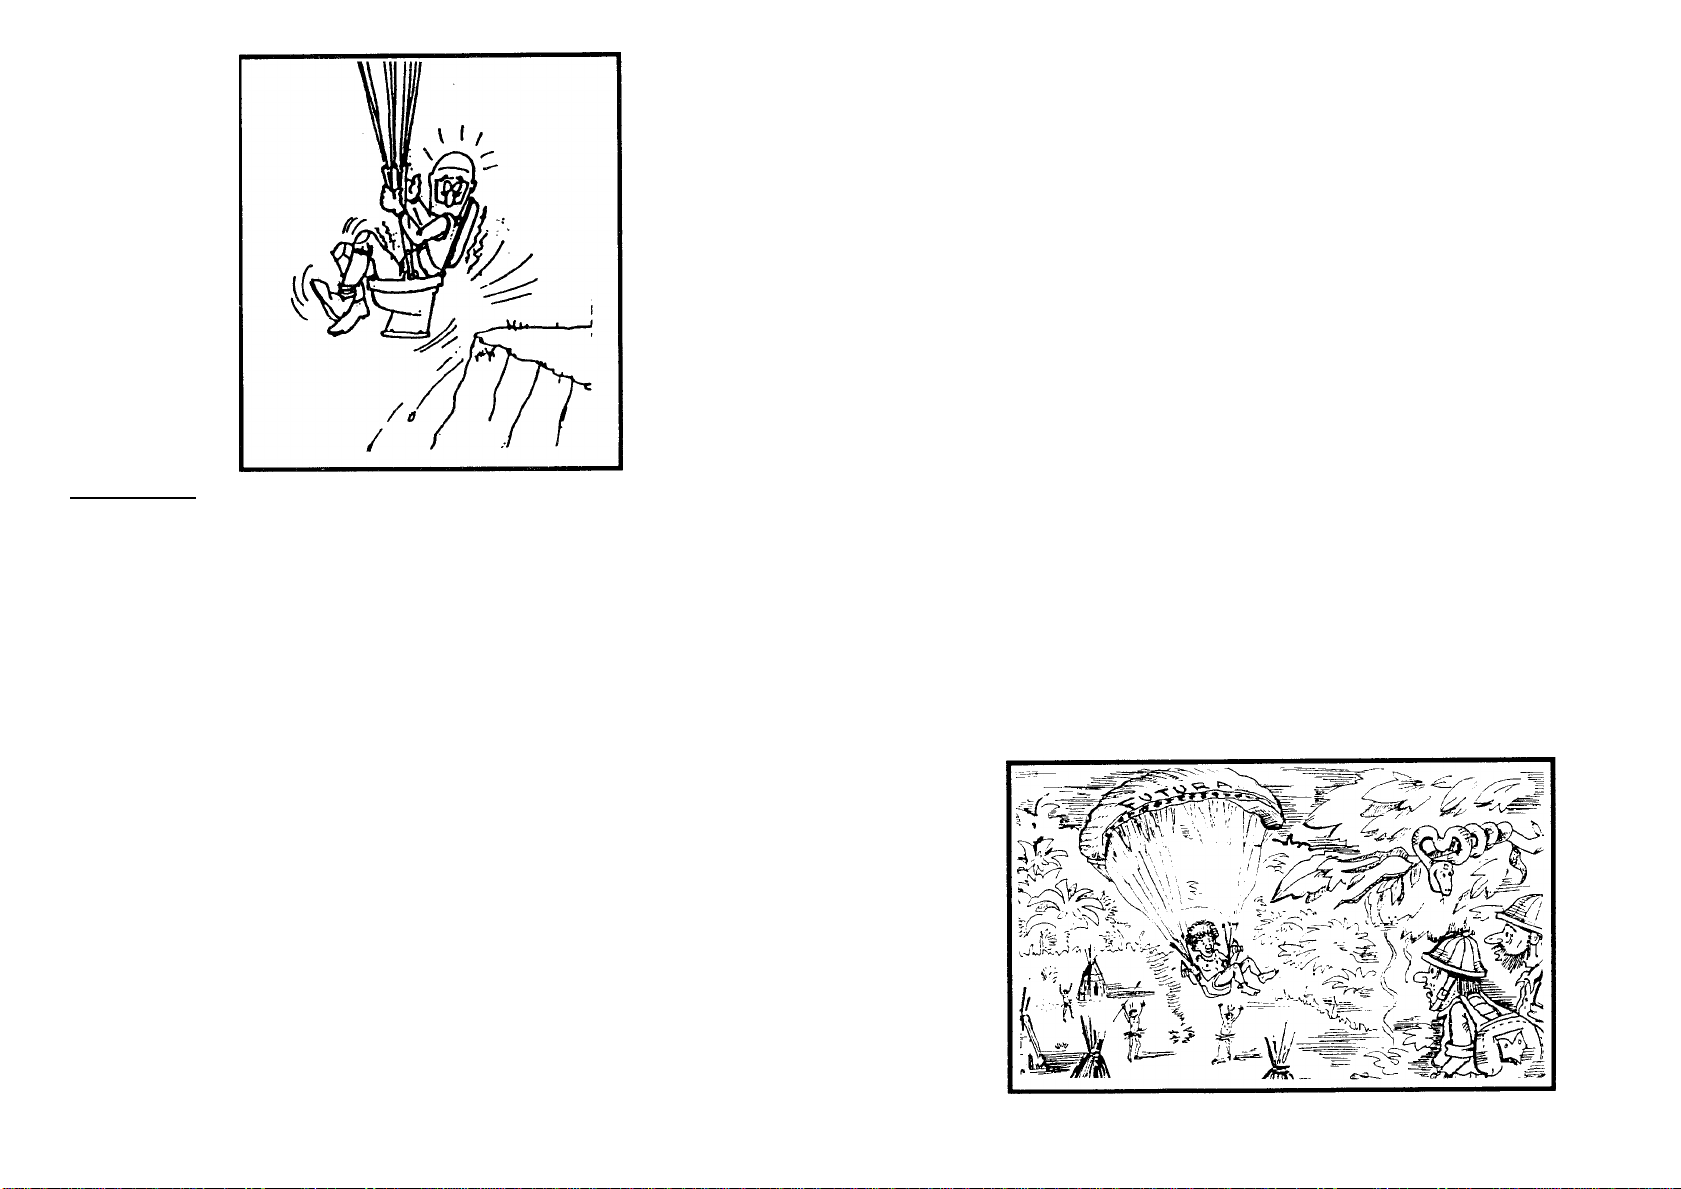
Tree landings:
If it is not possible to land in an open clearing, steer towards the
highest tree and sink down towards it, protecting your face with your hands,
elbows pressed to the body. Secure yourself to the tree with the unes if descent
from the tree involves danger, wait for assistance.
After a tree landing, all the
unes must be remeasured and the canopy checked.
Water landings:
As you approach landing, release all the buckles of the harness
except one leg.
Just before hitting the water, release the remaining leg buckle
and continue braking.
Swim away from the harness and glider to avoid
entanglement.
On impact, if the glider is allowed to rotate completely forwards
until it hits the water with the front openings, the air inside will then be trapped,
making the canopy into a big floating balloon which will give the pilot more time
to escape and make for a better recovery of the canopy which will not be so full
of water.
-
12 -

12.
PACKING
Spread the canopy completely out on the ground. Separate the fines to ieft and
right sides of the glider. If the v-fines are removed from the harness, join the two
v-fines together by passing one carabiner loop through the other. This keeps them
neatly together and helps to stop fine tangles.
Fold the canopy alternately from the right and left sides, working towards the
middle, press out the air, working from the rear towards the front. Place the
v-fines at the trailing edge of the folded canopy and use them to finally roll up the
canopy.
13. MAINTENANCE
Cleaning:
Cleaning should be carried out with water and if necessary, soft soap.
If the glider cornes into contact with sait water, clean thoroughly with fresh water.
Do not use solvents of any kind, as this may remove the protective coatings.
Storage:
The glider should be stored in a cool, dry place.A wet glider should
first be dried, preferably in a dark place. Protect the glider against sunlight (UV
radiation).
When on the hill keep it covered or in a bag. Never store the glider
near paint, petrol or other chemicals.
Damage:
Tears in the Bail (up to 5 cm) can be repaired by using spinnaker repair
tape (for non siliconized cloth).
Greater damage should be repaired by a
professional repairer.
14 GENERAL ADVICE
The glider should be checked every year by a qualified person or agent of the
company.
The glider is carefully
manufactured and checked by the factory.
Never make
changes to the canopy or the lines.
Changes can introduce dangerous flying
characteristics and will not improve flying performance.
Do not put the glider in direct sunlight when not necessary. In order to protect the
glider during transportation or waiting time we recommend one of our lightweight
storage bags.
If you have any doubts about flying conditions - do not begin.
If you have any questions, please contact us or your dealer.
Lastly, be equipped with a CERTIFIED EMERGENCY PARACHUTE on every
flight.
APCO wishes you many hours of enjoyable flying.

-
1
5 -
1
~~ ~~
0
000 00
O W U)N OONI
N N
I
I
I
I
•
E E E
E o 2 0
v ô ô ô
v
C
c
U
W
o '
Ln
C
•
m
•
ai
a
J
Y
~.
ô
df
v
y â
3
0
C. C C
C~ J
J -J J J
v
y
âv
ô
0
J J m
I
I
0
v v
c ?
•
ôâ
O4
C
o
APCO Aviation Ltd.
'
Product
FUTURA 27
-
16 -
â
O
n
0
Q
0
o
0
7
o
O
0
o
0
v
Q)
.
O
o
a
n
o
0
O
0
O
o
ro
O
O
0
m
M
o
0
0
M
o
l
n
g
U)
c
0
O
MM
v
n
o
ro
M
o
µ
ô
N
-
'
•
o
o
M
N
o
o
N
Û
M
N
O
M
v
O
M
a
n
o
CD
O
rn
m
•
•
O
`°
n
0
O
0
7
rn
C
O
p
°
U)
o
a
ro
O
0
-
O
U)
'
O
00
N
O
M
O
â
o
uo
o
â
ô
0
o
Q)
O
u
a
ô
o
I
D
ae
N
M
°
O
o
o
M
O
M
M
-
N
o
0
N
ô
n
C)
U
n
00
O
U)
00
N
M
U')
N
`t
N
O
O
7
p
~
M
Q
O
O
'>
•
p
n
0
M
m
0
O
7
N
N
O
C>
a
n
N
U)
O
o
7
U
n
N
a0
O
o
Q
U)
N
U)
M
U
O
N
O
M
y
O
M
't
O
't
o
o
o
o
n
a
U)
0
o
o
7
N
a
U)
0
o
-
a
o
O
10
lit,
ao 0
O
O
v
0
O
O
a
0
O
o
U)
N
N
O
O
a
Q)
0
N
M
Q
0
OO
O
O
,()
U)
o
M
U
i
n
O
O
O
O
't
O
N a
M
.-
ÔO
f
e0
O
O
<
0
0
o
M
't
0
a
0
Ô
ô
v
O
!
o
o
v
0
D
o
â
a
<
m
U
n
570 ± 10
4
44
42
40
48
t
47
~-
38
36
34
l'av
32
30
1
1
___
.
28 27
26
24
22
20
0
n
l
1
8
1
6
1
4
II_
_
l
'
1
1
0
8
in,
~
6
À
4
%-
-~~~
Î/
•
1
m
U C
m
2830 ± 10
Drawn by
Alex Louw
Part N
I
Toll
I
Quantity per glider
Date
9.08.96
Name
Drawing N
Scale
Sketch of lines
Fu.01.22.027
Approved
Anatoly Cohn
APCO Aviation Ltd.
Product
FUTURA 27
Drawn by
Alex Louw
Part N
I
Toll
Quantity per glider
Date 9.08.96
Name
Drawing N
Fu. 02.22.027
Scale
Table of length
of lines
Approved
Anatoly Cohn

-
1
7 -
-
18 -
o
O
N
U~~S
N
L
~
â
o` o,
x
p,
°
g~OO ~~ ~
~
N
L
I
y
oEEE
0 2 2 2 E--
v
p O O
N
~O
L
N N
T
T d
a
n
p
N
o~>> ôa
E
E
c
m
N
Q
ô
a
o
s
V
o
ô
41
i
c
v
w
o
cc ~;
Q.
O
47
W N y 1
0
J C C
J
DJ p'
J.J
y
w
v-O U
ô
a~ 3
0
a._ p
7~ J ID
~
o
07
O
0
0.l
O
7
m
,~
v
f
n
-)
g
O
O
o
M
H
o
O
n
N
~
O
O
7
O
K
(
O
9
7
O
M
-i
O
OO
O
V
~
p
O
o
v
0
o
r
o
~
-
0
o
•
o
o
"
o
ce
"
o
m
N
•
O
~
, o
O
O
N
o M
g
M
v
_
r`~
c
o^
O
-
o o
v
o
a
,
r,
Q
M
0
v
,
n
m
0
O
`~ ,
n
c~
~
u,
O
M
y
a
O
7
rn
c
o
O~
O
7
rn
ce
O
7~
O
K
M
O
K
o
0
0
t0
W
o
K
o
O
_
o
N
N
C
o
-
O
-
o
-
O
U)
0
O
o
0
0
0
0
Q
0
0
1
N
co
a
m
O
N
ce
N
O
0o
0
0
0
v
0
0
o
0
i
n
0
0
o
a
O
n
a
O
0
-
0
o
0
O
n
t
u,
0
O
n
a
0
't
a
O
O
C)
N
O)
o
't
~
--
O
'
n
N
Oc
O
~
0
~
(
n
N
c
0
't
a
O
O
t)
O
O
O
v
o
a
7
a
o
0
o
c
a
~
M
a
,
e
ro
_
0
o
v
,
n
rn
0
ce
ro
0
O
<r
0
0
v
77
v
oc
7
O
0
O
~,
M
e
m
O
~
M
a
g
rn
M
â
M
e
a
/
m
n
n
Drawn by
Alex Louw
Part N
I
Toll
I
Quantity per glider
Date
9.08.96
Name
Drawing N
Scale
Table of length of Unes
Fu. 15.22.028
Approved
Anatoly Cohn
APCO Aviation Ltd.
Product
FUTURA 28
570 ± 10
48
~
4
'
4 4
-~-'~
43
42
~
40
~
•
_
1
38
À,
~-~
n
'
36
I
„'
__
34
32
30
28
26
~/
29
`
-
'F»1
P
A
F
uuuuu ~dÉ
/l
a__
24
22
0
+1
c
20
1
8
1
6
'
'
"'
1
4
1
2
,
1
0
11
1
-ce
-
S
6
II
_
4
ll
V
,
ü_
0
l
ook
~~
c
m
o
m
2830 ± 10
Drawn by
Alex Louw
Part N
I
Toli
I
Quantity per glider
Date
9.08.96
Name
Drawing N
Scale
Sketch of lines
Fu.15.21.028
Approved
Anatoly Cohn
APCO Aviation Ltd.
Product
FUTURA 28

-
1
9 -
-
20-
570 + 0
48
.
d
~47
'
44
42
38
0
46
_
p
F,
43
~-
A
fi
36
I
34
/
v
3
0
28
~,
27
26
1
- _
24
1
~~
22
0
+i
2
1
8
a
1
6
;.
u
&
i
1
2
,
I
0
li
a
8
'
6
∎
~,
",
4
la
-
f
,,
211
NU
2
iim
I
,
m
v
o
L
m
2830 +10
Drawn by
Alex Louw
Part N
I
Toll
I
Quantity per glider
Date
9.08.96
Name
Drawing N
Scale
Sketch of lines
Fu.01.22.030
Approved
Anatoly Cohn
APCO Aviation Ltd.
~
Product FUTURA 30
00G
o
0
I
-
p
u
O
N
o
N
0
W
0
o
o
M
0
0
0
o
R7
0
a
O)
s
O
0
ri
0
o
o
O
a.
O
000
0
00
O~ N NN
~„
~ N
~
I
I
I
I
I
oE EE
ov
~,
E 5 5 2 E N
c d W N N T
ô
n a Q. O
G
0
o
p
n
n
a
p
.
0
v
o
M
p
m
t
D
o
M
m
0
o
o
N
m
0
°
0
M
a
O
O
o
o
o
O
O
o
a
o
m
o
a
O
O
°)
o
s
O~
O
)
N
o
_
o
o
-
N
o
a
0
O
a
N
a
M
0
N
o
~
0
sO~
o
s
a
0
M
0
7
O)
0
o
O
0
C
O
o
O
O)
m
o
O
'
N
N
W
N
p~
'
O
0
O~
0
p
O
â
`~
~
v
d
D
~
O
O
O
âi
_
_
~
C
-
~
y
O
w n
4
3
n
~~ c v d
J
~
â~ N
1
O
~p 3 2
E
7~
J
CO
O
O
N
O
~
N
O
O
N
N
N
N
ry
0
d
O
~
N
M
-
O
~
0
O
0
0
N
O
a
N
N
0
~
O
O
M
N
N
N
M
m
p
N
N
tt
N
o
M
V
O
N
O
M
a
O
M
_
~
o
O
a
a
O
O
a
N
o
U
o
a
N
0
a
a
r~
0
a°
O
N
f
m
N
0
s
O
O
O
N
m
N
N
O
â
O
O
û
O
o
O
--
~
)D
O
O
a
v
O
O
O
a
o
O
o
M
0)
m
O
O
a
o°
O
o
O
N
O
O
,
n
o
a
.c
N
Q
O
O
-
o o
~ O
N $
U
O
OO
O
U a
,
n
N
0
O
n
a
O
N)
'1
o
°
o(g
4
O
O
a
p
N
0
s
O
M
O
O
a
o
a
O
O
a
-
r
o
s
=
N
O
O
a
N
^
a
a
a
o
_
M
c~
n
Drawn by
Alex Louw Part N
I
Toll
*5
I
Quantity per glider
Date
9.08.96
Name
Drawing N
Scale
Table of length of unes
Fu. 02.22.030
Approved
Anatoly Cohn
s
APCO Aviation Ltd.
Product
FUTURA 30

-
2
1 -
-
22 -
00ç
04SS
0
0
0
7
0
o
~
d d
D
O
d
~
-
d
0
o
N
y
rn
°
°
°
d
~~
-
-
O
r
a
r
N
f
r
hl O
N
~
V
C
a
o
_-.~
<
o
c~
0000 00
V
~ ~
O
v
d
°
-iD
1
1
1
1
I
I
O~~
i
~
y
W
É
E
o
oo
v ô ~ ô v
v
ô
v v
v
~ r
n a n
o
G 7 7 ~d
E
O
d
N
N
n
~
v
°
~
o
m
c~
°
°
D
Q
d
a
v
ô
°
Y
v
s
n
v
v
v
m o
I
J
â °
0
O
m
m
0
-
-
c1
ô
O ~
n
Drawn by
Alex Louw
Part N
I
Toll
I
Quantity per glider
Date
9.08.96
Name
u
nes
Drawing N
Fu. 02.22.032
Scale
Table of Iength of
Approved
Anatoly Cohn
APCO Aviation Ltd.
Prodact
FUTURA 32
570 ± 0
48
46
,
44
42
-_
40
38
36
34
JL
30
^
~
/
'~
28
26
~~
24
0
+I
22
20
1
8
1
6
4
1
2
1
0
8
6 4
2
11 1
2
2 0
z
~
lui
'I
~ 19
'.
i;
~
,
la
1
1
„~
la
!.
,
I
i
•I
a
IIu
-
m
c~
o
2830 +10
m
Drawn by
Alex Louw
Part N
I
Toll
I
Quantity per glider
Date
9.08.96
Name
Drawing N
Scale
Sketch of lines
Fu. 01.22.032
Approved
Anatoly Cohn
APCO Aviation Ltd.
Product
FUTURA 32

Configuration lors des tes
Accessoires / Accessories
Kg
Kg
Kg
s
Configuration during the tests
Tests de conformite realises par I Conformity tests carried out by
AERO - TESTS
6 chemin de camperousse 06130
-
GRASSE - FRANCE
-
23 -
Configuration lors
des
tests
Accessoires / Accessories
Kg
Kg
Kg
configuration during
tests
Tests de conformité realises par 1 Conformity tests carried out by
AERO
-TESTS
6 Chemin de Camperousse 06130 -GRASSE -FRANCE
-
24-
I
Débattement de l'accélérateur
Range of speed bar
15
Cm
Débattement des afficheurs
Range of trimmers
sans afficheurs/ N
trimmers
cm
Plage de vitesse aux commandes
Brakes speed range
11
K m
/
h
Plage de vitesse avec accessoires
Range with accessories
20 Km/h
Révisa
Check every
!Ooh i Annueise _ 100 Fting H I
yea
_
Attention
avant utilisation lire 7e manuel de vol
Warning: before use refer to the users manuel
Type de harnais
Type of hamess
SEMI STABLE
Constructeur
Manufacturer
APCO AVIATION
Modale
Model
CONTOUR
Réglage de la ventrale
Chest strap adjust
(Cm)
45
Hauteur assise 1 maillon
seat l maillons distance
(Cm)
50
Poids total volant mini
Minimum flying weight
75
Poids total volant maxi
Maximum flying weight
90
Poids du modèle
Weight of the mode)
7
No d'élévateur
No. of risers
3
rroids
t
al volant mini
P
Mintrr urn
'iying weight
65
Poids total volant ma i
Maximum flying weight
80
Poids du modèle
Weight of the mode)
7
No délévateur
No of risers
3
Type de harnais
Type of herness
SE MISTA gLE
Constructeur
Manufacturer APCO AVIATION
Modela
Modal
CONTOUR
Réglage de la ventrale
Chest strap adjust
(Cm)
45
Hauteur assise
maillon
Seat 1 maillons distance
(
Cm)
50
AFRO -
TESTS
categorielcategory
PERFORMANCE
No de conformite aux normes
Reference number standards 96101742 AP
S52308 1552309
date d'enregistrement
date certified
16110196
CONSTRUCTEUR
MANUFACTURER
APCO AVIATION LTD
9
MODELE
FUTURA
27
AERO - TESTS
L
c
ategorielcategory
PERFORMANCE
No de conformite aux normes
Reference number standards
S52308 / S52309
96121745 AP
date d'enregistrement
date certified
04112196
CONSTRUCTEUR
MANUFACTURER
APCO AVIATION LTD
M
O D
E L E
FUTURA
28
Débattement de l'accélérateur
Range of speed bar
15
Cm
Débattement des afficheurs
Range of trimmers
sans afficheurs/ N
trimmers
Cm
Plage de vitesse aux commandes
Brakes speed range
14
Km/h
Plage de vitesse avec accessoires
Range with accessories
24
Km/h
Révision
Check every
annuelle/100 de vol - Yearly
100 flying hours
Attention: avant utilisation, lire le manuel de vol.
Warning Before use refer to the user's manual.

Configuration lors des tests 1 Confi uration durin the tests
Kg
Kg
Kg
Accessoires / Accessories
Tests de conformite realises par I Conformity tests carried out by
AERO - TESTS
6 chemin de camperousse 06130
-
GRASSE -FRANCE
-
2
5 -
[
PROCES
VERBAL
DE
TEST
EN
VOL
1
-
26-
Débattement de l'accélérateur
Range of speed bar
15 Cm
Débattement
des
afficheurs
Range of trimmers
sans
afficheurs/
No
trimmers
Cm
Plage de vitesse
aux commandes
Brakes speed range
13
Kmlh
Plage de
vitesse
avec accessoires
Range
with accessories 24
Kmltt
Révision
Check every
100h 1 Annuelle - 100 Flying H 1
year
Attention: avant utilisation lire le manuel de vol
Warning: before use refer to the users
manual
Type de harnais
Type of harness
S E M I S TA B L E
Constructeur
Manufacturer
APCO AVIATION
Modele
Model
CONTOUR
Réglage de la ventrale
Chest strap adjust
(Cm)
46
Hauteur assise 1 maillon
Seat 1 maillons distance
(Cm)
50
Poids total volant mine
Minirnum flying weight
-
85
Poids total volant maxi
Maximum flying weight
105
Poids du modèle
Weight of the mode)
7,50
No, d'élévateur
No. of risers
3
DECOLLAGE
L' silo écope bien sans point dur,
épasser en arrivant au dessus de
légère tendance à
la tête
ATTERRISSAGE
lion arrondi
UTILISATION
ACCESSOIRES
Accélérateur V min. 23/24; V max.
34/35; V ace. 44/45
STABILITE TANGAGE
L'aile décroche (les bout d'aile
puis du centre,
reprends le vol avec une abat ee
relativement amortie
RECHERCHE PARACHUTALE
COMMANDES
L'aile reprend soir voll avec une tendance à
srr l'axe de lacet ett un léger mouvement de
glisser
tangage
RECHERCHE PARACHUTALE
AUX «B»LENT
L'aile e tendance à r,-nier en parachutale,
Pet )ni au vol spon ané par un nouvement de
puis
tangage
RECHERCHE PARACHUTALE
AUX «B» RAPIDE
L'aile reviens en vol avec une légère
abattée
et une
léjè e glissade sur l'axe de lacet
APTITUDE
A
TOURNER
360
°
Effectué dans les temps, roulis inverse
nia
que, borne maniabilité.
assez
peu
MANOEUVRABILITE
L'aile abat franclienient en sortie de virage mais
reste bien homogène.
WING OVER
Commande progre.ssiverner.t physique avec débattement
moyen.
FERMETURE ASYMÉTRIQUE
L'aile effectue !a de torr en rouvr n d'un
bloc
FERMETURE ASYMETRIQUE
MAINTENUE
Réouverture rapide avec une bonne ressource et une
légère perte de pression à l'extérieur sans
conséquences.
VRILLE
Ressors avec une abattée assez bien amortie, arrêt
la rotation en
bi
de tour
de
DECROCHAGE ASYMETRIQUE
L'aile reste homogène avec un mouvement de tangage
bief amorti.
FERMETURE SYMETRIQUE
L'aile rouvre du centre puis progressivement des
bouts d'aile
360
°
ENGAGES
'
aile effectue un 3é0
°
avant de revenir sur axe
avec
une bonne ressource.
MARQUE
APCO DATE
/139/96
MODELE
FUIURA
27
TYPE SELLETTE
CONTOUR
ABS
REGLAGE VENTRALE
41 cm
POIDS TOTAL EN VOL
77 6g
PILOTE
t;OMLb 1 l'l'
LUN
JURY
IIAL:RON 1-,
Rode; A,
!
AWN A,
EXILA Li
CATEGORIE
['[
RFORM11Nt F
AERO -
TESTS
categorielcategory
PERFORMANCE
~~--
No
de conformite
aux
normes
Reference number standards
S52308 1 S52309
96101743 AP
date d'enregistrement
date certified
16110196
CONSTRUCTEUR
MANUFACTURER
APCO AVIATION LTD
MODELE
FUTURA
30

PROCES
VERBAL
DE
TEST
EN
VOL
I
AERO TESTS 6 ch de Camperousse 06130 GRASSE le Plan
-
27
DE COLLAGE
A'r'
MIM 1 ss,AGr
1
I'l' I I. I
.;A'l'
1
()fi
r rAn
II.
1
rl.
rAn' ;A' a:
I
+t<''111
I
111
~
rl'II'AI,I-:
I'''t-0ItfIi
I
I I F.'
I I I
l'
I I I
1
'
Ftnm ,
101
1,
'
PROCES VERBAL DE TEST EN VOL
VIII,
r
l i
t
l'
1
Llu.,
.,
,1
w
Il.,
1
'
t
1't
oru'.'
de voile I rr nu iii
-
nositarit un freinage pour
marquer la
phase
de
I
;
-
nq
o1ïnalion
A.ane
z
grand
debatt'in~ul
aury
commandes
l'
Ain.: 22; bras haut_: 3'.,; a<'-él.érée: 46.
l
'
.
ma; l'al'atLes qui. srnii. L'aile se comprime dans
l
' '
nv' 1.Inrn
a1r
nivr-
•
a
u cL:
,
:^;
cai-ssons
centraux
I
nr:
l
ongr, de
,
?',
Cf4.
-
•
.
viole franchement passant du parachutage au
-
1 1
.r
'
~
apideme
nt.
Reprise
du
voll
spontanément
vi'l'
•
r
:1'li. rIdsrtcnt sans effort le retour en
'
i
c„II
r;ivr'urent
nm,
I
.
r
' '
~"l'vunuvrl.
r
emise en vol
MNba. -,.
t 4 -
n
r
t
pa
du
ta
I
u
t t
r.:'
DECOLLAGE
Bon gonflage, la voile arrive assez rapidement au
dessus de la tête_.
ATTERRISSAGE
P. î\ S
UTILISATION
ACCESSOIRES
V min. 24 km/h V bras hauts; 38 km/h
V accélérée; 48 km/h
STABILITE TANGAGE
1
voile sort franchement avec un mouvement d'abattée
RECHERCHE PARACHUTALE
COMMANDES
Sortie progressive avec petit mouvement de tangage
RECHERCHE PARACHUTALE
UX «B»LENT
'ortie très progressive avec légère glissade latérale
RECHERCHE PARACHUTALE
AUX «B» RAPIDE
Sortie tranche avec mouvement de tangage un peu
marqué
APTITUDE
A
TOURNER
360
e
La voile tourne assez rapidement au début de la
rotation puis accélère avec l'augmentation du roulis,
MANOEUVRABILITE
Pas de tendance importante au départ en négatif,
sortie avec mouvement de tangage un peu marqué
WING OVER
La voile est facile à cadencer. Bon comportement des
bouts d'aile
FERMETURE ASYMETRIQUE
La voile se rouvre assez rapidement et revient sur
ax
avec environ 180' de rotation
FERMETURE ASYMETRIQUE
MAINTENUE
La voile se rouvre progressivement dans le troisième
t
our, intervention et retour sur axe dans les 90
°
VRILLE
La voile sort en rotation avec une abattée
asymétrique peu importante et revient sur axe après
environ 180'
DECROCHAGE ASYMETRIQUE
La voile sort avec un petit mouvement de tangage
FERMETURE SYMETRIQUE
La voile se rouvre progressivement par une
réalimentation par les bouts d'aile
360
°
ENGAGES
La voile sort assez progressivement de la rotation
mais n'a pas de tendance à la neutralité spirale
MARQUE
111'(0
DATE
1
213/8/96
MODELÉ
H'U'l'UItA
30
TYPE SELLETTE
CONS'[RU('L'F',I1R
----- -
---
GLAGE VENTRALE
-
-
--- 4S cm
POIDS TOTAL
EN VOL
-------
9', I<t_;
-----
----------
PILOTE
l'I?IIL [I:R
V i nceril.
JURY
liAI'C UN
l
',
I
tor,i:
A,
l
'
AI'JN
A,
IX LGA D
cAPrcoRLE
P1111()R141\NCI
MARQUE
APCO DATE
02/09/96
MODELE
Ii'UTURA 28
TYPE SELLETTE
APCO Contour
ABS
REGLAGE VENTRALE 45 cm
POIDS TOTAL EN VOL
87 kq
PILOTE
Didier EXIGA
JURY
RO ,t
Andre,
DAERON
Pie;
e,
I3EAUVALI ET
Xavier
CATEGORI E
f' i~;
R 1' O RMAN C I;

PROCES VERBAL
DE
TEST
EN VOLE
t'I
ODE LE
TYPE SELLETTE
REGLAGE
VENTRA
L
E
P
_
OiDS TO'TAI, EN VOL.
PILOTE
JURY
DATE
28/8/96
FUTUKA 3?.
W
NS
'
1
RU(
f EI I11
CUN'I l)UR -`
n
('li
1
1
U li , ,
'
I'
GULI1.ls VtIn:cur.
L
AGIU7N L',
L
u )
l-.
A,
1
~J11^IN
A, FAX I GA D
CA'L'E GOR M
L 1
•.
R F C1. 1'I AN C
•
L,
AFRO 'l'Etï'l'S 6 ch (le CautperoueRO 06130 CRASSE le Plan
-
29 -
o
w
U
-
3 0 -
llECOi.1.AGE
rA?nLe de vo il r frit,., un freinage marque; Gare
nlct
•
;
sattr
•
afin d„ .0 ab,l.tser son aile avant la mise
en vol
AT'l'EIUlISBAUE
3-'t'
vée
-
-
U'TILISAT'ION
brai; haut:
accélérée: 49.
ACCESSOIRES
O'1AHILITW, TANGAGE
Dans I'al,attMe l'aile sn comprime clans l'envergure et
atnnrce un'
•
~'r
eu t rr
RECHERCHE t'ARACHUTALE
F,n amorce du Parachutage l'aile se vide tranchement
dé,-corner, reprise du vol spontanément
RECHERCHE PARACHUTALF:
1.
'
aile
•
se vide sans ,e[fuLt puis se déforme dans
AUX eR»LEN'T
l'envergure,
prise
du-vol sens
Intervention
-_
RECHERCHE PAFUICHUI'ALE
Mém,. phénornènc mats r,
•P
rise (lu vol plus progressive
AUX «In»- RAPIDE
APTITUDE A TOURNER
lianrabL
•
,
ac
-
c~lénation t-t virage proyressive
360'
MANOEUVRADI LITE
Pas d,
-
sort i e du donm i nc de vol
RING OVER
Reste homoy~~nc
•
_
f
cils a .:ndencer
F'ERME'rURE ASYME'l'RIQUE
[louvfrttirc franche rte générant pas d'autre fermeture
une sttBpeutc haute .i '-t arrachée de son point
d'ancrage
FERME'l'UF1E ASYMETRIQrJE
Trds forte tr'ndanr_
•
e
à la rouverture par le travail dis
MAINTENUE
stabrlu, tofnCin„ rap)de,
VRILLE
Abat.Lée peu ma,tp,'e, anu,cce da Ceuneture. petit
rreque de cravate qui sortdne toute teste ptlotable
DECROCHAGE ASYf4ETRIQUE
Abattée P?u nntquée retour au vol apontar,ément
FERMETURE SYMETRIQUE
ilouverture f?ar 1s cent.rc puis les boute d'aile avec
un peu d'ab rn~ éçrie
360
°
ENGAGES "
Accélération importante mais progressive, retour au
vol spontanément
E
Î
A
Q
â
a-.
O ¢r
u
ts,
U
C
O
L
t
C
Y
.~
s
V
.
C
w
U -
Y
U
L
M
V
e

Established in 1974, APCO Aviation designs, manufactures and
markets original products in the fields of Paragliding, Hang
Gliding and Ultralight Aircraft, including Emergency Systems
and a wide range of accessories. APCO'S products are marketed
i
n 40 countries worldwide and is at the cutting edge of sport
aviation technology.
APCOS Paragliders hold the following FAI Certified
World Records.
Worlds' Iongest Cross Country Flight (Open Distance Record) - Alex Louw.
Worlds' longest Flight (to a Declared Goal) - Chris Muller
Worlds' Record Height Gain - Sean Dougherty
World 25 km Triangle Record - Speed Run - Eric Oddy
World Record Distance to a Turning Point - Willi Muller
World Record to Goal - Alex Louw
viaAtki
n
Lt
Setting Future Standards
MAIL: P.0.B.
2124, HOLON 58121. ISRAEL
FACTORY: 7.. CHALAMISH ST.. CAESAREA INDUSTRIAL PARK, 38900 ISRAEL
TEL: + 972 - 6 - 6273727 Fax: + 972 - 6 - 6273728
Email: [email protected]
Table of contents
Other APCO Aviation Aircraft manuals
Popular Aircraft manuals by other brands

DUOTONE
DUOTONE CLICK BAR user manual

Piper
Piper Cheyenne IIIA Airplane Maintenance Manual

DAVINCI GLIDERS
DAVINCI GLIDERS JAZZ 21 manual

Cessna
Cessna Skywagon 185 owner's manual

Horizon Hobby
Horizon Hobby E-FLITE Slow Ultra Stick 1.2m instruction manual

Evektor
Evektor EV-97 EuroStar SL Microlight Pilot operating handbook