2
System Guide........................................................................................................ 4
Precaution in Use ..................................................................................................................... 4
Product Guide .......................................................................................................................... 4
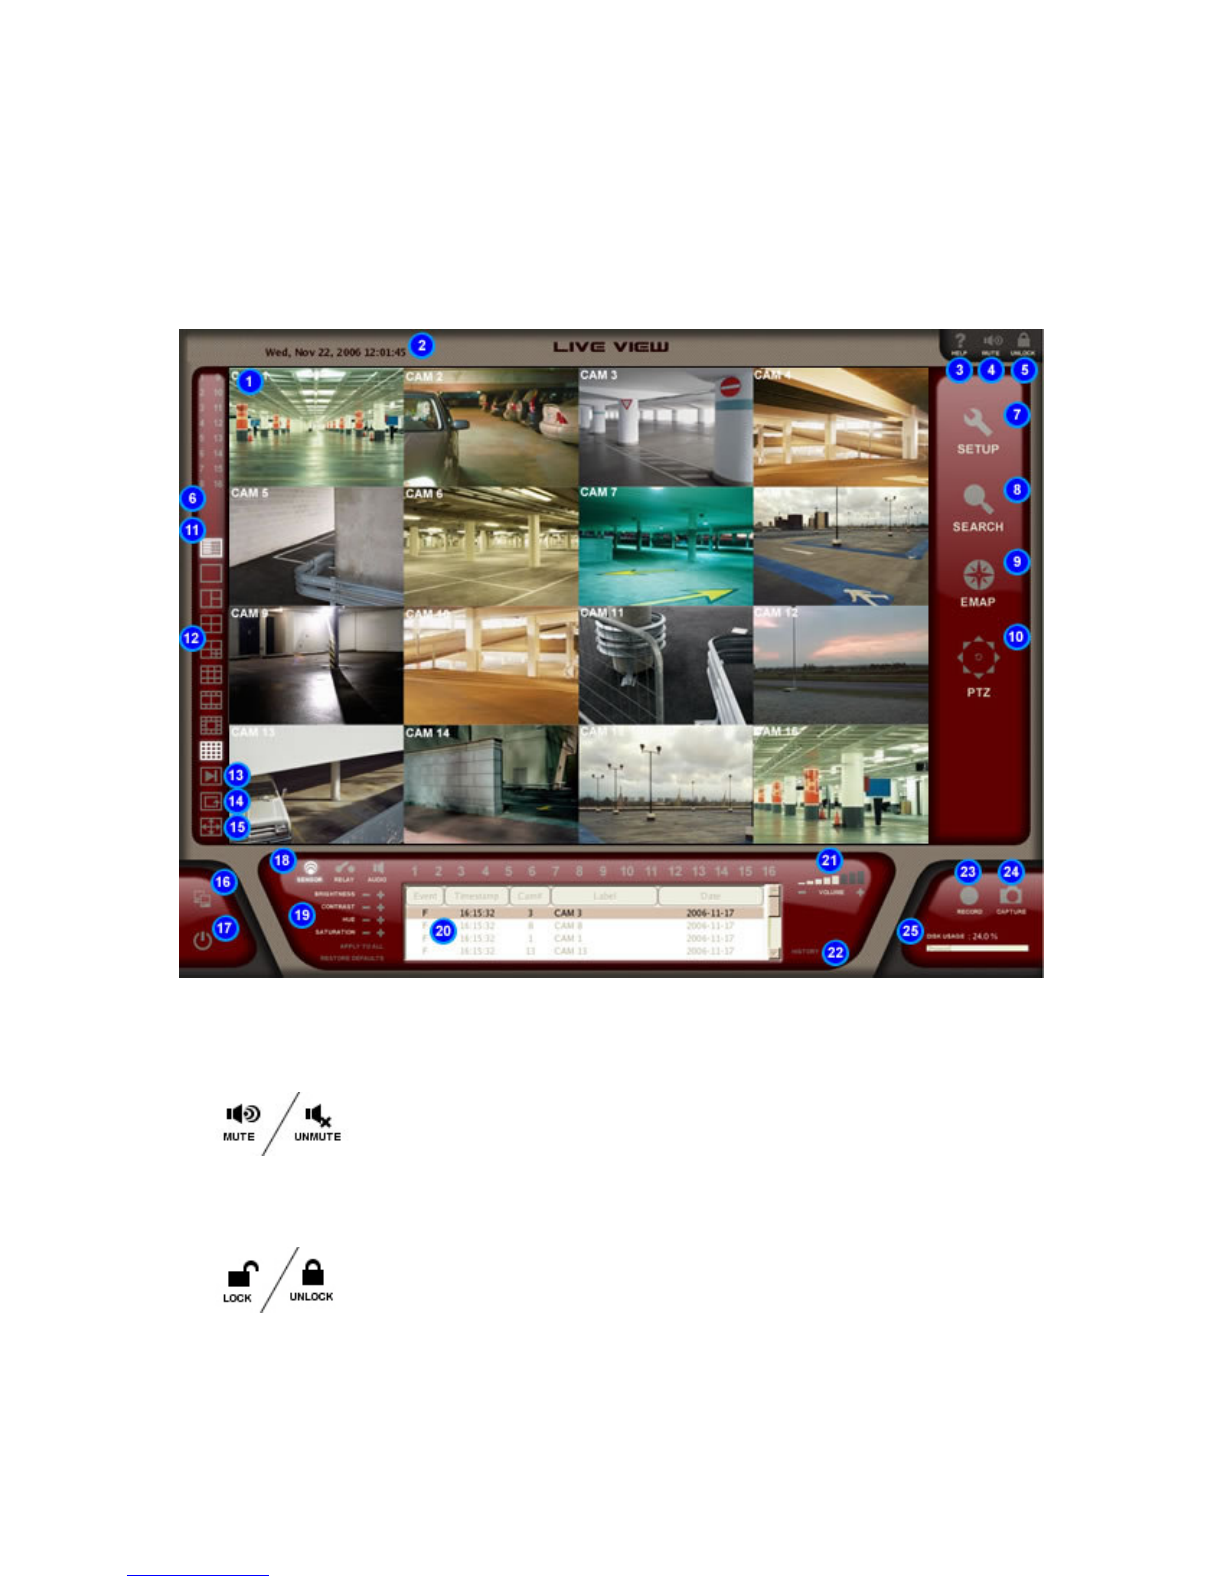
Live View...................................................................................................................... 5
Server Login ............................................................................................................................. 7
Power Off.................................................................................................................................. 7
On-Screen Display (OSD) ........................................................................................................ 8
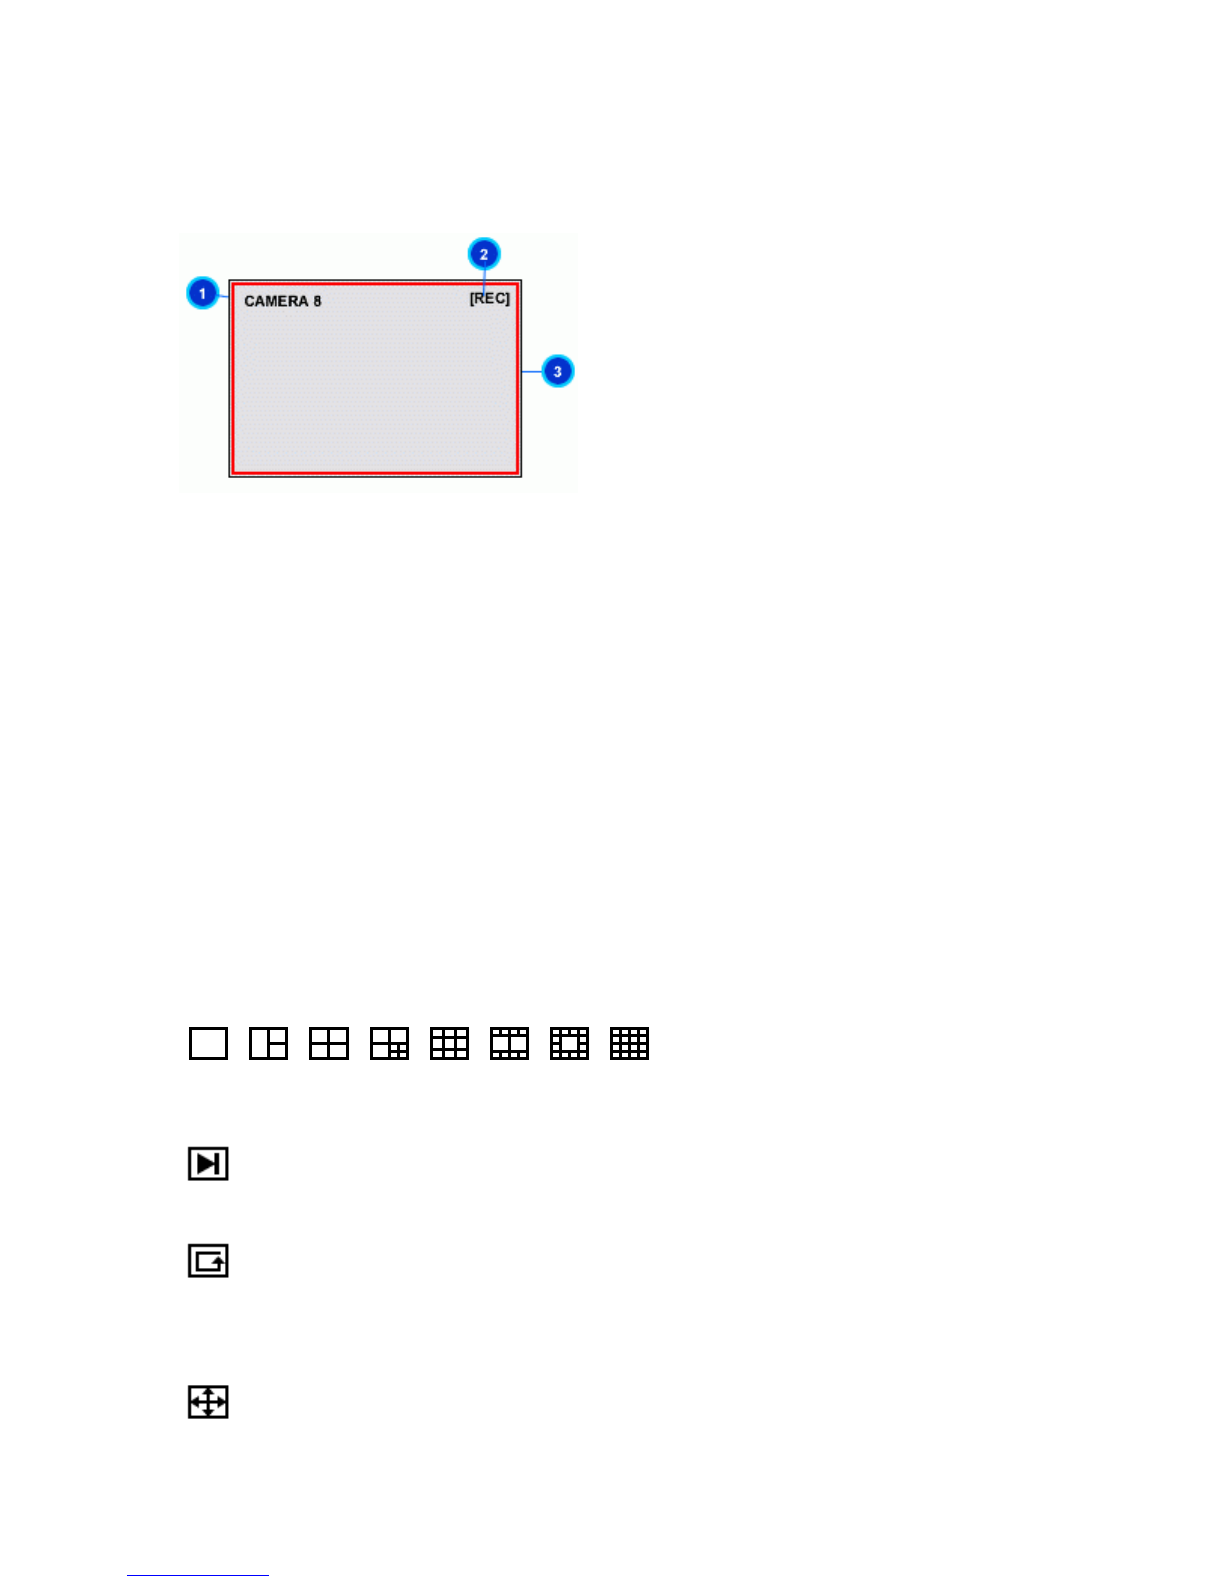
View Screen ............................................................................................................................. 8
Digital Zoom ............................................................................................................................. 9
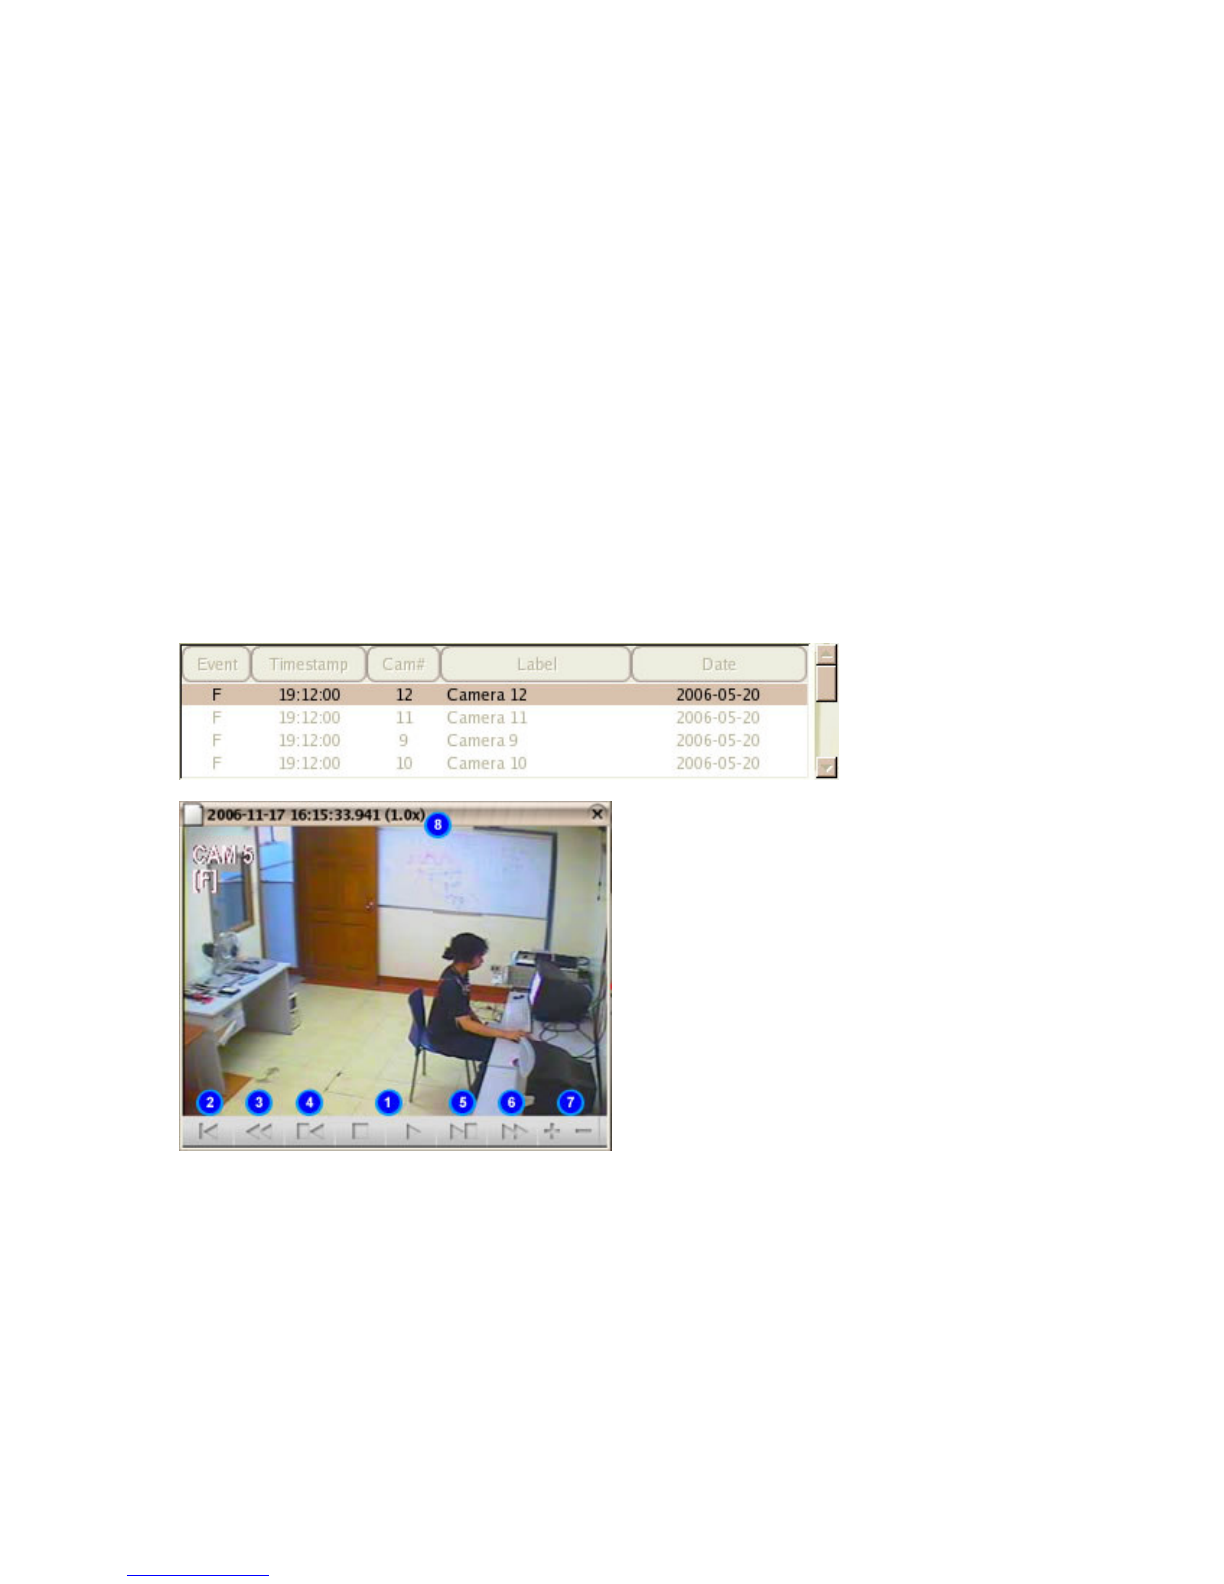
Video Event Log ....................................................................................................................... 9
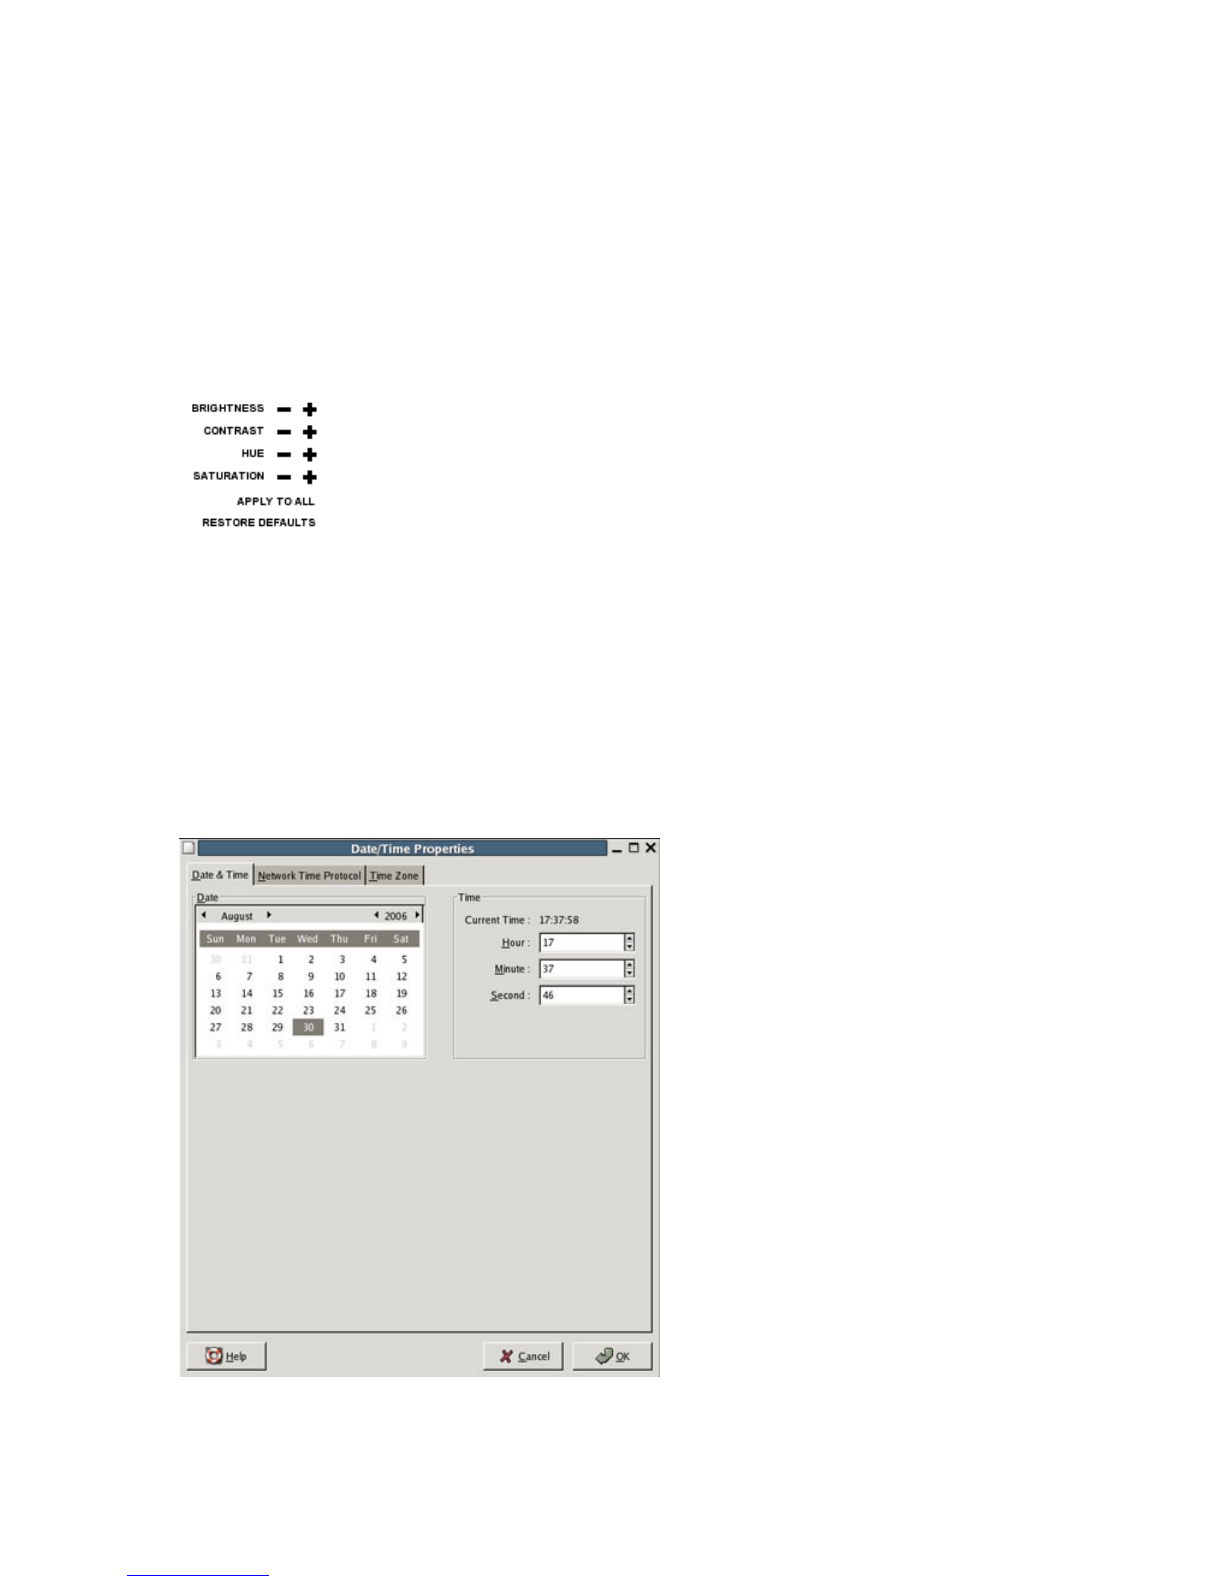
Image Control......................................................................................................................... 10
Date and Time........................................................................................................................ 10
Remote Connection................................................................................................................ 11
Screen Capture ...................................................................................................................... 11
Sensors .................................................................................................................................. 12
Relays..................................................................................................................................... 12
Audio ...................................................................................................................................... 12
Forced Recording................................................................................................................... 13
Disk Usage ............................................................................................................................. 13
Deinterlace ............................................................................................................................. 14
PTZ Function........................................................................................................ 15
Presets ................................................................................................................................... 16
Pattern Tracking ..................................................................................................................... 17
Group Run.............................................................................................................................. 19
Search and Playback............................................................................... 21
Backup and Restore.................................................................................. 25
Browse Snapshots....................................................................................... 30
E-map.............................................................................................................................. 31
Web View................................................................................................................... 32
Mobile View............................................................................................................ 34
Remote View........................................................................................................ 35
Client Login............................................................................................................................. 37
DVR Connection..................................................................................................................... 38
Remote Client OSD................................................................................................................ 39
View Screen ........................................................................................................................... 39
Digital Zoom ........................................................................................................................... 40
Video Event Log ..................................................................................................................... 40
Image Control......................................................................................................................... 41
Date and Time........................................................................................................................ 41
Screen Capture ...................................................................................................................... 42
Forced Recording................................................................................................................... 42
Sensors .................................................................................................................................. 43
Relays..................................................................................................................................... 43
Audio ...................................................................................................................................... 43
PTZ Function........................................................................................................ 44