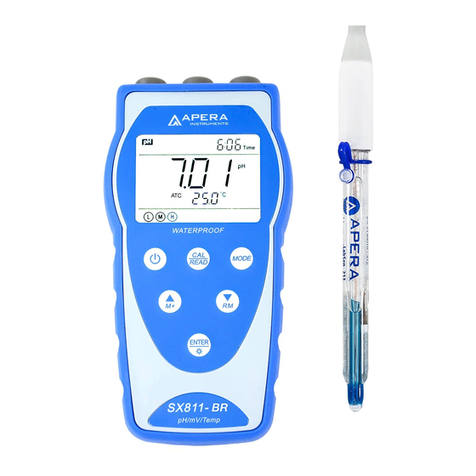
Apera SX811-SS User manual

SX811-SS
Portable pH Meter for Food Testing
Instruction Manual
APERA INSTRUMENTS, LLC
www.aperainst.com
V2.1

1Brief Introduction ............................................................................................................- 1 -
1.1 Features............................................................................................................................... - 1 -
1.2 Features of the LabSen 753 Spear pH Electrode..................................................................... - 1 -
1.3 Proper use and maintenance of the LabSen 753 Electrode..................................................... - 1 -
2Technical Specifications....................................................................................................- 2 -
2.1 Instrument Technical Specs................................................................................................... - 2 -
2.2 Others ................................................................................................................................. - 2 -
2.3 Electrode Technical Specs ..................................................................................................... - 2 -
3Instrument Description ....................................................................................................- 3 -
3.1 LCD Display .......................................................................................................................... - 3 -
3.2 Keypad ................................................................................................................................ - 4 -
3.3 Display mode ....................................................................................................................... - 5 -
3.4 Data storage, recall, and delete............................................................................................. - 5 -
4pH Measurement.............................................................................................................- 6 -
4.1 Information regarding pH Calibration.................................................................................... - 6 -
4.2 pH Calibration (use 3-point, USA Standard as an example)..................................................... - 9 -
4.3 Customized Calibration....................................................................................................... - 10 -
4.4 Sample test........................................................................................................................ - 10 -
5mV measurement ..........................................................................................................- 12 -
5.1 ORP measurement ............................................................................................................. - 12 -
5.2 Notes of ORP measurement ............................................................................................... - 12 -
6Parameter Setup............................................................................................................- 13 -
6.1 Main menu ........................................................................................................................ - 13 -
6.2 Submenu ........................................................................................................................... - 13 -
6.3 Submenu of pH parameter setup (press or key to switch) ....................................... - 14 -
6.4 Submenu of basic parameter setup (press key or key to switch).............................. - 15 -
7USB Communication ......................................................................................................- 16 -
7.1 System Requirement .......................................................................................................... - 16 -
7.2Software Interface ............................................................................................................. - 16 -
7.3 Load software .................................................................................................................... - 17 -
7.4 Automatic connection port................................................................................................. - 17 -
7.5 Run software ..................................................................................................................... - 17 -
7.6 Storage during operation.................................................................................................... - 17 -
7.7 Data processing.................................................................................................................. - 18 -
8What’s in the box...........................................................................................................- 18 -
9Warranty .......................................................................................................................- 18 -
10 Appendix.................................................................................................................... - 19 -
10.1 Appendix I: Parameter setup and factory default setup.................................................... - 19 -
10.2 Appendix II: Abbreviation glossary ............................................................................... - 20 -
10.3 Appendix III: Self-diagnosis information ....................................................................... - 20 -
11 Recommended pH Electrodes for Specific Applications................................................- 21 -

- 1 -
1 Brief Introduction
Thank you for purchasing the Apera Instruments SX811-SS portable food pH meter.
This device is an outstanding combination of advanced electrical, sensor technology and software design.
The meter is equipped with LabSen753 spear pH electrode, suitable for testing meat, bread, fruit, and
dairy products such as cheese, yogurt and other solid or semi-solid food sample’s pH value. It could also
be used for testing soil and regular aqueous solutions.
1.1 Features
•This microprocessor-based meter features automatic calibration, automatic temperature
compensation (ATC), menu set-up, calibration reminder, calibration date checking, automatic
powe-off and low-battery warning.
•GLP data management,clock display, manual storage and automatic timing storage, USB port
and power outage data protection, your data is safe even with a dead battery.
•Advanced digital processing technology improvs meter responding time and accuracy. There are
reading stability display mode and automatic lock-up display mode.
•IP57 waterproof, operable under extreme conditons. Powered by 3 AA batteries or USB
connection to other power source. Solid and durable case,accessories are included.
•1-3 points automatic calibration, calibration guide and self diagnose.
•Automatically recongnize pH standard buffer solutions.
1.2 Features of the LabSen 753 Spear pH Electrode
Swiss pH sensor technology
Food grade stainless steel housing, solid and durable
Using solid electrolyte as reference solution, it does not contanminate test samples, suitable for
samples that are rich in fat and proteins.
1.3 Proper use and maintenance of the LabSen 753 Electrode
a) After each test, the electrode must be rinsed thoroughly with distilled water to prevent
contamination. If the contaminents (such as grease or stains) cannot be rinsed off easily, users
can use a soft brush with soap water to clean them off.
b) This electrode needs to be stored in the Polymer solution when not in use. Do not store the
electrode in dry environment. The Polymer solution (50ml) is provided with the meter kit.
Replace the polymer solution in the probe cap if contaminated.
c) pH electrodes age and gradually lose accuracy over time. We recommend replacing the aged
electrode with a new one after 1-year of regular use to ensure the best accuracy.
d) To prevent damaging the electrode, please bore a hole (with a knife) in hard samples and then
insert the electrode into the hole for testing.
e) To prevent rusting, please do not scratch the stainless-steel casing of the electrode with sharp
object or sand paper.

- 2 -
2 Technical Specifications
2.1 Instrument Technical Specs
Technical Specs
pH
Range
-2.00 to 19.99 pH
Resolution
0.01/0.1 pH
Accuracy
±0.01 pH ±1 digit
Temperature
Compensation
0 to 100 ˚C (Auto or Manual)
mV
Range
-1999 mV - 0 - 1999 mV
Resolution
- 200 mV - 0 - 200 mV: 0.1 mV; Remaining: 1 mV
Accuracy
±0.1% F.S ±1 digit
Temp.
Range
0 to 100˚C (32 to 212˚F)
Resolution
0.1˚C
Accuracy
±0.5˚C ±1 digit
2.2 Others
Data Storage
500 groups
Storage
Content
Numbering, date, time, measurement, unit, temperature
Output
USB
Power
AA Batteries * 3 / DC5V (USB port)
IP Ranking
IP57 dust-proof and waterproof
Dimensions&
Weight
Meter: (88×170×33 ) mm/ 313g With case:(360×270×76) mm/ 1.6kg
2.3 Electrode Technical Specs
Housing Material
Food grade stainless steel
Temperature sensor
Yes
Junction
Single Junction Ceramic
Reference Electrode
Long-Life Reference System
Electrolyte
Polymer
Shape of glass membrane
Spear
Range
0 to 14 pH
Temperature Range
0 to 80˚C (32 to 176˚F)
Connector
BNC and RCA

- 3 -
3 Instrument Description
3.1 LCD Display
(1) — Measurement mode icons
(2) — Measurement value
(3) — Timing storage icon. When this icon appears, the meter is in the automatic storage mode
(4) — Date and time display value, and prompts of special display mode
(5) — Units of Date and time
(6) — Units of measurement
(7) — Temperature units (°C and °F)
(8) — Units of pH and conductivity calibration value
(9) — pH and conductivity calibration value, the numbering for storage and recall, and prompts of
special display mode
(10) — Storage and recall icons
M+ — Measurement to be stored icon, RM — Reading to be recalled icon
(11) — Temperature value and prompts of special display mode
(12) — Automatic reading lock-up icon
(13) — Temperature compensation icons
ATC — automatic temperature compensation, MTC — manual temperature compensation
(14) — Calibration guide icon
(15) — Stability icon of readings
(16) — USB icon,when this icon appears, the meter connects the computer
(17) — Low battery icon, when this icon appears, please renew the battery
Diagram-1

- 4 -
3.2 Keypad
3.2.1. Keypad operations
Short press ----- <1.5 seconds, Long press ----- >1.5 seconds.
3.2.2. Turn on the meter
Press to turn on the meter: LCD full display → display the measurement mode (backlight for one
minute).
3.2.3. Turn off the meter
Only in the measurement mode, press to turn off the meter.
Note: In the calibration mode or the parameter setup mode, pressing is invalid. Please
press key to return to the measurement mode, then press to turn off the meter.
Table – 1 Keypad operations and descriptions
Keypad
Operations
Descriptions
Short press
Press this key to turn on or turn off the meter.
Short press
Select measurement parameters:
pH meter: →
Long press
In measurement mode, press this key to enter main menu.
Short press
In measurement mode, press this key to enter in calibration
mode
In recall mode (RM), press this key to return to measurement
mode
Cancel any operation to return to measurement mode.
Short press
In measurement mode, press this key to turn on or turn off
backlight
In calibration mode, press this key to conduct calibration
In main menu, press this key to enter submenu
In submenu, press this key to enter parameter set-up
mode
In parameter set-up mode, press this key to confirm parameters.
Diagram-2

- 5 -
Long press
In pH measurement mode, press and hold this key to change the
resolution repeatedly: 0.01→ 0.1pH
Short/
long press
In the mode of manual temperature compensation (MTC), when press
and hold this key, the temperature value flashes, then press this key to
change the temperature value, and press to confirm
In measurement mode, press to store the measuring value,
press to recall the stored measuring value
In recall mode (RM), short press this key to change the
storage numberings, press and hold this key to change the number
quickly
In the main menu and submenu mode, press this key to change the
numbering of the main menu and the submenu
In the parameter set-up mode, press this key to select parameters.
3.3 Display mode
3.3.1 Reading stability display mode
When the measuring value is stable, smiley icon appears on LCD, see
Diagram – 3. If icon does not appear or flash, please do not get the
reading value or make calibration until the measuring value is stable.
3.3.2 Automatic lock-up display mode
Select On from parameter P4.6 to turn on automatic lock-up display function.
When the reading value stabilizes more than 10 seconds, the meter locks the
measuring value automatically and displays HOLD icon, see Diagram – 4.
In the HOLD mode, press to release lock-up.
3.4 Data storage, recall, and delete
3.4.1 Manual storage
When the measurement is stable, press key, the meter displays
M+ icon and storage serial number on LCD, storing measuring information,
see Diagram – 5: the meter stores the first group of the measuring value.
3.4.2 Automatic timing storage
Set the storage timing (eg. 3 minutes) from parameter P4.1,
icon appears on LCD and the meter enters into the timing storage
mode. When press key, icon flashes and the first measuring value
is stored. After 3 minutes, the 2nd measuring value is stored. See
Diagram – 6: the meter stores automatically eight measuring values.
When press key, icon stops flashing and the meter stops
automatic storage. In automatic storage mode, manual storage does
Diagram - 3
Diagram - 5
Diagram - 4
Diagram - 6

- 6 -
not work. Set time 0 from parameter P4.1 to exit from the automatic storage mode.
3.4.3 Recall stored data
In the measurement mode, press key to recall the last stored measuring
value. See Diagram – 7: display RM icon and storage serial number. Continue
pressing key and key to recall successively the stored measuring
value. Press and hold key and key to recall quickly the stored
measuring value.
3.4.4 Clear stored data
Select YES from parameter P4.5 to clear all stored value, refer to the Section 6.4.
4 pH Measurement
4.1 Information regarding pH Calibration
4.1.1 Things needed in addition to what’s included in the kit
A clean cup, distilled water (8-16oz), and tissue papers for rinsing and drying the probe.
4.1.2 Electrode Connectors
The pH electrode has two connectors: the BNC connector connects the pH probe; the RCA connector connects
the temperature sensor. Plug these two connectors into ‘pH/mV” and “TEMP” sockets. Please note not to pull
the cables in case of poor contact. Please keep the connectors clean and dry. Refer to section 1.3 regarding
how to properly maintain the pH electrode.
4.1.3 Use the Electrode
Screw off the probe cap, and put it aside (do not dump or spill the polymer solution). Prepare a cup of distilled
water, and rinse the electrode in it for a few seconds. Gently shake the probe to remove excess water, and dry
it with clean tissue paper (DO NOT rub or wipe the probe, just use paper to dap off excess water). Gently insert
the probe into the test sample (if sample is too hard, bore a hole in the sample and insert the probe in the
hole). Wait for the stable measurement (a smiley face appears and stays) and then record the readings. When
test is finished, rinse the probe with distilled water, and place the electrode in the probe cap with polyer solution
and tighten the cap so as to keep the sensitivity of the pH sensor.
4.1.4 Standard Buffer Solution
The meter adopts 3 series of standard buffer solutions: USA, CH, and NIST. They can be selected in
parameter P1.1 (see Section 6.3) as showed in Table-2 (default standard series is USA)
Diagram - 7

- 7 -
Table-2
Calibration icon
pH standard buffer series
USA
CH
NIST
3-Point
calibration
1.68 or 4.00 pH
1.68 or 4.00 pH
1.68 or 4.01 pH
7.00 pH
6.86 pH
6.86 pH
10.01 pH
9.18 pH
9.18 pH
4.1.5 3-Point Calibration
The meter can adopt 1 to 3 points’ calibration. The 1st point must be using 7.00 pH (or 6.86 pH) buffer
solution, and then choose other buffers to do 2nd point and 3rd point. Please refer to Table-3 for details. In
the process of calibration, the slope of acidity range and alkalinity range will be displayed.
Table-3 Calibration Mode
CH
USA
NIS
Calibration
icon
When to adopt
1-Point
Calibration
6.86 pH
7.00 pH
6.86 pH
accuracy≤ ±0.1
pH
2-Point
Calibration
6.86 pH and
4.00/1.68 pH
7.00 pH and
4.00/1.68 pH
6.86 pH and
4.01/1.68 pH
0 to 7.00 pH
6.86 pH and 9.18
pH
7.00 pH and 10.01 pH
6.86 pH and 9.18 pH
7.00 to 14.00
pH
3-Point
Calibration
6.86pH, 4.00/
1.68 pH, and
9.18 pH
7.00pH, 4.00/
1.68 pH and 10.01 pH
6.86pH, 4.01/
1.68pH, 9.18 pH
0 to 14.00 pH
4.1.6 How often to calibrate
The frequency that you need to calibrate your meter depends on the tested samples, performace of
electrodes, and the requirement of the accuracy. For high-accuracy meaustements (≤ ±0.02pH), the
meter should be calibrated before test every time; For ordinary-accuracy measurements (≥±0.1pH), once
calibrated, the meter can be used for about a week or longer. In the following cases, the meter must be
re-calibrated before testing:
a) The electrode hasn’t been used for a long time or a new electrode is connected.
b) After measuring strong acid (pH<2) or strong base (pH>12) solutions.
c) After measuring fluoride-containing solution and strong organic solution
d) There is a significant difference between the temperature of the test sample and the temperature of
the buffer solution that is used in the last calibration.

- 8 -
4.1.7 Calibration reminder
Preset the interval between calibrations (starting from the time when you set
it), and then the meter will remind you to calibrate at the end of that interval.
For detailes, please see P1.2 (6.3). When the preset time is reached, Er6 icon
will be displayed at the lower right corner of the LCD (as showed in graph-8).
At the time, the meter can still be operated. It is just reminding you to do
calibration in order to ensure its accuracy. After calibration, the Er6 icon will disappear;
To make it disappear, users can also choose NO in P1.2 in parameter setting.
4.1.8 Check calibration time
In this mode, users can see the date and time of last calibration so as to help them determine if there is
need to calibrate. For details, please see parameter setting P1.3 (6.3)
4.1.9 Change temperature manually
When temperature electrode is not connected, long press or , the temperature will flash, and
then short press or long press or to change temperature, press to confirm.
Diagram-8

- 9 -
4.2 pH Calibration (use 3-point, USA Standard as an
example)
1) Press to enter calibration mode. CAL1 icon will flash in the upper
right corner of the LCD. 7.00 pH will flash in the lower right corner of the LCD,
reminding you to use pH 7.00 buffer to conduct 1st point of calibration.
2) Use distilled water to rinse off electrode and then dry it. Dip it into pH 7.00
buffer solution, stir gently and let it stand still and wait for the reading to
become stable. In the lower right corner of LCD, the process of auto
recognizing the buffer solution will be displayed. Pressing before the
buffer is recognized will generate Er2 (please refer to table 6).
3) When the meter locks 7.00 pH, stable icon displays on LCD. Press
key to calibrate the meter. End icon appears after calibration is done.
The 1st point calibration is finished. In the meanwhile, CAL2 will flash at the
upper right corner, and 4.00 pH & 10.01 pH will flash alternately at the bottom
right, indicating using pH4.00 or pH10.01 buffer solution
to make the 2nd point calibration.
4) Take out pH electrode, rinse it in distilled water, dry it, and dip
it into pH 4.00 buffer solution. Stir the solution gently and let stand still in the
buffer solution until a stable reading is reached. The meter’s display will show
the recognition process of calibration buffer solution at the lower right
of LCD. When the meter recognizes 4.00 pH, stable icon displays on
LCD.
Press key to calibrate the meter. End icon and electrode slope of acidity
range display after calibration is done. In the meanwhile, CL3 will flash at the
upper right corner of the LCD, and 10.01 pH will flash at the lower right,
indicating using pH10.01 buffer solution to make the 3rd point calibration.
5) Take out pH electrode, rinse it in distilled water, dry it, and dip
it into pH 10.01 buffer solution. Stir the solution gently and let it stand still in the
buffer solution until a stable reading is reached. The meter’s display will show
recognition process of calibration buffer solution at the bottom right of
LCD. When the meter recognizes 10.01 pH, stable icon displays on LCD. Press
key to calibrate the meter. End icon and electrode slope of alkalinity range
display after calibration is done. The meter returns to the measurement mode, displays stable measuring
value and calibration guide icons. Please see Diagram–11 for the above calibration process.
Diagram - 11

- 10 -
6) During the calibration process, press key to exit from the calibration
mode. The meter can perform one-point, two-point and three-point calibration.
Calibration guide icons appear on LCD.
4.3 Customized Calibration
(take 1.60pH and 6.50pH calibration solution as an example)
1) Select CUS from parameter P1.1 (please refer to Section 6.3 for customer-defined solution). The meter
enters into Customer-defined calibration mode. When press key, the meter’s display shows a
blinking CAL1 icon at the top right of LCD, indicating the meter enters into the 1st point customer-defined
calibration.
2) Rinse pH electrode in distilled water, allow it to dry, and submerge it in pH1.60 buffer solution. Stir the
solution briefly and allow it to stay in the buffer solution until a stable reading is reached. When LCD
displays the stable measuring value and icon, press key and the measuring value flashes.
Press key or key to adjust the measuring value to 1.60, then press key to calibrate the
meter. After calibration is done, LCD at the top right shows blinking CAL2 icon, indicating the meter enters
into the 2nd point customer-defined calibration.
3) Rinse pH electrode in distilled water, allow it to dry, and submerge it in pH 6.50 buffer solution. Stir the
solution briefly and allow it to stay in the buffer solution until a stable reading is reached. When LCD
displays the stable measuring value and icon, press key and the measuring value flashes.
Press key or key to adjust the measurement value to 6.50, then press key to calibrate the
meter. After calibration is done, the meter returns to the measurement mode. For customer-defined
calibration, LCD does not show electrode calibration guide icons.
Note: For manual temperature compensation (MTC), when press key, the temperature value
flashes. Press key or key to adjust the temperature value, and then press key, pH
measuring value flashes.
4) Notes
(a) The meter can perform 1-2 point customer-defined calibration. When the 1st point calibration is done,
press key, the meter exits from calibration mode. This is one-point customer-defined calibration.
When the 2nd point calibration is done, the meter returns to the measurement mode automatically.
(b) The value set in “Customer-defined” is at a fixed temperature. The meter is suggested to perform
calibration and measurement at the same temperature to avoid significant errors. The meter cannot
recognize customer-defined calibration solution automatically.
4.4 Sample test
1) Rinse pH electrode in distilled water, dry it, and dip it in sample solution. Stir the solution gently and let
it stand still in the sample solution until the stable value and icon appears on LCD, get the reading
which is pH value of sample solution, please refer to Diagram-12 for calibration and measurement
process of pH meter.

- 11 -
Diagram – 12 Calibration and measurement process of pH meter
2) pH measurement of purified water
The meter is able to set up pH measurement mode of purified water with
temperature compensation for pH value from parameter setup P1.5
(please see Section 6.3). “PU-1” icon displays at the right top of LCD, please
refer to Diagram – 13.
3) pH measurement of purified water mixed with ammonia
The meter is able to set up pH measurement mode of purified water mixed
With ammonia with temperature compensation for pH value from parameter
setup P1.6 (please see Section 6.3). “PU-2” icon displays at the right top of LCD,
please refer to Diagram – 14.
Note: In parameter setup, either “PU-1” or “PU-2” measurement mode
can be selected, but both can not work at the same time.
4) Self-diagnosis information
During the process of calibration and measurement, the meter has self-diagnosis functions, indicating the
relative information as below, please refer to chart – 6.
Chart – 6 Self-diagnosis information of pH measurement mode
Display
Icons
Contents
Checking
Wrong pH buffer solution or the buffer
solution out of range.
1.Check whether pH buffer solution is correct.
2.Check whether the meter connects the electrode
properly.
3.Check whether the electrode is damaged.
Press key when measuring value
is not stable during calibration.
Press key when icon appears.
During calibration, the measuring value
is not stable for ≥3min.
1.Check if the electrode is damaged.
2.The pH electrode is aged. Replace a new one.
Diagram - 13
Diagram - 14
Press to turn
on the meter.
Press key to
enter into the
calibration mode.
Submerge the
electrode in pH7.00
solution, press
key when icon
appears.
After the 1st point
calibration is done,
press key to
enter into the
measurement mode.
Sample
Test
1 st point
calibration
2 n d
point
calibration
3 r d
point
calibration
After the 2nd point
calibration is done,
press key to
enter into the
measurement mode.
After the 3rd point
calibration is done,
the meter enters into
the measurement
mode automatically.
Submerge the
electrode in pH4.00
solution, press
key when icon
appears.
Submerge the
electrode in
pH10.01
solution,press
key when icon
appears.

- 12 -
pH electrode zero electric potential
out of range(<-60mV or >60mV)
1.Check whether pH buffer solution is correct.
2. Check if electrode is damaged.
3.The pH electrode is aged. Replace a new one.
pH electrode’s slope is out of range
(<85% or >110%)
Enter in pre-set due calibration to
remind calibration
Press key to perform calibration or cancel due
calibration setup from parameter P1.2.
5) pH isothermal principle
According to the pH isothermal measurement principle, the closer the test sample’s temperature is to the
calibration solution’s, the higher the accuracy of the measurement. This principle is recommended to follow
when conducting tests for the best result. Example: If users were to test samples at 150˚F, we recommend
warming up the calibration solutions to the same temperature before performing calibrations in order to get
the most accurate readings.
*The electrode can only test samples that are below 176˚F. Testing higher-temperature samples may
cause permanent damage to the electrode.
6) Factory default setting
For factory default setting, please refer to parameter P1.6 (Section 6.3). Per parameter P1.6, all
calibration data is deleted and the meter restores to the theory value (zero electric potential of pH is 7.00,
the slope is 100%). Some functions restore to the original value (refer to Appendix-I). When calibration
or measurement fails, please restore the meter to factory default setting and then perform re-calibration
or measurement. Please note once set the factory default, all the data deleted will not be retrievable.
5 mV measurement
5.1 ORP measurement
Press key, and switch the meter to mV measurement mode. Connect ORP electrode (need purchase
it separately) and dip it in sample solution, stir the solution briefly and allow it to stay in the solution until
icon appears and get the reading which is ORP value.
ORP means Oxidation Reduction Potential. The unit is mV.
5.2 Notes of ORP measurement
1) ORP measurement does not require calibration. When the user is not sure about ORP electrode quality
or measuring value, use ORP standard solution to test mV value and see whether ORP electrode or
meter works properly.
2) Clean and activate ORP electrode
After the electrode has been used over a long period of time, the platinum surface will get polluted which
causes inaccurate measurement and slow response. Please refer to the following methods to clean and
activate ORP electrode:
(a) For inorganic pollutant, submerge the electrode in 0.1mol/L dilute hydrochloric acid for 30 minutes, then
wash it in distilled water, then submerge it in the soaking solution for 6 hours.

- 13 -
(b) For organic or lipid pollutant, clean the platinum surface with detergent, then wash it in distilled water, then
submerge it in the soaking solution for 6 hours.
(c) For heavily polluted platinum surface on which there is oxidation film, polish the platinum surface with
toothpaste, then wash it in distilled water, then submerge it in the soaking solution for 6 hours.
6 Parameter Setup
6.1 Main menu
In the measurement mode, press and hold key to enter in mode P1.0, then press or to switch
among main menu: P1.0→P2.0→P3.0→P4.0. Please refer to Diagram – 20.
P1.0: pH parameter setup menu,
P4.0: Basic parameter setup menu.
6.2 Submenu
1) In P1.0 mode, press key to enter in submenu P1.1 of pH parameter setup, then press
and key to switch among submenu: P1.1→P1.2→…→P1.6, refer to Diagram – 20.
2) In P4.0 mode, press key to enter in submenu P4.1 of basic parameter setup, then press
and key to switch among submenu: P4.1→P4.2→…→P4.8, refer to Diagram – 20
P1.1 Select pH standard solution series
P1.2 Set calibration due date
P1.3 Check date of last calibration
P1.4 Set pH measurement of purified water
P1.5 Set pH measurement of pure
water mixed with ammonia
P1.6 Restore to factory default setting
P4.1 Adjust timing storage time
P4.2 Select temperature unit
P4.3 Select backlight time
P4.4 Select auto. power-off time
P4.5 Clear stored value
P4.6 Set auto. lock-up function
P4.7 Adjust date
P4.8 Adjust time
Submenu of pH parameter setup
Submenu of basic parameter setup
Main menu of parameter setup
Diagram -20

- 14 -
6.3 Submenu of pH parameter setup (press or key to switch)
P1.1. – Select pH standard solution (USA-NIST-CUS-CH)
1. In P1.0 mode, press to enter in P1.1 mode, refer to the left diagram.
2. When press key,USA flashes,then press key, NIST flashes,etc.
When parameter flashes, press to make confirmation(USA – USA
series, NIS–NIST series, CUS–customer-defined, CH–Chinese series)
3. Press key to enter in P1.2 mode, or press key to return to the
measurement mode.
P1.2. – Set due calibration (NO – H00 – D00)
1. When press key, No flashes, then press key, H flashes, then
press key, D flashes.
2. When H flashes, press key, 00 flashes. Press key to adjust
hours (0-99 hours), press key to confirm. When D flashes, press
key, 00 flashes. Press key to adjust days (0-99 days), press
key to confirm. When No flashes, press to confirm.
3. After confirming parameter, press key to enter in P1.3 mode, or
press key to return to the measurement mode.
P1.3. – Check the time and date of the last calibration
1. The time and date of calibration displays alternately at right top of LCD
(Date display: Month – Day), the number in the LCD middle displays
Year (Year 2012).
2. Press key to enter in P1.4 mode, or press key to return to the
measurement mode.
P1.4. – Set pH measurement of distilled water (Off – On)
1. Press key, Off flashes, then press key, On flashes, when
parameter flashes, press key to confirm. Off–turn off temperature
compensation, On – turn on temperature compensation.
2. After confirming parameter, press key to enter in P1.5 mode, or
press key to return to the measurement mode.
P1.5. – Set pH measurement of distilled water with ammonia (Off –
On)
1. Press key, Off flashes, then press key, On flashes, when
parameter flashes, press key to confirm. Off–turn off temperature
compensation, On–turn on temperature compensation.
2. After confirming parameter, press key to enter in P1.6 mode, press
key to return to the measurement mode.
P1.6. – Restore to factory default setting (NO – Yes)
1. Press key, No flashes, then press key, Yes flashes. Press
key to confirm, the meter returns to the measurement mode. No – Not
restore to factory default setting, Yes – restore to factory default setting.
2. When do not select Yes, press key to return to the measurement
mode.

- 15 -
6.4 Submenu of basic parameter setup (press key or key to switch)
P4.1. – Adjust timing storage time
1. In mode P4.0, press key to enter in mode P4.1, refer to the left
diagram: “00:”: hours (0-99), “:00”: minutes (0-59).
2. Press key, “:00” flashes, then press key, “00:” flashes. When
the number flashes, press key and key to adjust time and
press key to confirm.
3. After confirming the parameter, press key to enter in P4.2 mode or
press key to return to the measurement mode.
P4.2. – Select temperature unit (°C—°F).
1. Press key, °C flashes, then press key, °F flashes. When the
parameter flashes, press key to confirm.
2. After confirming the parameter, press key to enter in P4.3 mode
or press key to return to the measurement mode.
P4.3. – Select backlight timing (1-2-3-On)
1. When press key, “1” flashes, then press key to select
blinking 2→3→On. When the parameter flashes, press key to
confirm. Select On to turn on the backlight, the time unit is minute.
2. After confirming the parameter, press key to enter in P4.4 mode
or press key to return to the measurement mode.
P4.4. – Select automatic power-off time (10-20-30-On)
1. Press key, “20” flashes, then press key to select blinking
30→On→10. When the parameter flashes, press key to confirm.
Select On to turn on the function, the unit is day.
2. After confirming the parameter, press key to enter in P4.5 mode or
press key to return to the measurement mode.
P4.5. – Clear all the stored value
1. Press key, “No” flashes, then press key “Yes” flashes. When
the parameter flashes, press key to confirm. No: not delete, Yes:
delete.
2. After confirming the parameter, press to enter in P4.6 mode or
press
key to return to the measurement mode.
P4.6. – Set automatic lock-up function
1. Press key, “Off” flashes, then press key, “On” flashes. When
the parameter flashes, press key to confirm. Off: not set, On: set
(the reading is automatically locked when stabilizes>10 seconds.)
2. After confirming the parameter, press key to enter in P4.7 mode
or press key to return to the measurement mode.

- 16 -
P4.7. – Adjust date
1. Press key, “Month” flashes, then press key, “Date” flashes,
then press key, “Year” flashes. When the number flashes, press
key or key to adjust date, then press key to confirm.
Date display: Month - Date
2. After confirming the parameter, press key to enter in P4.8 mode
or press key to return to the measurement mode.
P4.8. – Adjust time
1. Press key, “Hour” flashes, then press key, “Minute” flashes.
When the number flashes, press key and key to adjust time,
then press to confirm.
2. After confirming the parameter, press key to to return to the
measurement mode.
7 USB Communication
7.1 System Requirement
The meter uses “PC-Link” software with USB communication function. This software requires the
computer to meet such requirement: Personal computer that operates in Windows system and a CD-
ROM driver and a USB communication port (with Microsoft Excel installed).
7.2 Software Interface
Software interface: refer to Diagram-21.
Diagram -21

- 17 -
1 — Meter serial number
2 — Stored value display area
3 — Keys
Clear — press this key to clear the data
Download — press this key to download the data from the meter to the computer, pH, mV,
conductivity and dissolved oxygen are classified in the file.
Export — press this key to export the stored value to Microsoft Excel file
Exit — press this key, PC-Link program exits from the computer interface
7.3 Load software
Please follow the following steps to load PC-Link to the computer:
Open “PC-Link” file→double click “Setup” program → click “OK”→ click icons (refer to Diagram – 22) →
click “Continue”→ click “Confirm”.
7.4 Automatic connection port
Connect USB cable to the meter and the computer, open PC-Link program, program interface shows,
automatic connection is done after a few seconds. icon shows at the left bottom of LCD.
Note: for re-connection after turn-off, the computer can not recognize the software automatically
and please re-open the software interface.
Besides, this software only recognizes 1-16 port numbers. For other port numbers, please set in “device
manager” of the computer.
7.5 Run software
Upload the stored value
Press “Download” key, all the data stored in the meter is downloaded to the computer. pH and mV are
sorted in the program.
7.6 Storage during operation
During operation, press key to store or set timing storage. The measuring information is
downloaded to the computer through USB and will not be stored in the meter. The stored data during
operation is the same as the data shown on the meter.
Diagram -22

- 18 -
7.7 Data processing
Press “Export ” key to export the stored value to Microsoft Excel file and then analyze or print the stored
data.
8 What’s in the box
Contents
Quantity
1
SX811-SS Portable pH Meter
1
2
LabSen753 Spear pH/ATC Electrode,
1
3
pH standard buffer (4.00pH/7.00pH/10.01pH /50mL each)
One of each
4
Polymer Electrode Storage solution (50 ml)
1
5
PC-Link Software disk
1
6
USB Cable
1
7
Carrying Case
1
8
Manual
1
9 Warranty
We warrant this instrument to be free from defects in material and workmanship and agrees to repair or
replace free of charge, at option of APERA INSTRUMENTS, LLC, any malfunctioned or damaged product
attributable to responsibility of APERA INSTRUMENTS, LLC for a period of two years from the delivery
(a six-month limited warranty applies to probes). This warranty does not apply to defects resulting from
actions such as misuse (violation of the instructions in this manual or operations in the manner not
specified in this manual), improper maintenance, or unauthorized repairs. Warranty period is the time limit
to provide free service for the products purchased by customers, not the service life of the tester or probe.
Table of contents
Other Apera Measuring Instrument manuals

Apera
Apera LabSen 371 User manual

Apera
Apera DO850 User manual

Apera
Apera LabSen AI3102 User manual

Apera
Apera PC60-Z User manual

Apera
Apera LabSen 232 User manual

Apera
Apera EC60 User manual

Apera
Apera EC700 User manual

Apera
Apera PC60-Z User manual

Apera
Apera TN400 User manual

Apera
Apera 201DJ-C User manual