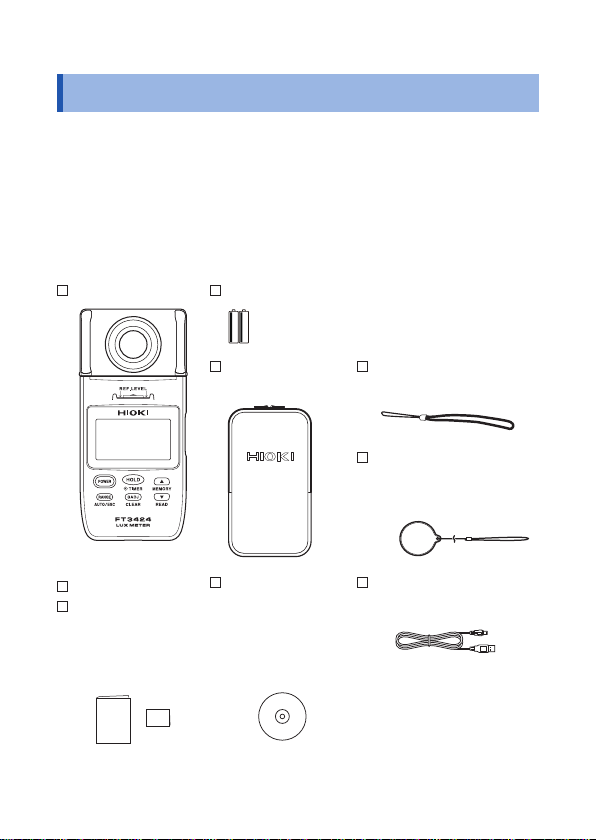
Hioki FT3424 User manual

FT3425
FT3424
Instruction Manual
LUX METER
Jan. 2018 Revised edition 4 FT3424A980-04
EN
99 Washington Street
Melrose, MA 02176
Phone 781-665-1400
Toll Free 1-800-517-8431
Visit us at www.TestEquipmentDepot.com


1
Introduction
Introduction
Thank you for purchasing the HIOKI FT3424, FT3425 Lux Meter.
To
obtain maximum performance from the product, please read this
manual rst, and keep it handy for future reference.
Only the FT3425 has the Bluetooth®communication function.
Using this function enables smart phones and tablets to view and
record measurement data.
Trademarks
•Bluetooth®is a registered trademark of BluetoothSIG, Inc.(USA).
The trademark is used by HIOKI E.E. CORPORATION under
license.
•Android and Google Play are trademarks of Google, Inc.
•IOS is a registered trademark of Cisco in the U.S. and other
countries.
•iPhone, iPad, iPad mini, iPad Pro, and iPod Touch are trademarks
of Apple Inc.
•The App Store is a service mark of Apple Inc.
1
Ind.Appx.
7
6
5
4
3
2

2
Verifying Package Contents
When you receive the instrument, inspect it carefully to ensure that
no damage occurred during shipping.
In particular, check the accessories, operation keys of the panel, and
connectors. If damage is evident, or if it fails to operate according to
the specications, contact your authorized Hioki distributor or reseller.
Check the package contents as follows.
FT3424 or FT3425 LR6 Alkaline battery × 2
Carrying case
(soft) Strap (for the instrument)
(p.26)
Sensor cap (with the
strap)
(p.29)
Instruction manual
Precautions
concerning use
of equipment that
emits radio waves
(FT3425 only)
CD* (USB driver,
dedicated computer
application
software, and
communications
specications)
USB cable
(Length: 0.9 m)
* The latest version can be downloaded from our web site.

3
Options (Sold Separately)
The following options are available for the instrument.
Contact your authorized Hioki distributor or reseller when ordering.
Connection cable
Use when positioning the sensor unit and display unit separately during use.
L9820 Connection Cable
(Length: 2 m)
Output cords
Required when using the instrument’s output functionality.
L9095 Output Cord
(Length: 1.5 m, for use with
BNC terminals)
L9094 Output Cord
(Length: 1.5 m, for use with
banana terminals)
L9096 Output Cord
(Length: 1.5 m, for use with
terminal blocks)
1
Ind.Appx.
7
6
5
4
3
2

4
Options (Sold Separately)
Carrying cases
Handy for storing the instrument with the L9820 Connection Cable, L9094/
L9095/L9096 Output Cord, and USB cable.
* L9820 Connection Cable
cannot be stored.
C0201 Carrying Case
(semi-hard) C0202 Carrying Case
(soft)
Measurement aid
Attach the sensor unit or instrument to this convenient cart to measure
illuminance on oor surfaces while standing. The cart can be easily moved
between measurement locations. In addition, a monopod can be attached to
keep height from the oor surface constant.
Model Z5023 Extension Cart

5
Safety Notes
Safety Notes
The instrument is designed to conform to IEC 61010 Safety
Standards, and has been thoroughly tested for safety prior to
shipment. However, using the instrument in a way not described in
this manual may negate the provided safety features.
Before using the instrument, be certain to carefully read the
following safety notes.
CAUTION
•Mishandling during use could lead to damage to
the instrument. Be certain that you understand the
instructions and precautions in the manual before use.
•Individuals using an electrical measuring instrument for the
rst time should be supervised by a technician who has
experience in electrical measurement.
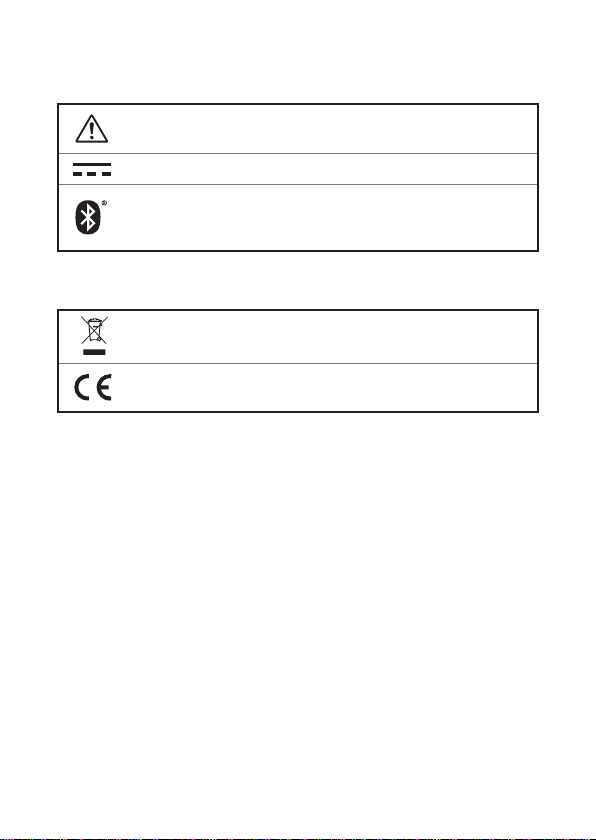
Notation
In this manual, the risk seriousness and the hazard levels are
classied as follows.
WARNING Indicates a potentially hazardous situation that may
result in death or serious injury to the operator.
CAUTION Indicates a potentially hazardous situation that may
result in minor or moderate injury to the operator or
damage to the instrument or malfunction.
IMPORTANT Indicates information related to the operation of the
instrument or maintenance tasks with which the
operators must be fully familiar.
Indicates the prohibited action.
Indicates the action which must be performed.
*Additional information is presented below.
1
Ind.Appx.
7
6
5
4
3
2

6
Safety Notes
Symbols afxed to the instrument
Indicates cautions and hazards. When the symbol is printed on the
instrument, refer to a corresponding topic in the Instruction Manual.
Indicates DC (Direct Current).
Bluetooth®is a registered trademark of BluetoothSIG, Inc.
(USA). The trademark is used by HIOKI E.E. CORPORATION
underlicense.
Symbols for various standards
Indicates the Waste Electrical and Electronic Equipment
Directive (WEEE Directive) in EU member states.
Indicates that the instrument conforms to regulations set out by
the EU Directive.

7
Safety Notes
Screen display
The screen of the instrument displays characters in the following
manner.
1 2 3 4 5 6 7 8 9 0
A B C D E F G H I J K L M N O P Q R S T U V W X Y Z
Different displays are used in the cases below.
Displays when power is shutdown (p.21)
Displays when the display unit and sensor unit are not
connected.
Accuracy
We dene measurement tolerances in terms of f.s. (full scale), rdg.
(reading) and dgt. (digit) values, with the following meanings:
f.s. (Maximum display value)
Indicates the maximum displayable value. This is usually the
name of the currently selected range.
rdg. (Reading value)
The value currently being measured and displayed on the
measuring instrument.
dgt. (Resolution)
The minimum display unit, indicating a minimum digit of 1.
1
Ind.Appx.
7
6
5
4
3
2

8
Usage Notes
Usage Notes
Follow these precautions to ensure safe operation and to obtain the
full benets of the various functions.
Before Use
Verify that the instrument operates normally to ensure that no
damage occurred during storage or shipping. If you nd any
damage, contact your authorized Hioki distributor or reseller.
Installation
For details on the operating temperature and humidity, see the
specications.(p. 64)
WARNING
Installing the instrument in inappropriate locations may
cause a malfunction of instrument or may give rise to
an accident. Avoid the following locations.
•Exposed to high temperature
•Exposed to corrosive or combustible gases
•Exposed to water, oil, chemicals, or solvents
•Exposed to high humidity or condensation
•Exposed to high quantities of dust particles
•Susceptible to vibration
When the instrument is not in use, store the instrument in a cool,
dark place because optical components are vulnerable to heat.

9
Usage Notes
Handling the cables and cords
CAUTION
•Before use, verify that the insulation on cables and
cords is not damaged and that no metal is exposed.
If you nd any damage, replace the cable or cord with
those specied by our company, as the instrument will
not be able to make accurate measurements or send/
receive data otherwise.
•Avoid stepping on or pinching the cables and cords,
which could damage the cable insulation.
•To avoid breaking the base of connectors and jacks, do
not bend or pull them.
• Cables and cords become stiff and rigid in freezing
temperatures. Exercise caution in such environments
as bending or pulling on cables and cords may damage
their insulation or cause them to break.
Handling the instrument
CAUTION
•The instrument consists of a sensor unit and a display
unit that can be positioned apart from one another
during operation. To avoid damage, be sure to turn off
the instrument before undocking or docking the sensor
and display units.
•To avoid damage to the instrument, protect it from
physical shock when transporting and handling. Be
especially careful to avoid physical shock from dropping.
•To avoid damage to the instrument, do not short-circuit
the D/A OUTPUT terminal and do not input voltage to
the D/A OUTPUT terminal.
1
Ind.Appx.
7
6
5
4
3
2

10
Usage Notes
IMPORTANT
• Use only the specied L9820 Connection Cable when using the
display unit and sensor unit separately. Using a non-specied
cable may result in incorrect measurements due to poor
connection or other reasons.
•When measuring illuminance underneath a standard lighting
xture, the display may not stabilize. In most cases, a failure
to stabilize is due to uctuations in the lighting xture’s supply
voltage or to the surrounding environment (for example, a
person’s shadow). Exercise care concerning these factors
when performing measurement.
•The LCD includes a backlight for use when making
measurements in dim locations. The backlight will activate
automatically when the measured value is retained or when the
measured value data stored in the internal memory is in read
mode, both in low-light environments (approx. 750 lx or less).
To avoid affecting measurement results, the backlight cannot
be turned on during measurement.
•The instrument’s measurement reference level (REF.LEVEL) is
the colored part in the drawing below.
Measurement
reference level
(REF.LEVEL)
•Do not attempt to disassemble the instrument or subject it to
mechanical shock.

11
Usage Notes
CD precautions
•Exercise care to keep the recorded side of the disc free of dirt
and scratches. When writing text on the disc’s label, use a pen
or marker with a soft tip.
•Keep the disc inside a protective case and do not expose to
direct sunlight, high temperature, or high humidity.
•Hioki is not liable for any issues your computer system
experiences in the course of using this disc.
Precautions during shipment
Observe the following during shipment. Hioki cannot be responsible
for damage that occurs during shipment.
CAUTION
•Handle the instrument carefully so that it is not damaged
due to a vibration or shock.
•To avoid damage to the instrument, remove the
accessories and optional equipment from the instrument
before shipment.
If the instrument is not to be used for an extended
period of time
IMPORTANT
To avoid corrosion and/or damage to the instrument due to battery
leakage, remove the batteries and store the instrument in a cool,
dark place if it will not be used for an extended period of time.
1
Ind.Appx.
7
6
5
4
3
2

12
Usage Notes

13
1Overview
1.1 Overview and Features
The instrument is a multifunctional, high-precision lux meter which
ensures durability.
Ability to send data
to a computer and
to be controlled by a
computer
Use the included dedicated
computer application (after
connecting the instrument with
a USB cable) to download data
and control the instrument.
Illuminance sensor
Features a luminosity lter so
that the instrument’s sensitivity
to wavelength approximates
the response of the human
eye.
Use the display unit and
sensor unit separately
L9820 Connection Cable
(option)
Engineered for use in a wide range of elds and settings,
including with lighting equipment, in lighting work, and in
equipment management.
Wide-range illuminance measurement (0.00 lx to 200000 lx)
Large, easy-to-read LCD
Backlight automatically turns on
when you retain the measured
value in a
low-illuminance
environment.
Memorizes measured
values
Internal memory can store
up to 99 measured values,
which can be sent together
to a computer.
Bluetooth communication
function (FT3425 only)
The measurement data can be
viewed and saved on a smart
phone or tablet with the Bluetooth
communication function.
Uses the GENNECT Cross
dedicated smartphone
application.
Retaining the
measurement
(HOLD)
Features the
timer hold
function.
1 Overview
2
3
4
5
6
7
Appx. Ind.

14
Parts Names and Functions
1.2 Parts Names and Functions
Front/Right Side
Illuminance
sensor
Operation
keys
(p.15)
D/A OUTPUT
terminal
(p.47)
USB terminal
(mini B type)
Reference
level
indication
LCD
(p.19)
Sensor unit Display unit
Sensor
cap
(p.29)
Strap hole (p.26)
The instrument can be separated into the sensor unit and display unit.
(p.37)
(Use the optional L9820 Connection Cable.)

15
Parts Names and Functions
Operation keys
FT3424
1 2
34
5
6
FT3425
1 2
34
5
6
2
3
4
5
6
7
Appx. Ind.

16
Parts Names and Functions
Press Press and hold
for at least 1
second
Turn on the
instrument
while holding
down
1Turn on the
instrument. Turn off the
instrument. –
2
Retains the
measured value or
cancels retention of
the measured value.
Start timer hold
function (p.35)
Automatically retain
after 5 to 60 seconds
(designating the time
is possible)
Cancels the
auto power off
function (APS).
(p.42)
3•Switches the
range. (p.33)
•Cancels read mode,
which allows you to
view the measured
values stored in the
internal memory. *1
(p.45)
•Switches to the auto
range.
•When pushed and
held together with
, starts or
disables Bluetooth
communications
functionality (the
setting is stored by
the instrument).
Displays the
software
version of the
instrument.
4Performs zero
adjustment.
•Allows you to delete
the last saved
measured value.
*1
(p.46)
•Cancels zero
adjustment when
[CAP] is displayed.
Places the
instrument in
the state that
enables all the
measured values
stored in the
internal memory
to be deleted.
(p.46)

17
Parts Names and Functions
Press Press and hold
for at least 1
second
Turn on the
instrument
while holding
down
5•Saves the
measured
values in internal
memory. (p.44)
•Increases the
memory No.*1, *2
•Increases the time
remaining on the
timer.*3
Continuously
increases the memory
No.
*1
(p.45)
Displays all the
indicators on the
LCD.
6•Decreases the
memory No.*1, *2
•Decreases the
time remaining on
the timer.*3
•Loads the
measured values
stored in the internal
memory for viewing.
(p.45)
•Continuously
decreases the
memory No.*1
(p.45)
•When pushed and
held together with
, starts or
disables Bluetooth
communications
functionality (the
setting is stored by
the instrument).
Sets the buzzer
sound non-
activated.
(p.56)
*1: In the read mode, which allows you to view the measured values stored in
the internal memory.
*2: and can only be operated when there are multiple
measured values stored in the internal memory.
*3: During operation of the timer hold function.
2
3
4
5
6
7
Appx. Ind.

18
Parts Names and Functions
Rear
Serial No.
It is necessary for production control
such as product warranty.
Do not peel off the label.
Mounting thread
Use when mounting the sensor unit
on a tripod, a monopod, or the Z5023
Extension Cart. The hole is located
exactly behind the center point of the
illuminance sensor on the front of the
sensor unit. (p.35)
Measurement range
The measurement range of the
instrument is noted.
Battery Cover
When replacing the batteries, remove
the cover.
Describes the type of the batteries to
be used.
See p.24.
Collation No.
Verify that the collation numbers on
the sensor unit and display unit match
before use.
Other manuals for FT3424
4
This manual suits for next models
1
Table of contents
Other Hioki Measuring Instrument manuals

Hioki
Hioki 3490 User manual

Hioki
Hioki HiTESTER 3415-02 User manual

Hioki
Hioki 8835-01 User manual

Hioki
Hioki 9272-05 User manual

Hioki
Hioki CM4002 User manual

Hioki
Hioki TM6101 User manual

Hioki
Hioki IM3536-01 User manual

Hioki
Hioki CT9691 User manual

Hioki
Hioki TM6102 User manual

Hioki
Hioki RM2611 User manual