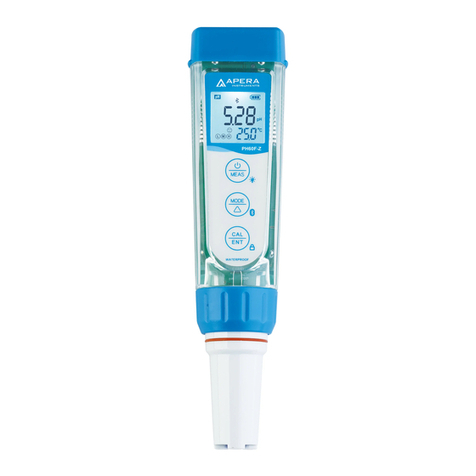
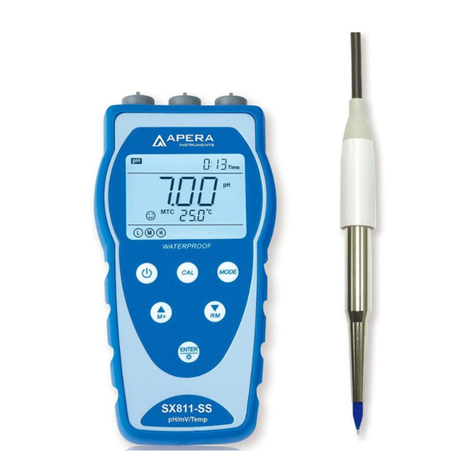
Apera PH400S User manual

- 1 -
PH400S Portable Conductivity Meter
Instruction Manual
PH400S Portable pH Meter
EC400S Portable Conductivity Meter
PC400S Portable pH/Conductivity Meter
APERA INSTRUMENTS (Europe) GmbH
www.aperainst.de
v3.2

- 2 -
Table of Contents
1Brief Introduction.......................................................................................................................................- 3 -
2Technical Specifications............................................................................................................................- 4 -
2.1 Parameter Specifications..................................................................................................................- 4 -
2.2 Other Specifications..........................................................................................................................- 5 -
3Instrument Description..............................................................................................................................- 5 -
4pH Measurement ......................................................................................................................................- 8 -
4.1 Information regarding the pH Electrode............................................................................................- 8 -
4.2 Information regarding pH Calibration................................................................................................- 8 -
4.3 pH Calibration (Take 3-point calibration as an example)................................................................- 10 -
4.4 Sample Measurement.....................................................................................................................- 11 -
4.5 Maintenance of the pH Electrode ...................................................................................................- 12 -
5mV Measurement....................................................................................................................................- 13 -
5.1 ORP measurement .........................................................................................................................- 13 -
5.2 Notes on ORP measurement..........................................................................................................- 13 -
6Conductivity Measurement .....................................................................................................................- 14 -
6.1 Information regarding the Conductivity Electrode ..........................................................................- 14 -
6.2 Information regarding Conductivity Calibration ..............................................................................- 15 -
6.3 Conductivity Calibration ..................................................................................................................- 16 -
6.4 TDS, Salinity, Resistivity & Conductivity.........................................................................................- 17 -
6.5 Sample test .....................................................................................................................................- 17 -
6.6 Maintenance of the Conductivity Electrode ....................................................................................- 18 -
7Parameter Setting...................................................................................................................................- 18 -
7.1 Main Menu ......................................................................................................................................- 18 -
7.2 Sub-Menu........................................................................................................................................- 18 -
7.3 pH Setting Sub-Menu......................................................................................................................- 20 -
7.4 Conductivity Setting Sub-Menu ......................................................................................................- 20 -
7.5 Basic Parameter Setting Sub-Menu ...............................................................................................- 21 -
8USB Data Communication......................................................................................................................- 23 -
9Complete Kit............................................................................................................................................- 24 -
10 Warranty..............................................................................................................................................- 25 -
11 Appendix 1: Table of Parameter Setting and Factory Default Setting................................................- 25 -
12 Appendix 2: Icons and Abbreviation ...................................................................................................- 26 -
13 Appendix 3: Table of Self-Diagnosis...................................................................................................- 27 -

- 3 -
1 BRIEF INTRODUCTION
Thank you for purchasing Apera Instruments PH400S Portable Conductivity Meters. Before using the product, please
read this manual carefully to help you properly use and maintain the product. For technical support, please contact
us at info@aperainst.de or +49 202 51988998
Apera Instruments reserves the right to update the content of this manual without giving prior notices.
1.1 Measuring Parameters
Measuring Parameters
PH400S
EC400S
PC400S
pH/mV
√
√
Conductivity/TDS//Salinity/Resistivity
√
√
Temperature
√
√
√
1.2 Features and Functions
•The built-in microprocessor chip enables advanced functions such as auto calibration, auto temperature
compensation, auto electrode recognition, parameter setting, self-diagnosis, calibration reminder, calibration
time check, auto power-off, low-battery reminder, etc.
•GLP data management, real-time clock display. Manual or Auto timing data storage. USB data
communication.
•The meter adopts advanced digital processing technology, intelligently improves the response time and
accuracy of the measurements. Stable reading and auto lock display mode are available for choice.
•Comes with a carrying case, which includes the meter, the electrode(s), calibration solutions, and other
accessories, convenient for in-field use.
•Meets IP57 Waterproof and dustproof rating, ideal for use under harsh environment.
1.3 Features in pH Measurement
•1 to 5 points auto calibration with calibration guide and auto-check function.
•Automatic recognition of calibration solutions. Two series of standard solutions for choice: USA and NIST
1.4 Features in Conductivity Measurement
•1 to 4 points auto calibration with calibration guide and auto-check function.
•Single-tap switch among conductivity, TDS, salinity, and resistivity.
•Automatic recognition of conductivity calibration solutions.

- 4 -
2 TECHNICAL SPECIFICATIONS
2.1 Parameter Specifications
Technical Parameters
Applicable
Models
pH
Measuring
Range
(-2.00 to 19.99) pH
PH400S
PC400S
Resolution
0.1/0.01 pH
Accuracy
±0.01 pH ±1 digit
Temperature
Compensation
Range
(0 to 100) °C, Automatic or Manual
mV
Measuring
Range
-1999 mV to 0 to 1999 mV
Resolution
1 mV
Accuracy
±0.1% F.S ±1 digit
Conductivity
Measuring
Range
Conductivity: 0 to 200 mS/cm, including 5 ranges:
(0.00 to 19.99) μS/cm, (20.0 to 199.9) μS/cm,
(200 to 1999) μS/cm, (2.00 to 19.99) mS/cm,
(20.0 to 199.9) mS/cm
TDS: (0 to 100) g/l, including 5 ranges:
(0.00 to 9.99) mg/l, (10.0 to 99.9) mg/l,
(100 to 999) mg/l, (1.00 to 9.99) g/l,
(10.0 to 100.0) g/l
Salinity: (0 to 100) ppt,
Resistivity: (0 to 100) mΩ·cm
EC400S
PC400S
Resolution
0.01/0.1/1 μS/cm, 0.01/0.1 mS/cm
Accuracy
±1.0% F.S ±1 digit
Temperature
Compensation
Range
(0 to 50) °C, Automatic or Manual
Electrode
Constant
0.1 / 1 / 10 cm-1
Temperature
Measuring
Range
-10 to 110℃
PH400S
EC400S
PC400S
Resolution
0.1°C
Accuracy
±0.5°C±1 digit

- 5 -
2.2 Other Specifications
Data Storage
PH400S, EC400S
500 Groups
PC400S
1000 Groups
Storage Content
Numberings, Date, Time, Measurements, Unit, Temperature
Data Output
USB
Power Supply
AA Batteries *4 (1.5V*4)
IP Rating
IP57 Waterproof and Dustproof
Dimensions and
Weight
PH400S, EC400S
Meter: (86x196x33) mm / 335 g.
With case: (360x275x80) mm / 1,6 kg
PC400S
Meter: (480x360x95) mm / 335 g
With case: (480x360x95) mm / 4,2 kg
3 INSTRUMENT DESCRIPTION
3.1 LCD Display
① — Measuring parameters
② — Measuring value
③ — Timing storage
④ — Date, time, and reminder icons
⑤ — “Date” and “Time”
⑥ — Measuring unit
⑦ — Temperature unit
⑧ — Measuring unit in calibration
⑨ — Calibration value, numberings of data storage, and reminder icons

- 6 -
⑩ — M+— Data storage; RM— Recall saved data
⑪ — Temperature and reminder icons
⑫ — ATC—Auto Temperature Compensation; MTC— Manual Temperature Compensation
⑬ — Stable reading icon
⑭ — Completed calibration icons
⑮ — Auto-Lock reading mode
⑯ — Low battery reminder. Please replace batteries when this icon is displayed.
⑰ — USB data communication. The meter is connected to your PC when this icon is displayed.
3.2 Keypad
3.2.1 Short Press — <1.5 s;Long Press — >1.5 s 。
3.2.2 Power On: Short press to power on: LCD displays the measuring mode used last time (Backlight turned
on for 1 minute).
3.2.3 Power Off: The meter can only be turned off in measuring mode by short pressing
Special Notes: Pressing in calibration mode or parameter setting mode will NOT turn the meter off.
Users need to press first to go back to measuring mode, and then press to power off.
Table- 1 Keypad Operation and Functions
Keypad
Operation
Functions
Short Press
•Power on/off
Short Press
•Choose measuring mode:
•PH400S pH Meter: →
•PC400S pH/Cond. Meter: → →
•EC400S Cond. Meter: N/A
Long Press
•Enter parameter setting
Figure-1

- 7 -
Short Press
•Enter calibration mode
Short Press
•In pH mode: choose resolution 0.01 pH→0.1 pH
•In conductivity mode:choose: → → →
Short Press
•In measurement mode: press to turn on/off the backlight
•In calibration mode: press to calibrate
•In parameter setting mode: press to confirm choice
Short Press
•Cancel any operation, the meter goes back to measurement mode
Short Press
•Save measuring data
Long Press
•Recall saved measuring data
Short Press
or Long
Press
•In manual temperature compensation (MTC) mode: Short press to adjust
temperature, long press to adjust swiftly.
•In parameter setting mode: press to change the numbering of parameters
in main menu and sub-menu.
•In sub-menu, press to change parameters and settings.
•In recall mode (RM), short press to change numberings, long press to
change swiftly.
3.3 Connectors
The meter adopts 8-pin connector, into which pH, ORP, and conductivity electrode can be connected. When
connected, the meter will automatically switch to the correspondent measurement mode.
3.4 Display Mode
3.4.1 Stable Reading Display Mode
When the measuring value is stable, the screen displays as shown in
figure-2. If does not appear or is flashing, that means the measuring
value has not been stable. Users should wait for the smiley face and not
record the readings or conduct calibrations at that moment.
3.4.2 Auto-Lock Display Mode
In parameter setting P4.6, select “On” to turn on the auto-lock display mode,
In which the reading will be automatically locked after the measuring value
has been stable for more than 10 seconds, and the HOLD icon will come up
as shown in figure-3. Short press to cancel the hold.
3.5 Data Storage, Recall, and Deletion
3.5.1 Manual Data Storage
When reading is stable, short press , the screen will display M+
Icon along with the storage numbering, and the data will be saved, as shown
in figure-4. For the storage capacity for each model, please refer to section 2.2
Figure-3
Figure-4
Figure-2

- 8 -
3.5.2 Automatic Timing Data Storage
In parameter setting P4.1, set up the time for timing measurements (e.g.
3 minutes). will be displayed, meaning the meter is ready to enter
the auto timing storage mode. Short press , the icon will start flashing,
and the 1st group of data will be stored. 3 minutes later, the 2nd one will be
stored. Figure-5 shows that 8 groups of data have been automatically
stored. Short press again, the icon will stop flashing. The meter
stops the auto timing storage. When in auto timing storage, manual storage
is disabled. In parameter setting P4.1, set the time to 0 to exit auto timing storage.
3.5.3 Recall the Stored Data
In measurement mode, long press , the meter will recall the measured
value that was lastly saved, as shown in figure-6, displaying RM icon and the
numbering. Press or to recall other stored data. Long press or to change numberings swiftly.
3.5.4 Clear Stored Data
In parameter P4.5, select Yes to clear all the stored data. For details, please refer to section 7.5
4 pH MEASUREMENT
4.1 Information regarding the pH Electrode
The instrument is equipped with a 201T-S 3-in-1 Combination pH Electrode. Its built-in temperature sensor allows
for auto temperature compensation. The electrode’s housing adopts PC plastics, which is shock-resistant and
corrosion-resistant. When the pH electrode is dipped into the test sample solution, stir it for a few seconds to remove
potential air bubbles inside the probe to help the measurement get stabilized quickly.
When connecting the electrode into the instrument, please slowly rotate the connector, identify the location of the
mount to insert it, and then screw it on. Please note that do not pull on the cables in case of poor contact.
Please keep the connector clean and dry. For detailed maintenance of the electrodes, please refer to section 4.5
4.2 Information regarding pH Calibration
4.2.1 Standard Buffer Solutions
The instrument adopts two series of standard buffer solutions: USA and NIST as shown in Table-2. Users can select
which one to use in P1.1 (refer to section 7.3).
Table-2
Calibration Icons
pH Standard Buffer Series
USA Series
NIST Series
5 Points
Calibration
1.68 pH
1.68 pH
3 Points
Calibration
4.00 pH
4.01 pH
7.00 pH
6.86 pH
10.01 pH
9.18 pH
12.45 pH
12.46 pH
Figure-5
Figure-6
Figure-5

- 9 -
4.2.2 pH Calibration Modes
The instrument has two calibration modes for choice: 3-point calibration (3P) and 5-point calibration mode (5P).
Users can make the selection in parameter settings P1.4 (refer to section 7.3)
a) 3-point Calibration Mode
The 3-point calibration mode is the most commonly used. Users can adopt 1 to 3 points to calibrate as needed.
In the 3-point calibration mode, the 1st point must be 7.00 pH (or 6.86 if using NIST). Then choose other calibration
solutions to conduct 2nd and 3rd points (see Table-3 for details). In the process of calibration, the meter will display
the electrode’s slope in acid and alkaline ranges.
Table-3 3-point Calibration Mode
USA
NIS
Calibration
icon
When to adopt
1-Point
Calibration
7.00 pH
6.86 pH
accuracy≤ ±0.1 pH
2-Point
Calibration
7.00 pH and
4.00/1.68 pH
6.86 pH and
4.01/1.68 pH
Measuring range: 0 to 7.00
pH
7.00 pH and 10.01 pH
6.86 pH and 9.18 pH
Measuring range: >7.00 pH
3-Point
Calibration
7.00pH, 4.00/
1.68 pH and 10.01 pH
6.86pH, 4.01/
1.68pH, 9.18 pH
Wide measuring range
b) 5-point Calibration Mode
In 5-point calibration mode, users can adopt 1 to 5 points of calibration, and can choose calibration buffer
solutions at any sequence. Typically, 5-point calibration is recommended when testing strong acid or strong
base solutions.
4.2.3 How often to calibrate
The frequency that you need to calibrate your meter depends on the tested samples, condition of electrodes,
and the requirement of the accuracy. For High-Accuracy measurements (≤ ±0.02pH), the meter should be
calibrated before test every time; For ordinary-accuracy Measurements (≥±0.1pH), once calibrated, the meter
can be used for about a week or longer. In the following cases, the meter must be re-calibrated:
a) The electrode hasn’t been used for a long time or the electrode is brand new.
b) After measuring strong acid (pH<2) or strong base (pH>12) solutions.
c) After measuring fluoride-containing solution and strong organic solution
d) There is a big difference between the temperature of the test sample and the temperature of the buffer
solution that is used in the last calibration.
4.2.4 Calibration Reminder Function
Preset the interval between calibrations (starting from the time when you set it), and then the meter will remind
you to calibrate at the end of that interval. For details, please see P1.2 (Section 7.3). When the preset time is
reached, Er6 icon will be displayed at the lower right corner of the LCD (as showed in Figure-8). At the time,
the meter can still be operated. It is just reminding you to do calibration in order to ensure the accuracy. After
calibration, the Er6 icon will disappear; To make it disappear, users can also choose “No” in P1.2 in parameter
setting.

- 10 -
4.2.5 Check calibration date
In this mode, users can see the date and time of last calibration to help determine if there is a need to re-
calibrate. For details, please see parameter setting P1.3 (Section 7.3)
4.3 pH Calibration (Take 3-point calibration as an example)
4.3.1 Press to enter calibration mode. CAL1 icon will flash in the upper right corner of
the LCD. 7.00 pH will flash in the lower right corner of the LCD, reminding you to use pH
7.00 buffer to conduct 1st point of calibration.
4.3.2 Use distilled water to rinse off electrode and then dry it. Dip it into pH 7.00 buffer
solution, stir gently and let it stand still and wait for the reading to become stable. In the
lower right corner of LCD, the process of auto recognizing the buffer solution will be
displayed. Pressing before the buffer is recognized will generate Er2 (please refer to
table 6).
4.3.3 When the meter locks 7.00 pH, displays on LCD. Press key to calibrate the
meter. End icon appears after calibration is done. The 1st point calibration is finished. In the
meanwhile, CAL2 will flash at the upper right corner, and 4.00 pH & 10.01 pH will flash
alternately at the bottom right, indicating using pH 4.00 or pH 10.01 buffer solution to make
the 2nd point calibration.
4.3.4 Take out pH electrode, rinse it in distilled water, dry it, and dip it into pH 4.00 buffer
solution. Stir the solution gently and let stand still in the buffer solution until a stable reading
is reached. The meter’s display will show the recognition process of calibration buffer
solution at the lower right of LCD. When the meter recognizes 4.00 pH, displays on
LCD. Press key to calibrate the meter. End icon and electrode slope of acidity range
display after calibration is done. In the meanwhile, CL3 will flash at the upper right corner of
the LCD, and 10.01 pH will flash at the lower right, indicating using pH10.01 buffer solution
to make the 3rd point calibration.
4.3.5 Take out pH electrode, rinse it in distilled water, dry it, and dip it into pH 10.01 buffer
solution. Stir the solution gently and let it stand still in the buffer solution until a stable reading
is reached. The meter’s display will show recognition process of calibration buffer solution
at the bottom right of LCD. When the meter recognizes 10.01 pH, displays on LCD.
Press key to calibrate the meter. End icon and electrode slope of alkalinity range display after
calibration is done. The meter returns to the measurement mode, displays stable measuring value and calibration
guide icons. Please see Figure-8 for the above calibration process.
4.3.6 5-point calibration has the same process as the above shows. Users can choose calibration solutions without
any sequence, and the slope data will not be displayed. During the calibration process, press key to exit from
the calibration mode. Correspondent calibration guide icons will appear on the LCD.
Figure-8

- 11 -
4.4 Sample Measurement
4.4.1 Rinse the pH electrode in distilled water or pure water, dry it, and dip it into sample solution. Stir the
solution gently and let it stand still in the sample solution until icon appears and stays on LCD, get the pH
reading, which is pH value of sample solution, please refer to Figure-9 for calibration and measurement process
of the pH meter.
Figure-9 Calibration and measurement process of pH meter
4.4.2 Self-Diagnosis Information
Table – 4 Self-diagnosis information
Display
Icons
Contents
Checking
Wrong pH buffer solution or the buffer
solution out of range.
1.Check whether pH buffer solution is correct.
2.Check whether the meter connects the electrode
properly.
3.Check whether the electrode is damaged.
Press when measuring value is not
stable during calibration.
Press key when icon appears and stays.
During calibration, the measuring value
being unstable for over 3 minutes
1.Check whether there are bubbles in glass bulb.
2.Replace with a new pH electrode.
pH electrode zero electric potential out of
range(<-60mV or >60mV)
1.Check whether there are bubbles in glass bulb.
2.Check whether pH buffer solution is correct.
3.Replace with new pH electrode.
pH electrode slope out of range
(<85% or >110%)
Enter in pre-set due calibration to remind
calibration
Press key to perform calibration or cancel due
calibration setup in parameter P1.2.
Submerge the electrode
in pH4.00 solution, press
when appears.
Submerge the electrode
in pH7.00 solution, press
when appears.
After the 1st calibration
point is done, press
to enter the
measurement mode.
Press to turn
on the meter.
Press to enter
the calibration
mode.
Sample
1-point-
calibration
2-point-
calibration
3-point-
calibration
After the 2nd calibration
point is done, press
to enter the
measurement mode.
After the 3rd calibration
point is done, the meter
enters the measurement
mode automatically.
Submerge the electrode
in pH10.01 solution,
press when
appears.

- 12 -
4.4.3 pH isothermal measurement principle
According to the pH isothermal measurement principle, the closer the test sample’s temperature is to the calibration
solution’s, the higher the accuracy of the measurement. So this principle is recommended to follow when conducting
tests.
4.4.4 Restore to factory default
The instrument has a function to return to factory default setting, which can be set up in P1.5 (refer to section 7.3).
Returning to factory default setting is to restore the meter to theoretical value (zero potential pH is 7.00, slope is
100%), and set all the parameters to default settings (see appendix 1). When the meter’s calibration or measurement
is performing abnormally, users can use this function to let the meter return to factory default mode, and then conduct
calibration and test again. Please note that this function is irreversible once used.
4.5 Maintenance of the pH Electrode
4.5.1. Daily maintenance
The soaking solution contained in the supplied protective bottle is used to maintain activation in the glass bulb and
junction. Loosen the capsule, remove the electrode and rinse in distilled or pure water before taking a measurement.
Insert the electrode and tighten the capsule after measurements to prevent the solution from leaking. If the soaking
solution is turbid or moldy, replace the KCL solution. (Preparation: 26g KCL dissolved in 100ml pure water).
The electrode should not be soaked in pure or distilled water, protein solution or acid fluoride solution for long periods
of time. In addition, do not soak the electrode in organic lipids.
4.5.2. Calibration buffer solution
For calibration accuracy, the pH of the standard buffer solution must be reliable. The buffer solution should be
refreshed often, especially after heavy use. We recommend 10-15 times of use before replacing the pH buffers.
4.5.3 Protect glass bulb
The sensitive glass bulb at the front of the combination electrode should not come in contact with hard surfaces.
Scratches or cracks on the electrode will cause inaccurate readings. Before and after each measurement, the
electrode should be washed with pure water and dried. If a sample sticks to the electrode or it’s contaminated, the
electrode should be thoroughly cleaned using a soft brush and then rinsed with pure water. After that, soak it in the
KCL solution again for 6 hours.
4.5.4 Renew glass bulb
Electrodes that have been used over a long period of time will become aged. Submerge the electrode in 0.1mol/L
hydrochloric acid for 24 hours, then wash the electrode in pure water, then submerge it in KCL soaking solution for
24 hours.
The method to prepare 0.1mol/L hydrochloric acid: dilute 9mL hydrochloric acid in pure water to 1000mL.
For serious passivation, submerge the bulb in 4% HF (hydrofluoric acid) for 3-5 seconds, and wash it in
pure water, then submerge it in the soaking solution for 24 hours to renew it.
4.5.5. Clean contaminated glass bulb and junction (please refer to Table-8)

- 13 -
Table-8 Clean contaminated glass bulb and junction
Contamination
Cleaning Solutions
Inorganic metal oxide
Dilute acid less than 1mol/L
Organic lipid
Dilute detergent (weak alkaline)
Resin macromolecule
Dilute alcohol, acetone, ether
Proteinic haematocyte sediment
Acidic enzymatic solution (saccharated yeast tablets)
Paints
Dilute bleacher, peroxide
Special Notes:
1) The 201T-S Plastic 3-in-1 Combination pH Electrode that comes with this meter will NOT give
accurate and stable pH readings when testing distilled or deionized water. This is because
these purified waters do not have enough ions present for the electrode to function properly.
To measure purified water pH levels, users need to use a specialized electrode. Visit
www.aperainst.de/electrodes and find the compatible Pure Water LabSen electrode for your
meter in order to accurately test purified waters.
2) The electrode housing is polycarbonate. When using cleaning solutions, take cautions on
carbon tetrachloride, trichlorethylene, tetrahydrofuran, acetone, etc., which will dissolve the
housing and invalidate the electrode.
5 mV MEASUREMENT
5.1 ORP measurement
Press key, and switch the meter to mV measurement mode. Connect ORP electrode (the 301Pt-S combination
ORP electrode is sold separately) and dip it in sample solution, stir the solution briefly and allow it to stay in the
solution until icon appears and get the reading.
ORP means Oxidation Reduction Potential. The unit is mV.
5.2 Notes on ORP measurement
5.2.1 ORP measurement does not require calibration. When the user is not sure about ORP electrode quality or
measuring value, use ORP standard solution to test mV value and see whether ORP electrode or meter works
properly. Table-9 is the data of standard ORP solution for 222 mV.
Table-9
°C
10
15
20
25
30
35
38
40
mV
242
235
227
222
215
209
205
201

- 14 -
5.2.2 Clean and activate ORP electrode
After the electrode has been used over a long period of time, the platinum surface will get polluted which causes
inaccurate measurement and slow response. Please refer to the following methods to clean and activate ORP
electrode:
(a) For inorganic pollutant, submerge the electrode in 0.1mol/L dilute hydrochloric acid for 30 minutes, then wash it
in pure water, then submerge it in the soaking solution for 6 hours.
(b) For organic or lipid pollutant, clean the platinum surface with detergent, then wash it in pure water, then submerge
it in the soaking solution for 6 hours.
(c) For heavily polluted platinum surface on which there is oxidation film, polish the platinum surface with toothpaste,
then wash it in pure water, then submerge it in the soaking solution for 6 hours.
6 CONDUCTIVITY MEASUREMENT
6.1 Information regarding the Conductivity Electrode
6.1.1. Conductivity electrode
Model 2301T-S plastic conductivity electrode with constant K=1.0 and built-in temperature sensor, can realize
automatic temperature compensation. The electrode housing is POM plastic which is corrosion resistant and
impact resistant. When submerge the conductivity electrode in solution, stir the solution briefly to eliminate the
air bubbles and improve response and stability.
6.1.2. Conductivity electrode constant
The meter matches conductivity electrodes of three constants: K=0.1, K=1.0 and K=10.0. Please refer to chart-
6 for measuring range. Set constant in parameter setting P2.1 and refer to clause 7.4
Chart – 6 Electrode constant and measuring range
Range
<20 μS/cm
0.5 μS/cm to 100 mS/cm
>100mS/cm
Conductivity
electrode constant
K=0.1 cm-1
K=1.0 cm-1
K=10 cm-1
Standard solution
84μS/cm
84 μS/cm
1413 μS/cm
12.88 mS/cm
111.8 mS/cm
Electrode’s model
DJS-0.1T-S
2301T-S
2310T-S
Note: When testing ultra-pure water with conductivity less than 1.0 μS/cm, a flow test should be conducted in a flow
cell.
6.1.3 When connecting the electrode, please rotate slowly to identify the location of the mount before plugging in.
The nut on the connector should be screwed on tightly. Once the conductivity electrode is connected, the meter will
automatically switch to conductivity mode (no need to switch manually). Please do not pull the cable in case of poor
contact. Make sure the connector is clean and dry. See more information regarding the conductivity electrode’s
maintenance in section 6.6.

- 15 -
6.2 Information regarding Conductivity Calibration
6.2.1 Conductivity Standard Calibration Solutions
The meter uses conductivity standard solution of 84 μS/cm, 1413 μS/cm, 12.88 mS/cm and 111.8 mS/cm. The meter
can recognize the standard solution automatically, and can perform 1 to 4 points of calibration. The calibration
indication icons correspond to the four standard values as shown in Table-8.
Table-8 Conductivity Calibration Solutions
Calibration Icons
Calibration Solutions
84 μS/cm
1413 μS/cm
12.88 mS/cm
111.8 mS/cm
6.2.2 How often to calibrate
(a) The meter has been calibrated before leaving the factory and can generally be used right out of the box.
(b) Normally perform calibration once per month.
(c) For high accuracy measurements or large temperature deviation from the reference temperature (25°C), perform
calibration once per week.
(d) Use conductivity standard solution to check whether there is error. Perform calibration if error is large.
(e) For new electrode or the meter has been set to factory default, perform 3-point or 4-point calibration. For general
use, choose standard solutions that are closer to the sample solution to perform 1-point or 2-point calibration.
6.2.3 Single point and multi-point calibration
If 1-point calibration is conducted after 3-point or 4-point calibration being done, the previous calibration values in
the same range will be replaced. In the meanwhile, the meter will display the 1-point calibration’s icon, and the
other calibration icons will be removed, but the chip will still store the data from the last calibration. When
conducting multi-point calibration, users should follow the sequence from low conductivity to high in case the high
concentration solution contaminating the low ones.
6.2.4 Reference Temperature
The factory default setting for reference temperature is 25℃. The reference temperature can be set from 15℃to
30℃. Users can set it up in parameter setting P2.5 (see Section 7.4 for details).
6.2.5 Temperature compensation coefficient
The temperature compensation coefficient of the meter setting is 2.0%/°C. However, the conductivity temperature
coefficient is different from solutions and concentration. Please refer to Table –9 and the data collected during testing.
Do the setting in P2.3. (see section 7.4 for more).
Note: When the coefficient for the temperature compensation is set to 0.00 (no compensation), the
measurement value will be based on the current temperature.

- 16 -
Table – 9 Temperature compensation coefficient of special solutions
Solution
Temperature compensation coefficient
NaCl solution
2.12%/°C
5% NaOH solution
1.72%/°C
Dilute ammonia solution
1.88%/°C
10% hydrochloric acid solution
1.32%/°C
5% sulfuric acid solution
0.96%/°C
6.2.6 Precaution for calibration solution’s contamination
Conductivity standard solution has no buffer. Please avoid being contaminated during usage. Before submerging the
electrode in standard solution, please wash the electrode and allow it to dry. Please do not use the same cup of
conductivity standard solution repeatedly, especially for standard solution of low concentration (84μS/cm). The
contaminated standard solution will affect accuracy.
6.2.7 Calibration Reminder Setup
Preset the interval between calibrations (starting from the time when you set it), and
then the meter will remind you to calibrate at the end of that interval. For details, please
see P2.3 (Section 7.4). When the preset time is reached, Er6 icon will be displayed at
the lower right corner of the LCD (as showed in Figure-8). At the time, the meter can
still be operated. It is just reminding you to do calibration in order to ensure the
accuracy. After calibration, the Er6 icon will disappear; To make it disappear, users
can also choose “No” in P2.3 in parameter setting.
6.2.8 Check calibration date
In this mode, users can see the date and time of last calibration to help determine if
there is a need to re-calibrate. For details, please see parameter setting P2.3 (Section
7.3)
6.3 Conductivity Calibration
1. Rinse the electrode in pure water, allow it to dry, wash with a little of standard
solution and submerge it in standard solution. Stir the solution briefly and allow it
to stay in the solution until a stable reading is reached.
2. Press key to enter the calibration mode. The meter’s display will show
blinking “CAL” at the top right, and scanning and locking process of calibration
solution at the bottom right. When the meter locks1413 μS, stable icon will
display on LCD. Press key to complete calibration. The meter will return to
measuring mode and is displayed on bottom left of the LCD screen. See
Figure-11.
3. Notes:
(a) Pressing key before stable icon appeared on LCD screen, Error
indication icon Er 2 will be shown. See Table -11.
(b) Press key before confirmation to exit calibration mode (calibration will not be completed).
Figure-10
Figure-11

- 17 -
4. For multi-point calibrations, please repeat the steps in 6.3.1 to 6.3.2 until all calibrations are finished. The
meter can be calibrated in the same calibration solution repeatedly until the reading is stable and repeatable.
6.4 TDS, Salinity, Resistivity & Conductivity
1. TDS and conductivity is linear related. The conversion factor is 0.40-1.00. Adjust the factor from parameter P2.6.
The factory default setting is 0.71 and please refer to section 7.4. Salinity and resistivity are all proportional to
conductivity. The calculating formula is preset in the meter. So the meter only needs to be calibrated in
Conductivity mode, then after calibration of conductivity, the meter can switch from conductivity to TDS, salinity,
or resistivity.
2. Adjust TDS conversion factor in parameter setting P2.6 according to the data collected during testing and
experience. Table – 10 lists some commonly used Conductivity and TDS conversion factors. This is for your
reference only.
Table – 10 Conductivity and TDS conversion factors
Conductivity of solution
TDS conversion factor
0-100 μS/cm
0.60
100-1,000 μS/cm
0.71
1-10 mS/cm
0.81
10-100 mS/cm
0.94
6.5 Sample test
1. Rinse conductivity electrode in distilled or pure water, dry it, and submerge it in the sample solution. Stir the
solution briefly and allow it to stay in the sample solution until a stable reading is reached and icon appears
on LCD, then get the reading value, which is the conductivity value of the solution.
2. Press key to switch to TDS, Salinity, and Resistivity.
3. During the process of calibration and measurement, the meter has self-diagnosis functions, indicating the
relative information as below: Table – 11.
Table – 11 Self-diagnosis information of conductivity measurement mode
Display Icons
Contents
Checking
Wrong conductivity calibration solution or
the meter recognition of calibration
solution out of range.
1. Check whether conductivity calibration
solution is correct.
2. Check whether the meter connects the
electrode well.
3. Check whether the electrode is damaged.
Press key when measuring value is not
stable during calibration.
Press key after icon appears.
During calibration, the measuring value
being unstable for over 3 minutes.
1. Shake the electrode to eliminate bubbles in
electrode head.
2. Replace with new conductivity electrode.
Enters pre-set due calibration to remind re-
calibration
Press key to perform calibration or cancel due
calibration setup in parameter P2.3.

- 18 -
4. Factory default setting
For factory default setting, please refer to parameter setting P2.7 (Section 7.4). With this function, all calibration
data is deleted and the meter restores to the theory value. Some functions restore to the original value (refer to
appendix -1). When calibration or measurement fails, please restore the meter to factory default setting and then
perform re-calibration or measurement. Please note once set the factory default, all the data deleted will be
irretrievable.
6.6 Maintenance of the Conductivity Electrode
6.6.1. Always keep the conductivity electrode clean. Before taking a measurement, rinse the electrode in pure
water. It is recommended to rinse it again in the sample solution. When submerge the electrode in solution, stir
the solution briefly to eliminate air bubbles and allow it to stay until a stable reading is reached. Conductivity
electrodes are usually stored dry. For conductivity electrodes that haven’t been used for a long time, users
should soak the electrode in 12.88 mS calibration solution for 5-10 minutes, or to soak it in tap water for 1 to 2
hours. Rinse the electrode in pure water after measurement.
6.6.2. The sensing rod of Model 2301T-S conductivity electrode is coated with platinum black to minimize
electrode polarization and expand measuring range. The platinum black coating adopted our special processing
technology, which improves the electrode performance and the firmness of the coating. If the platinum black
electrode is stained, gently clean the electrode with soft brush in warm water containing detergent or alcohol.
7 PARAMETER SETTING
7.1 Main Menu
In the measurement mode, press key to enter in P1.0, then press or to switch main menu:
P1.0→P2.0→P4.0. Please refer to Figure - 14.
P1.0: pH parameter setting menu,
P2.0: Conductivity parameter setting menu,
P4.0: Basic parameter setting menu.
7.2 Sub-Menu
7.2.1 In P1.0, press to enter the submenu P1.1 for pH setting, press and to change submenu:
P1.1→P1.2→ … →P1.5. See Figure-12 for details.
7.2.2 In P2.0, press to enter the submenu P2.1 for conductivity setting, press and to change submenu:
P2.1→P2.2→ … →P2.7. See Figure-12 for details.
7.2.4 In P4.0, press to enter the submenu P4.1 for basic parameter setting, press and to change
submenu: P4.1→P4.2→…→P4.8. See Figure-12 for details.

- 19 -
Figure-12
P4.1 Adjust timing for auto storage
P4.2 Select temp. unit
P4.3 Select lasting time for backlight
P4.4 Select auto power-off time
P4.5 Clear storage
P4.6 Set up auto lock reading mode
P4.7 Adjust date
P4.8 Adjust time
P2.1 Select electrode’s constant
P2.2 Set up calibration reminder
P2.3 Check calibration date
P2.4 Select reference temp.
P2.5 Adjust temp. coefficient
P2.6 Adjust TDS factor
P2.7 Restore to factory default
P1.1 Select pH buffers
P1.2 Set up calibration reminder
P1.3 Check calibration date
P1.4 Select pH calibration mode
P1.5 Restore to factory default
pH Setting Submenu
Main Menu
Basic Parameter Setup Submenu
Conductivity Setting Submenu

- 20 -
7.3 pH Setting Sub-Menu
P1.1 — Select pH buffer series (USA—NIST)
1. In measurement mode, long press to enter P1.0, press to enter P1.1
2. Press USA flashes; Press to choose USA→NIST; Press to confirm.
USA—USA NIS—NIST
3. Press to enter P1.2, or press to return to measurement mode.
P1.2 — Set up calibration reminder (No—H00—D00)
1. Press , “No” flashes. Press to choose No→H00→D00;
NO—no setting; H00—set 0-99 hours; D00—set 0-99 days.
2. When “H” flashes, press , “00” flashes; Press to adjust hours,
press to confirm; when “D” flashes, press , “00” flashes,
press to adjust days, press to confirm; When “No” flashes,
press to confirm.
3. Press to enter P1.3, or press to return to measurement mode.
P1.3 — Check Calibration Time
1. The data and time of last calibration displayed on the left image is: 18:08, 06/08/2016
2. Press to enter P1.4, or press to return to measurement mode.
P1.4 — Select pH calibration mode (3P—5P)
1. Press , “3P” flashes. Press to choose 3P→5P. Press to confirm.
3P— 1 to 3 point calibration; 5P—1 to 5 point calibration. (see 4.2.2 for details)
2. Press to enter P1.5, or press to return to measurement mode.
P1.5 — Return to factory default mode (No—Yes)
Press , “No” flashes, press to choose No→Yes; Press to confirm, the meter
returns to measurement mode.
No— not return to factory default mode; Yes—return to factory default mode
7.4 Conductivity Setting Sub-Menu
P2.1 — Select electrode’s constant(1.0—10.0—0.1)
1. In P2.0, press to enter P2.1
2. Press , “1.0” flashes, press to choose 1.0→10.0→0.1; press to confirm
3. Press to enter P2.2, or press to return to measurement mode.
This manual suits for next models
1
Table of contents
Other Apera Measuring Instrument manuals