manuals.online logo
Brands
  1. Home
  2. •
  3. Brands
  4. •
  5. Aprilaire
  6. •
  7. Humidifier
  8. •
  9. Aprilaire 400 Series User manual

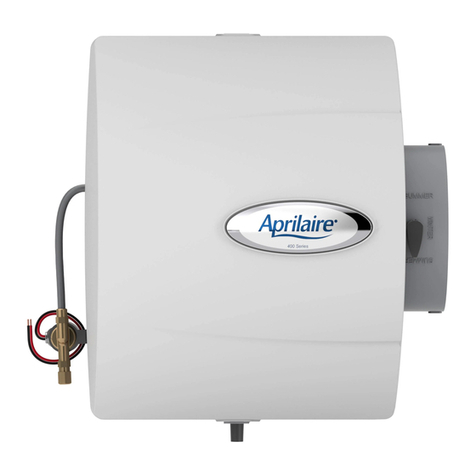
Aprilaire 400 Series User manual

Other manuals for 400 Series

9

Other Aprilaire Humidifier manuals

Aprilaire 400 Series Setup guide

Aprilaire

Aprilaire 400 Series Setup guide

Aprilaire 110 User manual

Aprilaire

Aprilaire 110 User manual

Aprilaire 300 User manual

Aprilaire

Aprilaire 300 User manual

Aprilaire 850 Installation and operating instructions

Aprilaire

Aprilaire 850 Installation and operating instructions

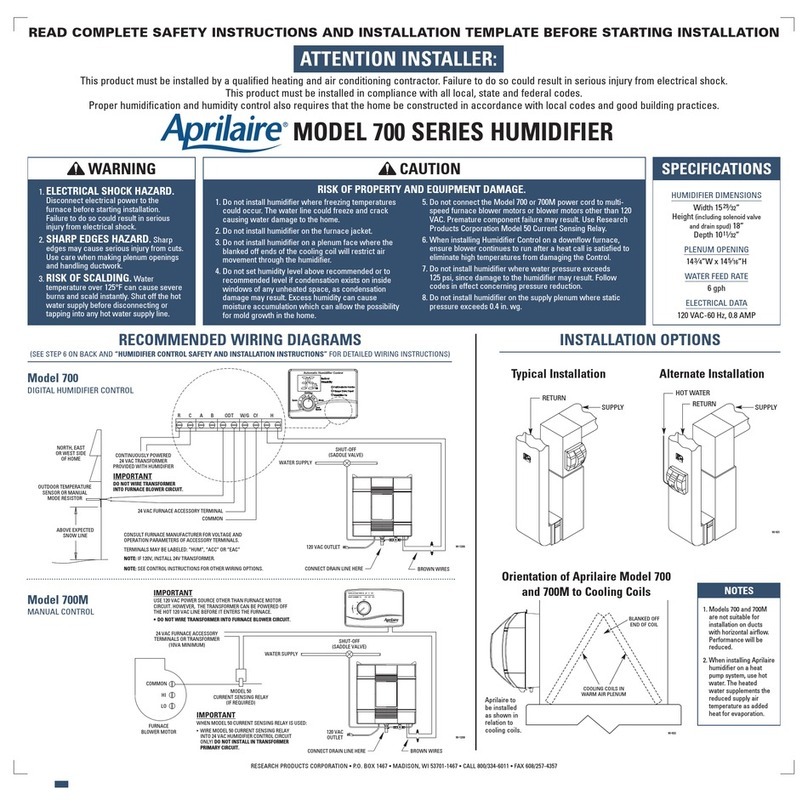
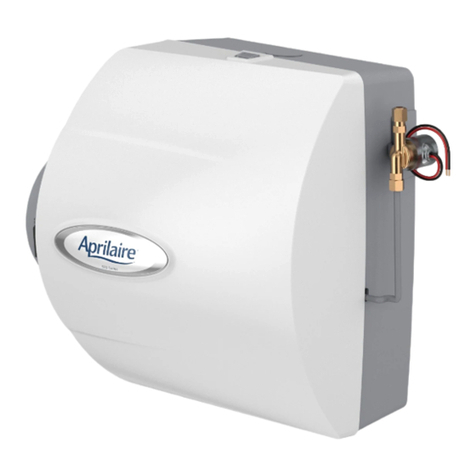
Aprilaire 600 & 700 User manual

Aprilaire

Aprilaire 600 & 700 User manual

Aprilaire 400 Series User manual

Aprilaire

Aprilaire 400 Series User manual

Aprilaire 700M User manual

Aprilaire

Aprilaire 700M User manual

Aprilaire 700 SERIES Technical specifications

Aprilaire

Aprilaire 700 SERIES Technical specifications

Aprilaire 850 Installation and operating instructions

Aprilaire

Aprilaire 850 Installation and operating instructions

Aprilaire 600 Setup guide

Aprilaire

Aprilaire 600 Setup guide

Aprilaire 700M User manual

Aprilaire

Aprilaire 700M User manual

Aprilaire 448 User manual

Aprilaire

Aprilaire 448 User manual

Aprilaire 850 Installation and operating instructions

Aprilaire

Aprilaire 850 Installation and operating instructions

Aprilaire 500 User manual

Aprilaire

Aprilaire 500 User manual

Aprilaire 700 SERIES Installation instructions

Aprilaire

Aprilaire 700 SERIES Installation instructions

Aprilaire 400 Series User manual

Aprilaire

Aprilaire 400 Series User manual

Aprilaire 600 User manual

Aprilaire

Aprilaire 600 User manual

Aprilaire 600 User manual

Aprilaire

Aprilaire 600 User manual

Aprilaire 800 Series User manual

Aprilaire

Aprilaire 800 Series User manual

Aprilaire 6055 User manual

Aprilaire

Aprilaire 6055 User manual

Aprilaire 800 Series Installation and operating instructions

Aprilaire

Aprilaire 800 Series Installation and operating instructions

Aprilaire 360 User manual

Aprilaire

Aprilaire 360 User manual

Aprilaire 500 Technical specifications

Aprilaire

Aprilaire 500 Technical specifications

Aprilaire 400 Series User manual

Aprilaire

Aprilaire 400 Series User manual

Popular Humidifier manuals by other brands

Scarlett Comfort SC-AH986E22 instruction manual

Scarlett

Scarlett Comfort SC-AH986E22 instruction manual

SOLAC HU1060 Instructions for use

SOLAC

SOLAC HU1060 Instructions for use

Vicks FilterFree use and care manual

Vicks

Vicks FilterFree use and care manual

Philips HU4902 quick start guide

Philips

Philips HU4902 quick start guide

Bionaire CM1 Instruction leaflet

Bionaire

Bionaire CM1 Instruction leaflet

Air-O-Swiss AOS 7131 Instructions for use manual

Air-O-Swiss

Air-O-Swiss AOS 7131 Instructions for use manual

Vitek VT-1768 BK Manual instruction

Vitek

Vitek VT-1768 BK Manual instruction

KING K 5002 Rainbow instruction manual

KING

KING K 5002 Rainbow instruction manual

Crane EE-6902 instruction manual

Crane

Crane EE-6902 instruction manual

Glaziar Ness user manual

Glaziar

Glaziar Ness user manual

Philips DreamStation Go Faqs

Philips

Philips DreamStation Go Faqs

Honeywell MISTMATE HUL520BC manual

Honeywell

Honeywell MISTMATE HUL520BC manual

Stadler Form Hera Operation instructions

Stadler Form

Stadler Form Hera Operation instructions

Hunter 31206 owner's guide

Hunter

Hunter 31206 owner's guide

TaoTronics TT-AH004 user guide

TaoTronics

TaoTronics TT-AH004 user guide

adorini Cigar Heaven manual

adorini

adorini Cigar Heaven manual

Pyle SereneLife PHUMDIF8 Instruction book

Pyle

Pyle SereneLife PHUMDIF8 Instruction book

Trotec B 200 operating manual

Trotec

Trotec B 200 operating manual

manuals.online logo
manuals.online logoBrands
  • About & Mission
  • Contact us
  • Privacy Policy
  • Terms and Conditions

Copyright 2025 Manuals.Online. All Rights Reserved.

8
7
2
10 12
14
13
4
5
3
1
11
6
9
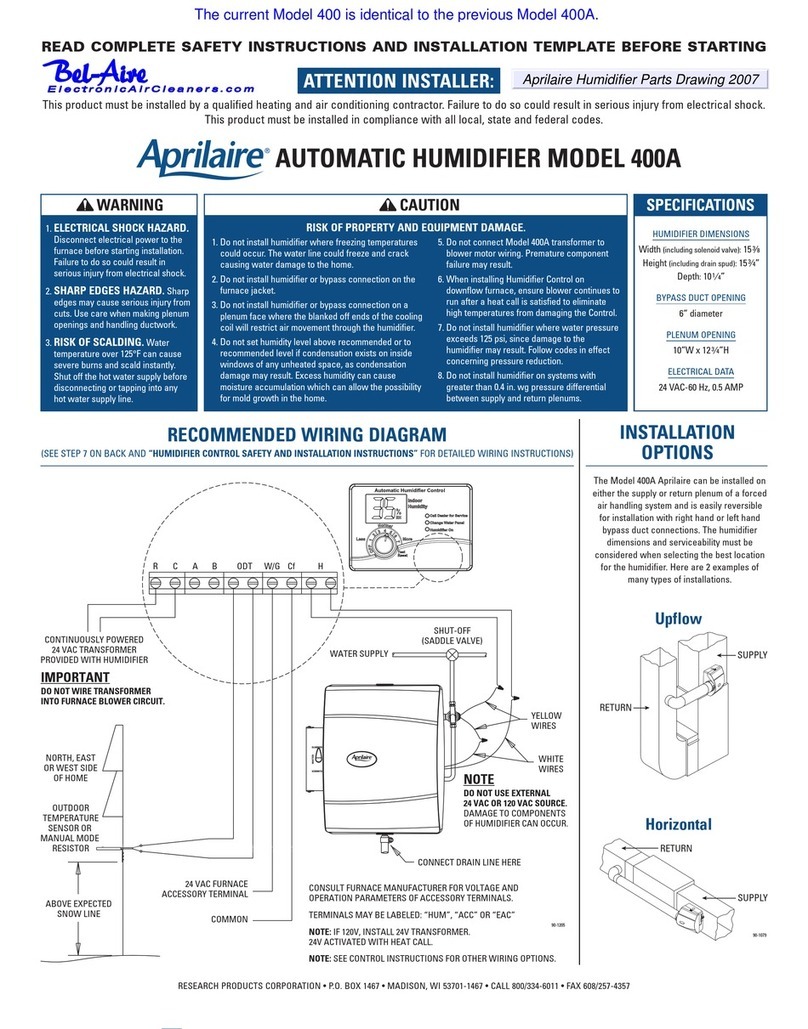
SPECIFICATIONS
Humidier Dimensions:
Width (including solenoid valve): 15-3/8”
Height (including drain spud): 15-3/4”
Depth: 10-1/4”
Bypass Duct Opening: 6” diameter
Plenum Opening: 10”W x 12-3/4”H
Water Feed Rate: 3 gph
Electrical Data: 24 VAC, 60 Hz, 0.5 Amp
Water Panel®: Model 45
INSTALLATION OPTIONS (LEFT HAND DISCHARGE SHOWN)
AprilAire Model 400 and 400M can be installed on either the supply plenum or cold air return of a forced air handling
system with right hand or left hand bypass duct connections. The humidier dimensions and serviceability must be
considered when selecting the best location for the humidier.
The humidier functions with cold, hot, softened, or unsoftened water.
FURNISHED ITEMS
• Humidier with built-in bypass damper
• 24 VAC transformer
• Automatic Digital Humidier Control
and Outdoor Temperature Sensor
(Model 400 only)
• Manual Humidier Control
(Model 400M only)
• Humidier Control Installation Instructions
• Saddle valve
• Humidier Installation Template
ITEMS NOT FURNISHED
• Mounting screws
(sheet metal screws)
• Water supply line
(1/4” O.D. copper)
• Overow tube
(1/2” I.D. hose)
• Low voltage wire
(18-22 gauge)
• Bypass ductwork
• Model 50 current sensing
relay (if required)
PARTS LIST
5. Water Panel
6. Scale Control
Insert/Float
Chamber
7. Bypass
Damper
8. Damper
Handle
9. Water Level
Sensor
Assembly
10. Hole Plug
11. Nameplate
12. Solenoid Valve
13. Float
14. Float Cover
1. Front Cover
2. Base
3. Feed Tube
4. Water
Distribution
Tray
RETURN
RETURN
SUPPLY
RETURN
SUPPLY
SUPPLY
FLOOR DRAIN OR
CONDENSATE
PUMP
OVERFLOW TUBE
OVERFLOW TUBE
FLOOR DRAIN OR
CONDENSATE
PUMP
RETURN
RETURN
SUPPLY
RETURN
SUPPLY
SUPPLY
FLOOR DRAIN OR
CONDENSATE
PUMP
OVERFLOW TUBE
OVERFLOW TUBE
FLOOR DRAIN OR
CONDENSATE
PUMP
HORIZONTALUPFLOW
90-1079
400 Series
Water Saver
Evaporative HumidierHumidier
Product Info &
Digital Manual
TEMPLATE MUST BE LEVEL
90-1263
INSTALLATION TEMPLATE
WARNING
• ATTENTION INSTALLER: Read this manual before
installing. Improper installation or maintenance
may cause property damage or injury. It is
recommended that installation, service, and
maintenance be performed by a trained service
technician. This product must be installed in
compliance with all local, state, and federal codes.
• ELECTRIC SHOCK HAZARD: 120 volts may cause
serious injury from electric shock. Disconnect
electrical power to the HVAC system and
humidier before starting installation or servicing.
Leave power disconnected until installation/
service is completed.
• RISK OF SCALDING. Water temperature over 125°F
can cause severe burns and scald instantly. Shut
off the hot water supply before disconnecting or
tapping into any hot water supply line.
• Avoid obstructions such as plumbing or electrical
wires when cutting into walls.
CAUTION
• SHARP EDGES MAY CAUSE INJURY FROM CUTS. Use
care when cutting plenum openings and handling
ductwork. Always wear glasses/goggles and
gloves when installing the unit.
• Dropping may cause personal injury or equipment
damage. Handle with care and follow installation
instructions.
NOTICE
FREEZING TEMPERATURES CAN BURST WATER PIPES.
• Do not install the humidier where freezing may
occur. The water line could freeze and crack
causing water damage to the home.
CONDENSATION DAMAGE OR MOLD CAN OCCUR.
• Position the return duct mounted humidier
control at least 6” upstream of the humidier,
bypass duct connection, or fresh air intake for
accurate humidity sensing.
• Position the wall-mounted humidier control in
areas unaffected by drafts or heat sources for
accurate humidity sensing.
• Lower the humidity setting on the humidier
control if there is excess condensation on the
inside of any windows in unheated living spaces.
EQUIPMENT DAMAGE MAY OCCUR IF INSTALLATION
INSTRUCTIONS ARE NOT FOLLOWED.
• Do not install the humidier or bypass connection
on the furnace jacket.
• Do not connect the transformer to the blower
motor wiring.
• Do not install the humidier or bypass connection
on a plenum face at the blanked end of the
cooling coil.
• If water pressure exceeds 125 psi, reduce water
pressure with devices allowed by local codes.
• Use water with a temperature no greater than
140°F (60°C).
• Do not install the humidier on systems with
differential pressure greater than 0.4” w.c. between
the supply and return plenums.
• When installing the humidier control on the
return duct of a downow furnace, ensure blower
continues to run after a heat call is satised to
eliminate high temperatures from damaging the
humidier control.
• Periodically check drain line to make sure water
ows freely to drain.
Insert feed tube into distribution tray. Turn damper handle to WINTER when in use.
6”
TEMPLATE
LEVEL
DO NOT
POSITION
OPENING IN
FRONT OF
COOLING
COILS
MINIMIZE
DISTANCE
6”
FLOOR
DRAIN OR
CONDENSATE
PUMP
DRAIN SPUD
HOSE CLAMP
OVERFLOW
TUBE
Tighten water line by double wrenching.
Locate manual or digital humidier control on the
return 6” above the humidier or bypass duct. Completed installation.Location of manual humidier control in living space.
Secure base with screws.
Press tabs
to remove cover.
Pull feed tube out of distribution
tray, and remove Water Panel
evaporative assembly. Cut opening using this template.
OVERFLOW
TUBE:
• Ensure
downward
slope and
no kinks.
• Do not over-
tighten hose
clamp onto
drain spud.
• Do not use
solvent
adhesive on
drain spud.
INSTALLATION INSTRUCTIONS
COMMON
HI
LO
FURNACE
BLOWER MOTOR
MODEL 50 CURRENT
SENSING RELAY (IF REQUIRED)
24 VAC FURNACE
ACCESSORY
TERMINALS OR
TRANSFORMER
(10VA MINIMUM)
SHUT-OFF
(SADDLE VALVE)
WATER SUPPLY
CONNECT OVERFLOW
TUBE HERE
YELLOW
WIRES
WHITE
WIRES
WHITE
WIRES
G
Y
W
C
RR
C
W
Y
G
OUTPUTSINPUTSPOWER
GWCR HHODT Gf
YELLOW
WIRES
THERMOSTAT OR
ZONE PANEL
EQUIPMENT TERMINALS
110 VAC
FURNACE
OUTDOOR
TEMPERATURE
SENSOR FOR
AUTOMATIC MODE
NORTH, EAST
OR WEST SIDE
OF HOME
ABOVE EXPECTED
SNOW LINE
CONTINUOUSLY POWERED
24 VAC TRANSFORMER
PROVIDED WITH HUMIDIFIER
WATER
SUPPLY
CONNECT
OVERFLOW
TUBE HERE
ADHC TERMINAL STRIP
INSTALLATION
CHECKLIST
Saddle valve is
fully open.
All plumbing
connections
are watertight.
Humidier
functions
properly.
Bypass
damper is in
proper position.
Owner’s
manual has
been given to
homeowner.
MODEL 400 DIGITAL HUMIDIFIER CONTROL WIRING MODEL 400M MANUAL CONTROL WIRING
90-1513
90-1399
TEMPLATE MUST BE LEVEL
B2205115H • 10008973 • 10.23
© 2023 AprilAire | aprilairepartners.com | 800.334.6011
AprilAire reserves the right to change specications without notice.
IMPORTANT: Use 120 VAC power source
other than furnace blower circuit.
However, the transformer can be
powered off the hot 120 VAC line before
it enters the furnace. Do not wire
transformer into furnace blower circuit.
IMPORTANT: When Model 50 current sensing relay is used, wire
Model 50 current sensing relay into 24 VAC humidier control
circuit only! Do not install in transformer primary circuit.
NOTE: Control will display software revision level, e.g., r3,
when the one minute test cycle has completed. Refer to the
control installation manual for system checkout instructions.
6
5
8a
8b
9
7
1
4
2
3
90-2248
90-2248
90-1666
90-2248 90-1165
90-2248
90-2248 90-1068 90-2248
90-1069