Aputure amaran PT User manual

amaran PT
Product Manual
English

Introduction
Important Safety Instructions
When using this unit, basic safety precautions should always be followed, including the following:
1. Read and understand all instructions before using.
2. Please keep amaran PT away from hard drives, credit cards, monitors, mechanical watches, mobile
phones, medical devices (pacemakers), etc.
3. Close supervision is necessary when any fixture is used by or near children. Do not leave the fixture
unattended while in use.
4. Care must be taken as burns can occur from touching hot surfaces.
5. Do not operate the fixture if a cord is damaged, or if the fixture has been dropped or damaged, until
it has been examined by qualified service personnel.
6. Position any power cables such that they will not be tripped over, pulled, or put into contact with hot
surfaces.
7. If an extension cord is necessary, a cord with an amperage rating at least equal to that of the fixture
should be used. Cords rated for less amperage than the fixture may overheat.
8. Always unplug the lighting fixture from the electrical outlet before cleaning and servicing, or when not
in use. Never yank the cord to remove the plug from the outlet.
9. Let the lighting fixture cool completely before storing. Unplug the power cable from lighting fixture
before storing and store the cable in assigned space of the carrying case.
10. To reduce the risk of electric shock, do not immerse this fixture in water or any other liquids.
11. To reduce the risk of fire or electric shock, do not disassemble this fixture. Contact [email protected]om
or take the lighting fixture to qualified service personnel when service or repair is required.
Incorrect reassembly may cause electric shock when the lighting fixture is in use.
12. The use of any accessory attachment not recommended by the manufacturer may increase the risk
of fire, electric shock, or injury to any persons operating the fixture.
13. Please power this fixture by connecting it to a grounded outlet.
14. Please do not block the ventilation or do not look at the LED light source directly when it is powered on.
Please do not touch the LED light source in any condition.
15. Please do not place the LED lighting fixture near any flammable object.
16. Only use a dry microfiber cloth to clean the product.
17. Please do not use the light fixture in wet condition on account of electric shock may be caused.
18. Please have the product checked by an authorized service personnel agent if the product has a problem.
Any malfunctions caused by unauthorized disassembly are not covered by the warranty. The user may
pay for maintenance.
19. We recommend only using the original Aputure cable accessories. Please note that any malfunctions
caused by using unauthorized accessories are not covered by the warranty. The user may pay for
maintenance.
20. When hanging the product overhead, always ensure an extra safety measure has been attached -
such as a safety chain- that is certified for the weight of the product.
21. This product is certified by RoHS, CE, KC, PSE, and FCC. Please operate the product in full compliance
with relevant country's standards. Any malfunctions caused by incorrect use are not covered by
warranty. The user may pay for maintenance.
22. The instructions and information in this manual are based on thorough, controlled company testing
procedures. Further notice will not be given if the design or specifications change.
-1-
SAVE THESE INSTRUCTIONS

WARNING
Changes or modications not expressly approved by the party responsible for compliance could void
the user's authority to operate the equipment.
NOTICE
This equipment has been tested and found to comply with the limits for a Class B digital device,
pursuant to Part 15 of the FCC Rules. These limits are designed to provide reasonable protection
against harmful interference in a residential installation. This equipment generates, uses, and can
radiate radio frequency energy and, if not installed and used in accordance with the instructions,
may cause harmful interference to radio communications. However, there is no guarantee
that interference will not occur in a particular installation.
If this equipment does cause harmful interference to radio or television reception, which can be determined
by turning the equipment offand on, the user is encouraged to try reorient or relocate the receiving antenna.
Increase the separation between the equipment and receiver.
Connect the equipment to an outlet on a different circuit than the receiver is connected to.
Consult the dealer or an experienced radio/ TV technician for help.
This device has been evaluated to meet general RF exposure requirements.
Please make sure all accessories listed below are completed before using. If not, please contact with
your sellers immediately.
PT1c
PT1c x 1 Carrying Pouch x 1 USB-C Cable x 1
FCC Compliance Statement
RF Warning Statement:
-2-
Components List

PT2c
PT4c
PT2c x 1 Power Adapter x 1
Magnetic
T12 Bracket x 2
Magnetic T12 Bracket x 2
Carrying Bag x1
PT4c x 1
Carrying Bag x1
3/8”-16 Eyebolt x 1
3/8”-16 Eyebolt x 1
-3-
Note: The illustrations in the manual are only diagrams for reference. Due to the continuous development of
new versions of the product, if there are any differences between the product and the user manual diagrams ,
please refer to the product itself.
Power Adapter x 1

Press and hold the power button fo 3 seconds to turn the amaran PT on or off.
PT1c
Rotatable Magnets (PT1c Only)
PT2c / PT4c
-4-
Product Details
Operations
1. Power ON/OFF
3
2
1
9
1
Battery Cover (PT1c Only)
2
Power Button
3
Menu/Back Button
4
Control Display Screen
5
Up/Down Buttons
6
OK (Enter) Button
7
USB-C Charging/DMX port
8
45
6
7
8
1
Note: PT2c shown as an example
9
9
3/8”-16 Female Threaded Holes
9

1. Read and understand all instructions before using.
2. Please keep amaran PT away from hard drives, credit cards, monitors, mechanical watches, mobile
phones, medical devices (pacemakers), etc.
3. Close supervision is necessary when any fixture is used by or near children. Do not leave the fixture
unattended while in use.
4. Care must be taken as burns can occur from touching hot surfaces.
5. Do not operate the fixture if a cord is damaged, or if the fixture has been dropped or damaged, until
it has been examined by qualified service personnel.
6. Position any power cables such that they will not be tripped over, pulled, or put into contact with hot
surfaces.
7. If an extension cord is necessary, a cord with an amperage rating at least equal to that of the fixture
should be used. Cords rated for less amperage than the fixture may overheat.
8. Always unplug the lighting fixture from the electrical outlet before cleaning and servicing, or when not
in use. Never yank the cord to remove the plug from the outlet.
9. Let the lighting fixture cool completely before storing. Unplug the power cable from lighting fixture
before storing and store the cable in assigned space of the carrying case.
10. To reduce the risk of electric shock, do not immerse this fixture in water or any other liquids.
11. To reduce the risk of fire or electric shock, do not disassemble this fixture. Contact cs@aputure.com
or take the lighting fixture to qualified service personnel when service or repair is required.
Incorrect reassembly may cause electric shock when the lighting fixture is in use.
12. The use of any accessory attachment not recommended by the manufacturer may increase the risk
of fire, electric shock, or injury to any persons operating the fixture.
13. Please power this fixture by connecting it to a grounded outlet.
14. Please do not block the ventilation or do not look at the LED light source directly when it is powered on.
Please do not touch the LED light source in any condition.
15. Please do not place the LED lighting fixture near any flammable object.
16. Only use a dry microfiber cloth to clean the product.
17. Please do not use the light fixture in wet condition on account of electric shock may be caused.
18. Please have the product checked by an authorized service personnel agent if the product has a problem.
Any malfunctions caused by unauthorized disassembly are not covered by the warranty. The user may
pay for maintenance.
19. We recommend only using the original Aputure cable accessories. Please note that any malfunctions
caused by using unauthorized accessories are not covered by the warranty. The user may pay for
maintenance.
20. When hanging the product overhead, always ensure an extra safety measure has been attached -
such as a safety chain- that is certified for the weight of the product.
21. This product is certified by RoHS, CE, KC, PSE, and FCC. Please operate the product in full compliance
with relevant country's standards. Any malfunctions caused by incorrect use are not covered by
warranty. The user may pay for maintenance.
22. The instructions and information in this manual are based on thorough, controlled company testing
procedures. Further notice will not be given if the design or specifications change.
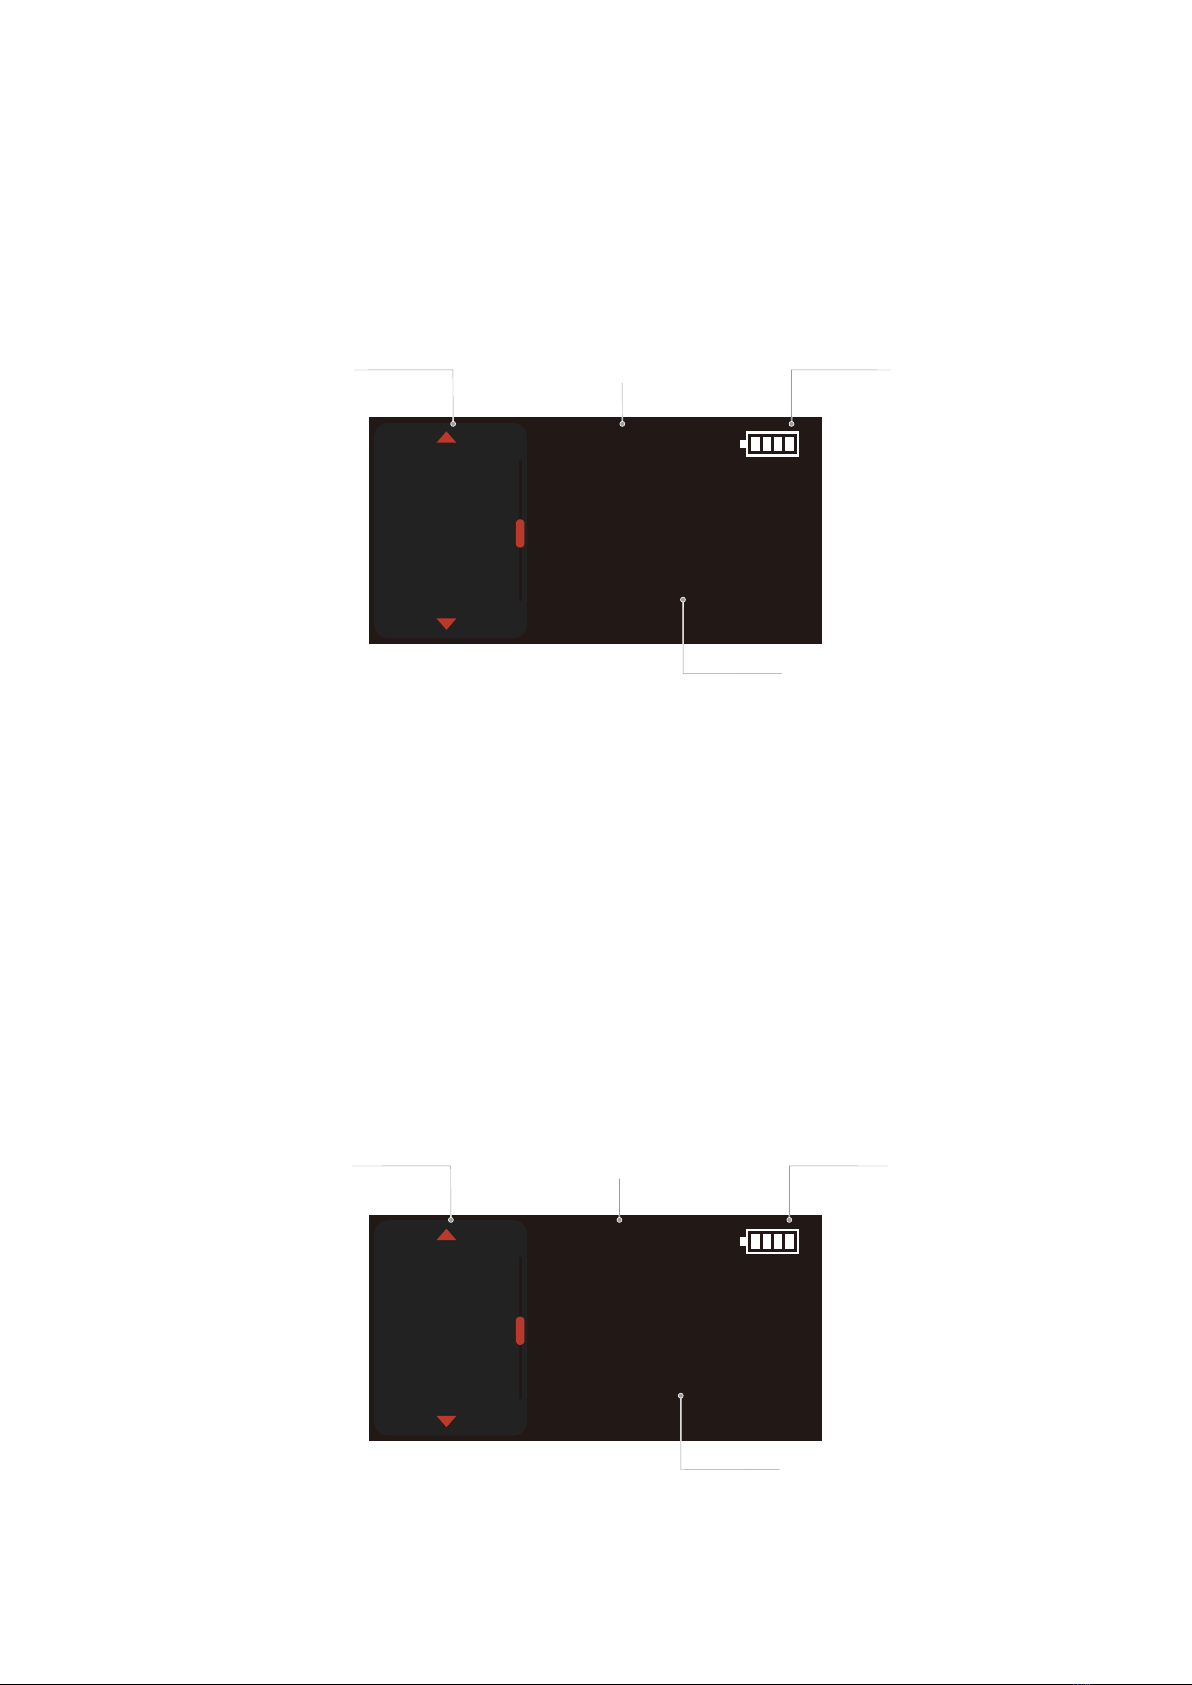
Battery remaining time
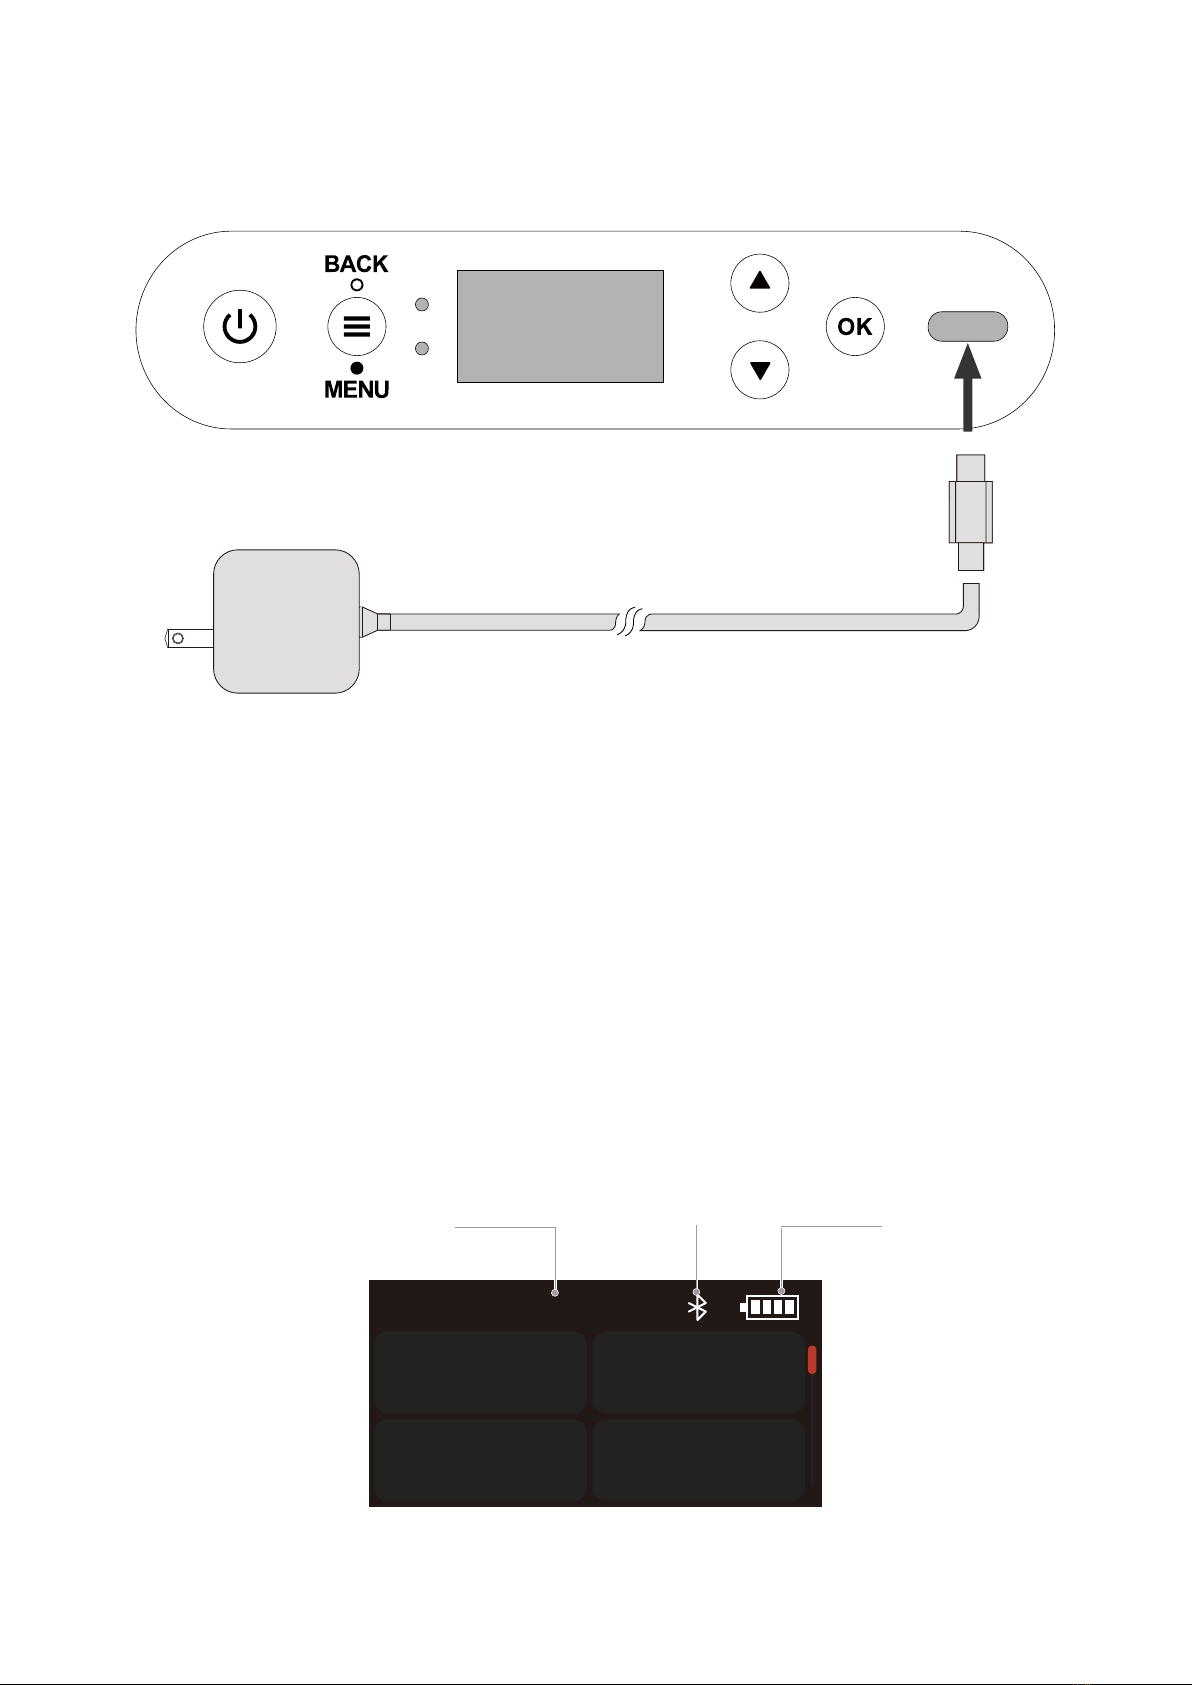
2. USB Type-C Charging
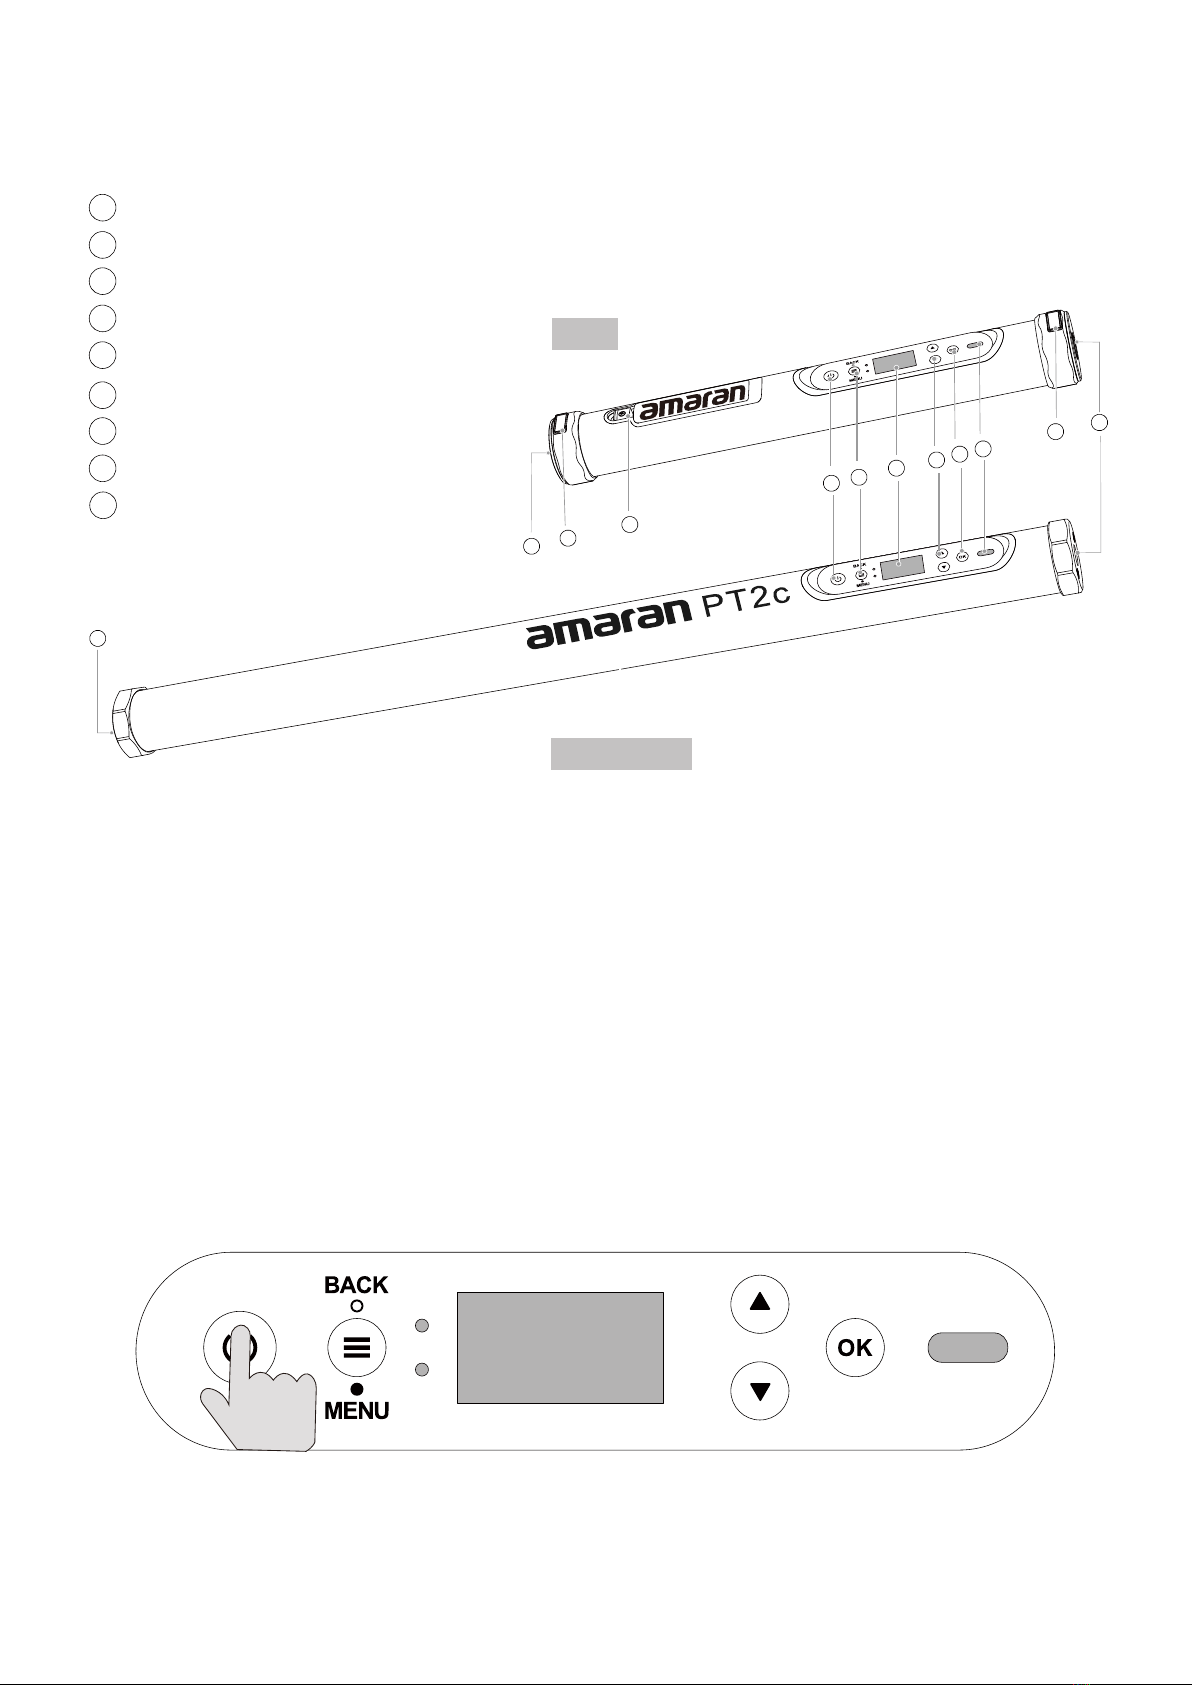
3. Manual Control
2h53m
Light Mode BT
Settings
SYS
Settings
DMX
Settings
Bluetooth status Battery level
-5-
100 - 240 V
Note: PT1c only supports 5V /2A power adapter or mobile power charging.
Note: Charging rate will slow down when the light is powered on. Turn the light offfor optimal charging.
3.1 Root Menu Screen

3.2 Menu
3.3 Light Mode
Press the Up/Down buttons and press the OK button to select HSI in Light Mode.
INT (Intensity): 0 - 100 %
CCT (Correlated Color Temp.): 2700 K - 10000 K
G/M (Green / Magenta adjustment): -1.0 ~ +1.0
INT (Intensity): 0 - 100 %
HUE (Hue): 1 - 360°
SAT (Saturation): 0 - 100 %
CCT (Correlated Color Temp.): 2700 K - 10000 K
3.3.1 CCT
3.3.2 HSI
-6-
Press MENU to access the system menu, press the Up/Down buttons and press the OK button to select
the Light Mode / Bluetooth Settings / DMX Settings / System Settings.
Press the Up/Down buttons and press the OK button to select CCT in Light Mode.
CCT
90
INT
G/M
CCT
HSI
90
INT
CCT
HUE

Pixel Fire
HUE 300
°
Bkgd
Fire 1
FRQ
3.3.3 SYS FX
-7-
Fireworks
90%
INT
STAT
MODE
Lighting Effect Name Battery LevelControl Parameter
Selection
Parameter Value
Press the Up/Down buttons and press the OK button to select SYS FX in Light Mode.
Press the Up/Down buttons and press the OK button to select one of the 9 available lighting effects.
SYS FX Sub-menu control screen layout:
Note: “Fireworks” SYS FX shown as an example.
Note: Please refer to pages 16-20 for detailed information of control parameters.
Press the Up/Down buttons and press the OK button to select Pixel FX in Light Mode.
Press the Up/Down buttons and press the OK button to select one of the 7 available pixel effects.
3.3.4 Pixel FX
Pixel Effect Name Battery LevelControl Parameter
Selection
Parameter Value
Note: “Pixel Fire” Pixel FX shown as an example.
Note: Please refer to pages 16-20 for detailed information of control parameters.
Pixel FX Sub-menu control screen layout:

-8-
3.4 BT Settings
Press the Up/Down buttons and press the OK button to select BT Settings in system menu, Press the Up/
Down buttons to select BT Status / BT Reset / BT UID.
BT Status : Turn on/offBluetooth.
BT Reset : Reset the amaran PT Bluetooth connection, and your mobile phone or tablet will be able to
connect to and control the light with Sidus Link App.
BT UID : Display the Bluetooth Unique Identifier.
BT Status
Enable Disable
BT Reset
BT UID
85350f
Press the Up/ Down buttons and press the OK button to select DMX Settings in system menu.
Press the Up/ Down buttons to select DMX Settings.
DMX Address : Set the DMX address of amaran PT, press and hold the OK button for 2 seconds to lock /
unlock the DMX address (To prevent accidental touch to exit DMX mode).
DMX Profiles: Press the Up/ Down buttons to choose DMX profile.
DMX Loss Behavior:
1. Hold Last Setting : After DMX signal is lost, remember the last control setting.
2. Black Out : When the DMX signal is lost, it will be Black out .
3. Fade To Black : After DMX signal is lost, it will fade to Black in 60 seconds.
4. After the DMX signal is lost, keep the last control setting for two minutes, and then Fade to Black within
60 seconds.
3.5 DMX Settings

-9-
Note: The fade-out time decreases as the percentage of brightness decreases. When the brightness output is 100%,
the fade-out time is 60 seconds, which decreases in sequence.
Note: If the signal is reconnected, the DMX console will continue to maintain the signal output as same as before.
DMX Address
001
DMX Profiles
1: CCT&RGB 8-bit
2: CCT 8-bit
3: CCT&HSI 8-bit
DMX Loss Be
Hold Last Setting
Black Out
Fade to Black
Press the Up/Down buttons and press the OK button to select System Settings in system menu.
Press the Up/ Down buttons to select Language / Screensaver / Product Info / Factory Reset.
Language : Press the Up/ Down buttons and press the OK button to select English or Simplified Chinese.
Screensaver: Press the Up/Down buttons and press the OK button to choose turn the screensaver
on after 30/60/120 seconds or turn it off.
3.6 System Settings
Language
English 中文

-10-
Screensaver
60s
30s
120s
Product Info: Press the Up / Down buttons and press the OK button to select Product Info to see the
Firmware Version.
Power Mode : Press the Up/Down buttons and press the OK button to select a Power Mode.
Factory Reset : Press the Up/Down buttons and press the OK button to select Factory Reset.
With battery: Optimize battery life by prioritizing power supply when equipped with batteries.
No battery : Operate the light with a power adapter plugged in without battery, please turn on this
function after removing the battery.
Product Info
Firmware 0
Power mode
With battery
No battery
Factory Reset

-11-
4.1 Connect a standard DMX controller
* USB-C to DMX Adapter with USB-C Input sold separately.
Factory Settings:
Light Mode: Intensity 50%, CCT 5600K, GM 0
BT Status: ON
DMX: Address 001, Profile CCT&RGB, Hold Last Setting.
System setting: Language English, screensaver off.
4. Wired DMX Control
In DMX mode, match the channel of your DMX controller with the light, and then adjust accordingly.
* The default DMX channel is 001.
* The range of DMX channels is 1 to 512.
4.3 Channel selection
4.2 DMX Interface Info
12
3
4
5
1
2
3
45
Signal Common
Data 2+ (Optional Secondary Data Link)
Data 2- (Optional Secondary Data Link)
Data 1+ (Primary Data Link)
Data 1- (Primary Data Link)
Signal Common
Data 2+ (Optional Secondary Data Link)
Data 2- (Optional Secondary Data Link)
Data 1+ (Primary Data Link)
Data 1- (Primary Data Link)
12
3
4
5
1
2
3
45
DMX512
12
3
4
5
Daisy chaining multiple lights using DMX
DMX512
OUTPUT
Connecting DMX to the first PT fixture

-12-
The amaran PT offers a variety of DMX modes. Please find a detailed overview of all DMX modes in the document,
DMX Chart is available for free download on the Aputure official website https://www.aputure.com.
You can download the Sidus Link app from the iOS App Store or Google Play Store for enhancing the
functionality of the light. Please visit Sidus.link/app/help for more details regarding how to use the app to
control your Aputure lights.
5. Using the Sidus Link APP
4.4 Controlling Device Via DMX
Sidus.link/app/helpGet Sidus Link App
R

-13-
Specifications
Maximum Power Draw PT1C: 8W
PT2C: 16W
PT4C: 32W
Maximum Power Output
PT1C: 6W
PT2C: 11.5W
PT4C: 23W
CCT Range 2,700 - 10,000K
CRI (@5600K) 95
TLCI (@5600K) 98
CQS (@5600K) 96
SSI (Tungsten) 85
SSI (D56) 75
TM-30 Rf (@5600K)
TM-30 Rg (@5600K)
Pixel Mapping
Beam Angle
Chargning Input
Battery Voltage
Battery Capacity
Battery Runtime (@ 100% Intensity)
92
100
USB Type-C
PT1C: 4
PT2C: 8
PT4C: 16
180
3.7V (PT1c), 14.8V (PT2c/PT4c)
PT1C: 2600mAh / 9.6Wh
PT2C: 2600mAh / 38.48Wh
PT4C: 5200mAh / 77Wh
PT1C: 70 minutes
PT2C: 170 minutes
PT4C: 170 minutes
Charge Time
PT1C: 110 minutes
PT2C: 170 minutes
PT4C: 190 minutes

-14-
* USB-C to 5-Pin XLR In & Out adapter sold separately.
Photometrics
PT1c
CCT 0.5 m 1m
2700K 325 lux 87 lux
3200K 331 lux 88 lux
4300K 342 lux 91 lux
5600K 359 lux 95 lux
6500K 355 lux 94 lux
7500K 339 lux 89 lux
10000K 313 lux 83 lux
Operating Temperature
Control Methods
Firmware Upgrade Method
Wireless Operating Range (Bluetooth)
Screen Type
IP Rating
Cooling Method
Dimensions
Weight
-10 C ~ 40 C / 14 F ~ 104 F
On-board, Sidus Link App, DMX via USB Type-C
Sidus Link
80m / 262.5ft
TFT
<_ <_
IP20
Passive Cooling
PT1C: Φ42 x 300 mm / Φ1.6 x 11.8 in
PT2C: Φ42 x 600 mm / Φ1.6 x 23.6 in
PT4C: Φ42 x 1200 mm/ Φ1.6 x 47.2 in
PT1C: 351 g / 0.77 lbs
PT2C: 705 g / 1.55 lbs
PT4C: 1375 g / 3.03 lbs

-15-
CCT 0.5 m 1m
2700K 586 lux 180 lux
3200K 595 lux 181 lux
4300K 613 lux 185 lux
5600K 647 lux 195 lux
6500K 643 lux 194 lux
7500K 612 lux 185 lux
10000K 563 lux 83 lux
PT2c
* This is an averaged result. The luminance of your individual unit may vary slightly from this data.
CCT 0.5 m 1m
2700K 867 lux 303lux
3200K 868 lux 306 lux
4300K 897 lux 316 lux
5600K 956 lux 332 lux
6500K 955 lux 330 lux
7500K 902 lux 322 lux
10000K 842 lux 297 lux
PT4c

-16-
Detailed Parameters of FX Control
System FX
INT
CCT
G/M
FRQ
Status
INT
CCT
G/M
FRQ
Status
INT
FRQ
Status
INT
FRQ
Status
Fire
0% - 100%
CCT
Warmer
Neutral
Cooler
1 - 10, Random
Stop / Loop
TV
0% - 100%
CCT
Warmer
Neutral
Cooler
1 - 10, Random
Stop / Loop
Lightning
0% - 100%
2700K - 10000K
-1.0 - 1.0
1 - 10, Random
Stop / Trigger /Loop
Paparazzi
0% - 100%
2700K - 10000K
-1.0 - 1.0
1 - 10, Random
Stop / Loop

-17-
INT
FRQ
CCT
G/M
FRQ
HUE
SAT
Status
INT
FRQ
CCT
G/M
FRQ
HUE
SAT
Status
INT
Colors
FRQ
Status
INT
SAT
FRQ
Status
°953-
°
0
0% - 100%
1 - 10, Random
2700K - 10000K
-1.0 - +1.0
1 - 10, Random
°953-
°
0
0% - 100%
Cop Car
0% - 100%
R/ B/ R+B/ B+W/ R+B+W
1 - 10, Random
Stop / Loop
Party Light
0% - 100%
0% - 100%
1 - 10, Random
Stop / Loop
Pulsing
0% - 100%
Mode
CCT
HSI
Stop / Loop
1 - 10, Random
2700K - 10000K
-1.0 - +1.0
1 - 10, Random
Faulty Bulb
0% - 100%
Mode
CCT
HSI
Stop / Loop

-18-
Pixel FX
INT
FRQ
Status
Firework
0% - 100%
Mode
CCT
HUE
CCT+HUE
1 - 10, Random
Stop / Loop
INT
Color No
Speed
Move
Status
INT
Color No
Speed
Transition
Move
Status
Color Cycle
0% - 100%
2/3/4
Color 1
Color 2
Color 3
Color 4
0.1-10.0S
Step / Smooth
Left/ Right
Play / Pause / Stop
Color Fade
0% -100 %
2/ 3/ 4
1 - 640 cm/s
Left / Right
Play/ Pause / Stop
Color 1
Color 2
Color 3
Color 4
HUE: 30° /60°/90°/120°/150°/180°/210°/240°/
270°/300°/330°/360°
CCT: 2500K/3200K/4300K/5600K/6500K/7500K
HUE: 30° /60°/90°/120°/150°/180°/210°/240°/
270°/300°/330°/360°
CCT: 2500K/3200K/4300K/5600K/6500K/7500K

-19-
Pixel INT
Bkgd INT
Pixel Size
Departure
Speed
Move
Status
One Pixel Chase
0%- 100%
0%- 100%
S/M/L
1 Way/ 2 Way
1 - 640 cm/s
Left/ Loop/ Right
Play/ Pause/ Stop
Pixel 1 Blackground
HUE: 30° /60°/90°/120°/150°/180°/210°/240°/
270°/300°/330°/360°
CCT: 2500K/3200K/4300K/5600K/6500K/7500K
HUE: 30° /60°/90°/120°/150°/180°/210°/240°/
270°/300°/330°/360°
CCT: 2500K/3200K/4300K/5600K/6500K/7500K
Pixel INT
Bkgd INT
Pixel Size
Departure
Speed
Move
Status
Two Pixel Chase
0%- 100%
0%- 100%
S/M/L
1 Way/2 Way
1 - 640 cm/s
Left/ Loop/ Right
Play/ Pause / Stop
Pixel 1
Pixel 2 Blackground
HUE: 30° /60°/90°/120°/150°/180°/210°/240°/
270°/300°/330°/360°
CCT: 2500K/3200K/4300K/5600K/6500K/7500K
Black (Blackground Only )
Pixel INT
Bkgd INT
Pixel Size
Departure
Speed
Move
Status
Three Pixel Chase
0%- 100%
0%- 100%
S/M/L
1 Way/2 Way
1 - 640 cm/s
Left/ Loop/ Right
Play/ Pause / Stop
Pixel 1
Pixel 2
Pixel 3
Blackground
This manual suits for next models
2
Table of contents
Other Aputure Camera Accessories manuals

Aputure
Aputure V-Control User manual

Aputure
Aputure Trigmaster Plus II Guide

Aputure
Aputure VS-1 FineHD User manual

Aputure
Aputure Trigmaster 2.4G User manual

Aputure
Aputure AL-M9 User manual

Aputure
Aputure Gigtube Wireless User manual

Aputure
Aputure Gigtube Wireless II User manual

Aputure
Aputure MAGNUM SPEEDLITE MG-68TL User manual

Aputure
Aputure Gigtube Wireless User manual

Aputure
Aputure Gigtube Wireless II User manual