‧
‧
‧
‧
‧
‧
‧
‧
‧
‧
‧
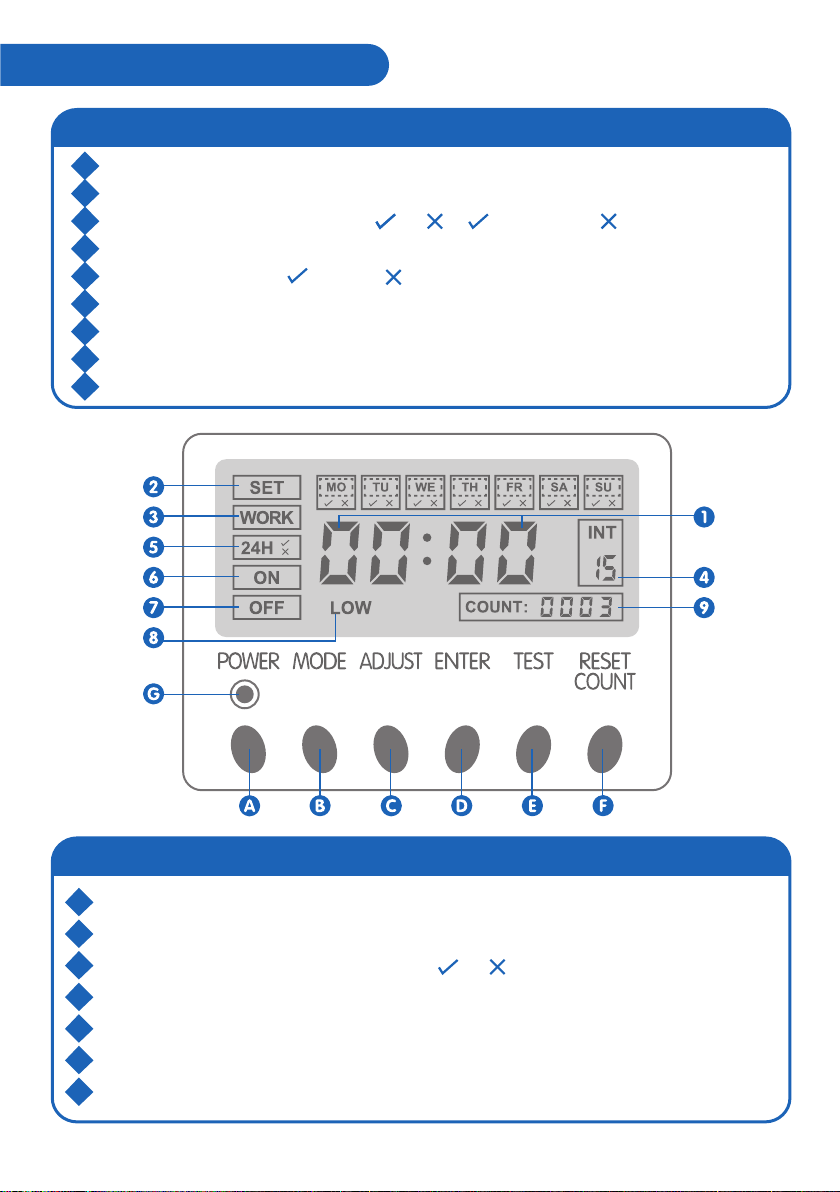
設定時間按MODE鍵:
進入時鐘圖標,“小時”閃動,按ADJUST輸入小時,選好後按ENTER跳到下一步驟
按ADJUST輸入“分鐘”,選好後按ENTER跳到下一步驟
按ADJUST在MO至SU確定當天週期日,選好後按ENTER跳到下一步驟
按ADJUST確定(順序從MO至SU)選 運作,選 待命
選定按ENTER,自動到下一日,即TU→WE→TH→FR→SA→SU,
選好後按ENTER跳到下一步驟
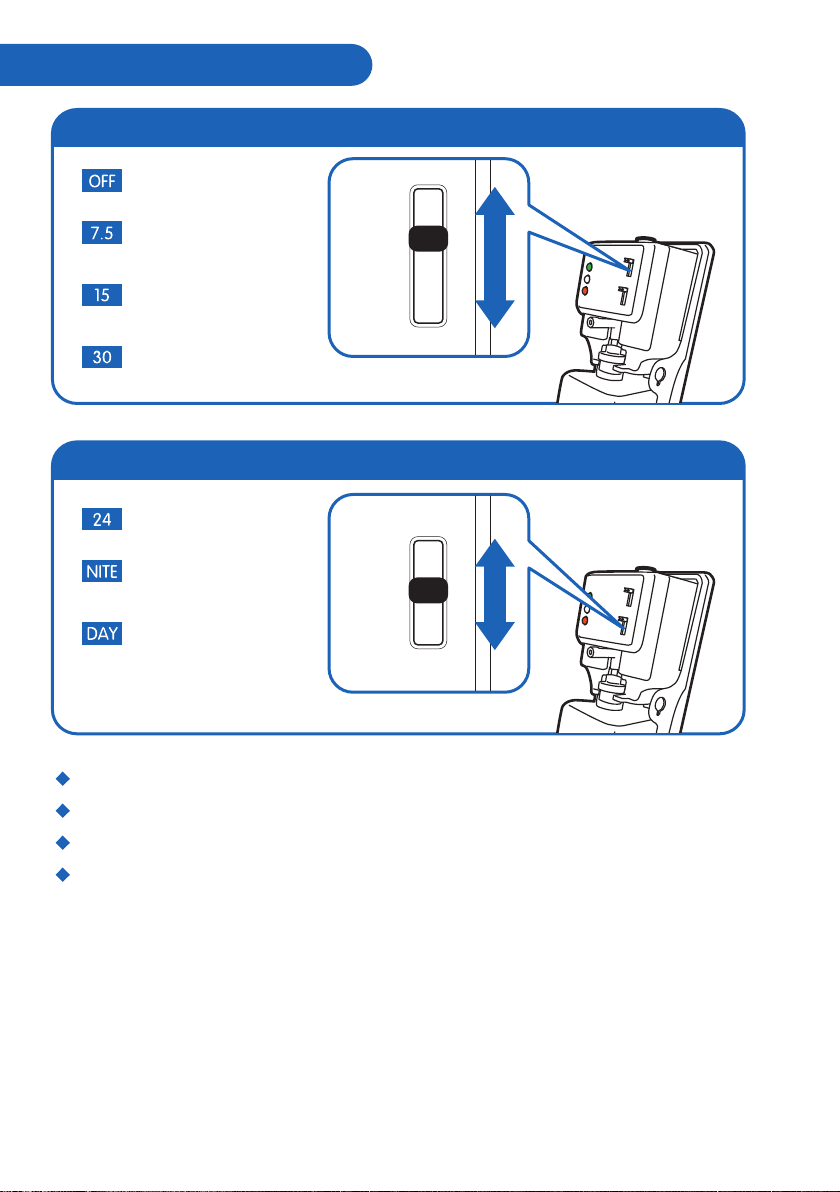
INT圖標閃動,按ADJUST從01-60分鐘內選定噴霧間隔時間,
選好後按ENTER跳到下一步驟
按ADJUST選定 或 , 代表24小時工作, 代表非24小時工作,
選好後按ENTER跳到下一步驟
按ADJUST輸入每日開始工作時間,選好後按ENTER跳到下一步驟
按ADJUST輸入“分鐘”,選好後按ENTER跳到下一步驟
按ADJUST輸入每日關閉工作時間,選好後按ENTER跳到下一步驟
按ADJUST輸入“分鐘”,選好按ENTER,
1
2
3
4
5
6
7
8
9
10
11
溫馨提示
‧
‧
‧
如閣下睡覺時對聲音特別敏感,建議選擇把噴霧機安裝於睡房以外
05
到此結束所有設定,並開始正常運作。若未能在15秒內完成自行設定程序,屏幕將自動回復
到原廠設定,需要重新開始設定程序。
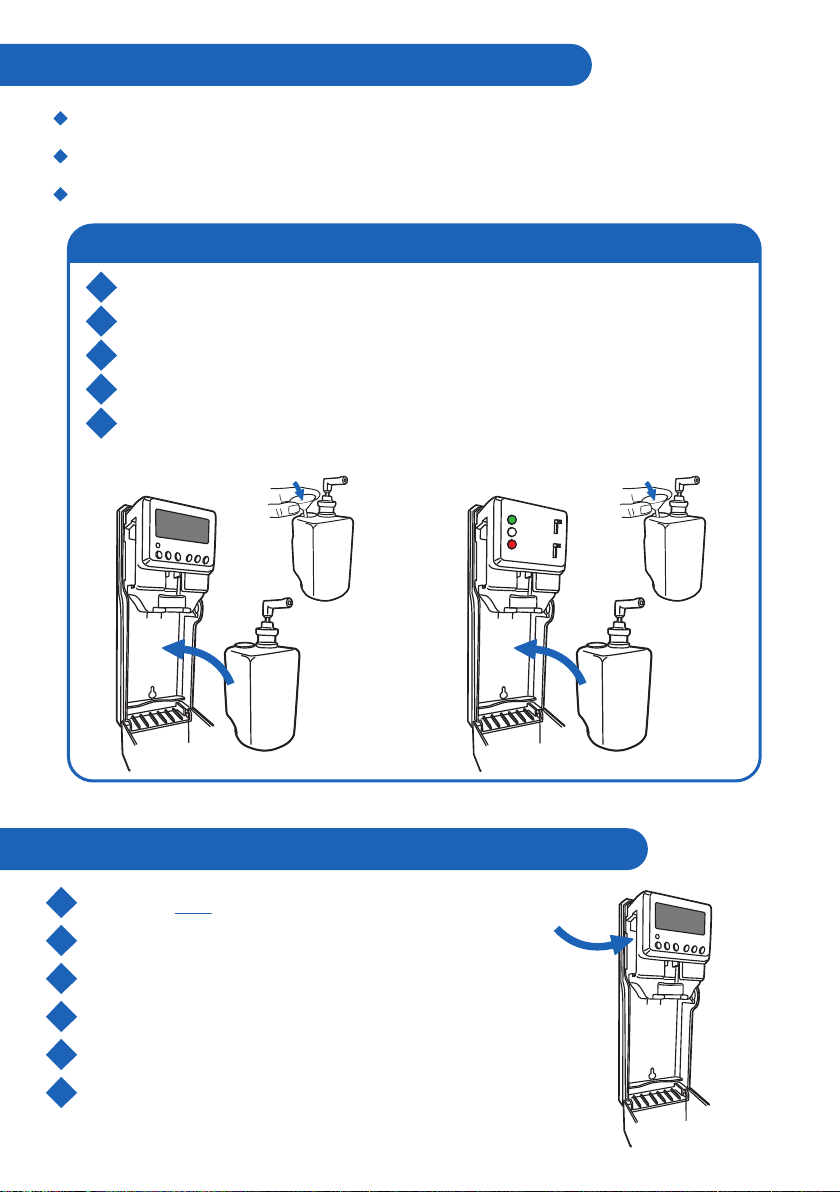
如使用不合適的電池,噴霧機很可能不能正常運作及受損,
必須使用AA鹼性電池如使用不合適的電池。
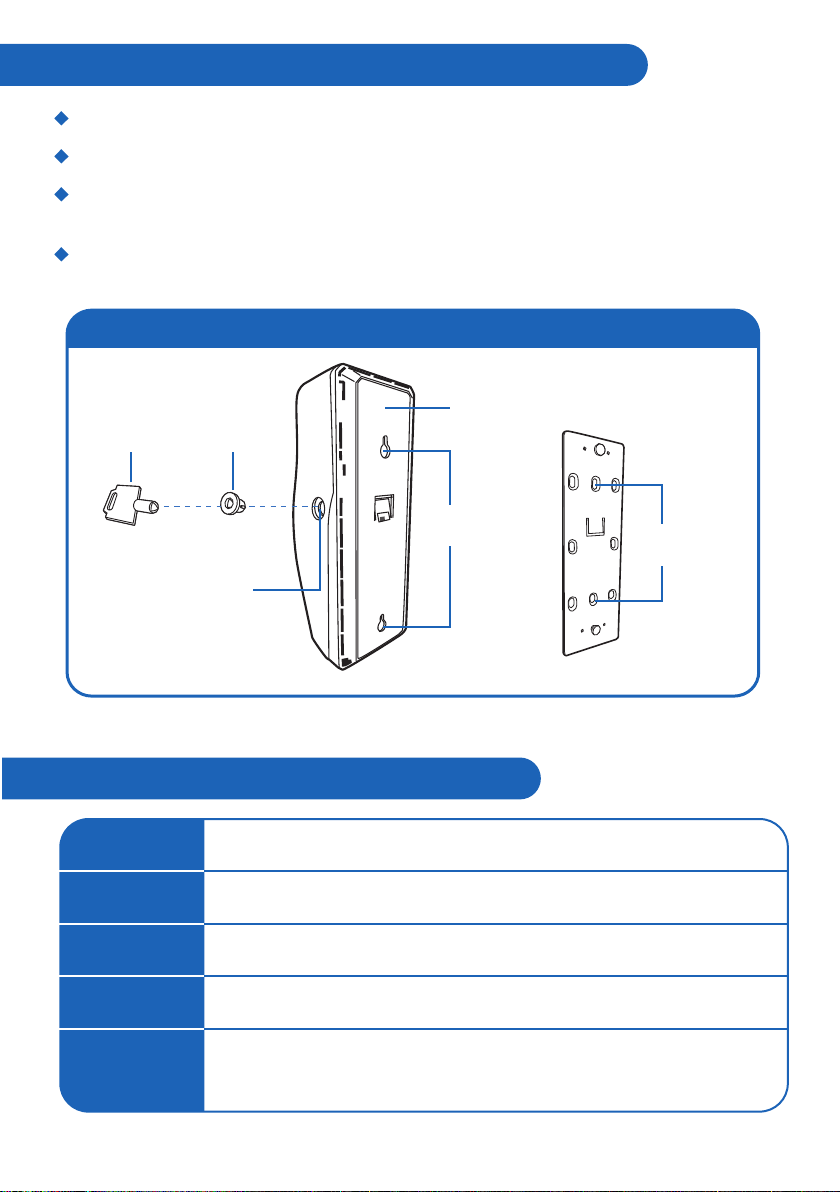
建議把噴霧機安裝於180cm高度以上,以達致更佳霧化效果