Pre-Installation Checklist
2
1. Inspect the unit carefully for damage or shortage.
2. The unit should be located close to a clean
working drain and connected according to local
plumbing codes.
3. An uninterrupted alternating (A/C) supply is
required. Please verify that your voltage supply is
compatible with your unit before installation. The
current draw for this unit is 0.5 Amperes and
the voltage is 110 volts.
4. A bypass valve should be provided.
5. A minimum of 20 psi of water pressure is required
for the valve to operate effectively.
CAUTION: The water pressure is not to
exceed 125 psi. The minimum
operating temperature is 40°F
(4°C). The maximum operating
temperature is 110°F (38°C).
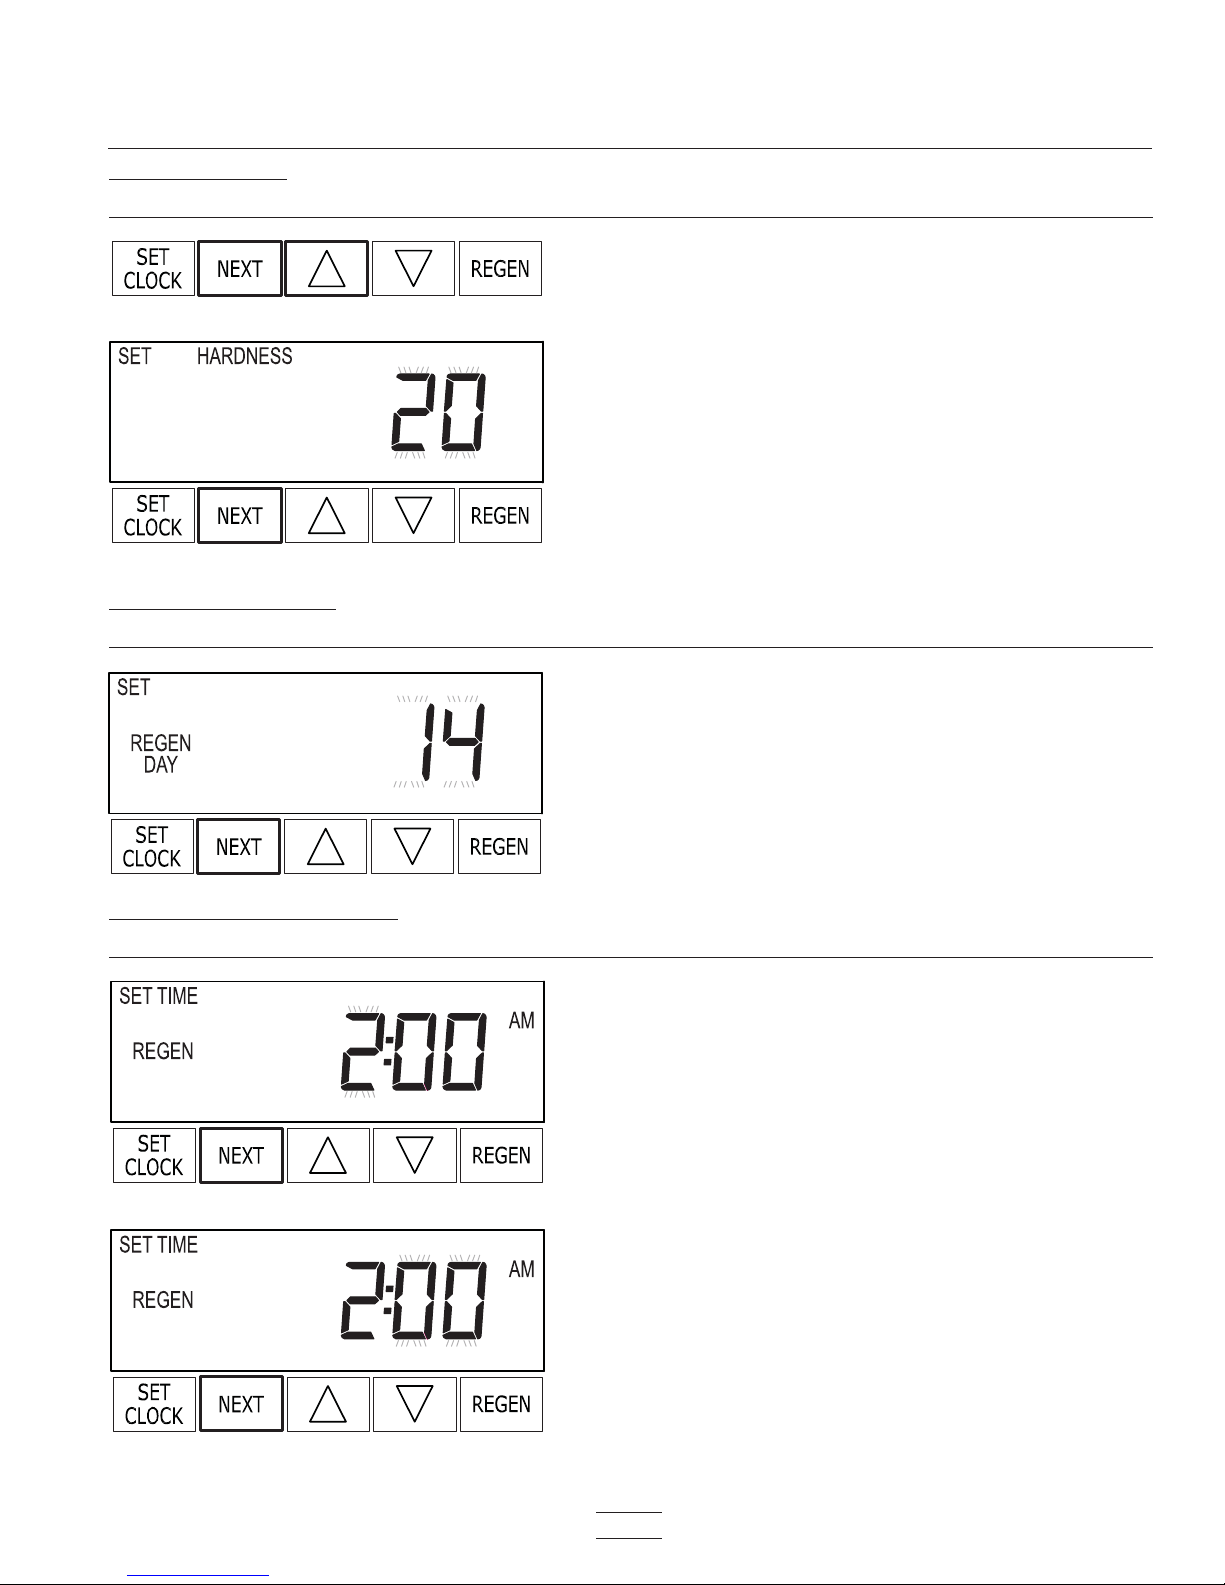
1. Place the unit on a firm, level base. Since salt must be
added to the brine tank for water softener installations,
the location should be easily accessible.
2. All plumbing should be done in accordance with local
plumbing codes. The pipe size for the drain should be
a minimum of 1/2". Backwash flow rates in excess of
7 gpm or length in excess of 20' require 3/4" drain
line.
3. Do not use Vaseline, oils, other hydrocarbon lubri-
cants or spray silicone anywhere. A silicone lubricant
may be used on black o-rings but is not necessary.
Avoid any type of lubricants, including silicone, on
red or clear lip seals.
4. Do not use pipe dope or other sealants on threads.
Teflon tape must be used on the threads of the 1" NPT
elbow or the 1/4" NPT connection and on the threads
for the drain line connection. Teflon tape is not neces-
sary on the nut connection or caps because of o-ring
seals.
5. Solder joints near the drain must be done prior to con-
necting the drain line flow control fitting. Leave at
least 6" between the drain line fitting and solder joints
when soldering pipes that are connected on the drain
line control fitting. Failure to do this could cause inte-
rior damage to the drain line flow control fitting.
6. When assembling the installation fitting package
(inlet and outlet), connect the fitting to the plumbing
system first and then attach the nut, split ring and o-
ring. Heat from soldering or solvent cements may
damage the nut, split ring or o-ring. Solder joints
should be cool and solvent cements should be set
before installing the nut, split ring and o-ring. Avoid
getting primer and solvent cement on any part of the
o-rings, split rings, bypass valve or control valve.
7. On units with a bypass, place in bypass position. Turn
on the main water supply. Open a cold soft water tap
nearby and let run a few minutes or until the system is
free from foreign material that may have resulted
from the installation. Once clean, close the water tap.
8. Place the bypass in service position and let water flow
into the mineral tank. When water flow stops, slowly
open a cold water tap nearby and let run until the air
is purged from the unit. Then close tap.
9. Plug the valve into an approved power source. Note:
All electrical connections must be connected accord-
ing to local codes. (Be certain the outlet is uninter-
rupted.) Install grounding strap on metal pipes.
10. It is not recommended to change control valves
from downflow to upflow brining or vice versa in
the field. The valve bodies for downflow and
upflow are unique to the regeneration type and
and should not be interchanged. A mismatch of
valve body and regeneration piston will result in
hard water bypass during service.
Installation Checklist