manuals.online logo
Brands
  1. Home
  2. •
  3. Brands
  4. •
  5. AQUAvalve
  6. •
  7. Irrigation System
  8. •
  9. AQUAvalve 12Pot XL Instruction Manual

AQUAvalve 12Pot XL Instruction Manual

Simple care
guidelines
[email protected] I www.autopot-usa.com I +(1) 562 612 4182 [email protected] I www.autopot-usa.com I +(1) 562 612 4182
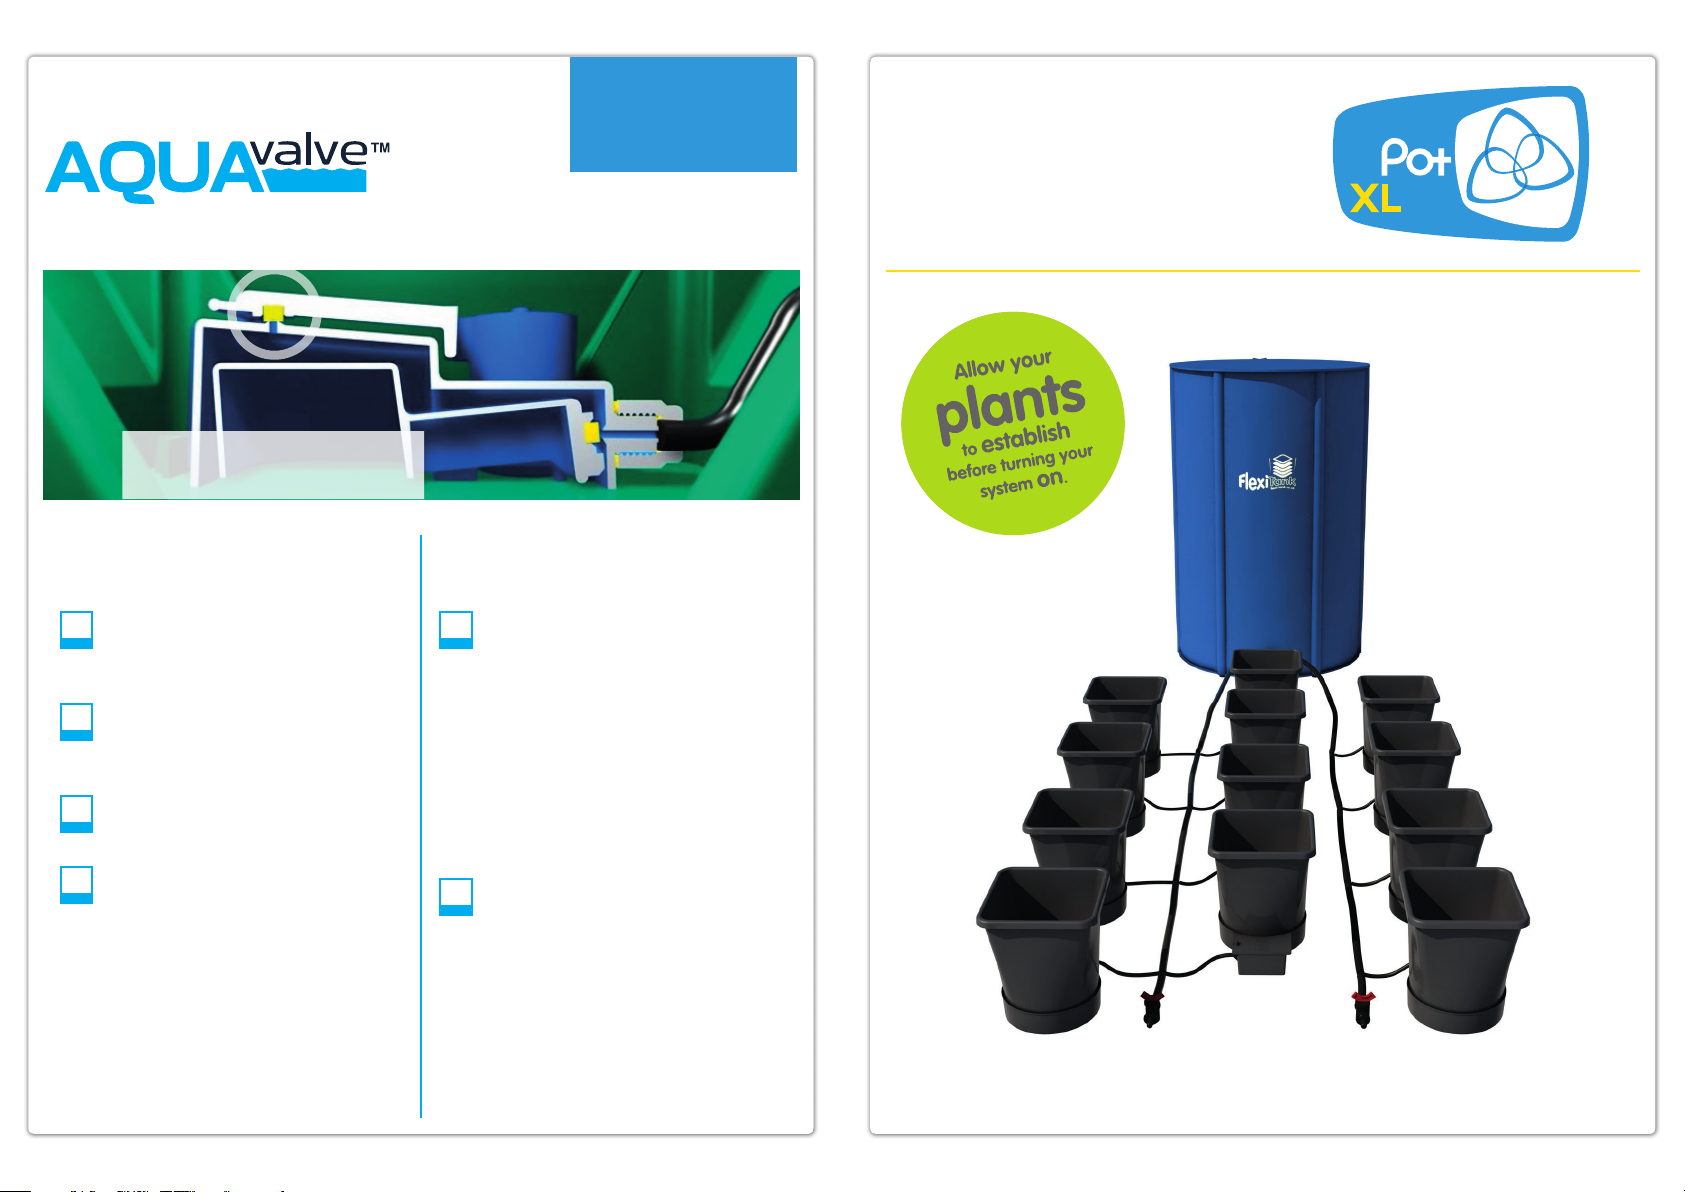
Your 12Pot XL system
set-up guidelines 12
1 1
2
2
3
4
Making sure your AQUAvalve floods and
drains correctly is simply achieved and only
takes a few seconds.
Hold the AQUAvalve at eye level so that
you can see the silicon fitted to the top float
resting on the hole below it.
The silicon must create a tight seal when
touching the hole.
If it looks like it is not sitting parallel on the
hole below, simply lift the top float and
apply pressure to one side of the silicon,
drop the float and hold at eye level again.
Repeat the procedure if necessary.
At the end of your growing season, clean
the AQUAvalve using warm soapy water.
Using an old tooth brush will help.
The AQUAvalve is easily disassembled.
The top float will slide all the way across
and the bottom float is unclipped from its
pivoting position. The circular discs fitted to
the top float can also be removed by using
pliers to grip the raised point.
At this point is it advisable to remove the
silicones to avoid them being lost.
It is also handy to have a paper clip or
pipe cleaner to hand so that you can push
it through the AQUAvalve nozzle, this will
remove any lime scale build up that may
have occurred during the growing season.
Blowing through the AQUAvalve nozzle will
also help to remove any build up. Do not
under any circumstances use a drill & drill
bit to clear the AQUAvalve nozzle.
This will potentially damage the
AQUAvalve beyond repair.
Ensuring that the AQUAvalve floods
and drains correctly
Care and maintenance
Ensure the silicon is sitting parallel on the
hole below it. Hold at eye level to check the
position is correct
12Pot XL system contents
• 1x 60 gallon FlexiTank
• 1x ½” click-fit tank adaptor & filter
• 26ft of ½” pipe
• 2x ½” in-line tap
• 1x ½” tee connector
• 4x ½”-¼” tee connector
• 4x ½”-¼” cross connector
• 12x 1Pot XL trays & lids
• 12x 6.6 gallon pot
• 12x AQUAvalve
• 19ft of ¼” pipe
• 12x Root Control Disc (round)
[email protected] I www.autopot-usa.com I +(1) 562 612 4182 If you require any guidance email - [email protected]
Advice
Plan views
and options
1Pot XL
dimensions
Advice
Using your front instruction sheet, repeat the module set up instructions for the number of trays.
Allow your plants to establish for 7-10 days before turning system on
1Pot XL setup
instructions
Suggested layout
• Pot up your plants, water through, then allow your plants to establish in the pots for a period of 7 to 10 days
before turning your system on. This will encourage a stronger and healthier root system.
• Always raise your reservoir/FlexiTank to a minimum of 6” above the highest AQUAvalve and re-fill the
reservoir/FlexiTank when there is approximately a 1/3 of the solution left – NEVER ALLOW THE RESERVOIR/
FLEXITANK TO RUN EMPTY.
• For best results, we recommend mineral fertilisers. Do not use organic fertilisers, as they have a tendency to
block small pipe work.
• Clean all substrate from the bottom and sides of the pots before placing in each tray.
This will ensure your system is clean from the start.
• Always use free draining substrates, for example: soil/perlite, coco/perlite, soil/clay pebbles,
coco/clay pebbles, rockwool/clay pebbles.
1 2
Place circular root
control disc gold face
down in pot
Fill pot with medium
and pot up plants.
Water through pot
and allow to drain
outside the tray
3 4
Remove collar
Push ¼” pipe through
collar and attach to
AQUAvalve nozzle
Rescrew collar - DON’T
overturn... when you
feel it grip STOP
Connect AQUAvalve
so ‘half moon’ is on
T section in the tray
5 6
Position tray
so it is level
Cut ¼” / ½” pipe to
appropriate length
8
According to the size of your system connect your
¼” / ½” pipe to relevant fitting or reservoir.
Place pot in the tray,
make sure it is CLEAN!
Place lid over valve
onto tray
7
60 gal
FlexiTank
25”
31.9”
System requires minimum
60 gal FlexiTank (supplied)
FlexiTank
¼" pipe
½" pipe
AQUAvalve
½" click-fit tank adaptor & filter
½" in-line tap
½" – ¼" cross connector
½" tee connector
½" – ¼" tee connector
60 gal
6.6 gal
pot
13"
10.4"
14.6"
15.2"
13"

Other AQUAvalve Irrigation System manuals

AQUAvalve 2Pot XL system Instruction Manual

AQUAvalve

AQUAvalve 2Pot XL system Instruction Manual

AQUAvalve 6Pot XL Instruction Manual

AQUAvalve

AQUAvalve 6Pot XL Instruction Manual

AQUAvalve 4Pot XL Instruction Manual

AQUAvalve

AQUAvalve 4Pot XL Instruction Manual

AQUAvalve 16Pot system Instruction Manual

AQUAvalve

AQUAvalve 16Pot system Instruction Manual

AQUAvalve 16Pot XL Instruction Manual

AQUAvalve

AQUAvalve 16Pot XL Instruction Manual

AQUAvalve 6Pot XL Instruction Manual

AQUAvalve

AQUAvalve 6Pot XL Instruction Manual

Popular Irrigation System manuals by other brands

Viking VK502 Technical data

Viking

Viking VK502 Technical data

Hunter Professional Series PGP manual

Hunter

Hunter Professional Series PGP manual

Sime SMART quick start guide

Sime

Sime SMART quick start guide

Kärcher HKF 50 E manual

Kärcher

Kärcher HKF 50 E manual

Toro 570Z PRX Series Specifications

Toro

Toro 570Z PRX Series Specifications

Rehau Firepex Design and installation guide

Rehau

Rehau Firepex Design and installation guide

Tyco ESFR-14 manual

Tyco

Tyco ESFR-14 manual

ARABLE MARK quick start guide

ARABLE

ARABLE MARK quick start guide

Tyco Fire Product TY-B Series instruction manual

Tyco Fire Product

Tyco Fire Product TY-B Series instruction manual

HI-FOG 1900 IDENTIFICATION AND CORRECTION PROCEDURE

HI-FOG

HI-FOG 1900 IDENTIFICATION AND CORRECTION PROCEDURE

Reliable G Series Bulletin

Reliable

Reliable G Series Bulletin

Tyco 16.8 K-factor manual

Tyco

Tyco 16.8 K-factor manual

Tyco TY-B Series manual

Tyco

Tyco TY-B Series manual

Hunter Institutional I-40 quick start guide

Hunter

Hunter Institutional I-40 quick start guide

Nelson F75 Big Gun Operation & maintenance instructions

Nelson

Nelson F75 Big Gun Operation & maintenance instructions

Eden 94094EDAMZ manual

Eden

Eden 94094EDAMZ manual

Globe GL5614 manual

Globe

Globe GL5614 manual

Reliable F1-SS Series manual

Reliable

Reliable F1-SS Series manual

manuals.online logo
manuals.online logoBrands
  • About & Mission
  • Contact us
  • Privacy Policy
  • Terms and Conditions

Copyright 2025 Manuals.Online. All Rights Reserved.