manuals.online logo
Brands
  1. Home
  2. •
  3. Brands
  4. •
  5. Tyco Fire Product
  6. •
  7. Irrigation System
  8. •
  9. Tyco Fire Product CENTRAL A User manual

Tyco Fire Product CENTRAL A User manual

contractor or sprinkler manufacturer
should be contacted relative to any
questions.
Sprinkler Identification Number
SIN C1211 - A Pend (K=2.8)
SIN C1111 - A UP (K=2.8)
SIN C2211 - A Pend (K=4.2)
SIN C2111 - A UP (K=4.2)
SIN C3211 - A Pend (K=5.6)*
SIN C3111 - A UP (K=5.6)*
SIN C4211 - A Pend (K=8.0)*
SIN C4111 - A UP (K=8.0)*
SIN C4911 - A Pend (K=8.0, 1/2" NPT)*
SIN C4811 - A UP (K=8.0, 1/2" NPT)*
Approvals
UL & ULC Listed. FM, LPC, VDS,
NYC Approved
(Refer to Table 1 - 4. The approvals
apply only to the service conditions
indicated in the Design Criteria Section)
Maximum Working Pressure
175 psi (12,1 bar)
250 psi (17,3 bar) UL & ULC (K=5.6)
Pipe Thread Connection
1/2 inch NPT -(K=2.7, 4.2, 5.6 & 8.0)
3/4 inch NPT - (K=8.0)
Discharge Coefficient
K = 2.8 GPM/psi1/2 (40,3 LPM/bar1/2)
K = 4.2 GPM/psi1/2 (60,5 LPM/bar1/2)
K = 5.6 GPM/psi1/2 (80,6 LPM/bar1/2)
K = 8.0 GPM/psi1/2 (116,8 LPM/bar1/2)
Temperature Ratings
165°F/74°C, 212°F/100°C, 286°F/141°C
Finishes
Sprinkler: White Polyester, Chrome
Plated, or Natural Brass
Corrosion Resistant Coatings
Sprinkler: Wax, Lead & Wax-over-Lead
* Head Guard & Water Shield:
G-2 (Guard) - (K=5.6 & K=8.0) Up & Pend.
WSG-2 (Guard & Shield) - (K=8.0) Up
WS-2 (Shield) - (K=5.6) Pendent
Factory Assembled Model A Pendent and
Model A M/L Shield - (K=5.6 & K=8.0)
(See Data Sheet 3-12.0 for details)
Tyco Fire Products --- www.centralsprinkler.com
451 North Cannon Avenue, Lansdale, Pennsylvania 19446 --- USA
Customer Service/Sales: Tel: (215) 362-0700 / Fax: (215) 362-5385
Technical Services: Tel: (800) 381-9312 / Fax: (800) 791-5500
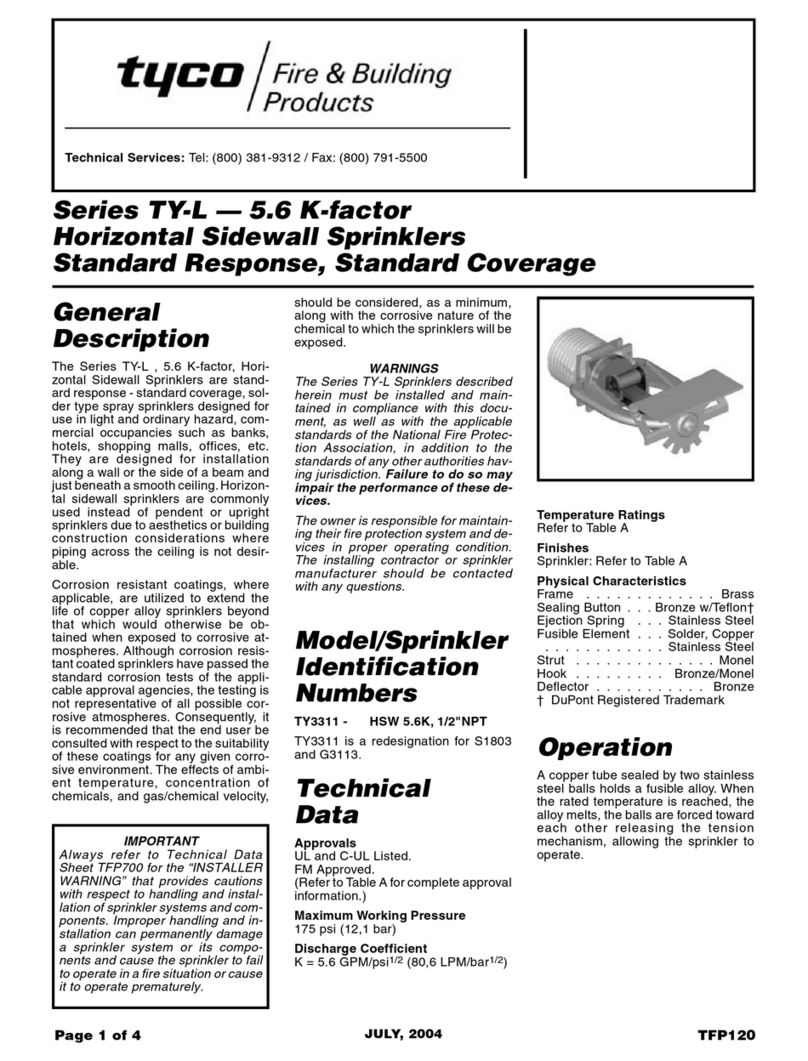
Model A
No. 1-1.0
2.8, 4.2, 5.6 & 8.0 K-factor
Standard Response
Standard Coverage
Upright & Pendent Pendent Fusible Solder Type Automatic Sprinkler
General
Description
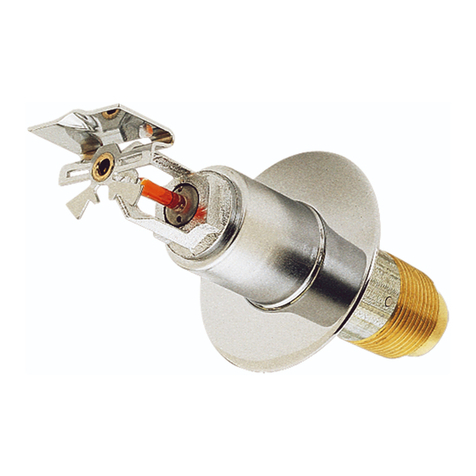
The Central Model A Upright & Pendent
Automatic Sprinklers are standard
response - standard coverage, fusible
solder type spray sprinklers designed for
use in light, ordinary, or extra hazard,
commercial occupancies such as banks,
hotels, shopping malls, factories, refiner-
ies, chemical plants, etc.
These sprinklers are available with wax
and lead coatings that may be utilized to
extend the life of copper alloy sprinklers
beyond that which would otherwise be
obtained when exposed to corrosive
atmospheres.
Although wax and lead coated sprinklers
have passed the standard corrosion tests
of the applicable approval agencies, the
testing is not representative of all possible
corrosive atmospheres. Consequently, it is
recommended that the end user be
consulted with respect to the suitability of
these corrosion resistant coatings for any
given corrosive environment. The effects
of ambient temperature, concentration of
chemicals, and gas/chemical velocity,
should be considered, as a minimum,
along with the corrosive nature of the
chemical to which the sprinklers will be
exposed.
Operation: A fusible alloy is sealed into a
bronze actuating rod (center strut) by a
stainless steel ball. When the alloy melts
at its rated temperature, the ball is forced
upward into the center strut, releasing the
two ejectors and operating the sprinkler.
WARNING
The Model A Upright & Pendent Sprin-
klers described herein must be installed
and maintained in compliance with this
document, as well as with the applicable
standards of the National Fire Protection
Association, in addition to the standards of
any other authorities having jurisdiction.
Failure to do so may impair the integrity of
these devices.
The owner is responsible for maintaining
their fire protection system and devices in
proper operating condition. The installing
Technical
Data
CENTRAL A2-01
Standard Spray
Upright &
Pendent
Sprinklers
Physical Characteristics
The Model A Upright & Pendent Sprin-
klers utilize a dezincification resistant
(DZR) bronze frame and a brass deflector.
The waterway is sealed with copper seal
disk, and the fusible assembly is con-
structed of bronze and stainless steel
components.
OBSOLETE
DEFLECTOR
SPRINKLER
FRAME
EJECTOR
SPRING ACTUATING
ROD
CAP
SEAL DISK
WRENCH
FLAT
1/2" or 3/4" NPT
1"
(25,4 mm)
2-9/16"
(65,1 mm)
WRENCH
FLAT
1/2" or 3/4" NPT
1-5/16"
(33,3 mm)
2-9/16"
(65,1 mm)
Figure 2 - Model A, Pendent SprinklerFigure 1 - Model A, Upright Sprinkler
Figure 3 - Cross Section
Model A, Upright Sprinkler Figure 4 - Combination Sprinkler Wrench (Part #1106)
Design
Criteria
The Model A Upright & Pendent
Sprinklers are Standard Response,
Standard Coverage, Spray Sprinklers
intended for fire protection systems
designed in accordance with the standard
installation rules recognized by the
applicable Listing or Approval agency.
The 2.8, 4.2, 5.6 & 8.0 K-Factor, Model A
Sprinklers (Ref. Table 1-4) are UL, ULC
Listed and NYC Approved for use in
accordance with current NFPA standards.
The 2.8, 5.6 & 8.0 K-Factor, Model A
Sprinklers (Ref. Table 1-4) are FM
Approved for use in accordance with the
FM Loss Prevention Data Sheets.
The Model A Sprinklers can be used with
any metalic flush or extended escutcheon,
provided the maximum ceiling to top of
sprinkler deflector dimension specified in
NFPA 13 is maintained. For recessed
applications, see Data Sheet 1-2.0
The Model A Upright & Pendent
Sprinklers
must be installed in accor-
dance with the following instructions.
NOTES
A leak tight 1/2 inch NPT sprinkler joint
should be obtained with a torque of 7 to
14 ft.lbs. (9,5 to 19,0 Nm). A maximum
of 21 ft.lbs. (28,5 Nm) of torque is to be
used to install 1/2 inch NPT sprinklers.
Installation
(K=2.8,4.2 & 8.0) & 1-3.0 (K=5.6) for
details.
NOTE
Inquiries concerning the appropriateness
of wax or lead coated sprinklers for a
given corrosive environment should be
submitted to the attention of the Technical
Services Department. Wax or lead coated
sprinklers are not suitable ro use in open
sprinkler applications.
A leak tight 3/4 inch NPT sprinkler joint
should be obtained with a torque of 10
to 20 ft.lbs. (13,4 to 26,8 Nm). A
maximum of 30 ft.lbs. (40,7 Nm) of
torque is to be used to install 3/4 inch
NPT sprinklers. Higher levels of torque
may distort the sprinkler inlet with
consequent leakage or impairment of
the sprinkler.
Step 1. Upright sprinklers must be
installed only in the upright position and
pendent sprinklers must be installed
only in the pendent position. The
deflector is to be parallel to the ceiling,
roof, or mounting surface, as applicable.
Step 2. With pipe thread sealant applied
to the pipe threads, hand tighten the
sprinkler into the sprinkler fitting.
Step 3. Tighten the sprinkler into the
sprinkler fitting using only the Combina-
tion Wrench (Ref. Figure 4), except that
an 8 or 10 inch adjustable Crescent
wrench is to be used for wax coated
(Continued on page 4)
OBSOLETE
SPRINKLER FINISH
Pendent and Upright
Temperature Frame Natural Chrome Polyester Lead Wax Wax Over
Rating Color Code Brass Plated Coated Coated Coated Lead Coated
165°F/74°C Unpainted
212°F/100°C White
286°F/141°C Blue
Table 1 - Laboratory Listings and Approvals (2.8 K-factor Sprinklers)
1. Listed by Underwriters Laboratories, Inc.
2. Listed by Underwriters Laboratories, Inc. for maximum
150°F/68°C ambient temperatures.
3. Listed by Underwriters' Laboratories of Canada.
4. Approved by Factory Mutual Research Corporation.
5. Approved by Factory Mutual Research Corporation for
maximum 150°F/68°C ambient temperatures.
Table 2 - Laboratory Listings and Approvals (4.2 K-factor Sprinklers)
Table 3 - Laboratory Listings and Approvals (5.6 K-factor Sprinklers)
Table 4 - Laboratory Listings and Approvals (8.0 K-factor Sprinklers with 1/2" or 3/4" NPT)
Notes:
6. Approved by the Loss Prevention Council
(United Kingdom).
7. Approved by Verband der Schadeversicherer
8. Approved by the City of New York under BSA 375-75-SA
*Upright Only
**Not approved with 1/2" NPT
1,3,4*,8 1,3,4*,8 1,8 1,3,4* 1,3 1
1,3,4*,8 1,3,4*,8 1,8 1,3,4* 1,3,4* 1
1,3,8 1,3,8 1,8 1 2 2
SPRINKLER FINISH
Pendent and Upright
Temperature Frame Natural Chrome Polyester Lead Wax Wax Over
Rating Color Code Brass Plated Coated Coated Coated Lead Coated
165°F/74°C Unpainted
212°F/100°C White
286°F/141°C Blue
1,3,8 1,3,8 1,8 1,3 1,3 1
1,3,8 1,3,8 1,8 1,3 1,3 1
1,3,8 1,3,8 1,8 1 2 2
SPRINKLER FINISH
Pendent and Upright
Temperature Frame Natural Chrome Polyester Lead Wax Wax Over
Rating Color Code Brass Plated Coated Coated Coated Lead Coated
165°F/74°C Unpainted
212°F/100°C White
286°F/141°C Blue
1,3,4,6,7,8 1,3,4,6,8 1,8 1,3,4 1,3,4 1,4
1,3,4,6,7,8 1,3,4,6,8 1,8 1,3,4 1,3,4 1,4
1,3,4,6,7,8 1,3,4,6,8 1,8 1,4 2,5 2
SPRINKLER FINISH
Pendent and Upright
Temperature Frame Natural Chrome Polyester Lead Wax Wax Over
Rating Color Code Brass Plated Coated Coated Coated Lead Coated
165°F/74°C Unpainted
212°F/100°C White
286°F/141°C Blue
1,3,4,6**,7**,8 1,3,4,8 1,8 1,3,4 1,3 1
1,3,4,6**,7**,8 1,3,4,8 1,8 1,3,4 1,3 1
1,3,4,6**,7**,8 1,3,4,8 1,8 1,4 2,5 2
OBSOLETE
Printed in U.S.A. 2-01
Flow Control
Tyco Fire

Products
Installation
(Continued)
The Model A Upright & Pendent Sprin-
klers
must be maintained and serviced in
accordance with the following instructions.
NOTES
Absence of an escutcheon which is used
to cover a clearance hole, may delay the
time to operation in a fire situation.
Before closing a fire protection system
main control valve for maintenance work
on the fire protection system it controls,
permission to shut down the affected fire
protection systems must be obtained from
the proper authorities. All personnel who
may be affected by this action must be
notified.
Sprinklers which are found to be leaking
or exhibiting visible signs of corrosion
must be replaced.
Automatic sprinklers must never be
shipped or stored where their tempera-
tures will exceed 100°F/38°C and they
must never be painted, plated, coated or
otherwise altered after leaving the factory.
Modified sprinklers must be replaced.
Sprinklers that have been exposed to
corrosive products of combustion, but
have not operated, should be replaced if
they cannot be completely cleaned by
wiping the sprinkler with a cloth or by
brushing it with a soft bristle brush.
Care must be exercised to avoid damage
- before, during, and after installation.
Sprinklers damaged by dropping, striking,
wrench twist/slippage, or the like, must be
replaced.
Frequent visual inspections are recom-
mended to be initially performed for wax
and/or lead coated sprinklers, after the
installation has been completed, to verify
the integrity of the wax and/or lead
coating. Thereafter, annual inspections
per NFPA 25 should suffice; however,
instead of inspecting from the floor level, a
random sampling of close-up visual
inspections should be made, so as to
better determine the exact sprinkler
condition and the long term integrity of the
wax and/or lead coating, as it may be
affected by the corrosive conditions
present.
The owner is responsible for the inspec-
tion, testing, and maintenance of their fire
protection system and devices in
compliance with this document, as well as
with the applicable standards of the
National Fire Protection Association (e.g.,
NFPA 25), in addition to the standards of
any other authorities having jurisdiction.
The installing contractor or sprinkler
manufacturer should be contacted relative
to any questions.
It is recommended that automatic
sprinkler systems be inspected, tested,
and maintained by a qualified Inspection
Service.
Care &
Maintenance
sprinklers. With reference to Figure 1 &
2, both the Combination Wrench and
the adjustable Crescent wrench are to
be applied to the wrench flats only.
When installing wax coated sprinklers
with the adjustable Crescent wrench,
additional care needs to be exercised to
prevent damage to the wax coating on
the sprinkler wrench flats or frame arms
and, consequently, exposure of bare
metal to the corrosive environment. The
jaws of the wrench should be opened
sufficiently wide to pass over the wrench
flats without damaging the wax coating.
Before wrench tightening the sprinkler,
the jaws of the wrench are to be
adjusted to just contact the sprinkler
wrench flats. After wrench tightening the
sprinkler, loosen the wrench jaws before
removing the wrench.
After installation, the sprinkler wrench
flats and frame arms must be inspected
and the wax coating retouched (re-
paired) whenever the coating has been
damaged and bare metal is exposed.
The wax coating on the wrench flats
can be retouched by gently applying a
heated 1/8 inch diameter steel rod to the
areas of wax that have been damaged,
to smooth it back over areas where bare
metal is exposed.
NOTES
Only retouching of the wax coating
applied to the wrench flats and frame
arms is permitted, and the retouching is
to be performed only at the time of the
initial sprinkler installation.
The steel rod should be heated only to
the point at which it can begin to melt
the wax, and appropriate precautions
need to be taken, when handling the
heated rod, in order to prevent the
installer from being burned.
If attempts to retouch the wax coating
with complete coverage are unsuccess-
ful, additional wax can be ordered in the
form of a wax block. Care should be
exercised to assure that the proper
rated temperature wax block is ordered.
Only the correct temperature wax is to
be used, and retouching of wrench flats
and frame arms is only permitted at the
time of initial sprinkler installation. With
the steel rod heated as previously
described, touch the rod to the area
requiring additional wax with the rod
angled downward, and then touch a
portion of the wax block to the rod
approximately one-half inch away from
the area requiring retouching. The wax
will melt and run down onto the
sprinkler.
Products manufactured by Tyco Fire
Products are warranted solely to the
original Buyer for ten (10) years against
defects in material and workmanship
when paid for and properly installed and
maintained under normal use and service.
This warranty will expire ten (10) years
from date of shipment by Tyco Fire
Products. No warranty is given for
products or components manufactured by
companies not affiliated by ownership with
Tyco Fire Products or for products and
components which have been subject to
misuse, improper installation, corrosion, or
which have not been installed, maintained,
modified or repaired in accordance with
applicable Standards of the National Fire
Protection Association, and/or the
standards of any other Authorities Having
Jurisdiction. Materials found by Tyco Fire
Products to be defective shall be either
repaired or replaced, at Tyco Fire
Products' sole option. Tyco Fire Products
neither assumes, nor authorizes any
person to assume for it, any other
obligation in connection with the sale of
products or parts of products. Tyco Fire
Products shall not be responsible for
sprinkler system design errors or inaccu-
rate or incomplete information supplied by
Buyer or Buyer's representatives.
IN NO EVENT SHALL TYCO FIRE
PRODUCTS BE LIABLE, IN CON-
TRACT, TORT, STRICT LIABILITY OR
UNDER ANY OTHER LEGAL THEORY,
FOR INCIDENTAL, INDIRECT, SPECIAL
OR CONSEQUENTIAL DAMAGES,
INCLUDING BUT NOT LIMITED TO
LABOR CHARGES, REGARDLESS OF
WHETHER TYCO FIRE PRODUCTS
WAS INFORMED ABOUT THE POSSI-
BILITY OF SUCH DAMAGES, AND IN
NO EVENT SHALL TYCO FIRE PROD-
UCTS' LIABILITY EXCEED AN AMOUNT
EQUAL TO THE SALES PRICE.
THE FOREGOING WARRANTY IS
MADE IN LIEU OF ANY AND ALL
OTHER WARRANTIES EXPRESS OR
IMPLIED, INCLUDING WARRANTIES
OF MERCHANTABILITY AND FITNESS
FOR A PARTICULAR PURPOSE.
Limited
Warranty
Ordering Information: When placing an
order, indicate the full product name.
Please specify the quantity, model, style,
orifice size, temperature rating, type of
finish or coating, and sprinkler wrench.
Refer to price list for complete listing of
Part Numbers.
Teflon is a trademark of the DuPont Corp.
Ordering
Information
OBSOLETE

Other Tyco Fire Product Irrigation System manuals

Tyco Fire Product Gem STAINLESS STEEL QUARTZOID User manual

Tyco Fire Product

Tyco Fire Product Gem STAINLESS STEEL QUARTZOID User manual

Tyco Fire Product Gem F898 User manual

Tyco Fire Product

Tyco Fire Product Gem F898 User manual

Tyco Fire Product CENTRAL H User manual

Tyco Fire Product

Tyco Fire Product CENTRAL H User manual

Tyco Fire Product TFR MAX User manual

Tyco Fire Product

Tyco Fire Product TFR MAX User manual

Tyco Fire Product Gem F892X User manual

Tyco Fire Product

Tyco Fire Product Gem F892X User manual

Tyco Fire Product Gem TY-B Series User manual

Tyco Fire Product

Tyco Fire Product Gem TY-B Series User manual

Tyco Fire Product CENTRAL BV-EC User manual

Tyco Fire Product

Tyco Fire Product CENTRAL BV-EC User manual

Tyco Fire Product CENTRAL BV-QR User manual

Tyco Fire Product

Tyco Fire Product CENTRAL BV-QR User manual

Tyco Fire Product TY300-B Series User manual

Tyco Fire Product

Tyco Fire Product TY300-B Series User manual

Tyco Fire Product CENTRAL Omega HEC-20 User manual

Tyco Fire Product

Tyco Fire Product CENTRAL Omega HEC-20 User manual

Tyco Fire Product Star Pulsar S160QR User manual

Tyco Fire Product

Tyco Fire Product Star Pulsar S160QR User manual

Tyco Fire Product CENTRAL ESLO User manual

Tyco Fire Product

Tyco Fire Product CENTRAL ESLO User manual

Tyco Fire Product Star PH-2 User manual

Tyco Fire Product

Tyco Fire Product Star PH-2 User manual

Tyco Fire Product Star TFP1 User manual

Tyco Fire Product

Tyco Fire Product Star TFP1 User manual

Tyco Fire Product D3 PROTECTOSPRAY User manual

Tyco Fire Product

Tyco Fire Product D3 PROTECTOSPRAY User manual

Tyco Fire Product CENTRAL TY-B User manual

Tyco Fire Product

Tyco Fire Product CENTRAL TY-B User manual

Tyco Fire Product CENTRAL ESFR-1 User manual

Tyco Fire Product

Tyco Fire Product CENTRAL ESFR-1 User manual

Tyco Fire Product Gem F916 User manual

Tyco Fire Product

Tyco Fire Product Gem F916 User manual

Tyco Fire Product TY300-FRB User manual

Tyco Fire Product

Tyco Fire Product TY300-FRB User manual

Tyco Fire Product CENTRAL LF User manual

Tyco Fire Product

Tyco Fire Product CENTRAL LF User manual

Tyco Fire Product CENTRAL ELO-16 GB FR User manual

Tyco Fire Product

Tyco Fire Product CENTRAL ELO-16 GB FR User manual

Tyco Fire Product CENTRAL Optima User manual

Tyco Fire Product

Tyco Fire Product CENTRAL Optima User manual

Tyco Fire Product STAR S160E User manual

Tyco Fire Product

Tyco Fire Product STAR S160E User manual

Tyco Fire Product Star Mizar S210 User manual

Tyco Fire Product

Tyco Fire Product Star Mizar S210 User manual

Popular Irrigation System manuals by other brands

Brandson 304260 user manual

Brandson

Brandson 304260 user manual

Viking MICROMATIC VK134 manual

Viking

Viking MICROMATIC VK134 manual

CENTRAL ULTRA K-25 ESFR manual

CENTRAL

CENTRAL ULTRA K-25 ESFR manual

Autopot SmartPot 6 System Set-up guidelines

Autopot

Autopot SmartPot 6 System Set-up guidelines

Underhill Mirage M-160-FP-9 Operating and maintenance instructions

Underhill

Underhill Mirage M-160-FP-9 Operating and maintenance instructions

SNOWJOE Aquajoe AJ-OMS18-TRB manual

SNOWJOE

SNOWJOE Aquajoe AJ-OMS18-TRB manual

Viking HQR-2 Technical data

Viking

Viking HQR-2 Technical data

Autopot AquaValve 1Pot XL Set-up guidelines

Autopot

Autopot AquaValve 1Pot XL Set-up guidelines

Tyco ESFR-14 quick start guide

Tyco

Tyco ESFR-14 quick start guide

Viking MIRAGE VK461 Technical data

Viking

Viking MIRAGE VK461 Technical data

Reliable KFR-CCS quick start guide

Reliable

Reliable KFR-CCS quick start guide

NaanDanJain Dan Fogger manual

NaanDanJain

NaanDanJain Dan Fogger manual

Netafim nmc-pro installation manual

Netafim

Netafim nmc-pro installation manual

Tyco RFII Series quick start guide

Tyco

Tyco RFII Series quick start guide

Lindsay GROWSMART installation manual

Lindsay

Lindsay GROWSMART installation manual

Rain Bird MAXI PAW manual

Rain Bird

Rain Bird MAXI PAW manual

Duramaxx Sprizzz manual

Duramaxx

Duramaxx Sprizzz manual

Gardena 1355 Assembly instructions

Gardena

Gardena 1355 Assembly instructions

manuals.online logo
manuals.online logoBrands
  • About & Mission
  • Contact us
  • Privacy Policy
  • Terms and Conditions

Copyright 2025 Manuals.Online. All Rights Reserved.