AQV OK770 User manual

Full HD
1080P
| User Manual |
OK770 Dash Cam

Contents
ENGLISH ............................................................................... 1
1.Quick Start Guide ............................................................... 1
1.1 What’s in the Box? ................................................ 1
1.2 Setup Initial Menu ................................................. 1
2.Important Notice ..................................................................5
2.1 Caution .................................................................. 5
2.2 Warm Tips ..............................................................6
2.3 Battery Warning .....................................................7
3.Interface and Button Function ............................................8
3.1 Camera Overview ................................................. 8
3.2 Recording Interface .............................................10
3.3 Specification ........................................................ 14
4.Getting Started ..................................................................15
4.1 Check the Memory Card .....................................15
4.2 Installing the Dash Cam ..................................... 15
4.3 Powering the Dash Cam On /Off ........................16
4.4 Initial Settings ...................................................... 17
4.5 View the Recorded Videos ................................. 17
5.Operating Mode ................................................................18
5.1 Video Recording Mode ....................................... 19
5.2 Taking Picture Mode ........................................... 20
5.3 Playback Mode ....................................................20
6.Problems and Answers .....................................................21
7. Warranty Policy ................................................................25
7.1 Warranty Period .................................................. 25
7.2 After-sales Service ..............................................26
7.3 What this warranty does not cover.....................26
DEUTSCH ............................................................................27
1. Schnellstartanleitung ....................................................... 27
1.1 Was ist im Lieferumfang enthalten? ...................27
1.2 Anfangsmenü einrichten ..................................... 27
2. Wichtige Hinweise ........................................................... 28
2.1 Vorsicht ................................................................28

2.2 Warme Tipps ....................................................... 29
2.3 Batteriewarnung ..................................................30
3. Schnittstelle und Tastenfunktion ..................................... 31
3.1 Überblick über die Kamera .................................31
3.2 Aufzeichnungsschnittstelle ................................. 33
3.3 Technische Daten ................................................37
4. Erste Schritte ................................................................... 37
4.1 Überprüfen der Speicherkarte ............................37
4.2 Installieren der Dash Cam ..................................38
4.3 Ein- und Ausschalten der Dashcam ...................39
4.4 Erste Einstellungen ............................................. 40
4.5 Betrachten der aufgezeichneten Videos ............40
5. Betriebsmodus .................................................................41
5.1 Videoaufnahme-Modus .......................................42
5.2 Aufnahmemodus ................................................. 43
5.3 Wiedergabemodus ..............................................43
6. Probleme und Antworten .................................................44
7. Gewährleistungspolitik .................................................... 49
7.1 Gewährleistungsfrist ........................................... 49
7.2 Kundendienst ...................................................... 49
7.3 Was diese Garantie nicht abdeckt ..................... 50
ITALIANO .............................................................................51
1. Guida Iniziale Rapida ...................................................... 51
1.1 Cosa c'è nella scatola? .......................................51
1.2 Menu iniziale di configurazione ..........................51
2. Avviso importante ............................................................ 52
2.1 Attenzione ............................................................52
2.2 Suggerimenti simpatici........................................53
2.3 Avviso batteria .....................................................54
3. Interfaccia e funzione del pulsante.................................55
3.1 Panoramica della fotocamera .............................55
3.2 Interfaccia di registrazione ..................................57
3.3 Specifica .............................................................. 61
4. Per iniziare ....................................................................... 61

4.1 Controllare la scheda di memoria ...................... 61
4.2 Installazione della Dash Cam .............................62
4.3 Accendere/Spegnere la Dash Cam ....................63
4.4 Impostazioni iniziali ............................................. 64
4.5 Visualizza i video registrati ................................. 64
5. Modalità di funzionamento .............................................. 65
5.1 Modalità di registrazione video ...........................66
5.2 Modalità di scatto ................................................ 67
5.3 Modalità di riproduzione ..................................... 67
6. Problemi e risposte ..........................................................68
7. Politica di garanzia .......................................................... 73
7.1 Periodo di garanzia .............................................73
7.2 Servizio Dopo-vendita.........................................73
7.3 Cosa non copre questa garanzia ....................... 74
ESPAÑOL ............................................................................ 75
1. Guía de Inicio Rápido ......................................................75
1.1 ¿Qué incluye la Caja? ........................................ 75
1.2 Menú de Inicio de Configuración ........................75
2. Aviso Importante ..............................................................76
2.1 Precauciones .......................................................76
2.2 Consejos Amables .............................................. 77
2.3 Advertencias sobre la Batería ............................ 78
3. Función de Interfaz y Botón ............................................79
3.1 Descripción General de la Cámara ....................79
3.2 Interfaz de Grabación ......................................... 81
3.3 Especificaciones ................................................. 85
4. Pasos Iniciales .................................................................85
4.1 Comprobar la Tarjeta de Memoria ......................85
4.2 Instalación de la Cámara de Tablero ................. 86
4.3 Encendido/apagado de la Cámara de Tablero..87
4.4 Ajustes Iniciales ...................................................88
4.5 Ver los Videos Grabados ....................................88
5. Modo de Funcionamiento ................................................89
5.1 Modo de Grabación de Video .............................90

5.2 Modo de Toma de Fotos ............................................. 91
5.3 Modo de Reproducción ...............................................91
6. Problemas y Soluciones .......................................................92
7. Política de Garantía ..............................................................97
7.1 Período de Garantía ....................................................97
7.2 Servicio Posventa ........................................................97
7.3 Situaciones no cubiertas por la garantía ................... 98
FANÇAIS ...................................................................................99
1. Guide de démarrage rapide ................................................. 99
1.1 Contenu de l’emballage ? ...........................................99
1.2 Menu initial de configuration .......................................99
2. Remarque importante .........................................................100
2.1 Précautions ................................................................100
2.2 Conseils chaleureux ..................................................101
2.3 Avertissement de batterie......................................... 102
3. Interfaces et fonctions de bouton .......................................103
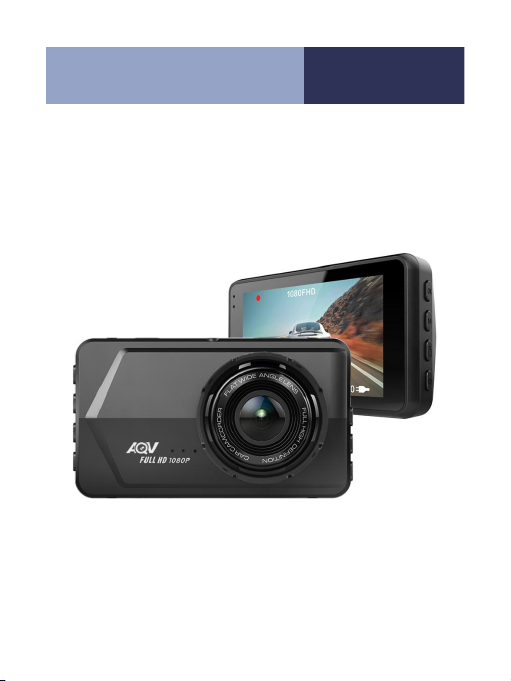
3.1 Présentation de la caméra ........................................103
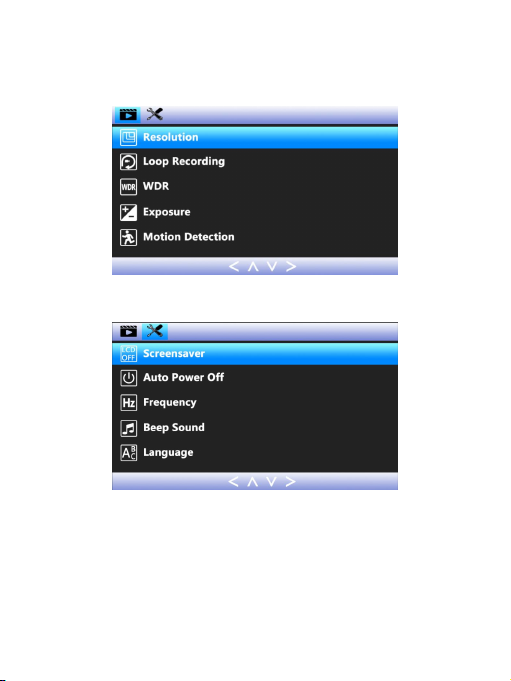
3.2 Interface d'enregistrement ........................................ 105
3.3 Caractéristiques ........................................................ 109
4. Mise en route ...................................................................... 109
4.1 Vérification de la carte mémoire ...............................109
4.2 Installation de la Caméra embarquée ...................... 110
4.3 Mise sous/hors tension de la Caméra embarquée .. 111
4.4 Réglages initiaux ....................................................... 112
4.5 Afficher les vidéos enregistrées ................................113
5. Mode de fonctionnement .................................................... 114
5.1 Mode d'enregistrement vidéo ................................... 114
5.2 Mode photo................................................................115
5.3 Mode lecture .............................................................. 116
6. Questions et réponses ........................................................116
7. Politique de garantie...........................................................122
7.1 Période de garantie ...................................................122
7.2 Service après-vente .................................................. 122
7.3 Eléments non couverts par la garantie ........................123

1
———— ENGLISH ————
1.Quick Start Guide
1.1 What’s in the Box?
1*dash cam
1*suction cup
1*cigarette lighter adapter (3.5m)
1*mini USB cable (0.5m)
1*user manual
1.2 Setup Initial Menu
1. The blinking red dot on the screen means the camera is
recording video, press OK button first to pause the
recording.
2. Short press MENU button to enter the video settings
mode. Press MENU button again, switch to the dash cam
setting mode. In the setting mode, short press UP and

2
DOWN button, you can toggle up and down in the sub-items,
short press OK button to enter the sub-item. Short press
MODE button, you can exit the setting.
(the video settings mode)
(the dash cam setting mode)
Please make the following initial settings before you start
using it.
Format the memory card: Short press 2 times MENU button
to enter the dash cam setting mode. Press DOWN button to
find out the ‘Format’ option, press OK button to enter the

3
setting. Press DOWN button to select OK, press OK button
to confirm the formatting and return to the system menu.
(Reminder: Please make sure there are no important
contents in the memory card before formatting it.)
1) Language setting: Press DOWN button to find out
‘Language’ option, short press OK button to enter it. Short
press UP and DOWN button to select the language you
want. Press OK button to confirm the modification.

4
2) Time setting: Press DOWN button to find out
“Date/Time” options, short press OK button to enter it. Short
press UP and DOWN button to select the correct year /
month / day / hour / minute / second, press OK button to
confirm the modification. Press MODE button to exit the
Date/Time setting.

5
3. Press MODE button to return to the standby mode. Press
OK button and the camera starts recording.
2.Important Notice
2.1 Caution
• Ensure you are using your dash cam within your countries
road laws. Please make sure you are familiar with your local
road legislation before use.
•Avoid leaving your dash cam in direct sunlight for extended
periods of time in airless space.

6
• The system is to be used only for non-commercial use,
within the limits permitted by the relevant laws.
• Avoid using the dash cam in the vicinity of any devices that
emit radio interference (e.g. Microwave Ovens).
• It is considered normal operation for the dash cam to get
warm during use.
2.2 Warm Tips
• To access the menu settings, please press the OK button
to stop the video recording first.
• Please format the memory card in the camera menu at the
first use.
• Please set time and date before you use this dash cam to
record.
• This camera records video at high resolution.Be sure to
use a high-speed Micro SD card (Class 10 or above,max
supports 128 GB.)
• For safety reasons,the built-in battery is only used for
emergency backup files.The dash cam is powered by the
car.The car camera will automatically switch on/off when the
car engine ignition is on/off.
• To work,the dash cam must be connected to the car's
cigarette lighter socket or hardwired to the car's fuse box.
• The video from the camera can be reviewed directly from
the dash cam or PC.
• Please connect the camera to the PC by the attached USB
cable or just remove the SD card and read it on PC to
review all the footage.

7
• To use the parking monitoring function, please use the
ACC hot-wire kit (Dash Cam Hard wire Kit). Please contact
us for a hot-wire kit.
2.3 Battery Warning
• The built-in battery is only used for emergency backup.
Always charge the dash cam using the provided charger.
Improper charging of the dash cam may result in failure of
the internal battery.
• Never dismantle the dash cam or expose the internal
battery,
• Do not dispose of the dash cam in fire.
• Dispose of the dash cam observing local regulations being
mindful of the internal battery.

8
3.Interface and Button Function
3.1 Camera Overview

9
1. MENU button
Short-Press to enter the menu;
2. UP button
Move selector up;
3. DOWN button
Move selector down; In the video mode, short
pressing to mute the recording;
4. OK button
In the video mode, short pressing to start recording
again press stop recording; In the camera mode, short
pressing to take pictures
5. MODE button
Short Press to switch between each other in the video
/ taking picture / playback
6. LOCK button
Press this button during the recording process, the
current video file is locked and can not be deleted.
7. The power button
Long press to open or close the dash cam.Short
press to open or close the screensaver.
8. USB Interface
To connect a PC to transfer data; To connect an
external power supply to supplies power to operate;
9. bracket mounting holes
Connect the car bracket mounting screw holes;
10. TF card slot
Memory card slot
11. MIC

10
The microphone of the dash cam is used for
recording.
12. Reset button
Press the reset button with the card removal pin and
the machine will restart.
13. Red LED light
Steady on means the power is connected.
14. Blue LED light
Blinking means recording is in progress, Steady on
means it is on and not recording.
15. Rear camera connection hole
Used to connect the rear camera. (we didn't include)
16. Audio
Play the sound of the video and the sound of
keystrokes.
3.2 Recording Interface
The camera will automatically enter Video Recording Mode
and start recording when connected to a car charger and
power on. A Red dot flashing on the top left corner indicates
record is in progress.Press the button [OK] to stop
recording,or start recording again.The following are icon
representations of some common functions on the
screen,indicating that these functions are enabled. (You can
also find their representations through the menu
accordingly).

11
3.2.1 Recording Interface
1. Recording Mode: This symbol indicates the current
mode. The current mode is the video mode. You can press
MODE button to switch to taking picture mode and playback
mode.
taking picture mode playback mode
2. Recording Status: The flashing red dot means that the
recording is in progress. You can press OK button to start or
pause the recording.
3. WDR:Wide Dynamic Range
4. G-sensor: This symbol represents the sensitivity of the
G-sensor. You can set the sensitivity by pressing MENU
button to enter the menu, pressing DOWN button to find out
“Gravity Sensor” option: off, low, medium, high. (Because

12
once the camera detects a vibration, it will automatically
lock the current video. The locked video will not be covered
automatically. We suggest you set it to "low", so that the
video will only be locked when the vehicle is shaking
violently and no memory will be wasted.)
5. Recording Time: The length of time currently being
recorded.
6. Resolution: This symbol shows the current resolution.
You can press MENU button to enter the menu and set the
desired resolution.
7. Memory Card Status: This symbol means that the
device already has a memory card.
8. Power Status: This symbol means that the device is
switched on. The device cannot be charged because it has
no battery and cannot store power. This dash cam only has
a super capacitor that is used to power the device.
9. Time & Date: This time represents the time of the current
location. You need to press MENU button to enter the menu
and make the setting. (As explained in 1.3 Setup Initial
Menu)
10. Audio Status: This symbol means that the current
recording is recording audio. You can press DOWN button
to turn it off/on, but this setting will not be saved after turning
off the camera. You can press MENU button to set it
permanently. This symbol means the Record Audio is off.
11. Exposure: Exposure compensation is used to alter
exposure from the value selected by the camera, making
photographs brighter or darker. You can press MENU button
to enter the selection of the exposure comp, then press UP
or DOWN button to choose the EV value.

13
12. Loop Recording: This symbol represents the duration
of the loop recording. You can set the duration by pressing
MENU button to enter the menu, pressing DOWN button to
find out “Gravity Sensor” option: Off, 1 minute, 3 minutes, 5
minutes.

14
3.3 Specification
Model
OK770
Video Resolution
1080FHD/720P/VGA
Photo Resolution
VGA/1.3M/2M/3M/5M/8M/10M/12M
Screen
3.0 inch
Angle
170° High-Resolution Wide Angle Lens
Frame Rate
30fps
Video-File Format
MOV
Photo-File Format
JPEG
Screen Saver
Supported
Loop Recording
Off/ 1 Minute / 3 Minutes / 5 Minute
WDR
Supported
G-sensor Lock
Supported
Language
English, Germany, Italy, France, Spanish,
Chinese (simplified), Japan
Audio Recording
Built-in microphone, On / Off optional
Memory card
TF (up to 128GB)
USB interface
Mini USB
External power
supply
5V 1A
Light Frequency
50HZ/60HZ
Battery
Built-in 200mAh

15
4.Getting Started
4.1 Check the Memory Card
Please insert the SD card in the correct direction. The SD
card will pop out after pressing it with a fingernail or sharp
object.
To remove the memory card
Ensure that the dash cam is powered off,then push the
memory card until a click is heard and then release the card
to eject.
Note:
- Do not remove or insert the memory card while the dash
cam is turned on as this may damage the memory card or
corrupt the memory card’s stored data.
- Please use a Class 10 or higher rated micro SD card with
a maximum capacity of 128 GB.
- Please format the Micro SD card before the initial use.
4.2 Installing the Dash Cam
1. Insert the high-speed TF card (Class10 or above) into the
Table of contents
Languages: