Add an intermediate router between the Araknis 310 router and your Internet port.
Just about any old router you can configure will do. If you don’t have an extra router
available, there are several models of economical, “travel” size routers you can order
online that will work. Make sure the router you use can be configured to use either
the 10.0.0.0 or 172.16.0.0 private network address and has both WAN and LAN
Ethernet ports.
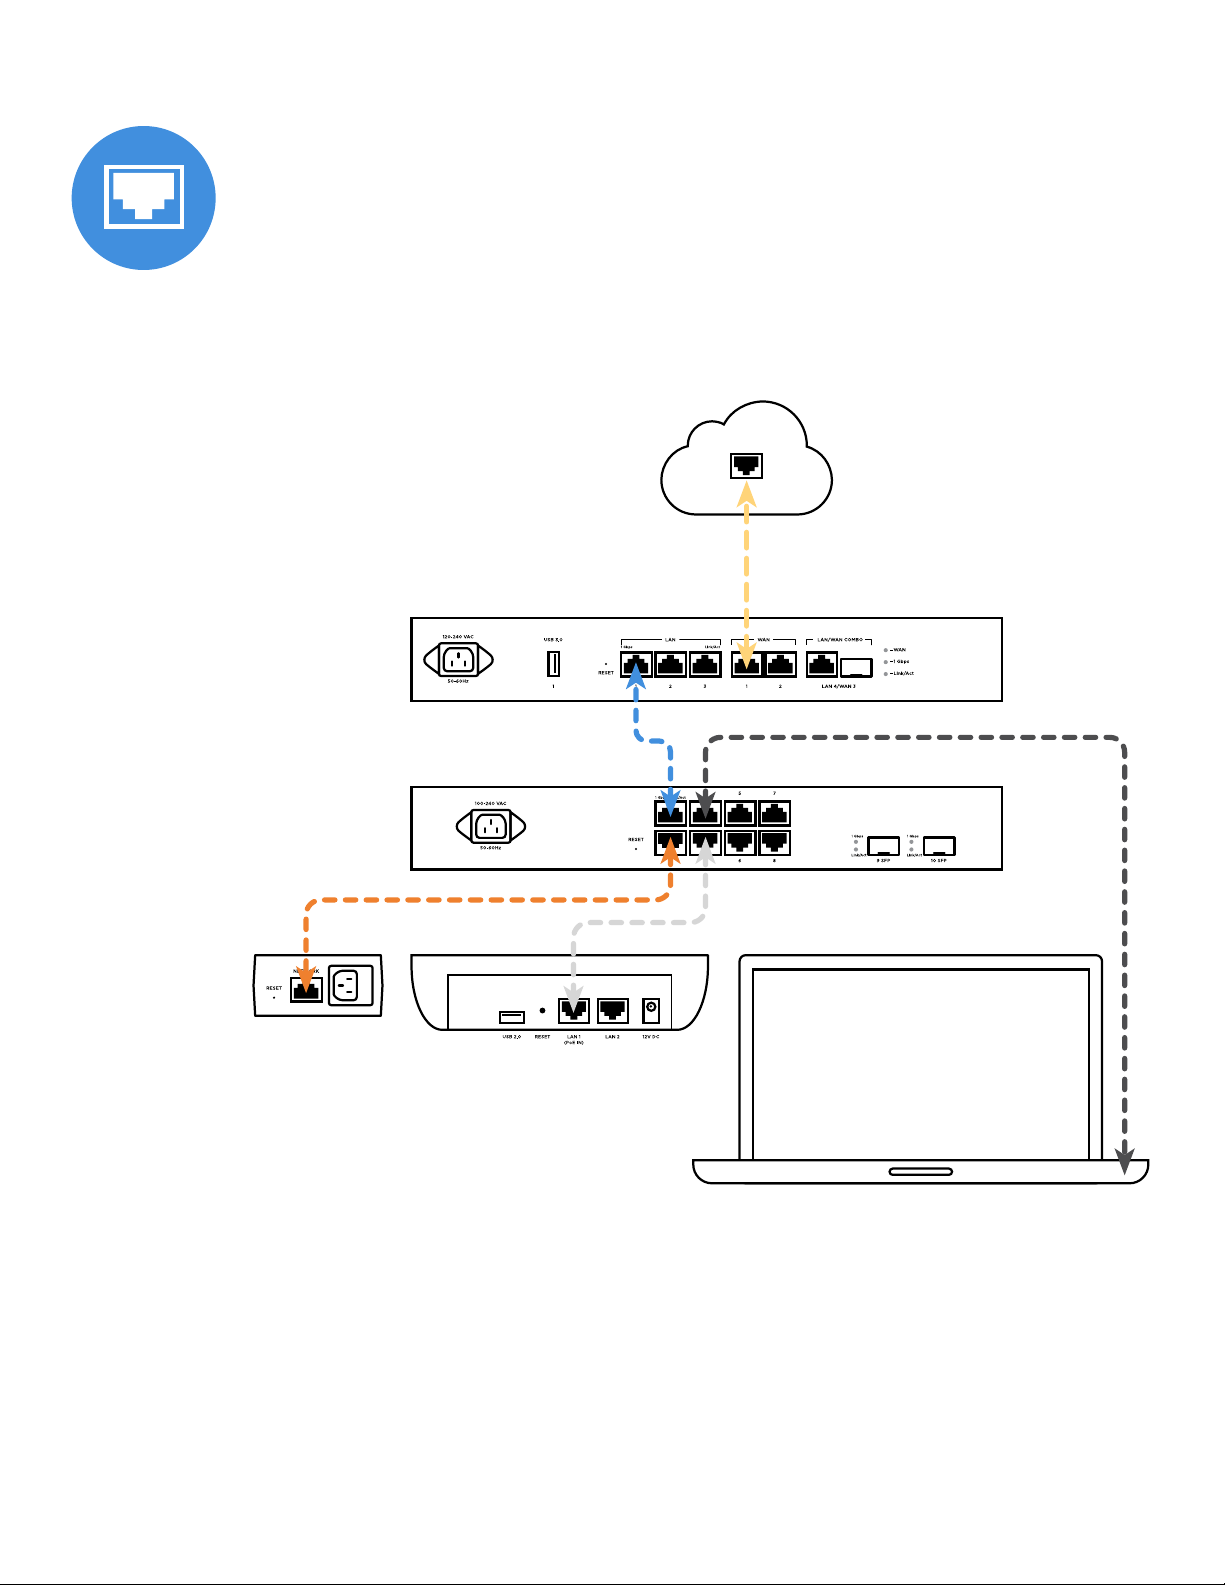
1. Disconnect your computer from your PCNA network and connect it directly to
your intermediate router.
2. Follow the manufacturer’s instructions to update the intermediate router’s LAN
configuration to use either the 10.0.0.0 or 172.16.0.0 private network address by
applying one of these specifications:
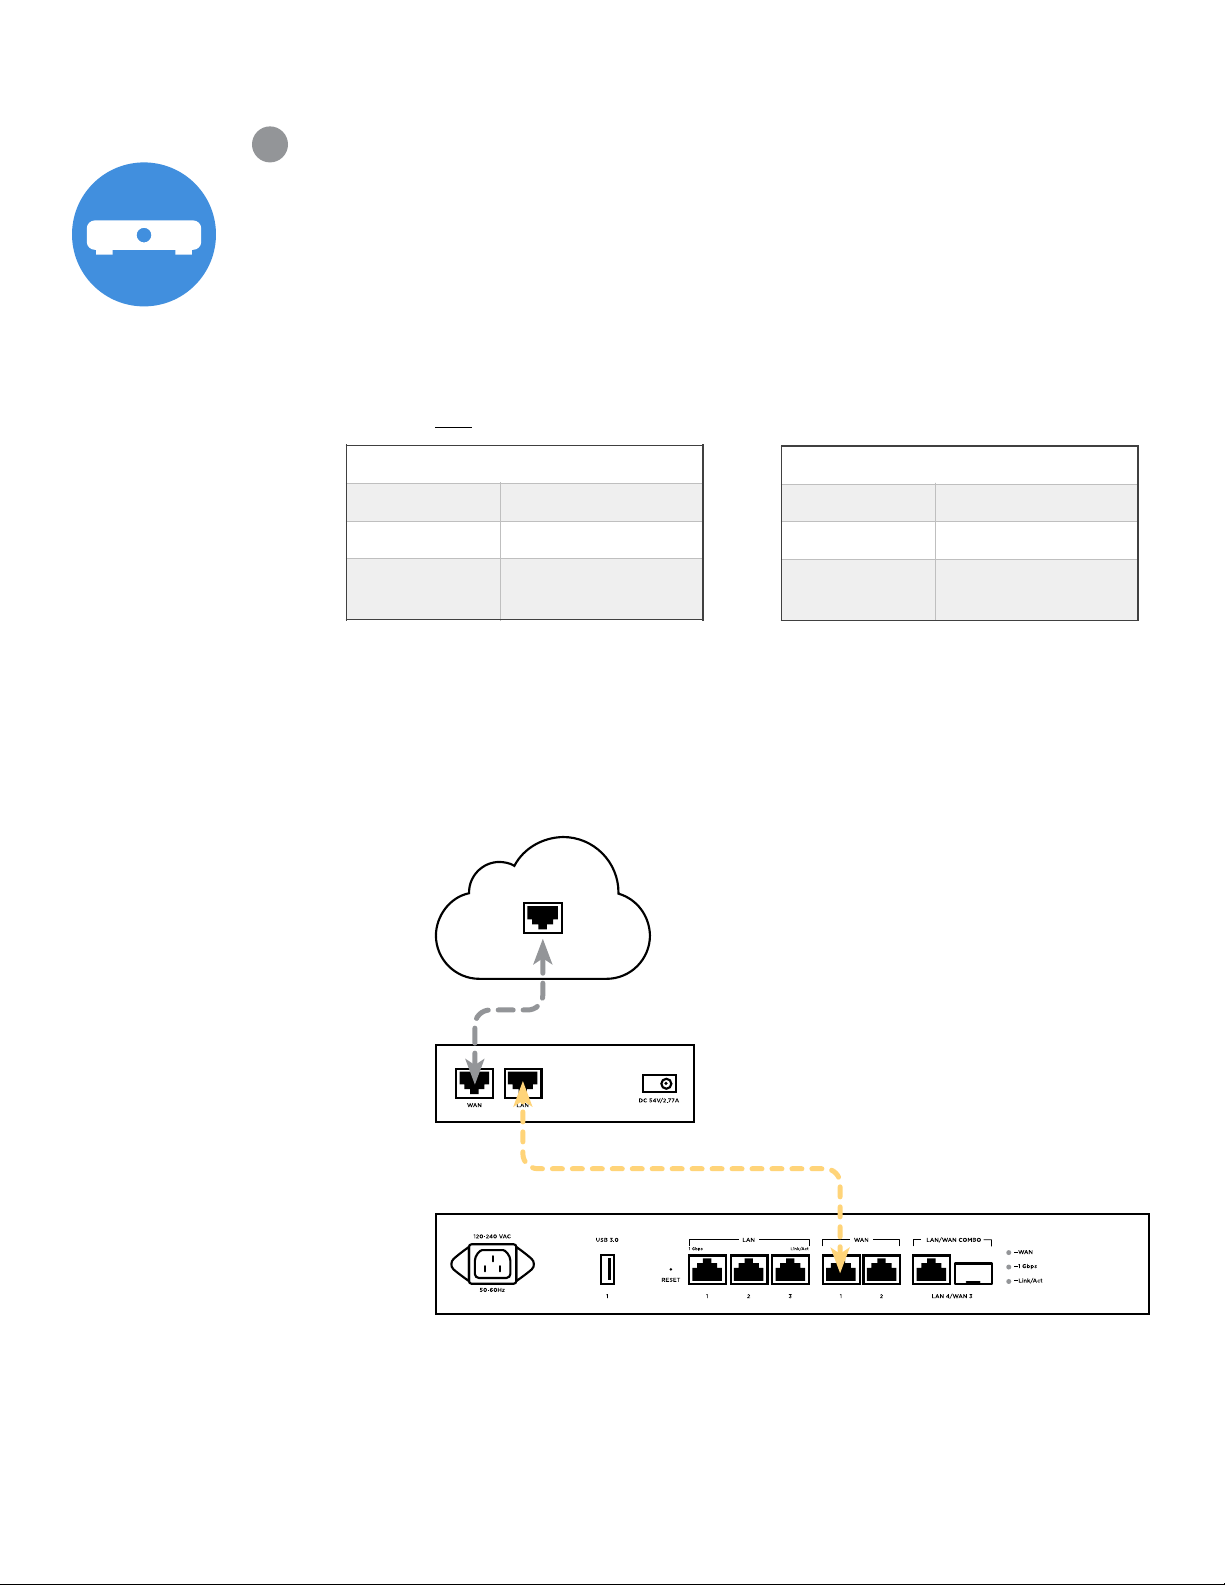
3. Connect the Araknis 310 router’s WAN 1 port to the intermediate router’s LAN
port (see diagram below). Leave all other connections as shown in Step 4:
Verify the Ethernet cables are properly connected.
4. Repeat Step 1: Renew your computer’s network host configuration, to test your
Internet connection.
Note: This solution is just a temporary one to help you complete the hands-on
activities that are part of PCNA. NEVER use this temporary solution for a customer’s
network.