ARB Awning 2500 User manual

Awning 2500
Owners Manual
Congratulations on purchasing your
ARB AWNING 2500 - the quick and easy way to enjoy camping.
Included in this leaflet is all the information that you require to obtain the maximum enjoyment and benefit from
your awning. Given proper care your awning will give you many years of trouble free camping.
1. Introduction
The ARB Awning 2500 has has been designed to fit most roof rack and roof bar systems,
horse floats, camper trailers and many other applications. This versatile product will give you
many years of trouble free service providing you follow these simple mounting, operating
and care instructions.
Before mounting the ARB Awning 2500 to your vehicle a few items need to be
consideredred.
1.The ARB Awning 2500 is supplied with 6 - 6x20mm
stainless steel bolts and nylock nuts. Where the mounting
is directly to the side of a roof rack, these bolts are usually
all that is required.
However, if you are mounting the ARB Awning 2500 to a
set of roof bars or in conjunction with an ARB Touring
Rooftop tent you will need an optional set of stainless
steel awning L brackets.
2.The ARB Awning 2500 needs to be mounted at a
suitable height so that the doors of the vehicle can be
opened without snagging the bottom of the awning.
3.The ARB Awning 2500 should be attached along it’s length at two points but preferrably
three points. Ensure that the unsecured length at each end of the awning does not exceed
700mm.
4.The ARB Awning 2500 should be attached using no less than 4 (6x20mm) nuts and bolts.
Note: 6 nuts and bolts supplied, using 6 is preferable.
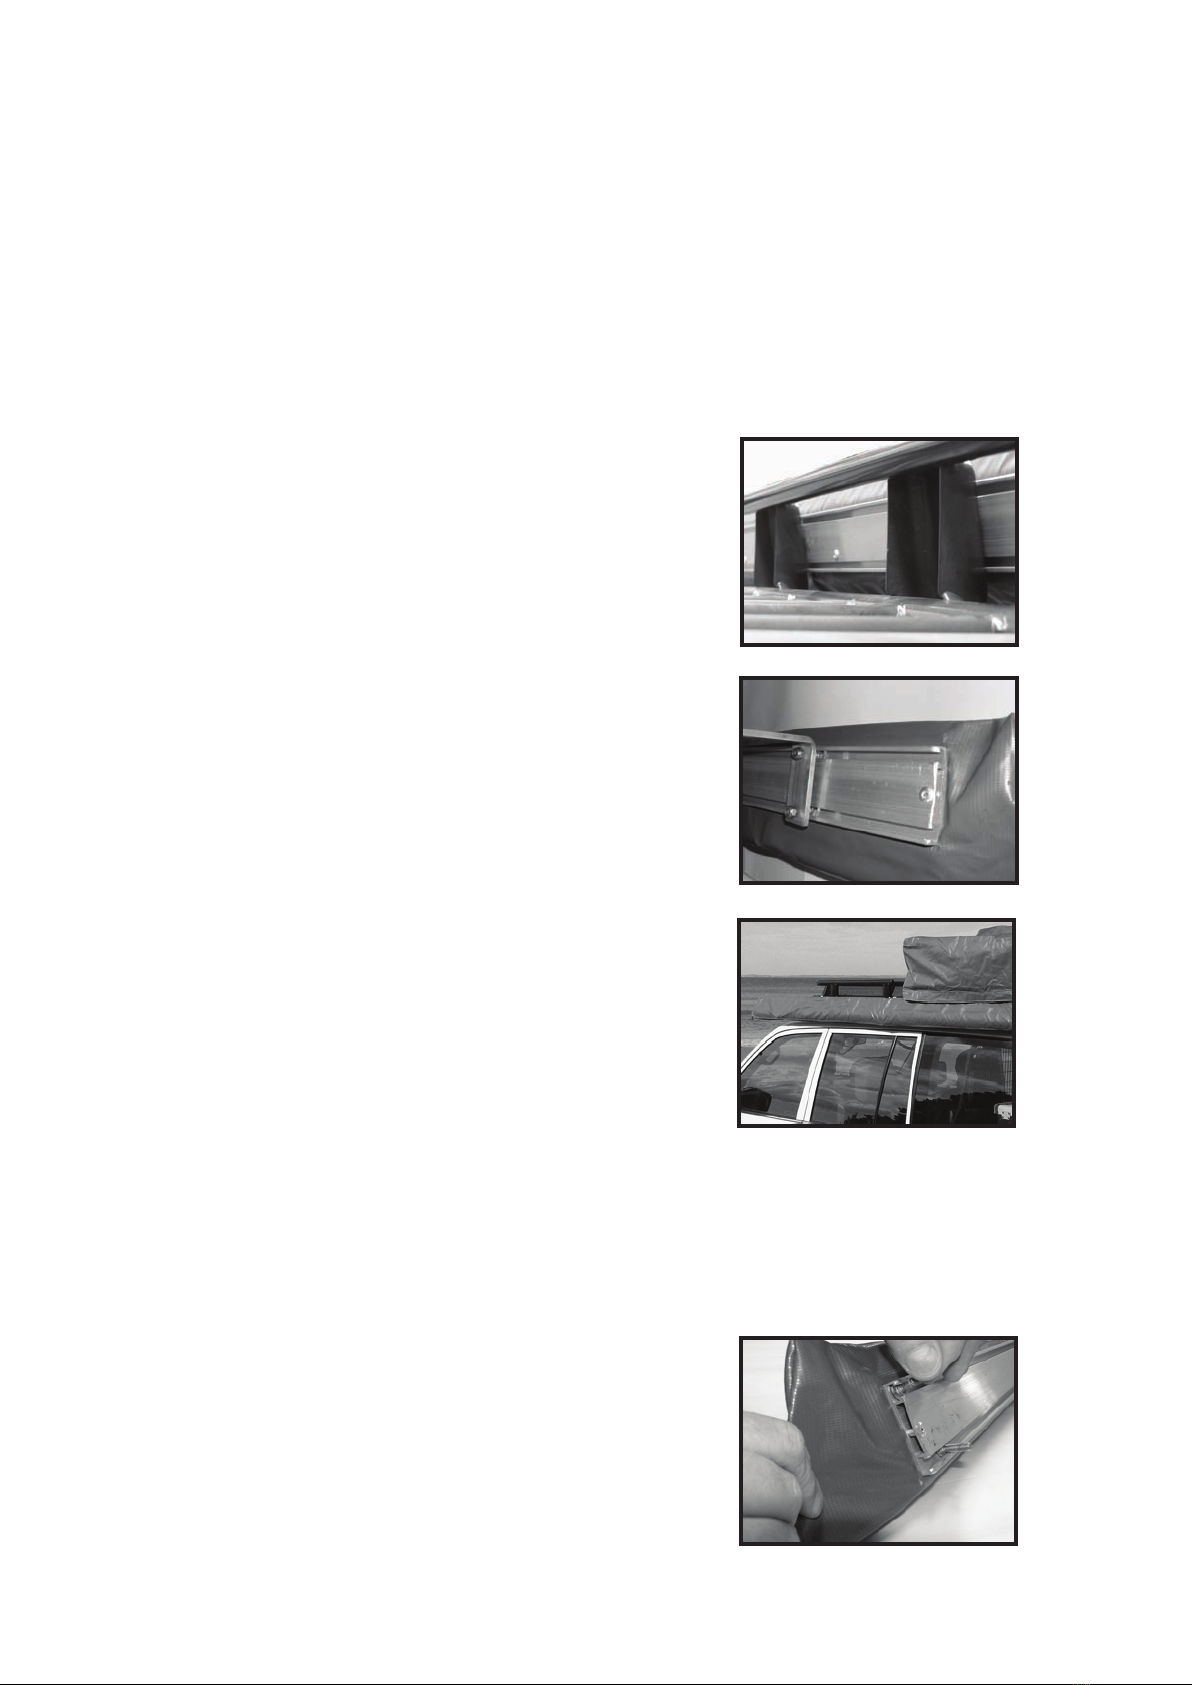
5.The mounting extrusion at the back of the ARB Awning
2500 will hold the head of the 6x20mm bolts captive. The
bolts can be positioned anywhere along the length of the
awning to correspond to the most appropriate mounting
points.
PAGE 1

2. Fitting the ARB Awning 2500
2.1. Mounting to roof bars:
1. Fit your L brackets to the roof bars.
2. Postion the awning on the roof bar brackets to determine the desired mounting
position. Remember to consider opening of doors on the vehicle etc.
3. Insert the provided 6mm bolts into the mounting extrusion on the rear of the awning,
and fit to the roof bar brackets, using the 6mm nylock nuts provided.
2.2. Mounting to roof racks:
1. Postion the awning on the roof rack to determine the desired mounting position.
Remember to consider opening of doors on the vehicle etc.
2. Mark and drill the roof rack (usually on the rise between the top rail of the roof rack
and the base of the roof rack) to accept the bolts that will be fitted into the mounting
extrusion.
3. Insert the provided 6mm bolts into the mounting extrusion on the rear of the awning,
and fit to the roof rack, using the 6mm nylock nuts provided.
3. Storage and Care Guidlines
3.1. Cautions
- Always secure the awning with pegs and guy ropes . This will prevent the wind from
lifting the awning and causing damage to your awning and/or your vehicle.
- Do not store the awning wet. The awning is made from 100% Polyester material with
a laminated pvc lining and is fully waterproof. Whilst this material is exceptionally
resistant to fungal attack, mildew will form if the awning is stored wet for extended
periods. The awning can be stored away wet for limited periods, but should be opened
and allowed to dry as soon as possible.
- In trip inspections. Regularly check that all nuts and bolts attaching your awning to
your vehicle are tight and in good repair.
3.2 Care for your awning
1. Use a soft brush to remove leaf litter etc. to prevent staining.
2.Where neccessary you may use a sponge and mild soapy water to wash the awning
material. After washing, rinse thoroughly with clean water and allow to dry before
extended storage.
PAGE 2
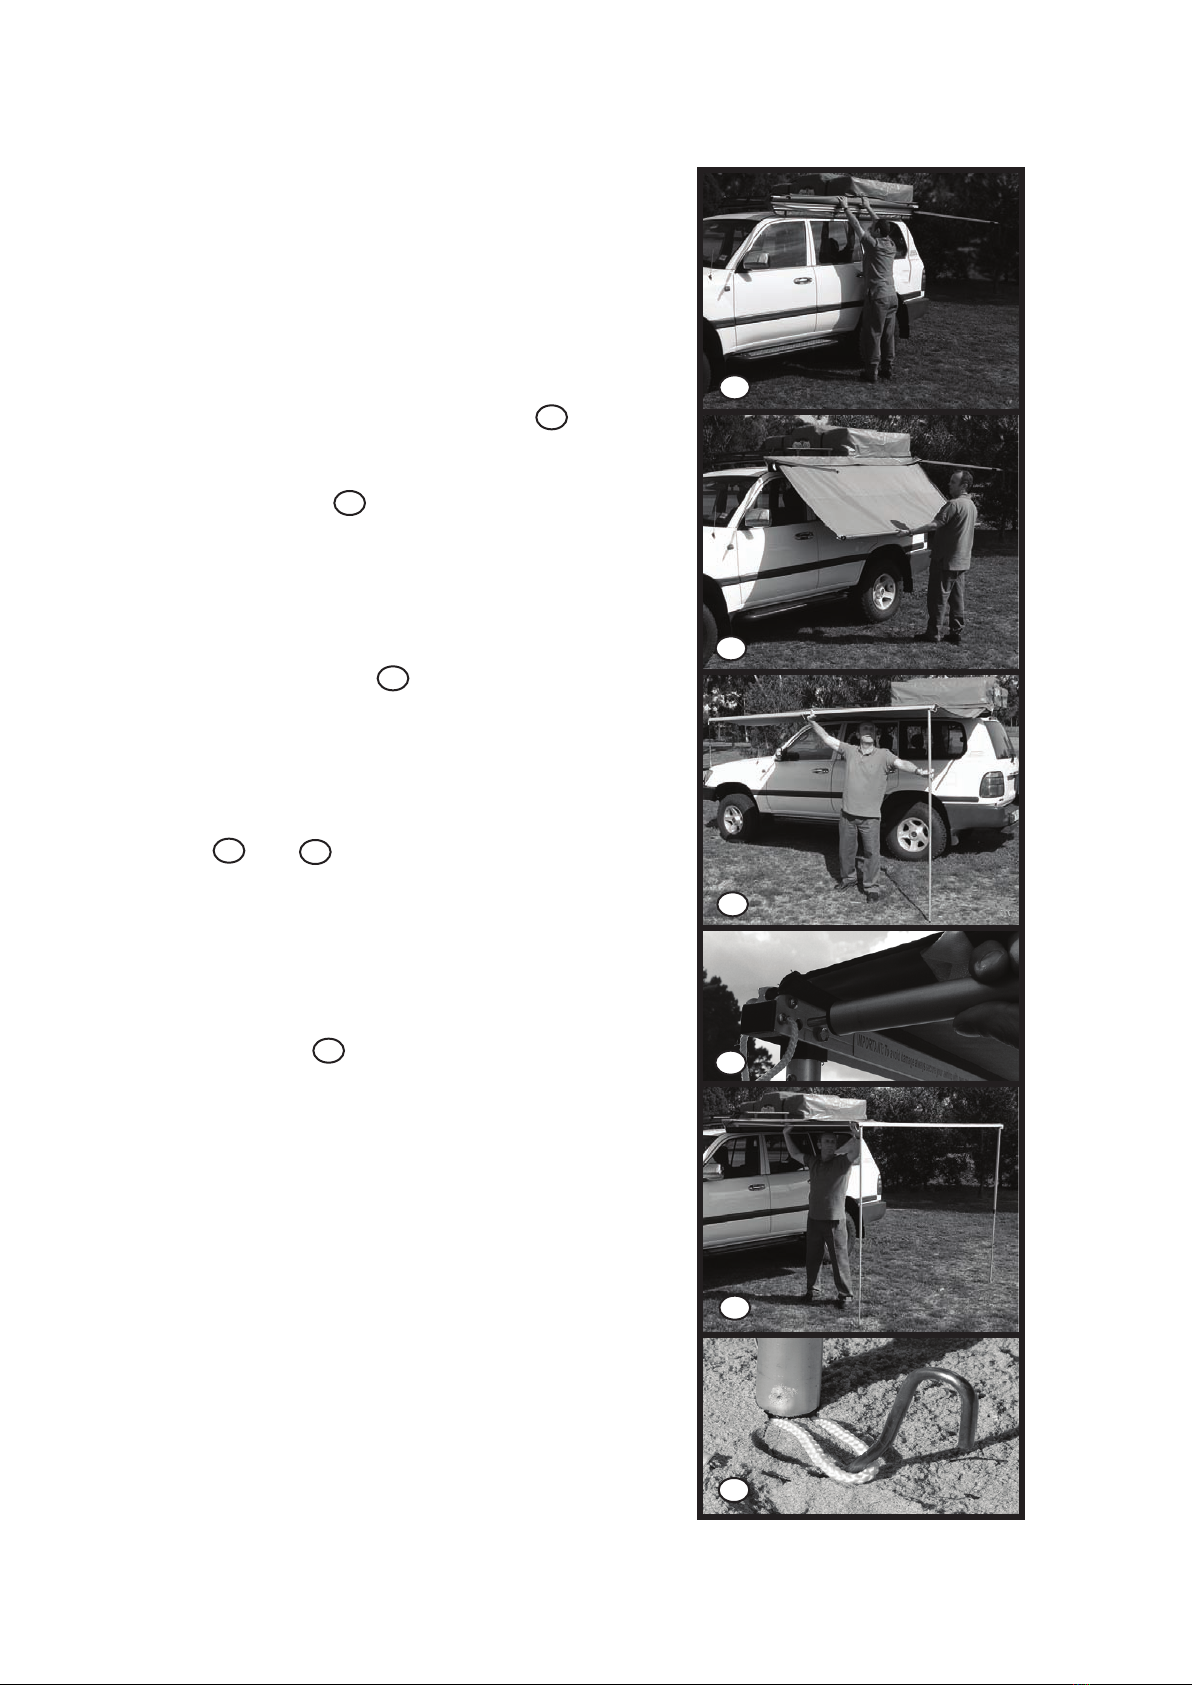
4. Set up Instructions:
1. Undo the zip on the PVC bag, and release the
buckles holding the awning in place.
2. Release the awning rafter arms from the velcro
dots holding them onto the main aluminium
extrusion. Swing both rafter arms slightly more
than 90˚ away from the vehicle. See
3. Allow the awning to unroll in your hands to it’s
full length. See
4. Release the legs of the awning from inside the
front beam. Slide the inner leg tube to the
desired height and engage the twist lock of the
leg by turning the bottom half of the leg to lock
the leg in place. See
5.With one hand holding the front beam, extend
the rafter arm, and place the arm pin into the
corresponding hole in the front beam. Twist the
arm to engage the twist lock.
See and
6. Secure the fabric to the rafter arms using the
velcro tabs.
7. Peg the legs to the ground using the rope
loops in the feet, and guy rope to secure in case
of winds. See
8. Pack up is simply the reverse of the above
procedure.
9. Note
- In the event of rain ensure that the awning is
set to an appropriate angle to allow rain water
to run off and not accumulate on top of the
awning.
- In windy conditions it is essential that the
awning be secured to the ground to prevent
damage to the awning and to the vehicle.
1
1
2
2
3
3
4
4
6
5
5
6
PAGE 3

5. ARB Mosquito Net 2500
1.The ARB Mosquito Net 2500 can be quickly and easily attached to the erected
awning.
2. Slide the rope cord with zip attachment into the front awning beam.
3. Slide main body of the ARB Mosquito Net 2500 into the lower rope track on the
main awning extrusion .
4. Zip the two sections together. It may be neccessary to release the tension on
the rafter arms to get the zip started. Once the ARB Mosquito Net 2500 has been
installed, the rater arms can be retensioned.
PAGE 4
Table of contents


