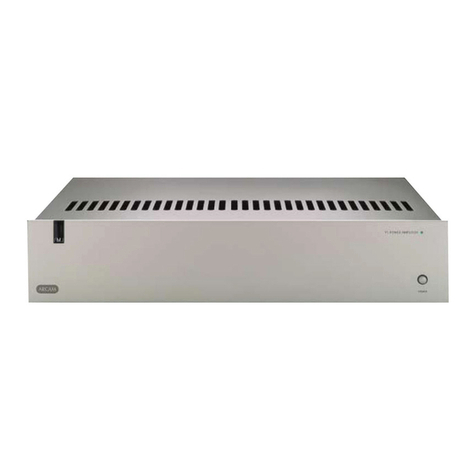
Arcam FMJ P777 User manual

P777
HANDBOOK Multichannel power amplier
MANUEL Amplicateur de Puissance Multicanaux
HANDBUCH Mehrkanal-Verstärker
HANDLEIDING Eindversterker voor Meerdere Kanalen

E-2
safety
guidelines
Important safety instructions
is product is designed and manufactured to meet
strict quality and safety standards. However, you should
be aware of the following installation and operation
precautions.
1. Follow all instructions
You should read all the safety and operating instructions
before operating this equipment. Retain this handbook
for future reference and adhere to all warnings in the
handbook or on the equipment.
2. Water and moisture
e presence of electricity near water can be dangerous.
Do not use the equipment near water – for example next
to a bathtub, washbowl, kitchen sink, in a wet basement
or near a swimming pool, etc.
3. Object or liquid entry
Take care that objects do not fall and liquids are not
spilled into the enclosure through any openings. Liquid-
lled objects such as vases should not be placed on the
equipment.
4. Liing and placing the equipment
is amplier weighs 37.2kg, so take extreme care when
liing or moving this unit. We recommend that two
people are available to li this unit.
Only use a rack or shelf that is stable and strong enough
to support the weight of this equipment.
5. Ventilation
Do not place the equipment on a bed, sofa, rug or
similar so surface, or in an enclosed bookcase or
cabinet, since ventilation may be impeded.
Keep a minimum of 5cm (2 inches) clear around the
apparatus to allow sucient passage of air.
6. Heat
Locate the equipment away from naked ames or heat-
producing appliances such as radiators, stoves or other
appliances that produce heat.
7. Climate
e equipment has been designed for use in moderate
climates and in domestic situations. Unplug this
equipment during lightning storms to prevent possible
damage from a strike or mains surge.
8. Cleaning
Unplug the unit from the mains supply before cleaning.
e case should normally only require a wipe with a so,
lint-free cloth. Do not use chemical solvents for cleaning.
We do not advise the use of furniture cleaning sprays or
polishes as they can cause permanent white marks.
9. Grounding
Ensure that the unit is grounded (‘earthed’) properly at
all times
10. Power sources
Only connect the equipment to a power supply of
the type described in the operating instructions or as
marked on the equipment.
e primary method of isolating the equipment from
the mains supply is to remove the mains plug. e
equipment must be installed in a manner that makes
disconnection possible.
11. Power-cord protection
Power supply cords should be routed so that they are not
likely to be walked on or pinched by items placed upon
or against them. Pay particular attention to the point
where they exit from the equipment.
12. Non-use periods
If the equipment is not being used for an extended
period, we recommend that you unplug the power cord
of the equipment from the outlet, to save power.
13. Abnormal smell
If an abnormal smell or smoke is detected from the
equipment, turn the power o immediately and unplug
the equipment from the wall outlet. Contact your dealer
and do not reconnect the equipment.
14. Servicing
You should not attempt to service the equipment.
Contact your dealer to arrange servicing.
15. Damage requiring service
e equipment should be serviced by qualied service
personnel when:
A. the power-supply cord or the plug has been
damaged, or
B. objects have fallen, or liquid has spilled into the
equipment, or
C. the equipment has been exposed to rain, or
D. the equipment does not appear to operate
normally or exhibits a marked change in
performance, or
E. the equipment has been dropped or the enclosure
damaged.
Safety compliance
is equipment has been designed to meet the IEC/EN
60065 international electrical safety standard.
is device complies with Part 15 of the FCC Rules.
Operation is subject to the following two conditions:
(1) is device may not cause harmful interference, and
(2) this device must accept any interference received,
including interference that may cause undesired
operation.
Many of these items are common sense precautions but, for your own safety and to ensure that you do not damage the unit, you must read them.
Warning
Mains plug/appliance coupler is used to disconnect
device and it shall remain readily operable.
CLASS I construction shall be connected to a MAINS
socket outlet with a protective earthing connection.
Do not defeat the safety purpose of the polarized or
grounding-type plug. A polarized plug has two blades
with one wider than the other. A grounding type plug
has two blades and a third grounding prong. e wide
blade or the third prong are provided for your safety. If
the provided plug does not t into your outlet, consult an
electrician for replacement of the obsolete outlet.
CAUTION: To reduce the risk of electric shock, do not remove cover (or back). No user serviceable parts inside. Refer
servicing to qualied service personnel.
WARNING: To reduce the risk of re or electric shock, do not expose this apparatus to rain or moisture.
e lightning ash with an arrowhead symbol within an equilateral triangle, is intended to alert the user to the
presence of uninsulated ‘dangerous voltage’ within the product’s enclosure that may be of sucient magnitude to
constitute a risk of electric shock to persons.
e exclamation point within an equilateral triangle is intended to alert the user to the presence of important
operating and maintenance (servicing) instructions in the literature accompanying the product.
CAUTION: In Canada and the USA, to prevent electric shock, match the wide blade of the plug to the wide slot in the
socket and insert the plug fully into the socket.
E2
E-3
English
welcome
ank you and congratulations for purchasing your Arcam FMJ P777 Multichannel power
amplier.
Arcam has been producing specialist audio products of remarkable quality for over three
decades and the P777 is the latest in a long line of award winning HiFi equipment. e design
of the FMJ range draws upon all of Arcam’s experience as one of the UK’s most respected audio
companies and is built to give you years of trouble-free listening enjoyment.
is handbook has been designed to give you all the information you need to install, connect
and use the Arcam P777. It may be that the P777 has been installed and set up as part of your
Hi-Fi or home cinema installation by a qualied Arcam dealer. In this case, you may wish to
skip the sections of this handbook dealing with installation and setting up the unit. Use the
Contents list to guide you to the section of interest.
We hope that your multichannel power amplier will give you years of trouble-free operation.
In the unlikely event of any fault, or if you simply require further information about Arcam
products, our network of dealers will be happy to help you. Further information can also be
found on the Arcam website at www.arcam.co.uk.
e FMJ development team
Contents
safety guidelines .......................................E-2
Important safety instructions........................... E-2
Safety compliance ................................................ E-2
welcome ......................................................E-3
installation .................................................E-4
Overview .................................................................. E-4
Placing the unit ..................................................... E-4
Room acoustics ...................................................... E-4
12V Trigger input .................................................. E-4
Power ......................................................................... E-4
Connecting to a pre-amplier .........................E-4
Interconnect cables.............................................. E-5
speakers ......................................................E-6
Speaker placement ..............................................E-6
Speaker wiring options ....................................... E-6
Single wiring ...........................................................E-7
Bi-wiring ................................................................... E-7
Bi-amping ................................................................ E-7
operation ....................................................E-8
Front panel control ............................................... E-8
Operating procedure ........................................... E-8
troubleshooting ........................................E-9
Fault status indicators .......................................E-10
specications .......................................... E-11
product guarantee ................................ E-12

E-4
installation
Overview
e P777 Multichannel Power Amplier is built
to Arcam’s traditional high quality design and
manufacturing standards. It is an extremely high-
performance multichannel power amplier obviously
well suited to multichannel home cinema amplication,
although it also provides superb quality stereo
performance with two-channel sources. e P777 is an
ideal partner for the FMJ AV888 Pre-amp Processor.
Each power amplier module is identical, and is
electrically isolated from the other modules by opto-
isolated circuitry which ensures that each amplier
module has its own isolated supply. is allows the
amplier to give excellent channel separation and very
low distortion.
e P777 also has input and output phono sockets
for the signal being fed to each channel, to allow the
signal to be passed on to additional power ampliers
to drive loudspeakers in other rooms or to bi-amplify
any of the speakers. If the P777 is being used to drive
a ve-channel surround sound system, then the spare
two modules (SBL and SBR) can be used in conjunction
with the main (L and R) modules to bi-amplify suitable
front le and right speakers.
e customised installation of the P777 to a listening
room is an important process which requires care at
every stage. For this reason, the installation information
is very comprehensive and should be followed carefully.
is manual has been written with the assumption that
the installer is familiar with the installation of high-end
audio/video systems.
Placing the unit
< Place the P777 on a level, rm surface, avoiding
direct sunlight and sources of heat or damp.
< e P777 is a powerful amplier and a source of
considerable heat output when driven hard. Take
this into consideration when placing the unit.
< Do not place the unit in an enclosed space such as
a bookcase or closed cabinet unless there is very
good provision for ventilation.
< Do not place any other component or item on top
of the P777 as this may obstruct airow around
the unit, causing the P777 to run hot.
< Do not place your record deck on top of this
unit. Record decks are very sensitive to the noise
generated by mains power supplies which will be
heard as a background ‘hum’ if the record deck is
too close.
Room acoustics
e shape of your room and how it’s furnished will aect
the sound you hear. For instance, too many bare surfaces
can cause reections that may add harshness to the
sound. Adding carpeting and drapes can help.
If you have a choice of rooms, avoid ones that are
perfectly square or have one dimension exactly twice
another. ese rooms can aggravate resonances that
colour the sound.
12V Trigger input
If your pre-amp provides a 12V Trigger output, it can
be connected to the 12V TRIGGER IN socket using a mono
3.5mm jack. is enables the P777 to be turned on
remotely from the pre-amp.
tip: 12V trigger signal
sleeve: ground
Note that the trigger input is only active when the
central power button on the front panel is depressed.
In normal use there is no need to make any connections
to this input.
Power
e P777 is supplied with a moulded mains plug already
tted to the lead. Up to 3kW is drawn at maximum
levels, so a heavy duty IEC mains cable is supplied.
Check that the plug supplied ts your supply – if your
mains supply voltage or mains plug is dierent, or you
need a new mains lead, please contact your Arcam
dealer.
Push the IEC plug end of the power cable into the socket
on the back of the P777, making sure that it is pushed in
rmly. Plug the other end of the cable into your mains
socket and, if necessary, switch the socket on.
Connecting to a pre-amplifier
Two dierent connection types are provided for
receiving signals from your pre-amplier: phono
sockets and XLR connectors. e connection type to use
depends on the set-up that you have.
< If the cables to be used to connect your pre-
amplier to the P777 are less than 3m long, we
recommend connecting your pre-amplier to the
AUDIO IN phono (RCA) sockets of your P777. To
use the phono connections, make sure that all the
channel input switches are not depressed.
< If the cables to be used to connect your pre-
amplier to the P777 are 3m or longer and your
pre-amplier has balanced XLR outputs, we
recommend using these instead of the phono
(RCA) connections. Performance will also be
improved in electrically-noisy environments
by using these connections. To use the XLR
connections, make sure that the INPUT SELECT
switches are depressed for each channel.
Pin Function
1 Chassis ground (cable shield)
2 ‘Hot’ (normal polarity)
3 ‘Cold’ (inverted polarity)
Female XLR Male XLR

E-5
English
Interconnect cables
We recommend the use of high-quality screened cables
that are designed for the particular application. Other
cables will have dierent impedance characteristics
that will degrade the performance of your system (for
example, do not use cabling intended for video use to
carry audio signals). All cables should be kept as short as
is practically possible.
It is good practice when connecting your equipment to
make sure that the mains power-supply cabling is kept
as far away as possible from your audio cables. Failure to
do so may result in unwanted noise in the audio signals.
XLR audio input
Balanced XLR connectors for each
of seven channels, from an XLR-
equipped pre-amplier.
Power inlet
Check the mains
supply voltage matches
the values printed on
the back panel before
connecting the mains
cable here.
12V Trigger input
See page 4 for details.
Speaker terminals
e P777 is equipped with seven pairs of
speaker terminals. See page 7 for information
on the dierent ways of connecting
loudspeakers.
Audio input and output
AUDIO IN from a pre-amplier for each of
seven channels. AUDIO OUT may be used to
bi-amplify a set of speakers (see page 7).
Input select switch
Depress this switch to take the audio source
from the BALANCED XLR INPUT connector for
each channel; if the switch is not depressed,
the audio source is taken from the AUDIO IN
RCA (phono) connector.

E-6
speakers
Speaker placement
e P777 allows connection of up to seven
loudspeakers. All speakers, with the exception of the
subwoofer, should be arranged around your normal
viewing/listening position (see diagram). e subwoofer
can be placed almost anywhere and we recommend
experimenting with it in various positions to obtain the
best result.
e closer you place a speaker to intersecting room
surfaces (corners, wall and ceiling, wall and oor),
the stronger the bass output. is can help bass-shy
speakers, but it can also add too much bass. Again, just
moving a speaker a few inches can oen make a big
dierence in sound.
Position your front le (L) and right (R) speakers
to achieve a good stereo image for normal musical
reproduction. If they are placed too close together there
will be a lack of spaciousness. Alternatively if they are
placed too far apart the stereo image will appear to have
a hole in the middle and will be presented in two
halves.
e centre speaker (C) allows for a more
realistic reproduction of dialogue and
centre sounds as well as wider and
better imaging for stereo eects
and background sounds for
home cinema use. Do not
compromise on the quality
of your centre speaker as it
carries all the dialogue for a
home cinema system.
Notes on making speaker
connections
< Do not make any connections to any amplier
while it is switched on. We recommend that
your amplier is completely disconnected
from the mains supply before starting.
< Before switching your amplier on for the
rst time aer connecting to speakers, please
check all connections thoroughly. Ensure
that bare wires or cables are not touching
each other or the amplier’s chassis (which
could cause short circuits), and that you
have connected positive (+) to positive and
negative (–) to negative. Be sure to check the
wiring for both the amplier and the speaker.
< Aer making connections: switch the
amplier on, with the pre-amplier volume
set to a low setting. Select a source signal, then
gradually increase the volume to the required
listening level.
< If you are unsure as to how your system
should be connected, or need advice on
bi-wiring or bi-amping, please contact your
Arcam dealer who will be happy to help you.
Speaker wiring options
Single wiring
Single wiring is the conventional wiring method of
running a single cable per channel between the amplier
and the speaker; this is the easiest technique.
Bi-wiring
Bi-wiring is running two separate cables between the
amplier and each speaker, with one cable carrying
the low-frequency information, the other the higher-
frequency signals.
Bi-wiring can improve the sound of your system because
the separation of high- and low-frequency signal
currents into dierent speaker cables avoids distortions
caused by the dierent currents interacting with one-
another within a single cable, as occurs in single-wired
systems.
e P777 is designed to allow easy bi-wiring, but you
will need to connect to loudspeakers that provide
separate terminals for the two cables. Each speaker
must have two pairs of terminals; one pair labelled HF
or ‘High Frequency’, the other pair labelled LF or ‘Low
Frequency’.
Bi-amping
Bi-amping is the separation of the amplication of
low- and high-frequency signals over two ampliers.
Bi-amping requires the use of two ampliers per
channel.
e surround le (SL) and right (SR) speakers
reproduce the ambient sound and eects present in a
multichannel home cinema system.
e surround back le (SBL) and surround back right
(SBR) speakers are used to add extra depth, a more
spacious ambience and sound localisation.
A subwoofer (SW) will greatly improve the bass
performance from your system. is is useful for
reproducing special cinema eects, especially where
a dedicated LFE (Low-Frequency Eects) channel is
available, as with Dolby Digital or DTS Digital Surround
encoded discs.

E-7
English
Single wiring
If each speaker has more than one pair of connecting terminals, use the terminals labelled
LF or ‘Low Frequency’ for each speaker.
Connect the positive terminal of the right speaker connection on the amplier (coloured
red and labelled +R) to the positive terminal of your right speaker. Similarly, connect the
negative terminal of the amplier (coloured black and labelled with R) to the negative
terminal of your speaker. Repeat the process for the le speaker, using the amplier
terminals labelled +L and L.
If your speakers support bi-wiring, then there is a strip of conductive metal on the
speakers connecting the low-frequency terminals to those for the higher-frequencies; this
MUST NOT BE REMOVED in a single-wired system.
Bi-wiring
Bi-wiring is performed in the same way as single wiring except that, for each speaker, a
pair of cables are used to connect the amplier to each speaker.
Follow the instructions given for single wiring; then perform the same actions, this time
connecting the upper set of speaker terminals on your amplier to the terminals labelled
HF or ‘High Frequency’ for each speaker. Please refer to the illustration.
Speakers that support bi-wiring have a strip of metal on the speakers connecting the low-
frequency terminals to those for the higher-frequencies; this MUST BE REMOVED in a
bi-wired system.
Bi-amping
Bi-amping requires the use of two amplier channels per speaker. Using this method will
prevent you from using seven surround speakers.
Connect two channels of the P777 with a phono cable between the AUDIO OUT socket on
one channel to the AUDIO IN channel of another. One channel should then be connected to
the speakers as described for single wiring, with the exception that this channel should be
connected to the speaker terminals labelled HF or ‘High Frequency’. e second channel must
then be connected to the LF or ‘Low Frequency’ terminals, as in the diagram.
Note that the strip of metal on the speakers connecting the lower terminals to the upper
terminals MUST BE REMOVED. Failure to do so will result in damage to both ampliers,
which will not normally be covered under warranty.
Arcam recommends that the phono connections are use for bi-amping. If you prefer to use the
XLR connectors, use a Y-lead with one female XLR to two male XLRs, so that two amplier
channels may be fed from a single source. Contact your dealer if you need assistance.
Bi-wiring using one amplier
channel per speaker
Bi-amping using two amplier
channels per speaker
Single wiring speaker
connections
Outputs from multichannel pre-amp (e.g AV888)
...etc...

E-8
operation
Front panel control
e front panel has a single control: a centrally located
power on/o button.
POWER
Switches the unit on and o. Note that the modules are
turned on individually to stagger the surge created when
a powerful amplier is switched on (i.e., it provides a
‘so start’). is reduces the surge current drawn from
the domestic power supply.
Status LEDs
A separate LED indicates the status of each of the seven
channels of the P777.
e LEDs cycle through red, orange, then green to
indicate the status from powered-up (initialised),
stabilised and active respectively.
All LEDs are o in standby mode.
Operating procedure
Once the relevant connections have been made, the
P777 can be switched on using the central button on the
front panel.
Switching on
It is recommended that you switch on your pre-amplier
or controller before powering up the power amplier.
Normal powering up is indicated by the following
sequence of front panel LED indicators:
1. On pressing the power switch, all LEDs turn red.
2. Aer a short delay (about half-a-second), the
centre LED turns amber.
3. e LEDs continue turning amber from the
centre to the edges in pairs, at about one second
intervals.
4. e centre LED turns green and a relay ‘click’ is
heard.
5. e LEDs continue turning green from the centre
to the edges in pairs, along with relay ‘clicks’, at
about one second intervals.
In the unlikely event that the LEDs do not follow this
sequence when the unit is powered up, or they behave
abnormally at any time during use, then refer to the
‘Fault status indicators’ table on page 10 to discover why
the amplier is in protection mode.
Switching o
To shut down, switch the power amplier o rst,
followed by the pre-amplier or controller.
is eliminates the chance of any ‘thumps’ or power
spikes being fed through to the power amplier and
potentially causing damage to the system.

E-9
English
trouble-
shooting
No Lights on the Unit
Check that:
< the power cord is plugged into the P777 and the
mains socket outlet it is plugged into is switched
on.
< the plug fuse has not failed, or a circuit-breaker
earlier in the power supply path has not opened.
< the power button is pressed in.
Red LED present
Refer to the ‘Fault status indicators’ table (overleaf) if
you have an unusual sequence of LEDs.
No sound is produced
Check that:
< the correct input has been selected on the pre-
amplier.
< you have assigned the digital input to the correct
input source.
< the volume is turned up to a reasonable level and
‘MUTE’ is not displayed on the front panel display
on the pre-amplier.
< your power amplier(s) are turned on and
working correctly.
Sound is poor and badly distorted
Check that:
< all cables are making a good connection. If
necessary withdraw the cable from the connector
and plug it back in again. (Turn the power o
before doing this.)
< you have selected the correct size of speakers
to suit your system in the setup menu of the
processor or pre-amp.
Sound only comes from some of the speakers
Check that:
< all speakers in the system are connected to the
P777.
< you have congured your pre-amp to include all
the speakers in your system.
< you have an appropriate surround sound source
selected and playing through the pre-amp.
< for digital sources, check the player is outputting
multichannel data. With some DVD players you
are able to select in what format multi-format
encoded discs are outputted, and whether
multichannel data is down-mixed to PCM
(stereo).
< the disc you are playing is a multichannel
recording and that the processor is outputting
multichannel audio.
< your speaker balance is correct.
< all ampliers are turned on and all channels are
working correctly.
< all units are turned on. If the audio is ‘daisy-
chained’ from the P777, make sure that the unit
being fed is turned on.
Hum on an amplier output
Check that:
< all cables are making a good connection. If
necessary withdraw the cable from the connector
and plug it back in again. (Turn the power o
before doing this.)
< if the hum originates from a ground loop caused
by an aerial, satellite dish or cable supply, you
should contact your aerial contractor.
< the signal (interconnect) leads are not wrapped
around a mains lead.
< try switching the ground li on the back panel of
the processor (if available).
There is radio/television reception
interference
e P777 has been designed to a very high standards of
electromagnetic compatibility.
Check that:
< the aerial/dish cable is routed as far as possible
from your amplier and its cabling.
< the cabling used from the aerial/dish is of high
quality and screened.
< repositioning the receiving aerial/dish as far as
possible from your amplier and its cabling may
bring an improvement.
< if the problem persists, contact your aerial
contractor.
< you are using high quality screened audio cable
between your equipment and that no cables are
broken or damaged.

E-10
Fault status indicators
e LED patterns below indicate the following fault conditions:
LED status Description Amplier action
All LEDs are green is is the normal operating state of the amplier. None
During power up all LEDs stay red for an extended time e amplier is waiting for the DC oset fault lines to
clear. A DC oset fault can occur if an excessive DC
voltage is present at the output of the pre-amp feeding
the P777. Normal operation resumes if the lines clear in
20 seconds.
To verify excessive DC oset voltage, remove the
interconnect leads (with the P777 switched o) and turn
on the P777. e fault should have cleared.
During power up or normal operation, one or more
LEDs are ashing green, with the remaining LEDs solid
red
e DC fault cannot be cleared. e channels with the
ashing green LEDs represent the amplier modules that
have a DC oset fault. Alternatively, a DC oset fault has
reoccurred on the same channel within 12 seconds of a
previous DC oset fault clearance.
e amplier shuts down. e power switch must be
cycled to reset the amplier (cycling the trigger does
NOT reset the amplier).
During power up or normal operation, one or more
LEDs are ashing green, with the remaining LEDs NOT
solid red
e amplier is attempting to clear a DC oset fault on a
channel with the ashing green LED.
e amplier mutes the channel with the fault and its
paired channel. e amplier stays in this state for up
to two seconds or until the fault clears (whichever is
sooner).
During power up or normal operation, one or more
LEDs are ashing red, with the remaining LEDs solid
red
A short circuit fault cannot be cleared. e ashing red
LEDs represent the amplier modules with a short circuit
fault. Alternatively, a short circuit fault has reoccurred on
the same channel within 12 seconds of a previous short
circuit fault clearance.
e amplier shuts down. e power switch must be
cycled to reset the amplier (cycling the trigger resets the
amplier).
During power up or normal operation, one or more
LEDs are ashing red, with the remaining LEDs NOT
solid red
e amplier is attempting to clear a short circuit fault on
a channel with the ashing red LED.
e amplier mutes the channel with the fault and its
paired channel. e amplier stays in this state for up
to half-a-second or until the fault clears (whichever is
sooner).
During power up or normal operation, one or more
LEDs are ashing amber
e amplier is attempting to clear an over temperature
fault on a channel with the ashing amber LED.
e amplier mutes the channel with the fault and its
paired channel and the fan is set to maximum speed. e
amplier stays in this state until the channel has cooled.
During power up or normal operation, one LED is
ashing amber, with the remaining LEDs solid red
An over temperature fault has reoccurred on the same
channel within 12 seconds of a previous over temperature
fault clearance. e ashing amber LEDs represent the
amplier modules with an over temperature fault.
e amplier shuts down. e power switch must be
cycled to reset the amplier (cycling the trigger resets the
amplier).
During power up or normal operation, all the LEDs are
ashing amber
e amplier is attempting to clear an over temperature
fault on more than one channel, or the power
transformers have overheated.
e amplier mutes all channels and the fan is set to
maximum speed. e amplier stays in this state until all
channels have cooled, or the transformer has cooled.
During normal operation, all the LEDs are solid red An over temperature fault has reoccurred on one or more
channels, or the power transformers have overheated
within 12 seconds of a previous over temperature fault
clearance.
e amplier shuts down. e power switch must be
cycled to reset the amplier (cycling the trigger resets the
amplier).
During power up or normal operation, one or more
LEDs are ashing amber, with the remaining LEDs
ashing green
A DC oset fault occurred on one or more channels
while attempting to clear a multiple over temperature
fault.
e amplier shuts down. e power switch must be
cycled to reset the amplier (cycling the trigger does
NOT reset the amplier).
During power up or normal operation, one or more
LEDs are ashing amber, with the remaining LEDs
ashing red
A short circuit fault occurred on one or more channels
while attempting to clear a multiple over temperature
fault.
e amplier shuts down. e power switch must be
cycled to reset the amplier (cycling the trigger resets the
amplier).

E-11
English
specications
All measurements are with 230V/50Hz mains power
Maximum continuous output power
All channels driven, 20Hz–20kHz, 8Ω 160W per channel; 1.05kW total
All channels driven, 20Hz–20kHz, 4Ω 270W per channel; 1.62kW total
One or two channels driven at 1kHz, 8Ω 170W per channel
One or two channels driven at 1kHz, 4Ω 290W per channel
Total harmonic distortion
At any level up to rated power, into 4Ω or 8Ω Typically <0.004% at 1kHz
Frequency response
Less than –0.3dB (10Hz—20kHz)
–3dB at 100kHz
Residual hum and noise
Ref. full power –108dB, 20Hz–20kHz, unweighted
Voltage gain
x 37 (31.5dB), Arcam standard
Input impedance
470pF in parallel with 22kΩ
General
Power requirements 115V or 230VAC, 50/60Hz, 1200W maximum via heavy
duty IEC C20 mains inlet (requires IEC C19 plug).
A so start system eliminates large inrush currents at
switch on.
Physical Dimensions: W430 x D450 x H180mm
Weight: 37.2kg net; 40kg packed
E&OE
NOTE: All specication values are typical unless otherwise stated
Continual improvement policy
Arcam has a policy of continual improvement for its
products. is means that designs and specications
are subject to change without notice.
Radio interference
e P777 is an audio device which has been
designed to very high standards of electromagnetic
compatibility.
e unit can radiate RF (radio frequency) energy.
In some cases this can cause interference with FM
and AM radio reception. If this is the case, keep the
P777 and its connecting cables as far from the tuner
and its aerials as possible. Connecting the P777 and
the tuner to dierent mains sockets can also help to
reduce interference.
EC Countries – ese products have been designed
to comply with directive 89/336/EEC.
USA – ese products comply with FCC
requirements.

E-12
product
guarantee
Worldwide Guarantee
is entitles you to have the unit repaired free of charge, during the rst two years
aer purchase, at any authorised Arcam distributor provided that it was originally
purchased from an authorised Arcam dealer or distributor. e manufacturer can take
no responsibility for defects arising from accident, misuse, abuse, wear and tear, neglect
or through unauthorized adjustment and/or repair, neither can they accept responsibility
for damage or loss occurring during transit to or from the person claiming under the
guarantee.
The warranty covers:
Parts and labour costs for two years from the purchase date. Aer two years you must pay
for both parts and labour costs. e warranty does not cover transportation costs at any
time.
Claims under guarantee
is equipment should be packed in the original packing and returned to the dealer from
whom it was purchased, or failing this, directly to the Arcam distributor in the country of
residence.
It should be sent carriage prepaid by a reputable carrier – not by post. No responsibility
can be accepted for the unit whilst in transit to the dealer or distributor and customers are
therefore advised to insure the unit against loss or damage whilst in transit.
For further details contact Arcam at:
Arcam Customer Support Department,
Pembroke Avenue, Waterbeach,
CAMBRIDGE,
CB25 9QR, England
or via www.arcam.co.uk.
Problems?
If your Arcam dealer is unable to answer any query regarding this or any other Arcam
product please contact Arcam Customer Support at the above address and we will do our
best to help you.
On-line registration
You can register your product on-line at www.arcam.co.uk.Correct disposal of this product
is marking indicates that this
product should not be disposed with
other household waste throughout
the EU.
To prevent possible harm to the
environment or human health from
uncontrolled waste disposal and to
conserve material resources, this
product should be recycled responsibly.
To dispose of your product, please use your local
return and collection systems or contact the retailer
where the product was purchased.

Français
F-1
P777
MANUEL Amplicateur de Puissance Multicanaux
Français

F-2
consignes
de sécurité
Instructions de sécurité
importantes
Cet appareil a été conçu et fabriqué conformément aux
normes de qualité et de sécurité les plus strictes. Vous
devez cependant observer les précautions qui suivent
lors de son installation et de son utilisation.
1. Suivez toutes les instructions
Il est impératif de lire les consignes de sécurité et
d’utilisation avant de mettre cet appareil en marche.
Conservez ce manuel pour vous y référer par la suite et
respectez scrupuleusement les avertissements gurant
dans ce manuel ou sur l’appareil lui-même.
2. Eau et humidité
L’installation d’un appareil électrique à proximité d’une
source d’eau présente de sérieux risques. Il ne faut donc
pas installer l’appareil près d’une baignoire, d’un lavabo,
d’un évier, dans un sous-sol humide, près d’une piscine,
etc.
3. Chute d’objets ou inltration de liquides
Veillez à ne pas laisser tomber d’objets ni couler de
liquides à travers les ouvertures de l’appareil et ne placez
pas sur l’appareil d’objet contenant du liquide, tel qu’un
vase par exemple.
4. Placement de l’équipement
L’amplicateur pèse 37.2kg, faites donc extrêmement
attention quand vous le manipulez. Nous vous
recommandons de le soulever à deux personnes.
Utilisez uniquement une étagère assez stable et solide pour
supporter le poids de cet équipement.
5. Ventilation
Évitez de placer l’appareil sur un lit, un canapé, un
tapis ou une surface similaire instable ou dans une
bibliothèque ou un meuble fermé. Ceci risquerait de
nuire à la ventilation du système.
Laissez un espace de 5 cm au minimum autour de
l’appareil pour garantir une aération susante.
6. Exposition à la chaleur
Ne placez pas l’appareil à proximité d’une amme nue
ou de tout dispositif produisant de la chaleur : radiateur,
poêle ou autre.
7. Conditions climatiques
L’appareil est conçu pour fonctionner dans des climats
modérés. Déconnectez cet équipement pendant un
orage pour éviter tous dommages possibles d’un impacte
de la foudre ou de surtension.
8. Nettoyage
Mettez l’appareil hors-tension avant de le nettoyer.
Pour l’entretien du boîtier, utilisez uniquement un
chion doux, humide et non pelucheux. N’utilisez pas
de solvant chimique.
L’emploi d’aérosols ou de produits de nettoyage pour
meubles est déconseillé, car le passage d’un chion
humide risquerait de laisser des traces blanches et
indélébiles.
9. Mise à la terre
Une bonne mise à la terre de l’appareil est essentielle à
tout moment.
10. Alimentation secteur
Branchez l’appareil uniquement sur une alimentation
secteur du type mentionné dans le manuel d’utilisation
ou indiqué sur l’appareil lui-même.
Le principal moyen d’isoler l’appareil du secteur est
d’utiliser l’interrupteur situé à l’arrière de l’appareil.
Cet appareil doit être installé de façon à pouvoir être
débranché si nécessaire.
11. Protection des câbles d’alimentation secteur
Veillez à ce que les câbles d’alimentation ne se trouvent
pas dans un lieu de passage ou bloqués par d’autres
objets. Cette règle s’applique plus particulièrement aux
prises et câbles d’alimentation et à leurs points de sortie
de l’appareil.
12. Périodes de non-utilisation
Si l’appareil possède une fonction de mise en veille, un
courant faible continuera de circuler lorsqu’il sera réglé
sur ce mode. Débrancher le cordon secteur de la prise
murale si l’appareil doit rester inutilisé pendant une
période prolongée.
13. Odeur suspecte
Arrêtez et débranchez immédiatement l’appareil en cas
d’émission de fumée ou d’odeur anormale. Contactez
immédiatement votre revendeur.
14. Service
N’essayez jamais d’eectuer d’autres opérations que celles
mentionnées dans ce manuel. Toute autre intervention
doit être eectuée par un personnel qualié.
15. Entretien par des techniciens qualiés
L’appareil doit être entretenu par du personnel qualié
lorsque :
A. la prise ou le câble d’alimentation a été
endommagé,
B. des objets sont tombés ou du liquide a coulé dans
l’appareil,
C. l’appareil a été exposé à la pluie,
D. l’appareil présente des dysfonctionnements,
E. l’appareil est tombé ou le boîtier a été endommagé.
Respect des consignes de
sécurité
Cet appareil a été conçu pour répondre à la norme
internationale de sécurité électrique EN60065.
Cet appareil est conforme à la Section 15 des règles
de la FCC. Son fonctionnement est soumis aux deux
conditions suivantes :
(1) ce produit ne risque pas de causer d’interférences
nuisibles et (2) ce produit doit accepter toutes les
interférences reçues, y compris celles qui risquent
d’entraîner un fonctionnement indésirable.
Bon nombre des consignes ci-dessous sont de simples précautions de bon sens. Nous vous recommandons toutefois de les lire pour votre propre sécurité et pour celle de l’appareil.
ATTENTION : an de réduire les risques de choc électrique, n’ouvrez pas le boîtier de l’appareil. Les pièces internes ne sont
pas réparables par l’utilisateur. Pour tout problème matériel, contactez des techniciens qualiés.
ATTENTION : an de réduire les risques de choc électrique et d’incendie, veillez à ne pas exposer cet appareil à la pluie ou
à l’humidité.
Le triangle dans lequel gure le symbole d’un éclair alerte l’utilisateur de la présence, dans le boîtier de l’appareil,
d’une tension dangereuse, non isolée et susamment importante pour représenter un risque de choc électrique.
Le triangle dans lequel gure un point d’exclamation alerte l’utilisateur de la présence d’instructions de
fonctionnement et de maintenance (réparation) importantes dans la documentation accompagnant le produit.
ATTENTION : au Canada et aux États-Unis, an de prévenir tout choc électrique, aligner la plus grosse broche de la prise à
la fente la plus large de la che et insérez entièrement la prise dans la che.
F2
Attention!
Assurez-vous qu’il est possible de débranchez l’appareil aisément
avec la che d’alimentation électrique à l’arrière de l’appareil.
La construction CLASSE I doit être connectée à une prise ayant
uneconnection à terre protectrice.
Ne pas nuire à la bonne marche de sécurité de la che polarisée
ou lache terre. La che polarisée a deux broches, l’une plus épaisse
quel’autre. La che terre a deux broches et la troisième est reliée à la
terre.
La broche la plus épaisse ou la broche reliée à la terre servent
toutesdeux à garantir votre sécurité. Si la che ne va pas dans la prise,
veuillez vous adresser à un électricien an de remplacer la prise.
Français

Français
F-3
bienvenue
Merci et félicitations pour votre achat de cet amplicateur de puissance multicanaux Arcam
FMJ P777. Depuis plus de trois décades, Arcam s’est spécialisé dans les produits audio de grande
qualité, le P777 est le dernier d’une longue ligne d’équipements HiFi maintes fois récompensés.
La conception de la gamme FMJ a fait appel à toute l’expérience d’Arcam en tant que l’une des
compagnies audio la plus respectueuse du Royaume Uni, elle vous garantira plusieurs années
d’écoute sans problème.
Ce manuel a été conçu pour vous donner toutes les informations dont vous avez besoin pour
installer, connecter et utiliser l’Arcam P777. Le P777 peut déjà avoir été installé et conguré,
par un revendeur qualié Arcam, comme un composant de votre chaîne Hi-Fi ou home cinéma.
Dans ce cas, vous pouvez ignorer les sections de ce manuel traitant de l’installation et de la
conguration de cet appareil. Utilisez le sommaire pour vous aider à retrouver les sections qui
vous intéressent.
Nous souhaitons que cet amplicateur de puissance multicanaux vous donne satisfaction
pendant plusieurs années. Dans le cas très improbable d’un problème avec ce produit, ou si
tout simplement vous avez besoin de renseignements sur les produits Arcam, notre réseau de
revendeurs serait heureux de vous aider. D’autres informations sont disponibles sur notre site
web d’Arcam à l’adresse www.arcam.co.uk.
L’équipe de développement FMJ
Table des matières
consignes de sécurité ...............................F-2
bienvenue...................................................F-3
installation .................................................F-4
Présentation ........................................................... F-4
Emplacement de l’appareil ............................... F-4
Acoustique des locaux ........................................ F-4
Entrée d’excitation 12 V ...................................... F-4
Alimentation ........................................................... F-4
Connexion d’un préamplicateur .................. F-4
Câbles d’interconnexion .................................... F-5
enceintes ....................................................F-6
Emplacement des enceintes ............................F-6
Options pour le câblage des enceintes ........ F-6
Mono-câblage ........................................................ F-7
Bi-câblage ................................................................ F-7
Bi-amplication .....................................................F-7
utilisation ....................................................F-8
Boutons de commande du panneau avant F-8
Procédure d’utilisation ........................................F-8
dépannage .................................................F-9
Indicateurs d’état d’erreur ................................F-10
spécications techniques..................... F-11
garantie du produit ............................... F-12

F-4
installation
Présentation
L’amplicateur de puissance multicanaux FMJ P777
est conçu selon les normes de fabrication de grande
qualité traditionnelles d’Arcam. C’est un amplicateur
de puissance multicanaux de très grandes performances
très bien adapté pour l’amplication dans un système
home cinema multicanaux, mais il peut également orir
une superbe qualité stéréo avec des sources stéréo. Le
P777 est un complément idéal pour le processeur de
préamplication FMJ AV888.
Tous les modules d’amplication sont identiques, et
chacun est isolé par rapport aux autres modules à l’aide
de circuits opto-isolés qui assurent que chaque module
de l’amplicateur a sa propre alimentation isolée. Cela
permet à l’amplicateur de donner une excellente
séparation de canaux et une faible distorsion.
Le P777 est également doté de prises d’entrée et
de sortie phono pour le signal alimentant chaque
canal, permettant ainsi au signal de passer à d’autres
amplicateurs de puissance pour des enceintes dans
d’autres pièces ou pour bi-amplier toute enceinte. Si le
P777 est utilise pour alimenter un système surround à
cinq canaux, les deux modules de réserve (SBL et SBR)
peuvent être utilisés conjointement avec les modules
principaux (Gauche et Droite) pour bi-amplier les
enceintes avant gauche et droite.
L’installation personnalisée du P777 dans une salle
d’écoute est un processus important qui exige une
attention à chaque niveau. Pour cette raison que les
informations d’installation sont bien détaillées et
doivent être soigneusement suivies : Ce manuel a été
rédigé en supposant que l’installateur est familier avec
l’installation des systèmes audio/vidéo de pointe.
Emplacement de l’appareil
< Placez le P777 sur une surface plate et solide, loin
des rayons directs du soleil et d’autres sources de
chaleur et d’humidité.
< Le P777 est un amplicateur puissant et source
de chaleur considérable lorsqu’il est trop exploité.
Prenez cela en considération lors du choix de
l’emplacement de l’appareil.
< Évitez de placer l’appareil dans espace fermé tel
qu’une bibliothèque ou un meuble fermé, à moins
qu’il y ait susamment d’espace pour une bonne
aération.
< Ne posez aucun autre dispositif ou objet au dessus
du P777 car ces derniers risquent d’obstruer la
circulation d’air autour de l’appareil entraînant
une surchaue du P777.
< Ne posez pas votre platine au dessus de cet
appareil. Les platines sont très sensibles au bruit
généré par l’alimentation secteur qui risque d’être
audible sous forme de bourdonnement si la
platine est trop près.
Acoustique des locaux
La forme de votre pièce et la manière dont elle est
meublée aecte le son que vous entendez. Par exemple,
trop de surfaces nues peuvent causer des réexions qui
risquent d’ajouter une rudesse au son. L’ajout de tapis et
de rideaux peuvent aider à résoudre cela.
Si vous avez le choix des pièces, évitez celles qui sont
parfaitement carrées ou ont un côté exactement le
double d’un autre. Ces pièces peuvent aggraver la
résonance et modier en mal votre écoute.
Entrée commande 12 V
Si votre pré-ampli est doté d’une sortie commande 12V,
elle peut être connectée à la prise d’entrée commande
12V TRIGGER IN au moyen d’un jack mono 3,5 mm.
Ceci permet d’arrêter ou de réveiller le P777 à distance
depuis le pré-ampli associé.
12V
0V
Alimentation
Le P777 est livré avec une prise secteur moulée au
cordon d’alimentation. Aux niveaux maximum
l’appareil puise 3 kW, ainsi un câble secteur IEC robuste
est fourni.
Vériez que la prise fournie est compatible avec votre
installation, en cas de diérence entre la tension secteur
et celle de la prise, ou vous avez besoin d’une nouvelle
prise, contactez votre revendeur Arcam.
Insérez l’extrémité de la prise IEC du cordon
d’alimentation dans la prise située au dos du P777,
assurez-vous qu’elle est complètement enfoncée. Insérez
l’autre extrémité du cordon dans une prise secteur, en la
mettant sous tension si nécessaire.
Connexion d’un préamplificateur
Deux types de connexion sont fournies pour recevoir
les signaux depuis votre préamplicateur : prises phono
et connecteurs XLR. Le type de connexion à utiliser
dépend de votre conguration.
< Si les câbles à utiliser pour connecter le
préamplicateur au P777 ont une longueur
inférieure à 3 m, il est recommandé de connecter
le préamplicateur aux prises d’entrée audio
(RCA) de votre P777. Pour utiliser les connexions
audio, assurez-vous que toutes les touches des
canaux d’entrée ne sont pas enfoncées.
< Si les câbles à utiliser pour connecter votre
préamplicateur au P777 sont plus longs que
3 m et que ce dernier est doté de sorties XLR
symétriques, il est recommandé d’utiliser ces
derniers plutôt que des connexions audio
(RCA). En utilisant ce type de connexions
les performances seront améliorées, et
encored’avantage dans des environnements
pollués électriquement. Pour utiliser les
connexions XLR, assurez-vous que toutes les
touches Sélecteur de signal d’entrée sont enfoncées
pour chaque canal.
Fiche fonction
1 Masse du châssis (blindage de câble)
2 ‘Hot’ (polarité normale)
3 ‘Cold’ (polarité inversée)
XLR femelle XLR mâle
Notez que l’entrée commande
n’est active que lorsque le bouton
d’alimentation central du panneau
avant est enfoncé. En utilisation
normale il n’est pas nécessaire de
faire des connexions à cette entrée.

Français
F-5
Câbles d’interconnexion
Il est recommandé d’utiliser des câbles blindés de
qualité supérieure conçus pour ce genre d’application.
L’utilisation de câbles inadéquats et possédants des
caractéristiques d’impédance diérentes risque de nuire
aux performances de votre système (veillez par exemple
à ne pas utiliser de câbles audio pour le transport de
signaux vidéo). Les câbles doivent être aussi courts que
possible.
Lors de la connexion du matériel, il convient en outre
de vérier que les câbles d’alimentation secteur sont
maintenus aussi loin que possible des câbles audio. Le
non respect de cette consigne peut entraîner des bruits
indésirables dans les signaux audio.
Entrée audio XLR
Des connecteurs XLR symétrique
pour chacun des sept canaux,
depuis un préamplicateur équipé
de XLR.
Prise d’alimentation
Avant de brancher au
secteur, vériez que la
tension indiquée sur la
plaque signalétique de
l’appareil correspond
bien à celui de votre
installation électrique. Entrée de commande 12 V
Pour plus de détails voir page 4.
Bornes des enceintes
Le P777 est équipé de sept paires de bornes
d’enceintes. Pour plus d’information sur
les diérentes méthodes de connexion des
enceintes, reportez-vous à la page 7.
Entrée et sortie audio
Entrée audio depuis un préamplicateur
pour chacun des sept canaux. Des sorties
audio peuvent être utilisées pour bi-amplier
un ensemble d’enceintes (voir page 7).
Sélecteur de signal d’entrée
Enfoncez cette touche pour prendre la
source audio au connecteur d’entrée XLR
symétrique pour chaque canal ; si la touche
n’est pas enfoncée, la source audio est prise au
connecteur Audio In RCA.

F-6
enceintes
Emplacement des enceintes
Le P777 permet de connecter jusqu’à sept enceintes.
Toutes les enceintes, à l’exception du subwoofer, doivent
être disposées autour de votre position de visualisation
et d’écoute normale (voir schéma). Le subwoofer peut
être placé presque n’importe où, essayez plusieurs
positions pour obtenir le meilleur résultat. Plus les
enceintes sont proches des surfaces d’intersection de
la pièce (coins, murs et plafond, murs et sol), plus les
graves sont accentuées. Cela peut améliorer les enceintes
timides en basses, mais risque d’ajouter trop de grave.
Toujours est-il, qu’en déplaçant les enceintes de quelques
centimètres peut produire une grande diérence sonore.
Placez l’enceinte avant gauche (L) et droite (R) de
manière à avoir une bonne image stéréo pour une
reproduction musicale normale. Si elles sont trop
rapprochées les unes des autres votre scène sonore sera
petite. De la même manière, si elles sont trop éloignées
les unes des autres, l’image stéréo apparaîtra comme
ayant un trou au milieu et sera présentée en deux
moitiés.
L’enceinte centrale (C) donne une
reproduction plus réaliste du dialogue et
des sons centraux et des eets d’image
stéréo et du fond sonore pour
une utilisation en cinédom. Ne
compromettez pas la qualité de
votre enceinte centrale car elle
transporte tous les dialogues
pour le cinédom.
Les enceintes surround gauche
(SL) et droite (SR) reproduisent
Remarques sur les connexions
des enceintes
< Ne faites aucune connexion à un amplicateur
allumé. Il est recommandé que votre
amplicateur soit complètement déconnecté
du secteur avant de faire des connexions.
< Avant d’allumer votre amplicateur pour
la première fois suite à une connexion des
enceintes, vériez soigneusement toutes les
connexions. Vériez qu’aucun l ou câble
nu n’en touche un autre ou le châssis de
l’amplicateur (qui risque de provoquer un
court-circuit), et que vous avez connecté le
pôle positif au (+) et le pôle négatif au (–).
Vériez le câblage entre l’amplicateur et les
enceintes.
< Après avoir eectué les connexions : Allumez
l’amplicateur, en ayant soin de mettre le
volume du préamplicateur au minimum.
Sélectionnez une source de signal, augmentez
graduellement le volume au niveau d’écoute
souhaité.
< Si vous n’êtes pas certain de la manière de
connecter votre système, ou si vous avez
besoin de conseils sur le bi-câblage ou la
bi-amplication, n’hésitez pas à contacter un
revendeur Arcam qui serait heureux de vous
aider.
Options pour le câblage des
enceintes
Mono-câblage
Le mode mono-câblage est la méthode de câblage
classique qui consiste à passer un seul câble entre
l’amplicateur et l’enceinte, c’est la méthode la plus
simple.
Bi-câblage
Le mode bi-câblage consiste à passer deux câbles séparés
entre l’amplicateur et chaque enceinte, avec un câble
pour le transport des informations de basse fréquence,
et l’autre pour les signaux de haute fréquence.
Le bi-câblage permet d’améliorer la qualité sonore de
votre système car la séparation des courants des signaux
de basse fréquence et haute fréquence sur deux câbles
d’enceinte diérents élimine les distorsions causées par
les interactions des diérents courants entre eux comme
c’est le cas du mon-câblage.
Le P777 est conçu de manière à faciliter le bi-câblage,
mais vous devez connecter les deux câbles aux enceintes
qui orent des bornes séparées pour deux câbles.
Chaque enceinte doit avoir deux paires de bornes ; une
libellée HF ou “haute Fréquence” et l’autre libellée LF ou
“basse Fréquence”.
Bi-amplication
La bi-amplication est la séparation des signaux
haute Fréquence et ou basse Fréquence sur deux
amplicateurs. La bi-amplication exige l’utilisation de
deux amplicateurs par canal.
le son d’ambiance et les eets présents d’un cinédom
multicanal.
Les enceintes surround arrière gauche (SL) et arrière
droite (SR) servent à ajouter plus de profondeur, une
ambiance plus étendue et une localisation sonore.
Un subwoofer (SW) améliorera énormément la
performance audio des graves de votre système. Cela est
utile pour reproduire des eets cinéma spéciaux, surtout
si un canal dédié LFE (Low-Frequency Eects (eets de
basses fréquences)) est disponible, comme c’est le cas
pour les disques codés Dolby Digital ou DTS Digital
Surround.

Français
F-7
Mono-câblage
Si chaque enceinte est dote de plus d’une paire de bornes de connexion, utilisez les bornes
libellées LF ou “basse Fréquence” de chaque enceinte.
Connectez la borne positive de l’amplicateur (de couleur rouge et libellée +R) à la
borne positive de l’enceinte droite. De la même manière, connectez la borne négative de
l’amplicateur (de couleur noire et libellée R-) à la borne négative de l’enceinte droite.
Répétez le processus pour l’enceinte gauche, en utilisant cette fois-ci les bornes libellées
+L et L–.
Si vos enceintes supportent le bi-câblage, il y aura une barrette de connexion pour
connecter les bornes de basse fréquence aux bornes de haute fréquence, elle NE DOIT
PAS ÊTRE RETIRÉE en mode mono-câblage.
Bi-câblage
Le bi-câblage est réalisé de la même manière qu’en mono-câblage sauf pour chaque
enceinte une paire de câbles est utilisée pour connecter l’amplicateur à chaque enceinte.
Suivez les instructions données pour le mono-câblage, puis eectuez les mêmes
opérations, mais cette fois-ci en connectant les bornes supérieures de l’enceinte aux
bornes de votre amplicateur libellées HF ou “haute Fréquence” pour chaque enceinte.
Reportez-vous à l’illustration.
Si vos enceintes supportent le bi-câblage, il y aura une barrette de connexion pour
connecter les bornes de basse fréquence aux bornes de haute fréquence, elle DOIT ÊTRE
RETIRÉE en mode bi-câblage.
Bi-amplification
La bi-amplication exige l’utilisation de deux canaux d’amplicateur par enceinte. L’utilisation
de cette méthode vous permet d’éviter l’utilisation de sept canaux d’enceintes surround.
Connectez deux canaux du P777 à l’aide du câble phono pour relier la prise AUDIO OUT d’un
canal à la prise AUDIO IN de l’autre. Un canal devrait par la suite être connecté aux enceintes
comme décrit dans la méthode mono-câblage, avec une exception : le canal devrait être
connecté aux bornes d’enceinte libellées HF ou “haute Fréquence”. Le second canal devrait être
connecté aux bornes d’enceinte libellées LF ou “basse Fréquence”, comme dans ce schéma.
Notez que la barrette métallique des enceintes connectant les bornes inférieures aux bornes
supérieures DOIT ÊTRE RETIRÉE. Dans le cas contraire les deux amplicateurs risquent
d’être endommagés, et cela n’est pas couvert par la garantie.
Arcam recommande que les connexions RCA soient utilisées pour la bi-amplication. Si vous
préférez des connecteurs XLR, utilisez un câble de type Y avec une femelle XLR vers un mâle
XLR, de manière que deux canaux de l’amplicateur puissent être utilisés depuis une seule
source. Contactez votre revendeur pour avoir de l’aide.
Le bi-câblage utilisant un canal
d’amplicateur par enceinte.
La bi-amplication utilisant deux
canaux d’un amplicateur par enceinte.
Connexions d’enceintes en
mono-câblage
Sorties depuis le préamplicateur multicanal (ex. AV888)
...etc...

F-8
utilisation
Boutons de commande du
panneau avant
Le panneau avant n’a qu’un seul bouton de commande :
le bouton d’alimentation placé au milieu.
Alimentation
Pour allumer et éteindre l’appareil. Notez que les
modules sont allumés individuellement pour décaler la
surtension créée lorsqu’un amplicateur de puissance
est allumé (ex., fournit un “démarrage en douceur”).
Cela réduit le courant de choc en provenance de la prise
secteur domestique.
Témoins d’état
Un témoin séparé indique l’état de chacun des sept
canaux du P777.
Les témoins basculent entre rouge, orange puis vert pour
indiquer les états allumé (initialisé), stabilisé et activé
respectivement.
Tous les témoins restent éteints en mode veille.
Procédure d’utilisation
Une fois les importantes connexions eectuées, vous
pouvez allumez le P777 à l’aide du bouton central du
panneau avant.
Mise en marche
Il est recommandé d’allumer votre préamplicateur ou
contrôleur avant d’allumer l’amplicateur de puissance.
La mise en marche normale est indiquée par la séquence
suivante des témoins du panneau avant :
1. En appuyant sur le bouton d’alimentation, tous les
témoins s’allument en rouge.
2. Au bout d’un moment (environ une demi-
seconde), le témoin central devient ambre.
3. Les témoins, depuis le centre vers les bords,
deviennent consécutivement ambre à des
intervalles d’une seconde.
4. Le témoin central devient vert avec émission d’un
“clic” de relais.
5. Les témoins, depuis le centre vers les bords,
deviennent consécutivement vert, avec émission
d’un “clic” de relais, à des intervalles d’une
seconde.
Dans le cas très improbable où les témoins ne suivent
pas cette séquence au moment de la mise en marche de
l’appareil, ou se comportent de façon anormale durant
un l’utilisation, reportez-vous au tableau “Indicateurs
d’état de défaillance” à la page 10 pour savoir pourquoi
l’amplicateur est en mode protection.
Arrêt
Pour arrêter, éteignez l’amplicateur de puissance en
premier, puis le préamplicateur ou le contrôleur.
Cela élimine toute probabilité de génération
d’ondes de choc ou de courant transitoire alimentés
par l’amplicateur de puissance et qui risquent
d’endommager gravement le système.
Other manuals for FMJ P777
1
Table of contents
Languages:
Other Arcam Amplifier manuals

Arcam
Arcam AV888 User manual

Arcam
Arcam AV9 User manual

Arcam
Arcam Alpha 9 User manual

Arcam
Arcam A90 User manual

Arcam
Arcam A49 User manual

Arcam
Arcam Integrated Amplifier Alpha 3 User manual

Arcam
Arcam FMJ A28 User manual

Arcam
Arcam Delta 290 User manual

Arcam
Arcam HDA PA720 User manual

Arcam
Arcam ALPHA ONE User manual