Specications
Featuring a compact and stand-alone design, AREC KS-2 Media Station consists of diverse features and functionality,
including dual-signals capturing, recording synchronously, codec, streaming online, live broadcasting, and web-based
monitor page, providing complete lecture capture solution.
Product Name Media Station
Model Name KS-2
Dimension 354mm(L) x 188.2mm(W) x 46mm(H)
Weight 1320g
Power Requirement 12V / 2A
Power Consumption (Max.) 24W (Max.)
Operating Temperature / Humidity 0ºC ~ 50ºC / 90%
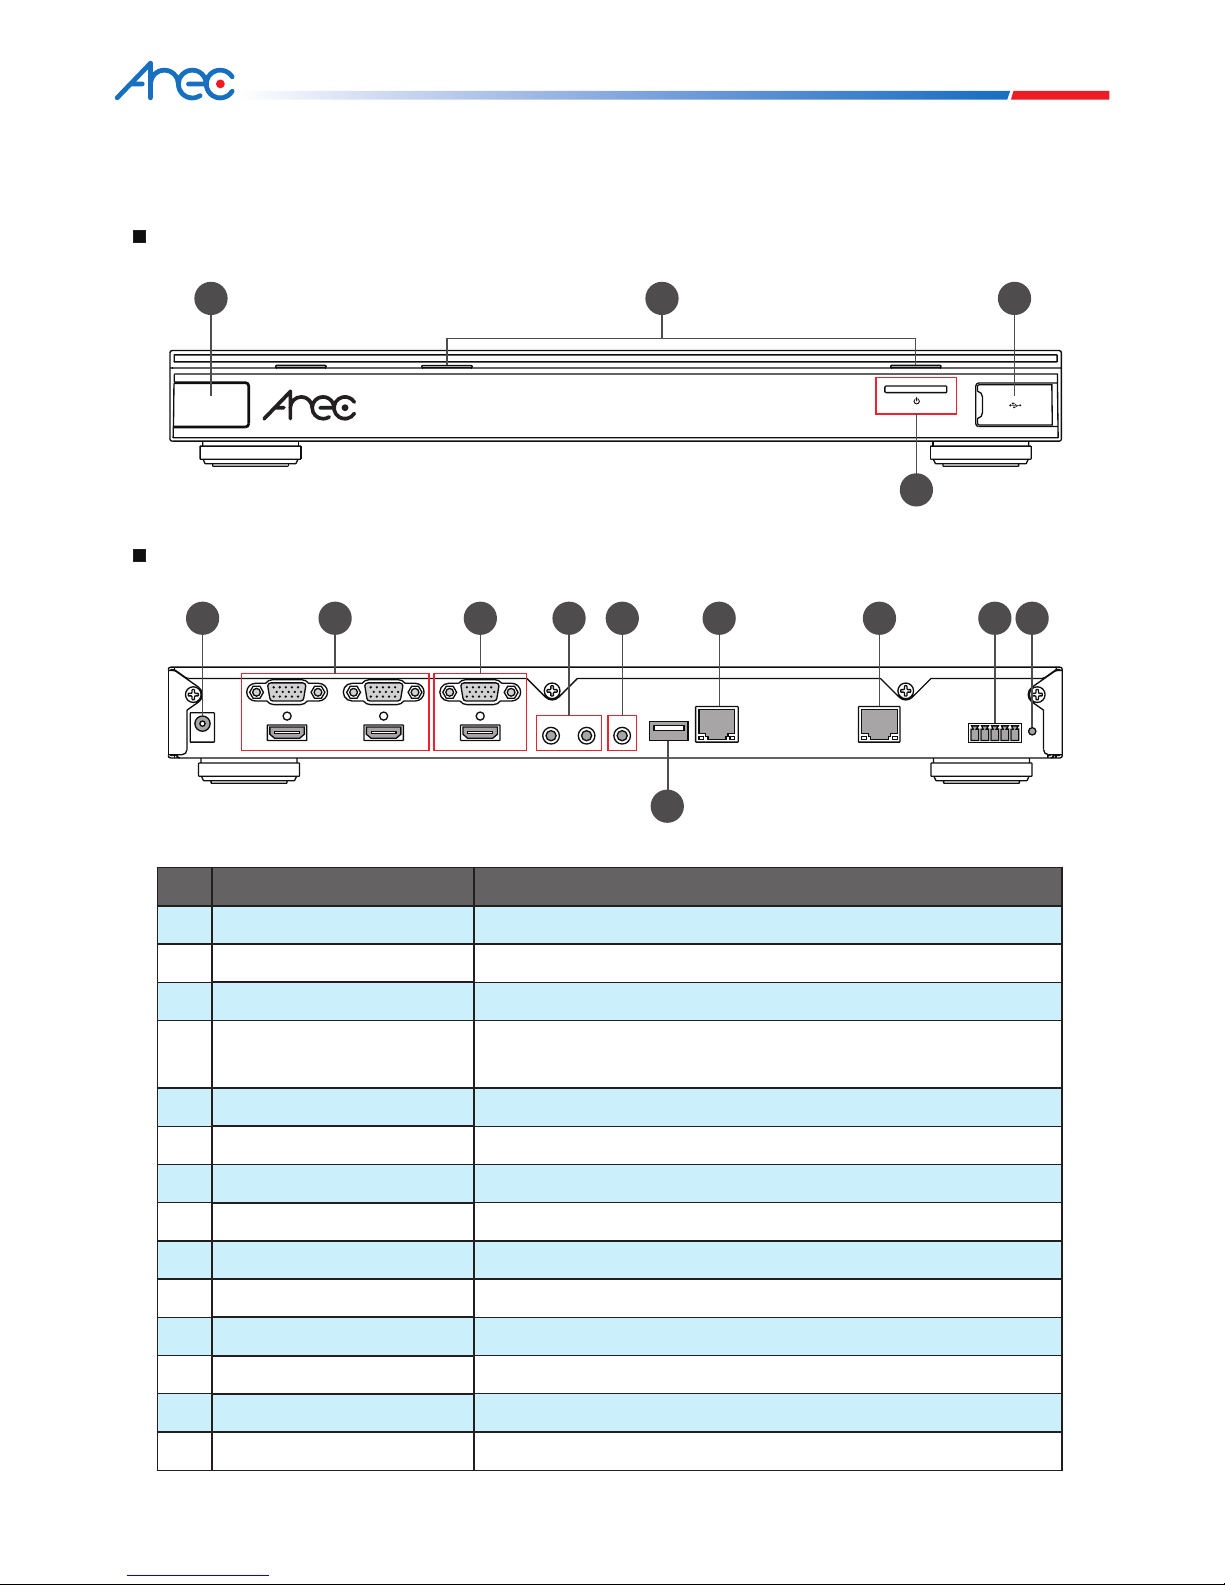
Maximum normal load description Insert 2 video signals (either HDMI or VGA input).Using external USB
flash to record the transcoded video / audio. And output the transcoded
video / audio to both HDMI and VGA port.
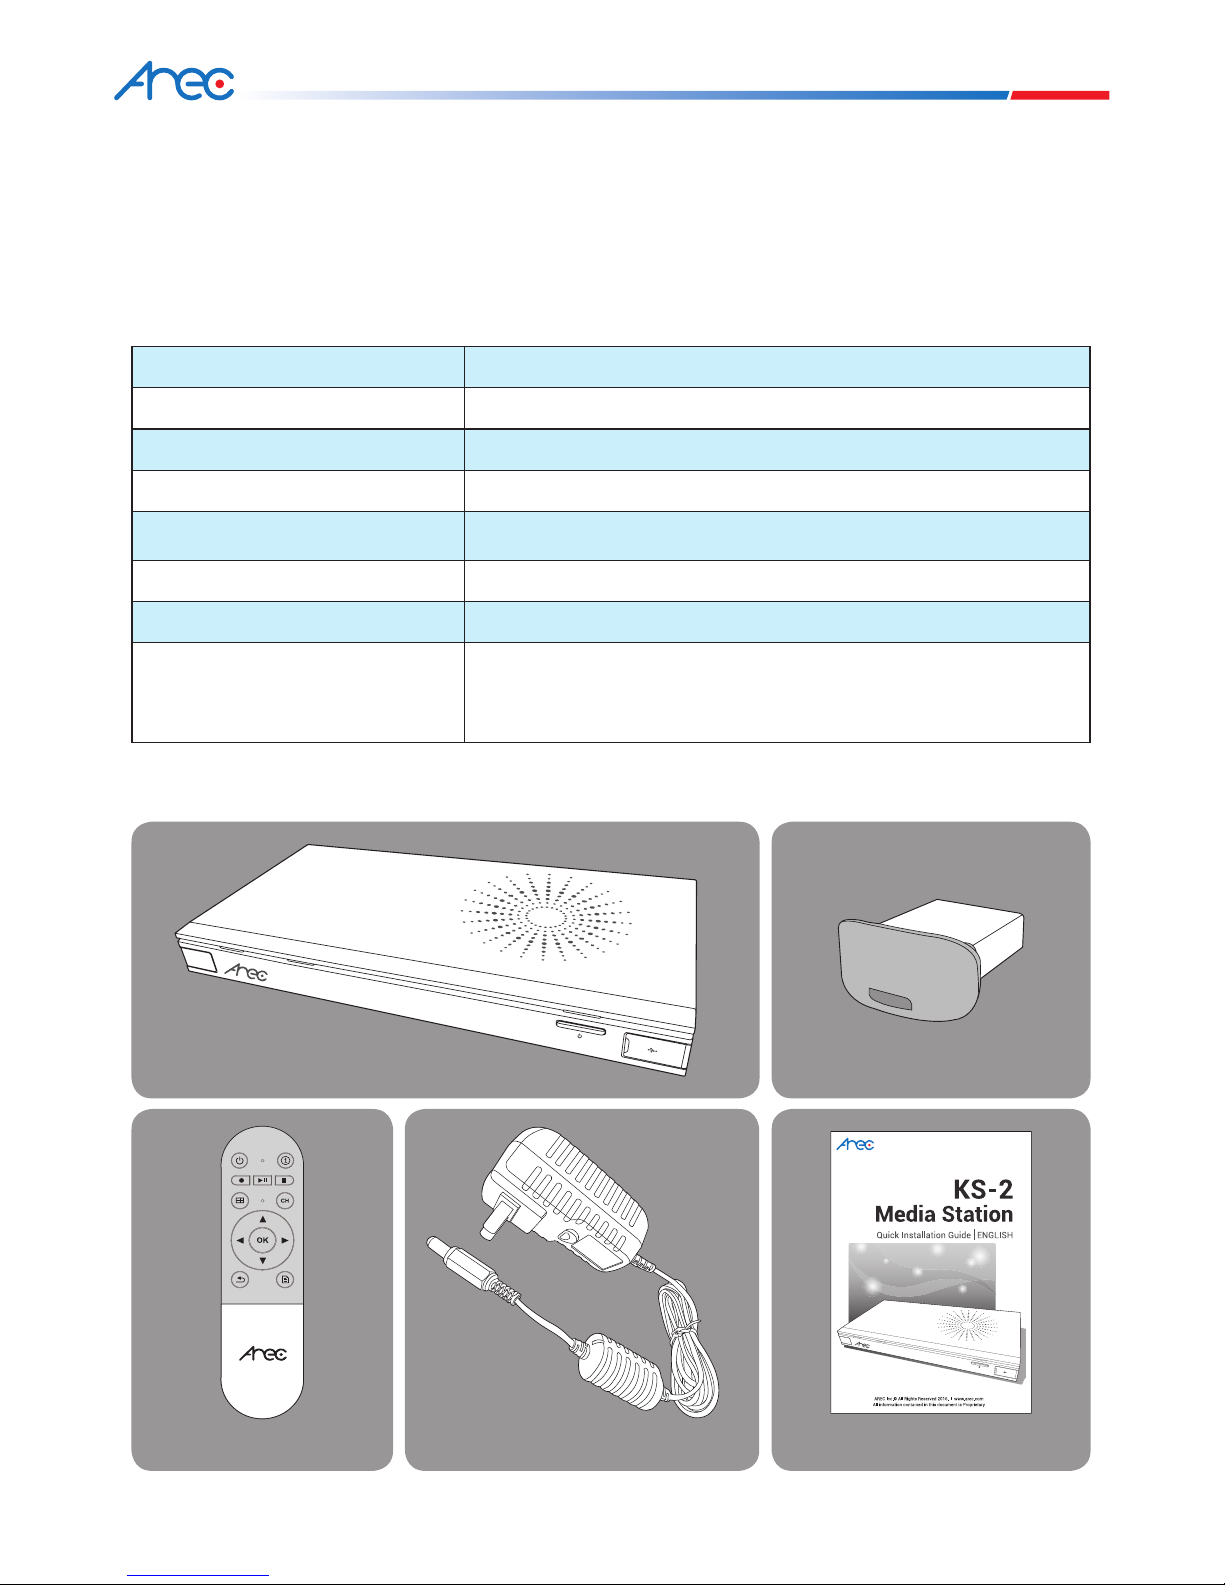
Chapter 1 Package Accessories
Introduction
Package Contents
AREC Media Station
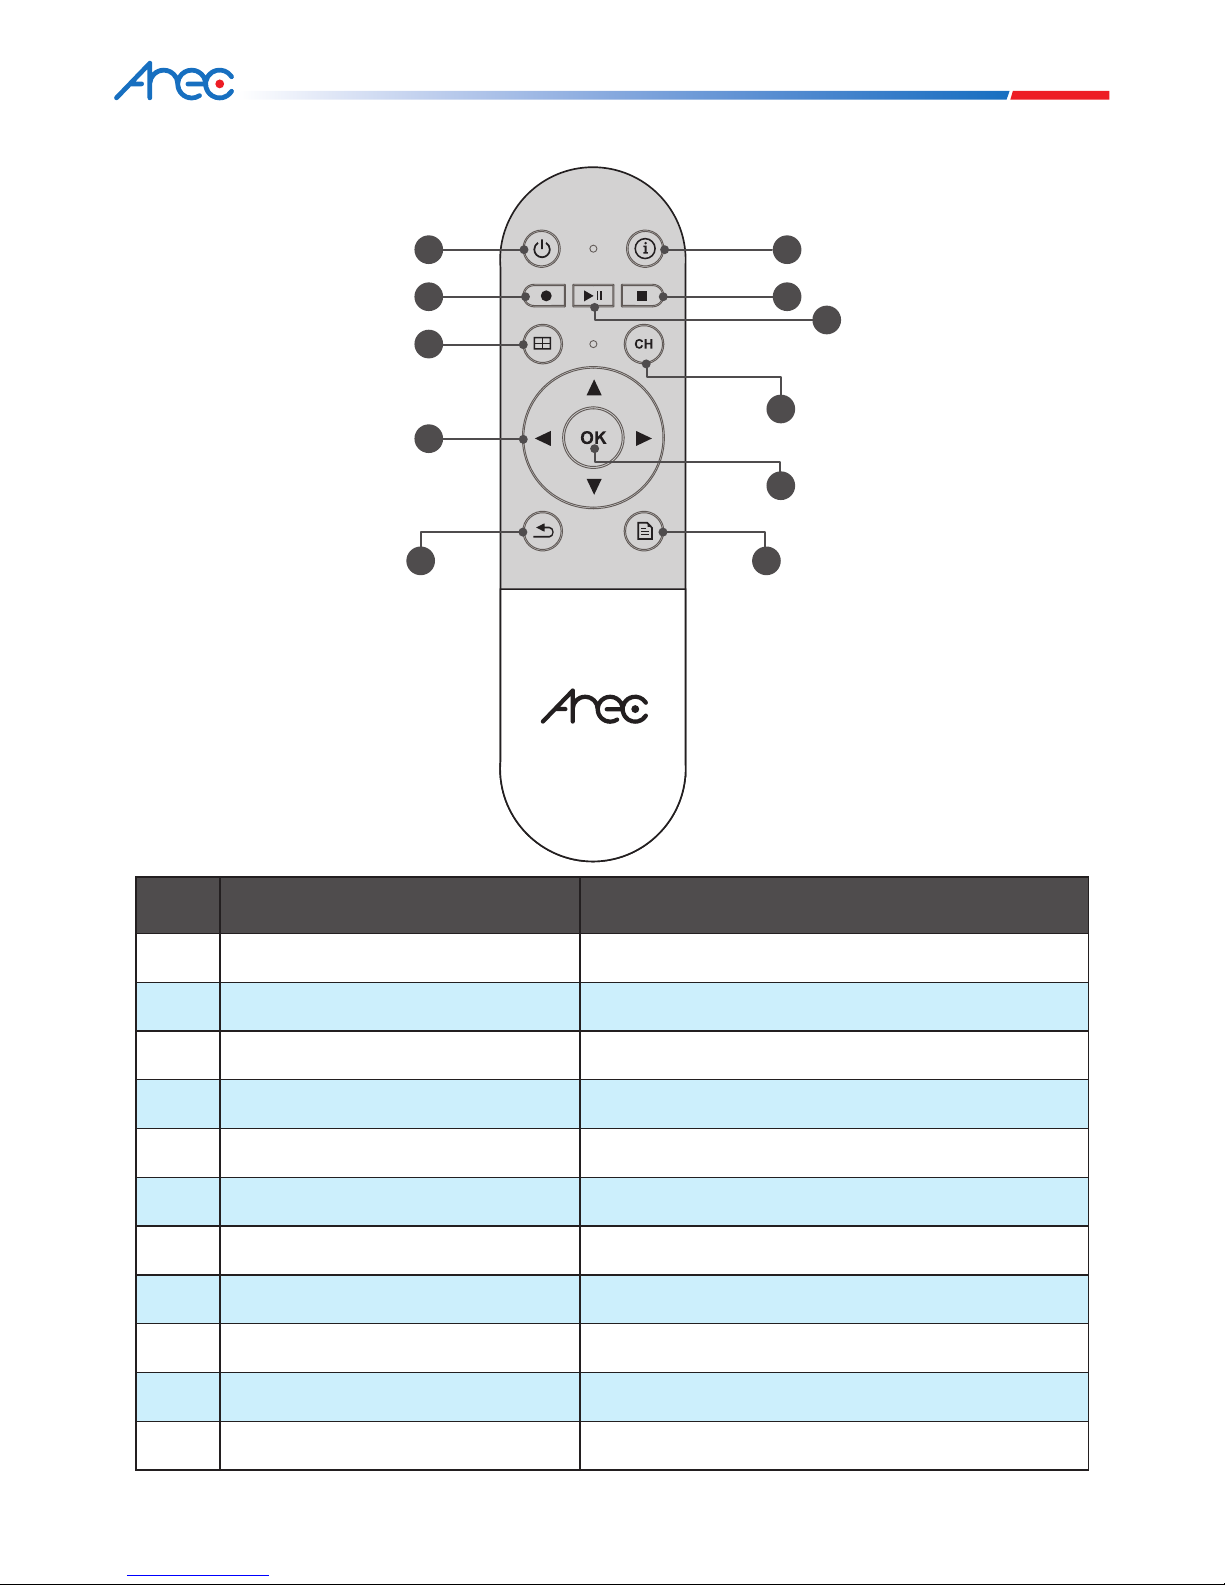
Quick Installation GuideRemote Controller
USB Drive
Power Adapter