Ares 53012 User manual

SPECIFICATIONS
WARNINGS
WARRANTY
LEVER GREASE GUNS
(53012 – ECONO LEVER & 53013 PRO LEVER)
OPERATIONS MANUAL
STORE THIS MANUAL IN A SAFE PLACE FOR FUTURE REFERENCE 1
53012-53013
NEED HELP?
Don’t forget to register your product!
(206) 453-6776
www.arestool.com

2
53012-53013
SPECIFICATIONS
WARNINGS
Capacity - 14 oz. (414ml)
Load Type - 3 Way (Cartridge, Injection Bulk Load and Bulk Suction Load)
Working Pressure - 4,500 PSI
Burst Pressure – 10,000 PSI
Delivery - 1 oz. / 30 Strokes
Hose / Extension Length - 6 in. Rigid 1/8 in. NPT Extension & 18” Flex Hose with Spring Guard
• Wear ANSI-approved safety goggles and protective work
gloves during operation.
• Use only as intended and described in this manual: Do not
use Grease Gun to hold and dispense any other materials
other than intended lubricants.
• Make sure to properly load the grease gun cartridge / or bulk
grease before use.
Grease Cartridge Loading:
1. First, rotate the head counterclockwise a couple turns and
pull the plunger all the way back. Then unscrew the head unit
completely and remove Head Cap from gun Barrel. (Fig. 1)
53012 – Economy Lever Type Grease Gun
Capacity - 14 oz. (414ml)
Load Type - 3 Way (Cartridge, Injection Bulk Load and Bulk Suction Load)
Working Pressure - 4,500 PSI
Burst Pressure – 10,000 PSI
Delivery - 1 oz. / 30 Strokes
Hose / Extension Length - 6 in. Rigid 1/8 in. NPT Extension & 18” Flex Hose with Spring Guard
53013 – Professional Lever Type Grease Gun
Head cap
Bleeder Valve
Barrel
Fig. 1
• Be sure to read and understand the entire instruction manual before attempting to operate or
maintain this product. Failure to follow these instructions may result in personal injury and/or
property damage.

NOTE: Apply a generous coating of grease to plunger gasket when using gun for the first time. Due
to the lack of lubrication on the rubber plunger, a new grease gun may be difficult to load with grease
cartridges the first time. This grease gun requires a 14 oz. grease cartridge.
3
53012-53013
2. Pull back on the plunger handle making sure the
plunger is locked in the full back position. Plunger rod
will catch on the friction lock and hold in place (Fig. 2)
WARNING: Depressing the lock release when the gun
is empty will cause the plunger handle to retract back
quickly. Be careful not to release handle until cartridge
is loaded and head unit a fully installed.
3. Remove the plastic cap from the grease cartridge and apply a small amount of grease to the inside
edge of the cartridge. This will allow for easier insertion of the plunger into the cartridge. (Fig. 3)
4. Insert the grease cartridge into the barrel completely, making sure the
metal pop-top lipped edge tightly seals on top edge of the grease gun
barrel. Pull and remove the pop-top seal from cartridge. (Fig. 4)
5. Reinstall the head unit by screwing on in a clockwise direction.
fully tighten down and then back off 2 – 3 turns. Pressing the
release on the plunger rod, release the locking mechanism and
push on plunger rod handle all the way in forcing the plunger
into cartridge. Wipe away any grease that comes out of the
threads and full tighten the head unit. (Fig. 5)
Fig. 3
Plastic Cap
Barrel
Grease Cartridge
Fig. 4
Flip-top Tab
Locker Release
Plunger Handle
Fig. 2
Fig. 5
Plunger locking
release button

4
53012-53013
Bulk Grease Loading Via Filler Valve:
WARNING: Do not attempt to bulk fill a grease gun with the cartridge sleeve still in the barrel. Remove
cartridge before proceeding with bulk fill.
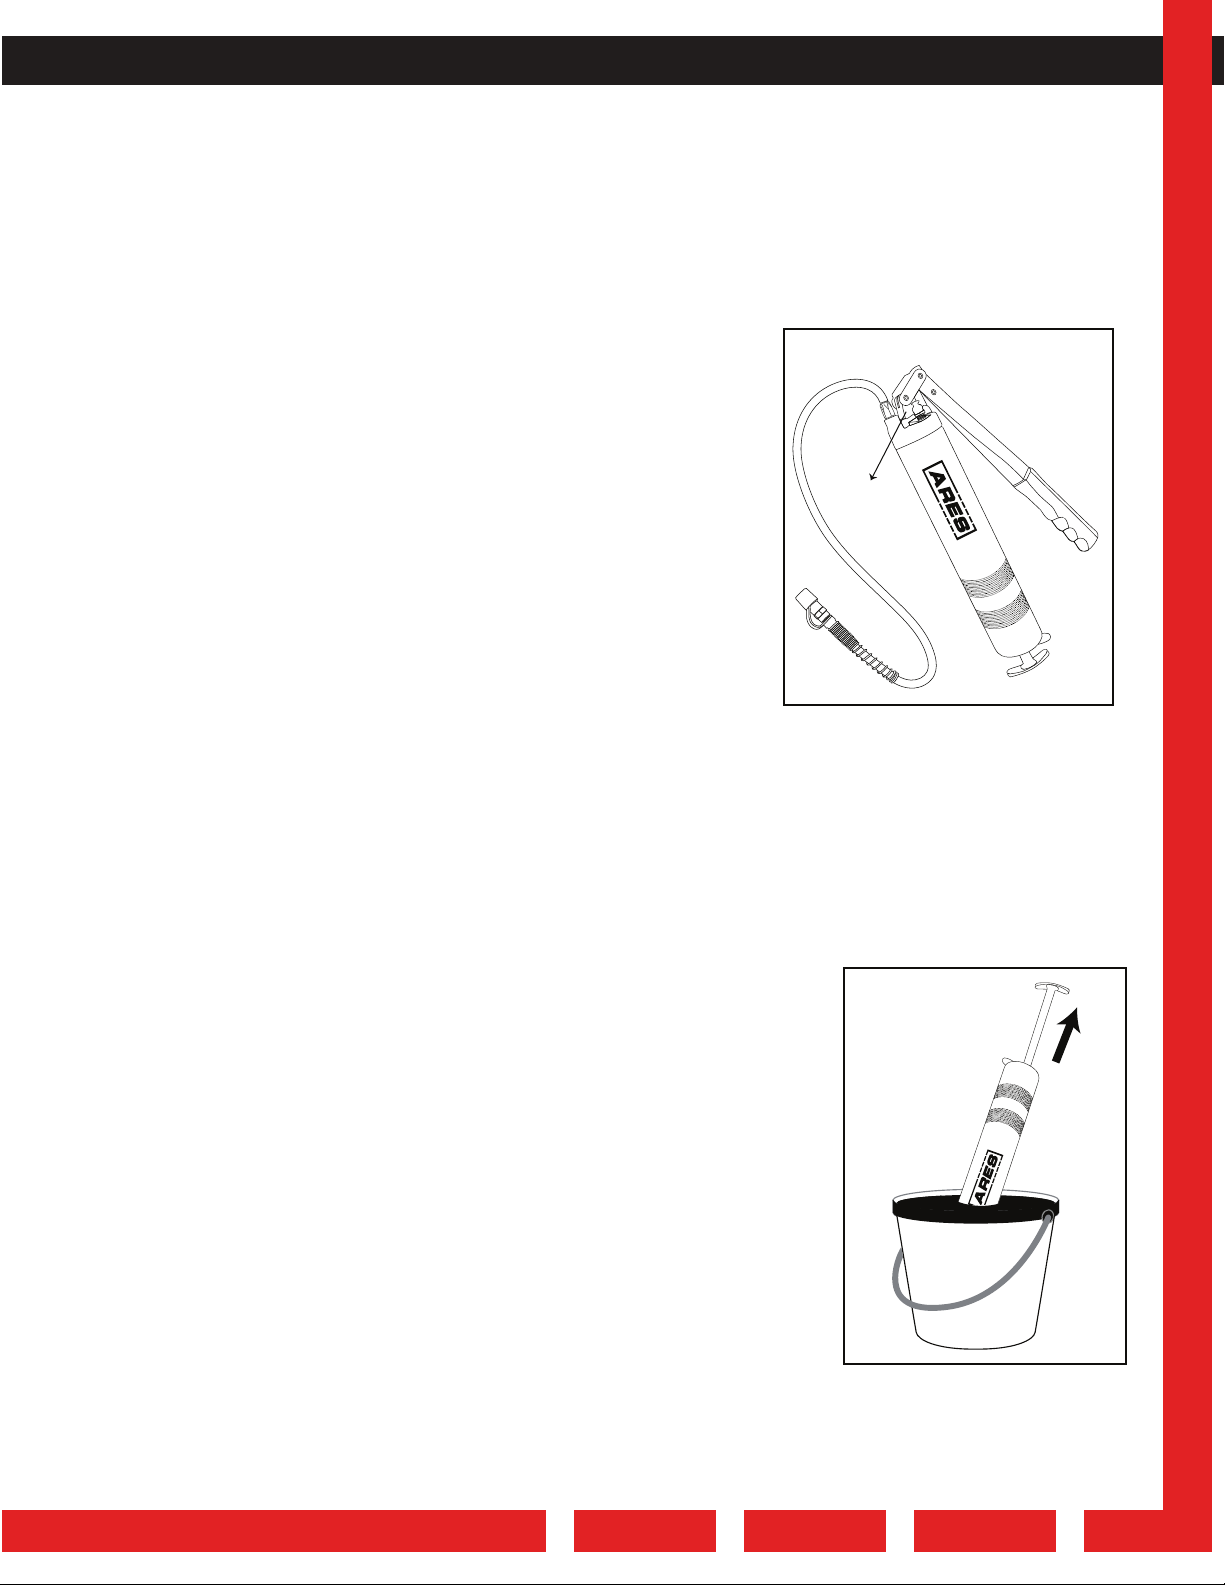
1. Make sure the filler valve adapter on the barrel pump is
compatible with the bulk loading adapter on the grease gun
head unit. (Fig 6)
2. Connect the bulk loading adapter to the filler valve on the head
of the gun pushing in and making sure the connection is secure.
3. Operate the pump handle while holding the gun firmly making
sure the bulk loading connect does not release. As grease
pumps into the grease gun barrel the plunger will begin to
extend. Bulk loading is complete once the plunger rod is fully
extended.
4. Twist the grease gun and the bulk loading connection from
the pump adapter. Press plunger lock release and push the plunger rod back into the gun.
5. Finally, pump the handle a few times and press the air release valve to release trapped air.
Continue pumping until grease comes out of the coupler. The grease gun is now fully primed.
Suction Loading:
WARNING: Do not attempt to suction load a grease gun with the cartridge sleeve still in the barrel.
Remove cartridge before proceeding with bulk fill.
1. Remove the grease gun head unit from the barrel completely.
2. Making sure the plunger handle is depressed completely place the
open end of the barrel into grease container and submerge. Hold
the barrel firm and pull back slowly on the plunger handle. Be sure
the mouth of the barrel continues to be submerged under the
surface of the grease so that air is not sucked into the barrel. (Fig. 7)
3. Suction loading is completed when plunger rod is pulled to the full
extent, and no air has been transferred into the chamber.
4. Reinstall the grease gun head unit to the barrel. Release the
plunger lock and push the plunger rod back into the grease gun.
WARNING: Grease guns can lose their prime due to air pockets in the grease. If this occurs, remove
the trapped air by bleeding the head unit by pumping and pressing the air release valve on the head.
Repeat this until grease begins to flow again.
6. Finally, pump the handle a few times and press the air release valve to release trapped air. Continue
pumping until grease comes out of the coupler. The grease gun is now fully primed.
Bulk load
filler valve
Fig. 6
Fig. 7

5
53012-53013
Please visit us at WWW.ARESTOOL.COM to register your
product and sign up for our ARES Tool Club
H4 MADE IN CHINA
HECHO EN CHINA
FABRIQUÉ À CHINA
ALWAYS WEAR EYE
PROTECTION THAT COMPLIES
WITH ANSI STANDARD
WARNING:
Cancer and Reproductive Harm-
www.p65Warnings.ca.gov
You are backed by the ARES Tool Performance Assurance!
ARES TOOL warrants this product (excluding carrying cases and storage accessories and the
product categories set forth below) to the original purchaser for its useful life (not to exceed one
year for products with electrical or electronic components) against defects and deficiencies in
material and workmanship.
This 1 YEAR WARRANTY does not cover products which in ARES Tool's judgement have been
subject to negligence, misuse, abuse, accident, improper storage, alteration, improper repair,
disassembly and/or reassembly. Normal wear and tear are also excluded. Deficient products will be
replaced or repaired.
Please call or email at (206) 453-6776 / ares@arestool.com for more details or to receive support.
This warranty excludes blades, bits, bit sockets, carrying cases, pouches, torque products,
punches, dies, bulbs, fuses, batteries, and other consumables which must be replaced under
normal use and service. These warranties set forth herein are the sole warranties applicable to
Products and is in lieu of all other warranties, whether expressed, implied or statutory.
The implied warranties of merchantability and fitness for a particular purpose are specifically
excluded. Customer's sole and exclusive remedy for breach of this Warranty is, at the option of
ARES TOOL, repair or replacement of the defective product.
LEVER GREASE GUNS
WARRANTY
1YEAR
Warranty
PERFORMANCE ASSURANCE
This manual suits for next models
1
Table of contents
Other Ares Landscape Lighting manuals
Popular Landscape Lighting manuals by other brands

Cooper Lighting
Cooper Lighting ACORN ACN-2 brochure

LIGMAN
LIGMAN LA-30036 installation manual

Volt
Volt VSAC-PANEL1-SBK installation instructions

Volt
Volt VWL-705-BBZ installation instructions

Global Light & Power LCC
Global Light & Power LCC WW440206 Installation instruction

SIMES
SIMES Techno Series instructions