Ares shadow 240 User manual

Distributed in the US by:
Firelands Customer Service/Product Support
1133 Libra Drive, Lincoln, NE 68512
1-800-205-6773
Distributed in the UK by:
Lenham,
Kent, UK
ME17 2DL.
www.jperkins.com
Distributed in Australia by:
Model Engines (Aust.) Pty. Ltd.,
Unit 1, 158-168 Browns Road,
Noble Park,
Victoria,
3174,
Australia.
www.modelengines.com.au
Ph (03) 8793 5555
MADE IN CHINA
Product specicaons are subject to change without noce.
Due to ongoing development, the actual product may vary from
images shown.
This product contains chemicals known to the State of California
to cause cancer, birth defects and other reproducve harm.
This product is not a toy! (14+) Recommended for ages 14 and
up. Adult supervision required for ages under 18 years old.
Contains small parts, keep out of reach of children 3 years of age
and younger.
For the most up to date Owner’s Manual &
Technical Informaon Guide, please visit www.
Ares-RC.com or scan the QR code with your
smart phone.

Main Features
• Full size 2.4GHz 4-channel transmitter
• Dual rates and digital trims
• 360° Flip button
• 780mAh 3.7V LiPo battery
• AC wall charger
• Bright LED lights for easy orientation
• Spare set of props included
• Supports WiFi FPV camera (sold separately)
• Supports some QX130 accessories (sold separately)
Specications
• Rotor diameter: 140mm (5-1/2”)
• Height: 65mm (2-1/2”)
• Weight: 110g (3.9 oz.)
• Motors: 8520 Coreless (4)
• Battery: 1S 3.7V 780mAh 20C Lithium Polymer
• Charger: 110-220V AC wall-charger
• Transmitter: 4-channel 2.4GHz
• On-Board Electronics: 5-in-1 control board
Install Transmitter Batteries
• Open the battery compartment door on the rear of the
transmitter
• Install 4 fresh AA batteries
• Make sure to maintain the correct polarity as
indicated in the battery box
• Turn the transmitter ON to check that installation is
correct
2

Mode 2 Transmitter Functions
3
Auto Flip Button
FPV Screen Mount
Throttle Trim Elevator Trim
Throttle/Rudder
Stick
Elevator/Aileron
Stick
Rudder Trim
Aileron Trim
Mode 1/ Mode 2
Switch
LEDs ON and OFF,
Accessory Functions
Power Switch
Dual Rates 60%/100%

Safety Precautions
1. Please read and follow the instructions carefully.
2. Fly the quadcopter in an open area and within your line of
sight.
3. Never y the quadcopter in crowded areas near people or
animals in order to prevent personal injury or property
damage.
4. Do not attempt to modify the quadcopter.
5. Keep away from small children as small parts can create a
choking hazard.
6. Maintain a safe distance from the quadcopter when ying to
avoid injury.
7. Do not dispose of batteries in a re.
8. Do not dispose of batteries in the trash. Only recycle in an
environmentally safe and approved fashion.
9. Never subject the quadcopter to wet conditions, this can lead
to malfunctions and parts failure not covered under warranty.
CAUTION: Never leave LiPo batteries unattended
during the charge process.
Charging the LiPo Battery
1. Plug the AC charger into the mains power.
2. The green LED will light indicating power is being supplied.
3. Plug the JST connector into the charger. Be careful to
maintain the correct plug orientation. The LED will change
to red indicating that charging is taking place.
4. The LED will return to green when charge is complete.
NOTE: The supplied charger is
suitable for charging 1-cell LiPo
batteries ONLY.
4

Preparing to Fly & Pairing
1. The Shadow 240 is designed for indoor and outdoor ight.
2. Recommended minimum ying area is 12’ x 12’ x 9’.
3. Make sure the LiPo battery is fully charged.
4. With the transmitter OFF and the throttle stick in its lowest
position, place the transmitter near the quadcopter.
5. Insert the charged LiPo battery into the battery box and plug
in.
6. Place the quadcopter on a at surface and Do Not Move the
quadcopter after this point. LEDs on the Shadow 240 will
blink.
7. Switch ON the transmitter. The pairing process begins.
8. When the LEDs on the quadcopter remains solid the
quadcopter is paired and ready to y.
9. Advance the throttle slowly to rise o the ground.
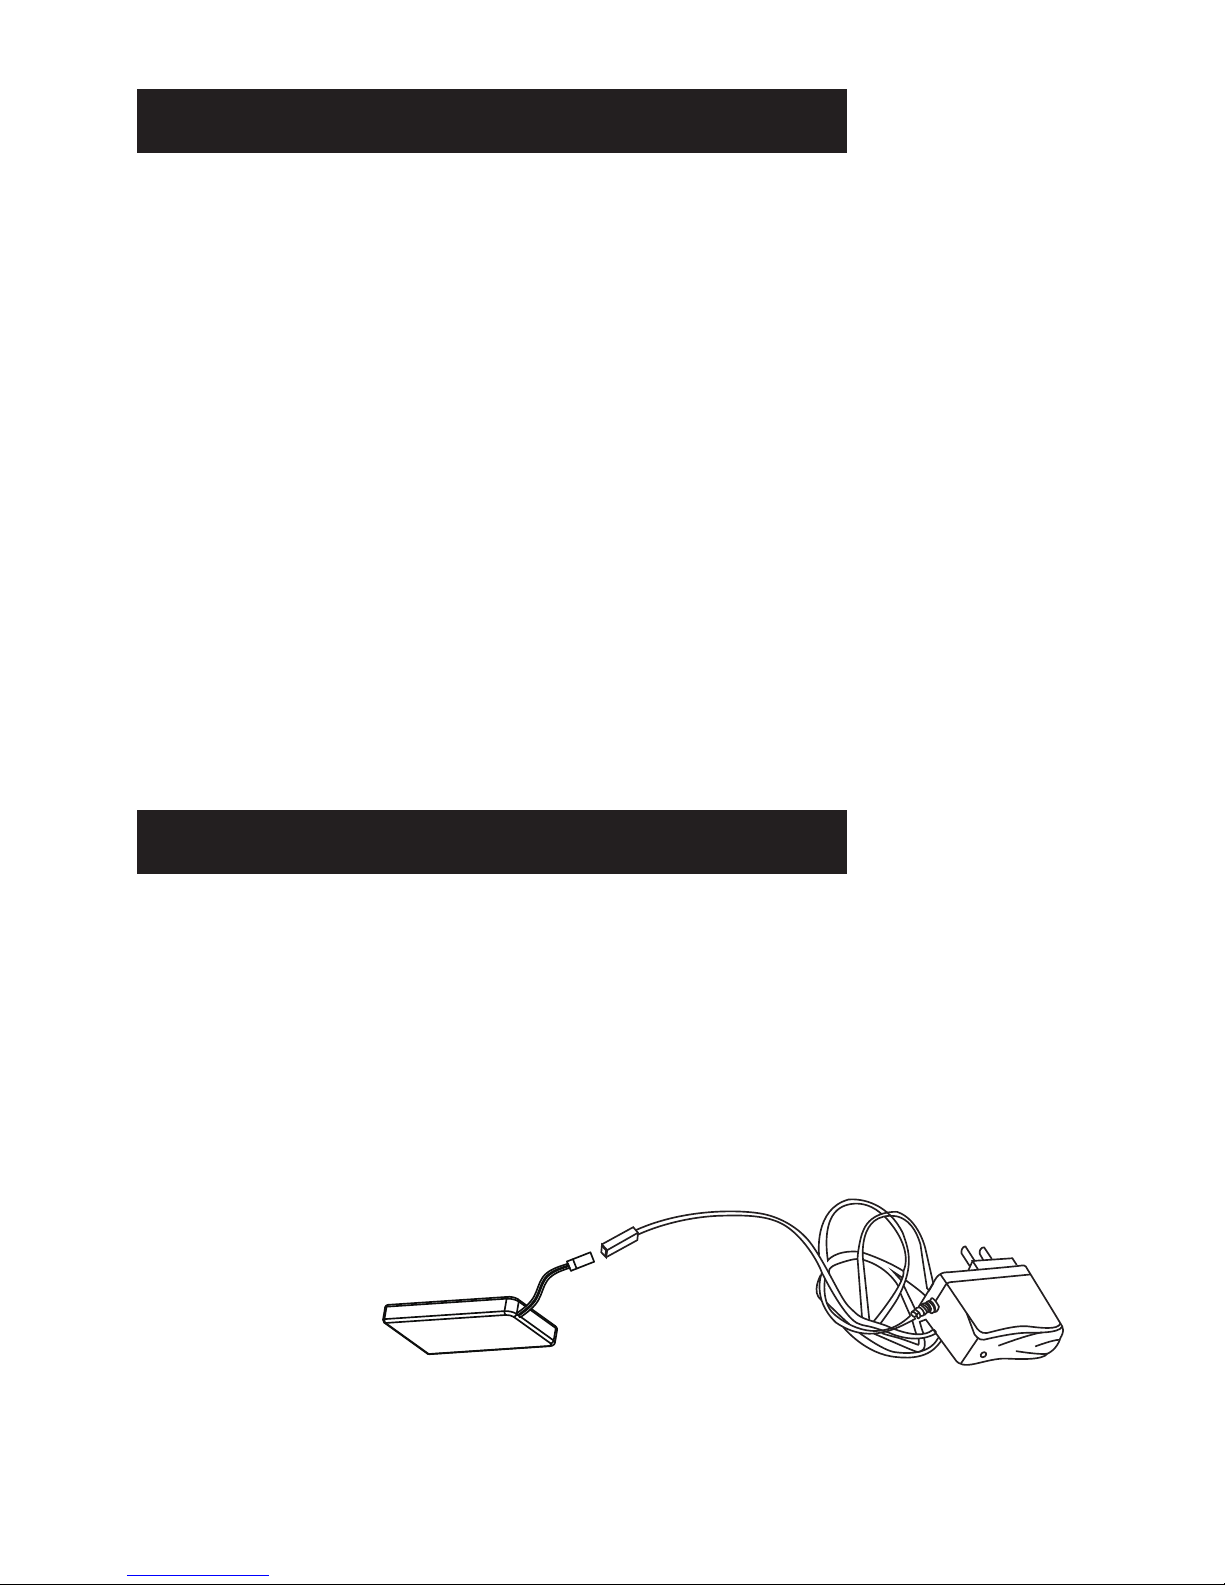
Insert the LiPo battery from the front
10. When the ight battery power gets low, the LEDs on the
quad will begin to blink indicating that it’s getting close to
time to land and recharge.
11. If the quadcopter is not responding quickly enough to stick
movements, switch to high rates by pressing the rate
button. It is located in the top right on the transmitter.
12. After becoming familiar with the ight controls of the
quadcopter and gaining condence you will be ready to
move on to ips and faster forward ight.
5

Throttle
Flight Controls
Flips and Rolls
From a stable hover, press the ip button on the left shoulder
of the transmitter. You will hear a series of beeps, the ip
function is active. Move the aileron/elevator stick in the
direction that you want the Shadow 240 to ip.
There is a programmed momentary power increase at the
beginning of the ip maneuver. Do not begin a ip if the quad
is closer than 18” from the ceiling.
6
Elevator forward Elevator backward

Exploded View
7
NOTE: Exploded view provided for general layout only

8
Accessory Plugs
1 2 3 4
1. Video and Still camera plugs in here.
2.This plug is not used.
3. WiFi camera plugs in here.
4. Winch, Water Blaster and Bubble Blower plug
in here.
To remove/replace a propeller, unscrew the single screw
on the top of the propeller and pull propeller up. Install new
propeller on shaft and replace the screw.
Propeller Rotation

9
A Button
B Button
C Button
D Button
Video and Still Camera Accessory
Abutton: Starts and stops the video camera.
C button: Takes a still photo with each push
Water Blaster Accessory
C button: Press repeatedly for water blast
Bubble Blower Accessory
C button: Press repeatedly to create bubbles
Winch Accessory
Not compatible with this quad
Rocket Launcher
Not compatible with this quad
LED Control
B button turns LEDs on quad On/O
Accessory Buttons

Motor Clockwise
Rotation
AZSQ1813
Motor Counter
Clockwise Rotation
AZSQ1814
780mAh 1-Cell
3.7V 20C LiPo
AZSQ1805
Light Covers
AZSQ1822OR
AZSQ1822GR
Bearing Set (8)
AZSQ1816
Prop Shaft (4)
AZSQ1815
Body (Airframe)
AZSQ1820OR
AZSQ1820GR
Bottom Covers
AZSQ1821
Main Gear Set (4)
AZSQ1817
5-in-1 Control Unit
AZSQ1806
Prop Set (4)
AZSQ1818
Ext. Landing Pads
AZSQ1810
Landing Pads (4)
AZSQ1809
Screw Set (16)
AZSQ1819
LED Light Set
AZSQ1825OR
AZSQ1825GR
Shock Mount Set
(8)
AZSQ1824
Spare Parts
10

AZSQ1800 Shadow 240 RTF Quadcopter
AZSQ1808 4-Ch 2.4GHz Transmitter
AZSQ1805 780mAh 1-Cell/1S 3.7V 20C LiPo Battery
AZSQ1806 5-in-1 Control Unit
AZSQ1809 Landing Pads (4)
AZSQ1810 Extended Landing Pads (4)
AZSQ1813 Motor, Clockwise Rotation
AZSQ1814 Motor, Counter-Clockwise Rotation
AZSQ1815 Propeller/Rotor Blade Shaft (4)
AZSQ1816 Bearing Set; 6x3x2mm (8)
AZSQ1817 Main Gear (4)
AZSQ1818 Propeller/Rotor Blade Set (2 White, 2 Black)
AZSQ1819 Screw Set (16)
AZSQ1820OR Body (Airframe); Orange Print
AZSQ1820GR Body (Airframe); Green Print
AZSQ1821 Bottom Covers (3)
AZSQ1822OR Light Covers, Orange (3) & White (2pcs)
AZSQ1822GR Light Covers, Green (3) & White (2pcs)
AZSQ1824 Shock Mount Set (8)
AZSQ1825OR LED Light Set: White(2) & Orange (3)
AZSQ1825GR LED Light Set: White(2) & Green (3)
AZSH1254 1S 3.7V LiPo, 0.5A, AC Charger
Accessories
AZSQ1826 WiFi FPV Camera and Smartphone Holder
AZSH1322 Camera w/2G Micro Memory Card
& USB Card Reader
AZSH1324 Water Blaster Unit
AZSH1325 Bubble Machine Unit
AZSH1326 Winch Unit
Parts and Accessories List
11

www.Ares-RC.com
© 2015
Rev. 1.1
1/16
Table of contents
Other Ares Quadcopter manuals