10
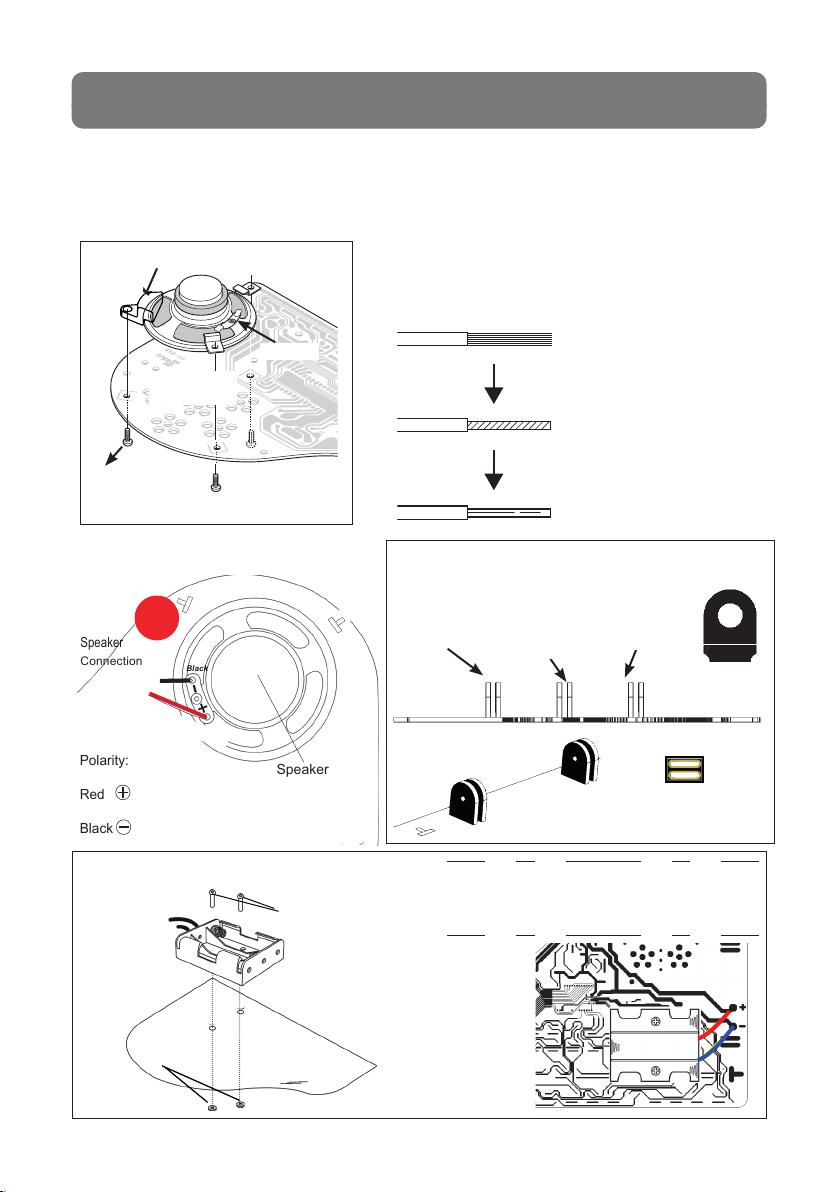
a. Insert the batteries into the battery holder. PLEASE NOTICE the correct polarity
of the batteries!
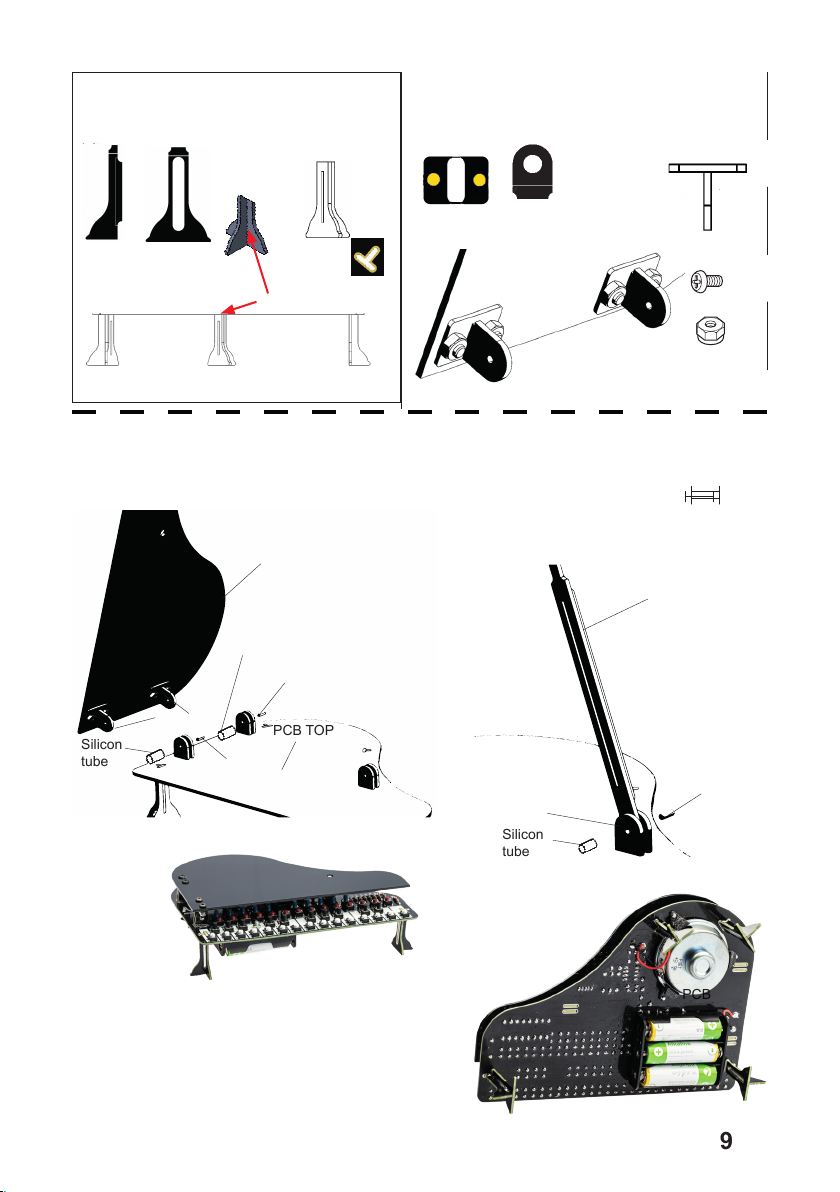
b. Lift the piano cover and place the piano arm
NOTICE: you can stop all playing actions directly with the STOP button!
c. Switch on the ON/OFF switch (you will hear a starting tune) Often the sound is too
loud at the start, turn down the piano with „volume -“ until the volume and quality of
the sound is OK.
CAUTION... if there is any smoke or a component getting very hot, switch o
the piano immediately and check all part directions and polarity!
When there is no smoke you had a good start and we can continue testing
d. Push any of the white or black push buttons, you must hear a sound. If not,
check batteries rst and then all part assembly (Sound IC, opamp, battery- and
speaker connection).
e. Push the red DEMO button, then you should hear a melody.
Push again for more melodies.
f. During a DEMO melody you can check the VOLUME + and VOLUME - buttons to
see if the soundlevel changes.
g. Push the START button to stop. When the tune stops, randomly push the white
buttons. Now you hear the tune like you play it yourself.
h. Push the blue RHYTHM button, then you will hear the rhythm section (slow rock, rock,
twist, cha cha or samba). You can change the speed with the TEMPO buttons
i. When a rhythm plays you can also play on the keyboard.
j. Play a DEMO tune and change the instruments by pushing the INSTRUMENT
button. You should hear dierent instruments now
k. Push the RECORD button and play your own melody
l. Push the REPLAY button to listen back your own melody
Our compliments if you have passed this test in one go, that means you have
built the piano right the rst time!
More about the keyboard functions, see chapter 7
How does a synthesyzer work,see chapter 8
6. Function Test