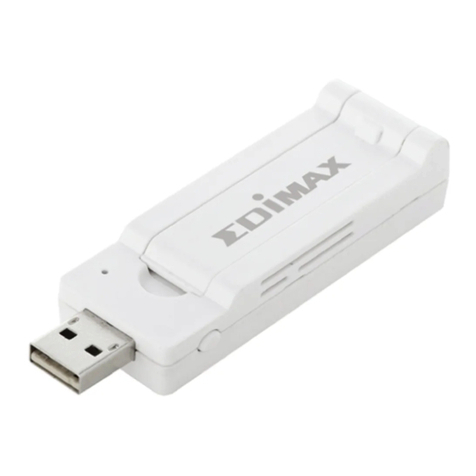
Aria Myricom ARC 10G Series Operator's manual

Myricom ARCSeries 10G
Adapter (TX-Only)
INSTALLATIONANDCONFIGURATIONGUIDE
February 3, 2020

Copyright © 2020 CSP Inc.
All rights reserved.
ARIA Cybersecurity Solutions, which includes ARIA SDS, Myricom network adapters, and nVoy security appliances, are
designed and manufactured by the High Performance Products Division of CSP Inc.
No part of this publication may be reproduced, transmitted, transcribed, stored in a retrieval system, or translated into
any language, in any form or by any means, electronic, mechanical, photocopying, recording, or otherwise, without prior
written permission from CSP Inc.
All copyright, confidential information, patents, design rights and all other intellectual property rights of whatsoever
nature contained herein are and shall remain the sole and exclusive property of CSP Inc. The information furnished
herein is believed to be accurate and reliable. However, no responsibility is assumed by CSP Inc. for its use, or for any
infringements of patents or other rights of third parties resulting from its use.
ARIA™ and nVoy™ are trademarks of CSP Inc. Myricom®is a registered trademark of CSP Inc. All other trademarks are
the property of their respective owners.
PRELIMINARYNOTICE
This document is in the preliminary stage and is subject to change without notice.
Publishing Information
Revision Date Details
1.0.0 February 3, 2020 Initial draft.
Address
ARIACybersecurity Solutions Product Development
C/O CSP Inc.
175 Cabot Street, Suite 210
Lowell, MA 01854
Tel: (800) 325-3110
ARIA_support@ariacybersecurity.com
https://www.ariacybersecurity.com/support/

Contents
1 Overview 1
1.1 Features 1
1.2 Physical Dimensions 2
1.3 Environmental Specifications 2
1.4 Power Consumption 2
1.5 LED Indicators 2
2 Installing the Myri-10G Adapter 3
2.1 Verifying the PCIe Expansion Slot 3
2.2 Installing the Physical Myri-10G Adapter 3
2.2.1 Installing the Adapter 3
2.2.2 Installing the Tx-Only Firmware 4
3 Troubleshooting 7
4 ARIA Technical Support 9
ARCSeries 10GInstallation Guide i

ii ARCSeries 10GInstallation Guide

1.1 Features
Chapter 1
Overview
The ARIA™Cybersecurity Solutions Myricom®ARC Series 10G network adapter (Myri-10G Adapter)
improves server and application performance by offloading a variety of server-intensive functions, such as
encryption or micro-segmentation. This specialized Ethernet adapter connects to a PCIe slot on a host system
and supports one or more 10G network interfaces.
When configured as Tx-only, the adapter acts as a “data diode,” isolating the network. In this mode, traffic
flows in one direction only, from low secure areas to high secure areas. This unidirectional security gateway
ensures non-secure traffic can only travel in one direction.
This document describes the adapter and provides the instructions for installing the adapter, Tx-only
firmware, and verifying the 10G Ethernet driver for Linux-based systems.
1.1 Features
The Myri-10G Adapter component supports the following features:
lHalf height and ½ length PCIe board
lTwo Lanai Z8ES CPUs @ 365 MHz
l2 MB RAM
lPCIe Gen 2 x8 host interface, with backwards compatibility for PCIe Gen 1
lFour LEDs (two per port)
l10G network interface ports (single- or dual-port)
See the following figure for an illustration of a dual-port card.
Figure 1-1: Myri-10G Adapter
ARCSeries 10GInstallation Guide 1

1.2 Physical Dimensions
2 ARCSeries 10GInstallation Guide
1.2 Physical Dimensions
The Myri-10G Adapter is a full-height, 3/4 length PCIe card. See the following table for the
dimensions of the board (excluding the faceplate).
Dimension Inches Millimeters
Height 2.7 68.6
Length 6.6 168
Width 0.9 22.9
Table 1-1: Physical Dimensions
1.3 Environmental Specifications
The environmental specifications are listed in the following table.
Specification Value
Operating Humidity 15% - 80% Relative Humidity, Non-Condensing
Operating Temperature 0 °C - 80 °C
Table 1-2: Environmental Specifications
1.4 Power Consumption
The power supply and consumption values are listed in the following table.
Specification Value
Supply Voltage 12 V
Consumption 25 W (Maximum)
Table 1-3: Power Consumption
1.5 LED Indicators
The Myri-10G Adapter contains two LED indicators to specify the link status and activity for each
network interface port. The link LED is green and is labeled L, while the status LEDis amber and
is labeled S. See the following table for a description of the different colors/states.
Color State Indicates
Green Solidly Lit The adapter is powered on and has established a 10G link.
Off The adapter has not established a link or Linux has not booted
yet.
Amber Off The PCIe bus is initializing.
Blinking The PCIe link is active.
Table 1-4: Network Interface Port LEDs

2.1 Verifying the PCIe Expansion Slot
Chapter 2
Installing the Myri-10G Adapter
This chapter describes the following tasks for installing the Myri-10G Adapter hardware.
ARIA products are designed to be compatible with industry standards and typically install quickly without
significant effort. If you encounter any issues during the installation process, please contact ARIA customer
support for assistance (ARIA_support@ariacybersecurity.com).
This chapter focuses on the physical installation and configuring the hardware for transmit (Tx) only.
2.1 Verifying the PCIe Expansion Slot
Prior to installing the Myri-10G Adapter, you should verify the expansion slot is compatible with
the card. The Myri-10G Adapterrequires a PCIe server slot with a minimum of 4 lanes, but a slot
with 8 lanes is recommended. For the best performance, you should check the slot to ensure a
secure electrical connection.
2.2 Installing the Physical Myri-10G Adapter
Installing the physical Myri-10G Adapter requires installing the adapter into a host system. You
can then install the firmware once the board is properly functioning in the host system. Installing
the firmware requires a tarball file that you can download to the host system at any time.
2.2.1 Installing the Adapter
To install the adapter:
The Myri-10G Adapter contains materials and parts that are susceptible to damage
caused by Electrostatic Discharge (ESD). Use static-safe procedures when handling
the card.
1. Close all active applications and shut down the operating system.
2. Turn off the computer and disconnect the power cord.
3. Open the computer chassis to find an available PCIe slot.
NOTE: Place the adapter in an expansion slot that is connected to the CPU that
will run your application.
4. Seat the adapter firmly into the PCIe slot until the card clicks into place.
5. Secure the adapter to the chassis with a screw.
6. Close the computer chassis and connect the power cord.
7. Power on the computer.
You can now install the firmware required for configuring the adapter for Tx only.
ARCSeries 10GInstallation Guide 3

2.2 Installing the Physical Myri-10G Adapter
4 ARCSeries 10GInstallation Guide
2.2.2 Installing the Tx-Only Firmware
NOTE: The TX-only firmware is supported on Linux systems only.
Once you have installed the hardware, you can install the Tx-only firmware. The firmware is
contained in a tarball file (.tar.gz) and is available from ARIACybersecurity Solutions Support
(ARIA_support@ariacybersecurity.com).
NOTE: You must be logged in as an administrator or have super user privileges to install the
firmware.
The commands for installing the firmware differs for CentOS and Ubuntu. The procedures for each
OS are provided in the following sections.
Ubuntu (18.04)
To install the Tx-only firmware on Ubuntu:
1. Place the tar.gz file in a temporary directory on the machine.
2. Extract the files.
tar xvf myri-tools-<version>-linux-64bit.tar.tz
3. Verify the required .mcp2 file is local to the system. This file contains the firmware that will
be installed in the EEPROMflash of the adapter.
4. Execute the ze-upgrade script from the <tools>/bin/ directory.
sudo ./ze-upgrade ../myri-eeprom-<version>.mcp2
5. Change the directory to /lib/firmware on the machine.
6. Delete or move all .dat files the card is currently using.
7. Copy the new .dat files from tarball (.tar.gz) to the /lib/firmware directory.
8. Update the firmware.
sudo update-initramfs -u
9. Reboot the system and verify the adapter is using the Tx only firmware.
./myri_info
The output reflects Tx-only firmware when successfully completed.

2.2 Installing the Physical Myri-10G Adapter
pci-dev at 02:00.0 vendor:product(rev)=14c1:0008(01)
behind bridge root-port: 00:02.0 8086:2f04 (x8.1/x16.3)
Myri-10G-PCIE-8B -- Link x8
EEPROM String-spec:
MAC=##############
SN=#######
PWR=100
PC=10G-PCIE-8B-S
PN=09-04228
MEMMAP=----------------
PSERDES=0
TAG=ze_tools-1_4_53a
EEPROM MCP, PRESENT, length = 199316, crc=0x11352508
ETH ::1.4.59-txonly -- 2014/10/17 22:54:11 myri10ge firmware
Simple-bundle: exec_len = 199312
Running MCP:
ETH :: 1.4.59-txonly -- 2014/10/17 23:10:09 myri10ge firmware
Figure 2-1: Firmware Successfully Installed
CentOS(7.7)
To install the Tx-only firmware on CentOS:
1. Place the tar.gz file in a temporary directory on the machine.
2. Extract the files.
tar xvf myri-tools-<version>-linux-64bit.tar.tz
3. Verify the required .mcp2 file is local to the system. This file contains the firmware that will
be installed in the EEPROMflash of the adapter.
4. Execute the ze-upgrade script from the <tools>/bin/ directory.
sudo ./ze-upgrade ../myri-eeprom-<version>.mcp2
5. Change the directory to /lib/firmware on the machine.
6. Delete or move all .dat files the card is currently using.
7. Copy the new .dat files from tarball (.tar.gz) to the /lib/firmware directory.
8. Update the firmware.
sudo dracut -f
9. Reboot the system and verify the adapter is using the Tx only firmware.
./myri_info
The output reflects Tx-only firmware when successfully completed. See Figure 2-1 for
example output.
ARCSeries 10GInstallation Guide 5

6 ARCSeries 10GInstallation Guide

Chapter 3
Troubleshooting
This chapter identifies some issues you may encounter while installing the Myri-10G Adapter. For each
issue, a probable cause and possible solution are listed. The ARIAproduct development team recommends
exhausting all possibilities in this chapter before contacting support.
Issue Probable Cause Possible Solution
The server cannot
identify the adapter.
The adapter is not
properly seated.
Make sure the adapter is fully connected in the PCIe slot.
There is an issue
with the PCIe slot.
Make sure the PCIe slot is a generation 2, 4- or 8-lane slot.
Install the adapter into a known working slot.
The driver is
invalid or cor-
rupted.
Reinstall the driver or contact ARIASupport.
The port LED is not lit. There is an issue
with the cable.
Replace the cable with a known working cable.
Make sure the cables are properly seated.
The adapter stopped
working.
There is an issue
with the cable.
Replace the cable with a known working cable.
The server has
encountered an
error.
Reboot the server.
The card is over-
heating.
Increase the fan speed of the PCIe slot where the Myri-10G Adapter is
installed. See Environmental Specifications on page 2 for more information.
The driver is
invalid or cor-
rupted.
Contact ARIA Support.
Table 3-1: Troubleshooting Chart
ARCSeries 10GInstallation Guide 7

8 ARCSeries 10GInstallation Guide

Appendix 4
ARIA Technical Support
ARIA technical support, downloads, and user documentation are available from ARIAsupport.
ARIA Email Support
ARIA_support@ariacybersecurity.com
ARIACybersecurity Solutions Product Development
C/O CSPInc.
175 Cabot Street, Suite 210
Lowell, MA 01854
Tel: (800) 325-3110
ARIA_support@ariacybersecurity.com
http://www.ariacybersecurity.com
ARCSeries 10GInstallation Guide 9
Table of contents
