manuals.online logo
Brands
  1. Home
  2. •
  3. Brands
  4. •
  5. Ariens
  6. •
  7. Lawn Mower
  8. •
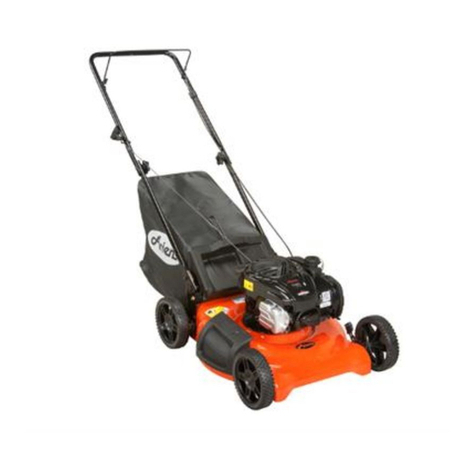
  9. Ariens 71513100 User manual

Ariens 71513100 User manual

Other Ariens Lawn Mower manuals

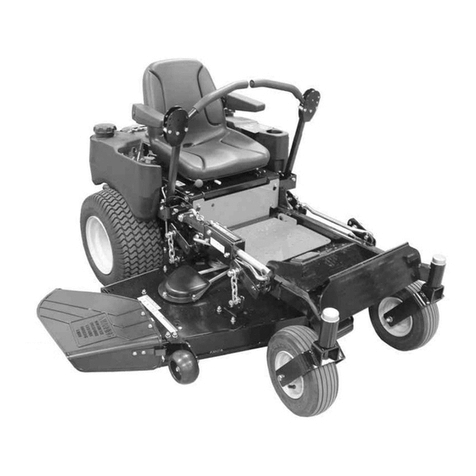
Ariens 961360 User manual

Ariens

Ariens 961360 User manual

Ariens 927021 User manual

Ariens

Ariens 927021 User manual

Ariens 836008 User manual

Ariens

Ariens 836008 User manual

Ariens Promaster PM144Z Owner's manual

Ariens

Ariens Promaster PM144Z Owner's manual

Ariens 911160-LM21 Classic User manual

Ariens

Ariens 911160-LM21 Classic User manual

Ariens 911153 - BR21SP CARB Owner's manual

Ariens

Ariens 911153 - BR21SP CARB Owner's manual

Ariens GRAVELY Pro Unit HR1536FX Owner's manual

Ariens

Ariens GRAVELY Pro Unit HR1536FX Owner's manual

Ariens IKON-X User manual

Ariens

Ariens IKON-X User manual

Ariens LM21SC Owner's manual

Ariens

Ariens LM21SC Owner's manual

Ariens 911207 Pro21XD, 911214 Pro21XD Owner's manual

Ariens

Ariens 911207 Pro21XD, 911214 Pro21XD Owner's manual

Ariens 911513 User manual

Ariens

Ariens 911513 User manual

Ariens ZOOM 915055-1944 Owner's manual

Ariens

Ariens ZOOM 915055-1944 Owner's manual

Ariens 992807-ProZoom 2760S Owner's manual

Ariens

Ariens 992807-ProZoom 2760S Owner's manual

Ariens 935335 42" User manual

Ariens

Ariens 935335 42" User manual

Ariens Zenith 60 User manual

Ariens

Ariens Zenith 60 User manual

Ariens fairway 912000 series Operating instructions

Ariens

Ariens fairway 912000 series Operating instructions

Ariens 911271-Pro21 User manual

Ariens

Ariens 911271-Pro21 User manual

Ariens 911110 - P 21LM Owner's manual

Ariens

Ariens 911110 - P 21LM Owner's manual

Ariens 911102 - PRO21SCH Owner's manual

Ariens

Ariens 911102 - PRO21SCH Owner's manual

Ariens Razor 911373 User manual

Ariens

Ariens Razor 911373 User manual

Ariens 991085-Max Zoom 48 Owner's manual

Ariens

Ariens 991085-Max Zoom 48 Owner's manual

Ariens 935000 Series User manual

Ariens

Ariens 935000 Series User manual

Ariens Value 21 Push Walk Behind User manual

Ariens

Ariens Value 21 Push Walk Behind User manual

Ariens Hydro 936056 User manual

Ariens

Ariens Hydro 936056 User manual

Popular Lawn Mower manuals by other brands

Toro 20047 Operator's manual

Toro

Toro 20047 Operator's manual

Toro Greensmaster TriFlex 3300 Operator's manual

Toro

Toro Greensmaster TriFlex 3300 Operator's manual

Global garden products 72 Workshop manual

Global garden products

Global garden products 72 Workshop manual

EINHELL 01045 operating instructions

EINHELL

EINHELL 01045 operating instructions

Toro Greensmaster 3120 Operator's manual

Toro

Toro Greensmaster 3120 Operator's manual

Baroness LM315GC Owner's operating manual

Baroness

Baroness LM315GC Owner's operating manual

GreenWorks Tools 25157 user manual

GreenWorks Tools

GreenWorks Tools 25157 user manual

Etesia MVEHH user manual

Etesia

Etesia MVEHH user manual

Husqvarna LTH125 owner's manual

Husqvarna

Husqvarna LTH125 owner's manual

Gravely 915034 - ZT1640 Owner's/operator's manual

Gravely

Gravely 915034 - ZT1640 Owner's/operator's manual

Jacobsen 63281 Technical manual

Jacobsen

Jacobsen 63281 Technical manual

GreenWorks Pro MO802524 Operator's manual

GreenWorks Pro

GreenWorks Pro MO802524 Operator's manual

Toro TimeMaster 20976 Operator's manual

Toro

Toro TimeMaster 20976 Operator's manual

Deutz-Allis 3000 Series parts manual

Deutz-Allis

Deutz-Allis 3000 Series parts manual

Craftsman 917.9998C owner's manual

Craftsman

Craftsman 917.9998C owner's manual

jobmate YT9108 user manual

jobmate

jobmate YT9108 user manual

Yard force GM R40A instructions

Yard force

Yard force GM R40A instructions

Husqvarna R 419TsX AWD Operator's manual

Husqvarna

Husqvarna R 419TsX AWD Operator's manual

manuals.online logo
manuals.online logoBrands
  • About & Mission
  • Contact us
  • Privacy Policy
  • Terms and Conditions

Copyright 2025 Manuals.Online. All Rights Reserved.

© Copyright 2013 • Ariens Company • Brillion, WI 54110 04447600B 6/13 Page 1 of 3
Instruction Sheet
Kit Number: 71513100
42-INCH MULCH KIT
For Use On Models:
915148, 159, 170, 171, 323 (S/N 10000 and up)
Package Contents
Check the contents of your kit for the parts listed below
(Figure 1):
REMOVAL
1. Stop engine, remove key, wait for all moving parts
to stop and engine to cool, and disconnect spark
plug wire.
2. Set deck to highest cutting height.
3. Raise the front of the unit to expose the underside
of the deck. Securely support the unit.
4. Remove two locking top flange nuts from discharge
chute mount and remove discharge chute and
mounting strap. Retain discharge chute and all
hardware for future use with discharge chute or
bagger. See Figure 2.
5. Remove two locking top flange nuts from discharge
baffle and remove baffle. Retain discharge baffle
and hardware for future use with discharge chute or
bagger. See Figure 2.
6. Remove two 5/16" hex bolts and locking top flange
nuts from the top leading edge of the mower deck.
Retain for future use with discharge chute or
bagger. See Figure 3.
WARNING: FAILURE TO FOLLOW
INSTRUCTIONS could result in personal injury
and/or damage to unit.
Read, understand, and follow all safety
practices in Owner/Operator Manual before
beginning.
Item Description Qty Part Number
1 42" Mulch Baffle Weldment 1 04447251
2 5/16-18 Locking Top Flange
Nut 3 06543100
3 1/4-20 x 1 Hex Washer
Head Tapping Screw 1 07412400
4 1/4-20 Locking Top Flange
Nut 1 06543500
5 5/16-18 x 3/4 Hex Bolt 1 05947000
6 5/16-18 x 1-3/4 Hex Bolt 2 05957400
7 7/16 x 1 x 5/64 Flat Washer 2 06435900
8 42" Mulch Cover 1 04687551
9 5/16 x 3/4 x 1/16 Flat Steel
Washer 2 06435800
10 1/4-20 Locking Top Flange
Nut 2 06543500
Figure 1
1
2
23
4
5
7
6
2
8
9
10
WARNING: Mower blades are sharp and can
cut you. Wrap the blade(s) or wear gloves, and
use extra caution when servicing them.
Figure 2
Discharge
Chute
Mounting
Strap
Discharge
Baffle
Flange
Nuts
Flange
Nuts
04447600B 6/13 Page 2 of 3
7. Remove the outer 1/4 x 3/4" hex tapping screw from
the left belt cover. Retain for future use with
discharge chute or bagger. See Figure 3.
8. Remove blades.
9. Remove four round head square neck bolts and hex
nuts retaining rear baffle and remove baffle. Retain
baffle and hardware for future use with discharge
chute or bagger. See Figure 4.
INSTALLATION
1. Install mulch baffle into deck with the rear edge of
the baffle positioned inside of the deck. See
Figure 5.
2. From bottom side of mulch kit, install two 5/16-18 x
1-3/4" bolts (item 6) and two 7/16" flat washers
(item 7). See Figure 5.
3. Secure the mulch baffle from the top of the deck
with two 5/16" locking top flange nuts (item 2). See
Figure 5.
4. From the top of the deck install 1/4 x 1" hex washer
head tapping screw (item 3) through outer hole in
left side belt cover. From under the deck secure
with 1/4" locking top flange nut (item 4). See
Figure 6.
5. From the underside of the deck install two 5/16 x
3/4" hex bolts (item 5) and secure with two 5/16"
locking top flange nuts (item 2). See Figure 6.
6. Install mower blades. Ensure that blades are
installed with air lifts facing upward. Torque blade
nuts to 92 – 130 lbf-ft (125 – 176 N•m).
WARNING: Mower blades are sharp and can cut
you. Wrap the blade(s) or wear gloves, and use
extra caution when removing and handling.
Figure 3
Left Belt Cover Outer
Tapping Screw
5/16"Hex
Bolts
Flange
Nuts
Figure 4
Rear
Baffle
Hardware
Figure 5
2
Rear edge of
baffle is
positioned
inside of
deck.
76
Figure 6
23
54
04447600B 6/13 Page 3 of 3
7. Secure mulch cover (item 8) onto weld screws with
two 5/16" flat steel washers (item 9) and two 1/4"
locking top flange nuts (item 10). Position mulch
cover over gap between deck opening and mulch
baffle. See Figure 7.
8. Lower unit to the ground.
9. Connect spark plug wire to spark plug.
MULCHING TIPS
For best mulching quality, follow these tips:
1. Mow at full throttle.
2. Mow at half speed.
3. Mow dry grass only. Mowing wet grass causes
clumping.
4. Keep mower blades sharp.
5. Cut no more than 1 in. (2.5 cm) at a time. For tall
grass, mow at a higher cutting height, then make a
second (or third) pass with the deck set to the
desired cutting height.
6. Clean the underside of deck after each mowing.
IMPORTANT: When cleaning, DO NOT wash with high-
pressure water. Allow all parts to cool before cleaning.
Figure 7
8
109