manuals.online logo
Brands
  1. Home
  2. •
  3. Brands
  4. •
  5. Ariston
  6. •
  7. Washer
  8. •
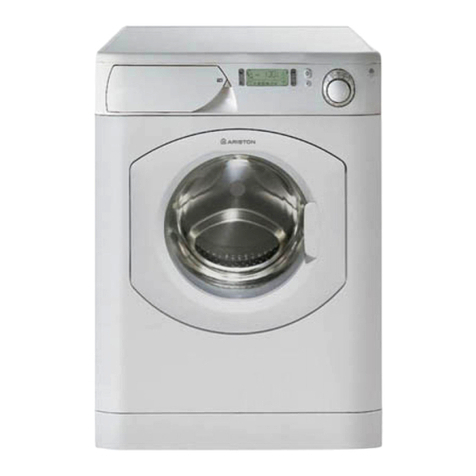
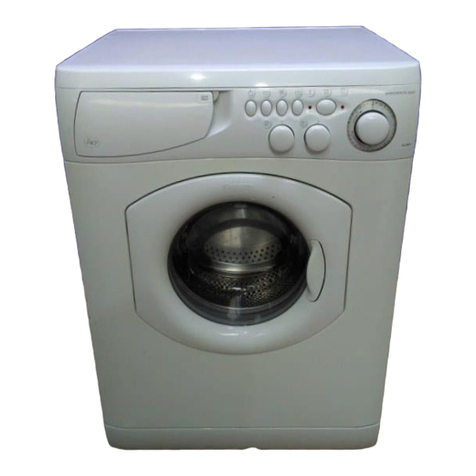
  9. Ariston AV 52 User manual

Ariston AV 52 User manual

1
GB
English, 1
Contents
Installation, 2-3-4-5
Unpacking and levelling, 2
Electric and water connections, 2-3
The first wash cycle, 4
Technical details, 5
Washing machine description, 6
Control panel, 6
Starting and rogrammes, 7
riefly: how to start a programme, 7
Programme table, 7
ersonalisations, 8
Setting the temperature, 8
Functions, 8
Detergents and laundry, 9
Detergent dispenser, 9
Preparing your laundry, 9
Special items, 9
recautions and advice, 10
General safety, 10
Disposal, 10
Saving energy and respecting the environment, 10
Care and maintenance, 11
Cutting off the water or electricity supply, 11
Cleaning your appliance, 11
Cleaning the detergent dispenser, 11
Caring for your appliance door and drum, 11
Cleaning the pump, 11
Checking the water inlet hose, 11
Troubleshooting, 12
Service, 13
efore calling for Assistance, 13
WASHING MACHINE
AV 52
Instructions for use
GB
AR
, 15
2
GB
Keep this instruction manual in a safe place for
future reference. Should the appliance be sold,
transferred or moved, make sure the instruction
manual accompanies the washing machine to inform
the new owner as to its operation and features.
Read these instructions carefully: they contain vital
information on installation, use and safety.
Unpacking and levelling
Unpacking
1. Unpack the washing machine.
2. Check whether the washing machine has been
damaged during transport. If this is the case, do not
install it and contact your retailer.
3. Remove the 3
protective screws and
the rubber washer with
the respective spacer,
situated on the rear of
the appliance (see
figure).
4. Seal the gaps using the plastic plugs provided.
5. Keep all the parts: you will need them again if the
washing machine needs to be moved to another
location.
Packaging materials are not children's toys.
Levelling
1. Install the washing machine on a flat sturdy floor,
without resting it up against walls, furniture cabinets
or other.
2. If the floor is not
perfectly level, compen-
sate for any unevenness
by tightening or
loosening the adjustable
front feet (see figure);
the angle of inclination,
measured according to
the worktop, must not
exceed 2°.
Levelling your appliance correctly will provide it with
stability and avoid any vibrations, noise and shifting
during operation. If it is placed on a fitted or loose
carpet, adjust the feet in such a way as to allow
enough room for ventilation beneath the washing
machine.
Electric and water connections
Connecting the water inlet hose
1. Insert seal A into the
end of the inlet hose
and screw the latter
onto a cold water tap
with a 3/4 gas threaded
mouth (see figure).
efore making the
connection, allow the
water to run freely until
it is perfectly clear.
2. Connect the other end
of the water inlet hose to
the washing machine,
screwing it onto the
appliance's cold water
inlet, situated on the top
right-hand side on the
rear of the appliance
(see figure).
3. Make sure there are no kinks or bends in the
hose.
The water pressure at the tap must be within the
values indicated in the Technical details table
(on the next page).
If the water inlet hose is not long enough, contact
a specialist store or an authorised serviceman.
Installation
A
3
GB
Connecting the drain hose
Connect the drain hose,
without bending it, to a
draining duct or a wall
drain situated between
65 and 100 cm from the
floor;
alternatively, place it
over the edge of a
basin, sink or tub,
fastening the duct
supplied to the tap (see
figure). The free end of
the hose should not be
underwater.
 We advise against the use of hose extensions; in
case of absolute need, the extension must have the
same diameter as the original hose and must not
exceed 150 cm in length.
Electric connection
efore plugging the appliance into the mains socket,
make sure that:
 the socket is earthed and in compliance with the
applicable law;
 the socket is able to sustain the appliance's
maximum power load indicated in the Technical
details table (see page 5);
 the supply voltage is included within the values i
ndicated on the Technical details table
(see page 5);
 the socket is compatible with the washing
machine's plug. If this is not the case, replace
the socket or the plug.
Your appliance is now supplied with a 13 amp fused
plug it can be plugged into a 13 amp socket for
immediate use. efore using the appliance please
read the instructions below.
WARNING - THIS APPLIANCE MUST E EARTHED.
THE FOLLOWING OPERATIONS SHOULD E
CARRIED OUT Y A QUALIFIED ELECTRICIAN.
Replacing the fuse:
When replacing a faulty fuse, a 13 amp ASTA
approved fuse to S 1362 should always be used, and
the fuse cover re-fitted. If the fuse cover is lost, the
plug must not be used until a replacement is obtained.
Replacement fuse covers:
If a replacement fuse cover is fitted, it must be of the
correct colour as indicated by the coloured marking or
the colour that is embossed in words on the base of
the plug. Replacements can be obtained directly from
your nearest Service Depot.
Removing the plug:
If your appliance has a non-rewireable moulded plug
and you should wish to re-route the mains cable
through partitions, units etc., please ensure that
either:
the plug is replaced by a fused 13 ampere re-
wearable plug bearing the SI mark of approval.
or:
the mains cable is wired directly into a 13 amp cable
outlet, controlled by a switch, (in compliance with
S 5733) which is accessible without moving the
appliance.
Disposing of the plug:
Ensure that before disposing of the plug itself, you
make the pins unusable so that it cannot be
accidentally inserted into a socket.
Instructions for connecting cable to an alternative
plug:
Important: the wires in the mains lead are coloured
in accordance with the following code:
Green & Yellow Earth
Blue Neutral
Brown Live
As the colours of the wires in the lead may not
correspond with the coloured markings identifyng
the terminals in your plug, proceed as follows:
Connect Green & Yellow wire to terminal marked E
or or coloured Green or Green & Yellow.
Connect rown wire to terminal marked L or
coloured Red.
Connect lue wire to terminal marked N or coloured
lack.
ServiceTroubleshootingrecautions Carerogrammes DetergentsInstallation Description
65 - 100 cm
4
GB
If a 13 amp plug ( S 1363) is used it must be fitted
with a
13 amp fuse, either in the plug or adaptor or at the
distribution board.
If you are in any doubt the electrical supply to your
machine, consult a qualified electrician before use.
How to connect an alternative plug:
The wires in this mains lead are coloured in
accordance with the following code:
BLUE NEUTRAL (N)
BROWN LIVE (L)
GREEN & YELLOW EARTH (E)
Disposing of the appliance:
When disposing of the appliance please remove the
plug by cutting the mains cable as close as possible
to the plug body and dispose of it as described
above.
 The washing machine should not be installed in an
outdoor environment, not even when the area is
sheltered, because it may be very dangerous to
leave it exposed to rain and thunderstorms.
 When the washing machine is installed, the mains
socket must be within easy reach.
 Do not use extensions or multiple sockets.
 The power supply cable must never be bent or
dangerously compressed.
 The power supply cable must only be replaced by
an authorised serviceman.
Warning! The company denies all liability if and when
these norms are not respected.
GREEN &
YELLOW
BROWN
BLUE
13 ampere fuse
CROSS-BAR
CORD GRIP
The first wash cycle
Once the appliance has been installed, and before
you use it for the first time, run a wash cycle with
detergent and no laundry, setting the 90°C
programme without a pre-wash cycle.
5
GB
ServiceTroubleshootingrecautions Carerogrammes DetergentsInstallation Description
Technical details
Model AV 52
Dimensions
59.5 cm wide
85 cm high
52.5 cm deep
Capacity from 1 to 5 kg
Electric
connections
voltage 220/230 Volts 50-60 Hz
maximum absorbed power 2000 W
Water
connections
maximum pressure 1 MPa (10 bar)
minimum pressure 0.05 MPa (0.5 bar)
drum capacity 40 litres
Spin speed up to 500 rpm (60 Hz)
Control
programmes
according to
IEC456 directive
programme 2; temperature 60°C;
run with a load of 5 kg.
This appliance is compliant with the
following European Community
Directives:
- 73/23/CEE of 19/02/73 (Low
Voltage) and subsequent amendments
- 89/336/CEE of 03/05/89
(Electromagnetic Compatibility) and
subsequent amendments
6
GB
Control panel
Washing machine description
Detergent dispenser
ON/OFF
utton
TEM ERATURE
Knob
ROGRAMME
Knob
FUNCTION
uttons
ON-OFF
Led
Detergent dispenser: to add detergent and fabric
softener (see page 9).
FUNCTION buttons: to select the functions
available.
ON/OFF button: to turn the washing machine on
and off.
ON/OFF led, to find out whether the washing
machine is on.
TEM ERATURE knob: to set the temperature or
the cold wash cycle (see page 8).
ROGRAMME knob: to select the wash
programmes.
Remember that this dial should be turned in a
clockwise direction and only when the machine is
off.
7
GB
ServiceTroubleshootingrecautions Carerogrammes DetergentsInstallation Description
Starting and rogrammes
Notes
for the description of the Anti-crease function, please see page 8. The information contained in the table is purely indicative.
Type of fabric and degree of soil Program-
mes
Te m p e -
rature
Detergent Fabric
softener
Cycle
length
(minutes)
Description of wash cycle
pre-
wash wash
Cotton
Extremely-soiled whites (sheets,
tablecloths, etc.) 190°C    150 Pre-wash, wash cycle, rinse cycles,
intermediate and final spin cycles
Heavily-soiled whites (sheets,
tablecloths, etc.) 290°C   140 Wash cycle, rinse cycles, intermediate
and final spin cycles
Heavily-soiled whites and resistant
colours 260°C   140 Wash cycle, rinse cycles, intermediate
and final spin cycles
Heavily soiled whites and resistant
colours 240°C   140 Wash cycle, rinse cycles, intermediate
and final spin cycles
Soiled whites and resistant colours
(coloured linen, dressing gowns,
jumpers, etc.) 60°C   115 Wash cycle, rinse cycles, intermediate
and final spin cycles
Slightly-soiled whites and colours 40°C   115 Wash cycle, rinse cycles, intermediate
and final spin cycles
Slightly-soiled whites and delicate
colours (shirts, jumpers, etc.) 440°C   95 Wash cycle, rinse cycles, intermediate
and final spin cycles
Rinse  Rinse cycles, intermediate and final spin
cycles
Treatment with softeners  Rinse cycles with automatic softener
intake, intermediate and final spin cycles
Spin cycle Draining and final spin cycle
Synthetics
Heavily-soiled resistant colours
(baby linen, etc.) 560°C   85 Wash cycle, rinse cycles, anti-crease or
delicate spin cycle
Heavily-soiled colour synthetics 550°C   85 Wash cycle, rinse cycles, anti-crease or
delicate spin cycle
Heavily-soiled delicate colour
synthetics 540°C   85 Wash cycle, rinse cycles, anti-crease or
delicate spin cycle
Soiled colour synthetics 650°C   75 Wash cycle, rinse cycles, anti-crease or
delicate spin cycle
Delicate colour synthetics
(all types of slightly soiled garments) 740°C   65 Wash cycle, rinse cycles, anti-crease or
delicate spin cycle
Rinse  Rinse cycles, anti-crease or delicate spin
cycle
Treatment with softeners  Rinse cycles with automatic introduction of
softener, anti-crease or delicate spin cycle
Spin cycle Draining and delicate spin cycle
Delicates
Wool (machine-washable) 840°C   55 Wash cycle, rinse cycles, anti-crease or
delicate spin cycle
Rinse  Rinse cycles, anti-crease or delicate spin
cycle
Treatment with softeners  Rinse cycles with automatic introduction of
softener, anti-crease or delicate spin cycle
Spin cycle Draining and delicate spin cycle
Draining Draining without spin cycle
rogramme table
Briefly: starting a programme
1. Set the desired programme.
2. Set the wash temperature (see page 8).
3. Load your laundry into the appliance and shut the door.
4. Add the detergent and any fabric softener (see page 9).
5. Turn the appliance on by pressing button ON/OFF.
6. At the end of the wash cycle wait approximately 3
minutes.
Then turn the washing machine off by pressing
ON/OFF button. You can now open the washing
machine door safely. After having removed the
freshly cleaned washing, leave the door open to
allow air circulation inside the drum.
Always disconnect electricity at the socket and
turn off the water supply.
8
GB
ersonalisations
Setting the temperature
Turn the TEMPERATURE knob to set the wash temperature (see Programme table on page 7).
The temperature can be lowered, or even set to a cold wash ( ).
Functions
To enable the functions, press the button corresponding to the desired function, according to the table below:
Function Effect Comments
Half load
Reduces water
consumption during
the rinse cycles.
We recommend that you use this function only with small laundry loads,
dosing the detergent proportionally.
No Spin
Use this button to
exclude the spin
cycle.
We recommend that you use it when washing garments which are difficult
to iron.
Anti-crease
This feature interrupts the wash cycle (position ), letting the laundry soak in the water before the spin cycle. It
is activated only during the wash cycles for synthetic materials and wool. This feature is very useful because it
prevents delicate and synthetic clothing from wrinkling (for example, when you are unable to remove the
laundry at the end of the wash cycle and it must remain in the machine for several hours). The wash program
can be completed with either a spin cycle or by draining the water without wringing. In the first case, simply
turn the knob PROGRAMME clokwise one click. In the second, turn the knob PROGRAMME to the drain
setting .
In both cases, the knob PROGRAMME must be turned when the machine is off.
9
GB
ServiceTroubleshootingrecautions Carerogrammes DetergentsInstallation Description
Detergents and laundry
Detergent dispenser
Good washing results also depend on the correct
dose of detergent: adding too much detergent won't
necessarily make for a more efficient wash, and may
in fact cause build up on the interior of your
appliance and even pollute the environment.
Open up the detergent
dispenser and pour in
the detergent and fabric
softener, as follows.
compartment 1: Detergent for pre-wash
(powder)
compartment 2: Detergent for the wash cycle
(powder or liquid)
Liquid detergent should only be poured in
immediately prior to the wash cycle start.
compartment 3: Additives (fabric softeners, etc.)
The fabric softener should not overflow from the grid.
 Do not use hand wash detergent because it may
form too much foam.
reparing your laundry
 Divide your laundry according to:
- the type of fabric/the symbol on the label.
- the colours: separate coloured garments from
whites.
 Empty all pockets and check for loose buttons.
 Do not exceed the weight limits stated below,
which refer to the weight when dry:
Sturdy fabrics: max 5 kg
Synthetic fabrics: max 2.5 kg
Delicate fabrics: max 2 kg
Wool: max 1 kg
How much does your laundry weigh?
1 sheet 400-500 g
1 pillow case 150-200 g
1 tablecloth 400-500 g
1 bathrobe 900-1,200 g
1 towel 150-250 g
Special items
Curtains: fold curtains and place them in a pillow
case or mesh bag. Wash them separately without
exceeding half the appliance load.
Quilted coats and windbreakers: if they are
padded with goose or duck down, they can be
machine-washed. Turn the garments inside out and
load a maximum of 2-3 kg, repeating the rinse cycle
once or twice and using the delicate spin cycle.
Trainers: remove any mud. They can be washed
together with jeans and other tough garments, but
not with whites.
Wool: for best results, use a specific detergent,
taking care not to exceed a load of 1 kg.
12
3
10
GB
 The washing machine was designed and built in
compliance with the applicable international safety
regulations. The following information is provided for
your safety and should consequently be read
carefully.
General safety
 This appliance has been designed for non-
professional, household use and its functions must
not be changed.
 This washing machine should only be used by
adults and in accordance with the instructions
provided in this manual.
 Never touch the washing machine when barefoot
or with wet or damp hands or feet.
 Do not pull on the power supply cable to unplug
the appliance from the electricity socket. Pull the
plug out yourself.
 Do not open the detergent dispenser while the
appliance is in operation.
 Do not touch the drain water as it could reach
very high temperatures.
 Never force the washing machine door: this could
damage the safety lock mechanism designed to
prevent any accidental openings.
 In the event of a malfunction, do not under any
circumstances touch internal parts in order to
attempt repairs.
 Always keep children well away from the
appliance while in operation.
 The appliance door tends to get quite hot during
the wash cycle.
 Should it have to be moved, proceed with the
help of two or three people and handle it with the
utmost care. Never try to do this alone, because
the appliance is very heavy.
 efore loading your laundry into the washing
machine, make sure the drum is empty.
Disposal
 Disposing of the packaging material:
observe local regulations, so the packaging can
be re-used.
 Disposing of an old washing machine:
before scrapping your appliance, cut the power
supply cable and remove the appliance door.
Saving energy and respecting the
environment
 To avoid wasting resources, the washing machine
should be used with a full load. A full load instead
of two half loads allows you to save up to 50% on
energy.
 The pre-wash cycle is only necessary on
extremely soiled garments. Avoiding it will save on
detergent, time, water and between 5 and 15%
energy.
 Treating stains with a stain remover or leaving
them to soak before washing will cut down the
need to wash them at high temperatures. A
programme at 60°C instead of 90°C or one at
40°C instead of 60°C will save up to 50% on
energy.
 Use the correct quantity of detergent depending
on the water hardness, how soiled the garments
are and the amount of laundry you have, to avoid
wastage and to protect the environment: despite
being biodegradable, detergents do contain
ingredients that alter the natural balance of the
environment. In addition, avoid using fabric
softener as much as possible.
 If you use your washing machine from late in the
afternoon until the early hours of the morning, you
will help reduce the electricity board's peak load.
 If your laundry has to be dried in a tumble dryer,
select a high spin speed. Having the least water
possible in your laundry will save you time and
energy in the drying process.
recautions and advice
11
GB
Care and maintenance
ServiceTroubleshootingrecautions Carerogrammes DetergentsInstallation Description
Cutting off the water or electricity
supply
 Turn off the water tap after every wash. This will
limit the wear of your appliance's water system
and also prevent leaks.
 Unplug your appliance when cleaning it and
during all maintenance operations.
Cleaning your appliance
The exterior and rubber parts of your appliance can
be cleaned with a soft cloth soaked in lukewarm
soapy water. Do not use solvents or abrasives.
Cleaning the detergent dispenser
Remove the dispenser
by raising it and pulling it
out (see figure).
Wash it under running
water; this operation
should be repeated
frequently.
Caring for your appliance door and
drum
 Always leave the appliance door ajar to prevent
unpleasant odours from forming.
Cleaning the pump
The washing machine is fitted with a self-cleaning
pump that does not require any maintenance.
Checking the water inlet hose
Check the water inlet hose at least once a year. If
you see any cracks, replace it immediately: during
the wash cycles, water pressure is very strong and
a cracked hose could easily split open.
 Never use hoses that have already been used.
1
2
12
GB
Your washing machine could fail to work. efore calling for Assistance (see page 3), make sure the problem
can't easily be solved by consulting the following list.
roblem
The washing machine won't
start.
The wash cycle won't start.
The washing machine fails to
load water.
The washing machine
continuously loads and unloads
water.
The washing machine does not
drain or spin.
The washing machine vibrates
too much during the spin cycle.
The washing machine leaks.
There is too much foam.
ossible causes/Solution:
 The appliance is not plugged into the socket, or not enough to
make contact.
 There has been a power failure.
 The appliance door is not shut properly.
 The ON/OFF button has not been pressed.
 The water tap is not turned on.
 The water inlet hose is not connected to the tap.
 The hose is bent.
 The water tap is not turned on.
 There is a water shortage.
 The water pressure is insufficient.
 The drain hose is not fitted between 65 and 100 cm from the floor
(see page 3).
 The free end of the hose is underwater (see page 3).
 The wall drainage system doesn't have a breather pipe.
If the problem persists even after these checks, turn off the water tap,
switch the appliance off and call for Assistance. If the dwelling is on
one of the upper floors of a building, there may be drain trap problems
causing the washing machine to load and unload water continuously.
In order to avoid such an inconvenience, special anti-drain trap valves
are available in shops.
 The programme does not foresee the draining: some programmes
require enabling the draining manually (see page 7).
 The Anti-crease function is enabled (where available): This function
requires enabling the draining manually.
 The drain hose is bent (see page 3).
 The drain duct is clogged.
 The drum was not unblocked correctly during installation (see page 2).
 The washing machine is not level (see page 2).
 The washing machine is closed in between furniture cabinets and
the wall (see page 2).
 The water inlet hose is not screwed on correctly (see page 2).
 The detergent dispenser is obstructed (to clean it, see page ).
 The drain hose is not secured properly (see page 3).
 The detergent is not suitable for machine washing (it should bear
the definition "for washing machines" or "hand and machine wash",
or the like).
 You used too much detergent.
Troubleshooting
13
GB
Service
ServiceTroubleshootingrecautions Carerogrammes DetergentsInstallation Description
Before calling for Assistance:
Check whether you can solve the problem on your own (see page 2);
Restart the programme to check whether the problem has been solved;
If this is not the case, contact an authorised Technical Service Centre on the telephone number
provided on the guarantee certificate.
Always request the assistance of authorised servicemen.
Notify the operator of:
 the type of problem;
 the appliance model (Mod.);
 the serial number (S/N);
This information can be found on the data plate situated on the rear of the washing machine.
14
GB
ﻲﺑﺮﻋ
لﺎﻤﻌﺘﺳﻻا ﻞﺟأ ﻦﻣ تﺎﻤﻴﻠﻌﺗ
ﺲﺑﻼﻣ ﺔﻟﺎﺴﻏ
AV 52
ﻲﺑﺮﻋ
اﻟﻔﻬﺮس
اﻟﺘﺮآﻴﺐ
اﺧﺮاجاﻟﺠﻬﺎزﻣﻦﺗﻐﻠﻴﻔﻪوﺗﺴﻮﻳﺔاﻟﺠﻬﺎز،16
ﺗﻮﺻﻴﻼتاﻟﻤﺎءواﻟﻜﻬﺮﺑﺎء،
أولدورةﻏﺴﻴﻞ،
ﻣﻮاﺻﻔﺎتﻓﻨﻴﺔ،
وﺻﻒﻏﺴﺎﻟﺔاﻟﻤﻼﺑﺲ20
ﻟﻮﺣﺔاﻟﻘﻴﺎدة،02
اﻟﺘﺸﻐﻴﻞواﻟﺒﺮﻣﺠﺔ،12
ﺑﺒﺴﺎﻃﺔ:ﺗﺸﻐﻴﻞﺑﺮﻧﺎﻣﺞ،12
ﻟﻮﺣﺔاﻟﺒﺮاﻣﺞ،12
ﺗﺸﺨﻴﺺ،22
وﺿﻊدرﺟﺔاﻟﺤﺮارة؛22
وﻇﺎﺋﻒ،22
ﻣﺴﺎﺣﻴﻖﻏﺴﻴﻞوﻣﻼﺑﺲ،32
ﺣﻮضﻣﺴﺎﺣﻴﻖاﻟﻐﺴﻴﻞ،32
ﺗﺤﻀﻴﺮاﻟﻤﻼﺑﺲﻟﻠﻐﺴﻴﻞ،32
أﻗﻤﺸﺔﺧﺎﺻﺔ،32
ﺗﺤﺬﻳﺮاتوﻧﺼﺎﺋﺢ،42
أﻣﻦﻋﺎم،42
اﻟﺘﺨﻠﺺﻣﻦاﻟﻨﻔﺎﻳﺎت،42
اﻻﻗﺘﺼﺎدوواﺣﺘﺮاماﻟﺒﻴﺌﺔ،42
ﺻﻴﺎﻧﺔوﺣﻤﺎﻳﺔ،52
اﻏﻼقاﻟﻤﺎءواﻟﺘﻴﺎراﻟﻜﻬﺮﺑﺎﺋﻲ،52
ﺗﻨﻈﻴﻒﻏﺴﺎﻟﺔاﻟﻤﻼﺑﺲ،52
ﺗﻨﻈﻴﻒﺣﻮضﻣﺴﺎﺣﻴﻖاﻟﻐﺴﻴﻞ،52
ﺣﻤﺎﻳﺔﺑﺎباﻟﻐﺴﺎﻟﺔوﺣﻮضﻏﺴﻴﻞاﻟﻐﺴﺎﻟﺔ،52
ﺗﻨﻈﻴﻒﻣﻀﺨﺔﺗﻔﺮﻳﻎاﻟﻐﺴﺎﻟﺔﻣﻦاﻟﻤﺎء،5
2
ﻓﺤﺺﺧﺮﻃﻮمﺗﻐﺬﻳﺔاﻟﻐﺴﺎﻟﺔﺑﺎﻟﻤﺎء،52
ﺣﺼﻮلﺑﻌﺾاﻟﻤﺸﺎآﻞوﺣﻠﻮلﻟﻬﺎ،62
اﻟﺼﻴﺎﻧﺔاﻟﻔﻨﻴﺔ،72
15
19-18-17-16
16-17
18
19
لﺎﻤﻌﺘﺳﻻا ﻞﺟأ ﻦﻣ تﺎﻤﻴﻠﻌﺗ
ﻣ
ـ
ﻦاﻟ
ـ
ﻤ
ـ
ﻬ
ـ
ﻢاﻟ
ـ
ﺤ
ـ
ﻔ
ـ
ﺎظﻋ
ـ
ﻠ
ـ
ﻰه
ـ
ﺬااﻟ
ـ
ﻜ
ـ
ﺘ
ـ
ﻴ
ـ
ﺐﻟ
ـ
ﻴ
ـ
ﻤ
ـ
ﻜ
ـ
ﻨ
ـ
ﻜ
ـ
ﻢاﻟ
ـ
ﻌ
ـ
ﻮدةاﻟ
ـ
ﻴ
ـ
ﻪﻋ
ـ
ﻨ
ـ
ﺪاﻟ
ـ
ﺤ
ـ
ﺎﺟ
ـ
ﺔاﻟ
ـ
ﻰاﻟ
ـ
ﺘ
ـ
ﻌ
ـ
ﺮف
ﻋﻠﻰﻣﻌﻠﻮﻣﺎتﻋﻦاﻟﺠﻬﺎزﻓﻲأيﻟﺤﻈﺔ،ﻓﻲﺣﺎﻟﺔﺑﻴﻊاﻟﺠﻬﺎزأواﻋﻄﺎءهآﻬﺪﻳﺔأو
ﻋﻨﺪﻧﻘﻞاﻟﺠﻬﺎزﻣﻦﻣﻜﺎنﻻﺧﺮ،ﺗﺄآﺪواﻣﻦأنﻳﺒﻘﻰهﺬااﻟﻜﺘﻴﺐﻣﻊاﻟﺠﻬﺎزوذﻟﻚ
ﻟ
ـ
ﺘ
ـ
ﻘ
ـ
ﺪﻳ
ـ
ﻢﻣ
ـ
ﻌ
ـ
ﻠ
ـ
ﻮﻣ
ـ
ﺎتﺗ
ـ
ﺘ
ـ
ﻌ
ـ
ﻠ
ـ
ﻖﺑ
ـ
ﺘ
ـ
ﺸ
ـ
ﻌ
ـ
ﻴ
ـ
ﻞوﺑ
ـ
ﺮﻣ
ـ
ﺠ
ـ
ﺔاﻟ
ـ
ﺠ
ـ
ﻬ
ـ
ﺎزﺑ
ـ
ﺎﻻﺿ
ـ
ﺎﻓ
ـ
ﺔاﻟ
ـ
ﻰاﻟ
ـ
ﻨ
ـ
ﺼ
ـ
ﺎﺋ
ـ
ﺢواﻟ
ـ
ﺘ
ـ
ﺤ
ـ
ﺬﻳ
ـ
ﺮ
ﻟﻠﻤﺎﻟﻚاﻟﺠﺪﻳﺪﻟﻠﺠﻬﺎز.
أﻗ
ـ
ﺮؤواﺑ
ـ
ﺘ
ـ
ﻤ
ـ
ﻌ
ـ
ﻦاﻟ
ـ
ﺘ
ـ
ﻌ
ـ
ﻠ
ـ
ﻴ
ـ
ﻤ
ـ
ﺎت:ﻓ
ـ
ﻲداﺧ
ـ
ﻞه
ـ
ﺬااﻟ
ـ
ﻜ
ـ
ﺘ
ـ
ﻴ
ـ
ﺐﻣ
ـ
ﻮﺟ
ـ
ﻮدﻣ
ـ
ﻌ
ـ
ﻠ
ـ
ﻮﻣ
ـ
ﺎته
ـ
ﺎﻣ
ـ
ﺔﺗ
ـ
ﺘ
ـ
ﻌ
ـ
ﻠ
ـ
ﻖ
ﺑﺎﻟﺘﺮآﻴﺐ،اﻻﺳﺘﻌﻤﺎل،وأﻣﻦاﻟﺠﻬﺎز.
اﺧﺮاجاﻟﺠﻬﺎزﻣﻦﺗﻐﻠﻴﻔﻪوﺗﺴﻮﻳﺔاﻟﺠﻬﺎز
اﺧﺮاجاﻟﺠﻬﺎزﻣﻦﺗﻐﻠﻴﻔﻪ
1.اﺧﺮﺟﻮااﻟﻐﺴﺎﻟﺔﻣﻦﺗﻐﻠﻴﻔﻬﺎ
2.ﺗﺄآﺪواﻣﻦاﻟﻐﺴﺎﻟﺔﻟﻢﻳﺤﺪثﻟﻬﺎأﺿﺮارﺧﻼلﺷﺤﻨﻬﺎوﻧﻘﻠﻬﺎﻣﻦﻣﻜﺎنﻻﺧﺮ،
اذاآ
ـ
ﺎناﻟ
ـ
ﺠ
ـ
ﻬ
ـ
ﺎزﻣ
ـ
ﻀ
ـ
ﺮرأوﻣ
ـ
ﻀ
ـ
ﺮوبﻓ
ـ
ﻲﻣ
ـ
ﻜ
ـ
ﺎنﻣ
ـ
ﺎﻻﺗ
ـ
ﻘ
ـ
ﻮﻣ
ـ
ﻮاﺑ
ـ
ﻌ
ـ
ﻤ
ـ
ﻠ
ـ
ﻴ
ـ
ﺔﺗ
ـ
ﻮﺻ
ـ
ﻴ
ـ
ﻠ
ـ
ﻪأو
ﺗﺮآﻴﺒﻪ،واﺗﺼﻠﻮاﺑﺎﻟﺒﺎﺋﻊ.
3.اﺧ
ـ
ﻠ
ـ
ﻌ
ـ
ﻮااﻟ
ـ
ﺜ
ـ
ﻼثﺑ
ـ
ﺮاﻏ
ـ
ﻲاﻟ
ـ
ﺘ
ـ
ﻲﺗ
ـ
ﺤ
ـ
ﻤ
ـ
ﻲ
اﻟﺠﻬﺎزﺧﻼلﻋﻤﻠﻴﺔاﻟﻨﻘﻞ،وآﺬﻟﻚاﺧﻠﻌﻮا
اﻟ
ـ
ﻘ
ـ
ﻄ
ـ
ﻊاﻟ
ـ
ﻤ
ـ
ﻄ
ـ
ﺎﻃ
ـ
ﻴ
ـ
ﺔوﻣ
ـ
ﺒ
ـ
ﺎﻋ
ـ
ﺪآ
ـ
ﻞواﺣ
ـ
ﺪةﻣ
ـ
ﻦ
ه
ـ
ﺬه،اﻟ
ـ
ﺘ
ـ
ﻲﺗ
ـ
ﻜ
ـ
ﻮنﻣ
ـ
ﻮﺟ
ـ
ﻮدةﻓ
ـ
ﻲاﻟ
ـ
ﻤ
ـ
ﻨ
ـ
ﻄ
ـ
ﻘ
ـ
ﺔ
اﻟﺨﻠﻔﻴﺔﻣﻦاﻟﺠﻬﺎز)اﻧﻈﺮاﻟﻰاﻟﺸﻜﻞ(
4.اﻏﻠﻘﻮااﻟﺜﻘﻮبﺑﻮاﺳﻄﺔاﻷﻏﻄﻴﺔاﻟﺒﻼﺳﺘﻴﻜﻴﺔاﻟﺘﻲﺗﻜﻮنﻣﺰودةﻣﻊاﻟﺠﻬﺎز.
5.أﻏ
ـ
ﻠ
ـ
ﻘ
ـ
ﻮاﺑ
ـ
ﺎﻷﻏ
ـ
ﻄ
ـ
ﻴ
ـ
ﺔاﻟ
ـ
ﺘ
ـ
ﻲﺗ
ـ
ﻜ
ـ
ﻮنﻣ
ـ
ﺰودةﻣ
ـ
ﻊاﻟ
ـ
ﺠ
ـ
ﻬ
ـ
ﺎزاﻟ
ـ
ﺜ
ـ
ﻼثﺛ
ـ
ﻘ
ـ
ﻮبﺣ
ـ
ﻴ
ـ
ﺚﻳ
ـ
ﻜ
ـ
ﻮن
ﻣ
ـ
ﻮﺿ
ـ
ﻮعﻗ
ـ
ﺎﺑ
ـ
ﺲاﻟ
ـ
ﺘ
ـ
ﻴ
ـ
ﺎراﻟ
ـ
ﻜ
ـ
ﻬ
ـ
ﺮﺑ
ـ
ﺎﺋ
ـ
ﻲ)اﻟ
ـ
ﺬآ
ـ
ﺮ(اﻟ
ـ
ﺬيﻳ
ـ
ﻜ
ـ
ﻮنﻣ
ـ
ﻮﺟ
ـ
ﻮدﻓ
ـ
ﻲﺧ
ـ
ﻠ
ـ
ﻒاﻟ
ـ
ﺠ
ـ
ﻬ
ـ
ﺎز
ﻣﻦاﻷﺳﻔﻞﻋﻠﻰاﻟﻴﻤﻴﻦ.
6.ﺣﺎﻓﻈﻮاﻋﻠﻰﺟﻤﻴﻊاﻟﻘﻄﻊاﻟﺘﻲﺗﻢﻓﻜﻬﺎ:ﻋﻨﺪﻧﻘﻞاﻟﺠﻬﺎزﻣﻦﻣﻜﺎنﻻﺧﺮﻳﺠﺐ
ﺗﺮآﻴﺐهﺬهاﻟﻘﻄﻊﻣﻜﺎﻧﻬﺎﻣﻦﺟﺪﻳﺪ.
ﻳﺠﺐﻋﺪمﺗﺮكاﻷﻃﻔﺎلاﻟﻠﻌﺐﺑﺘﻐﻠﻴﻒاﻟﺠﻬﺎز.
ﺗﺴﻮﻳﺔاﻟﺠﻬﺎز
1.رآﺒﻮاﻏﺴﺎﻟﺔاﻟﻤﻼﺑﺲﻋﻠﻰأرﺿﻴﺔﻣﺴﺘﻮﻳﺔوﺻﻠﺒﺔﺑﺪونأرﺗﻜﺎزهﺎﻋﻠﻰﺣﺎﺋﻂ
أوﻗﻄﻊأﺛﺎثأوأيﺷﻲءاﺧﺮ.
2.اذاآ
ـ
ﺎﻧ
ـ
ﺖاﻷرﺿ
ـ
ﻴ
ـ
ﺔﻏ
ـ
ﻴ
ـ
ﺮﻣ
ـ
ﺴ
ـ
ﺘ
ـ
ﻮﻳ
ـ
ﺔ،
ﻳ
ـ
ﻤ
ـ
ﻜ
ـ
ﻨ
ـ
ﻜ
ـ
ﻢاﻻﺳ
ـ
ﺘ
ـ
ﻌ
ـ
ﺎﻧ
ـ
ﺔﺑ
ـ
ﺎﻷرﺟ
ـ
ﻞاﻷﻣ
ـ
ﺎﻣ
ـ
ﻴ
ـ
ﺔ
اﻟﻤﺘﺤﺮآﺔواﻟﺘﻲﻗﺎﺑﻠﺔاﻟﺘﻌﺪﻳﻞﻓﻲارﺗﻔﺎﻋﻬﺎ
وذﻟﻚﻻزاﻟﺔﻋﺪماﺳﺘﻮاءاﻷرﺿﻴﺔ)اﻇﺮ
اﻟﻰاﻟﺸﻜﻞ(.زاوﻳﺔاﻟﻤﻴﻼناﻟﺘﻲﻳﻤﻜﻨﻜﻢ
ﻗﻴﺎﺳﺘﻬﺎﻋﻠﻰاﻟﺴﻄﺢاﻟﻌﻠﻮيﻟﻠﺠﻬﺎزﻳﺠﺐ
أنﻻﻳﺰﻳﺪﻋﻦ2درﺟﺔ.
وﺿ
ـ
ﻊاﻟ
ـ
ﺠ
ـ
ﻬ
ـ
ﺎزﺑ
ـ
ﺸ
ـ
ﻜ
ـ
ﻞﻣ
ـ
ﺴ
ـ
ﺘ
ـ
ﻮيﺗ
ـ
ﻌ
ـ
ﻤ
ـ
ﻞﻋ
ـ
ﻠ
ـ
ﻰﺛ
ـ
ﺒ
ـ
ﺎتاﻟ
ـ
ﺠ
ـ
ﻬ
ـ
ﺎزﺑ
ـ
ﻤ
ـ
ﻜ
ـ
ﺎﻧ
ـ
ﻪوﻋ
ـ
ﺪمذﺑ
ـ
ﺬﺑ
ـ
ﺘ
ـ
ﻪ،وﻋ
ـ
ﺪم
ﺳﻤﺎعاﺻﻮاتﻣﺰﻋﺠﺔﺧﻼلﻋﻤﻞاﻟﺠﻬﺎزأوﺗﺤﺮكاﻟﺠﻬﺎزﻣﻦﻣﻜﺎﻧﻪﺧﻼلﻋﻤﻞ
اﻟﺠﻬﺎز،ﻓﻲﺣﺎﻟﺔوﺟﻮدﻣﻜﻴﺖأوﺳﺠﺎدﻋﻠﻰاﻷرﺿﻴﺔﺗﺤﺖاﻟﺠﻬﺎزﻋﻴﺮوااﻷرﺟﻞ
ﺗﺤﺖاﻟﺠﻬﺎزﺑﺤﻴﺖﻳﺘﻢﺗﺮكﻣﺴﺎﻓﺔﺑﻴﻦاﻟﺠﻬﺎزواﻷرﺿﻴﺔﺗﺤﺘﻪوذﻟﻚﻟﺘﺮكﺣﻴﺰ
ﻟﺪﺧﻮلاﻟﻬﻮاءﻣﻦأﺟﻞاﻟﺘﻬﻮﻳﺔ.
ﺗﻮﺻﻴﻞاﻟﻤﺎءواﻟﻜﻬﺮﺑﺎءﺑﺎﻟﺠﻬﺎز
ﺗﻮﺻﻴﻞﺧﺮﻃﻮمﺗﻐﺬﻳﺔاﻟﺠﻬﺎزﺑﺎﻟﻤﺎء
1.أدﺧﻠﻮاﺣﻠﻘﺔﻋﺪمﺗﺴﺮباﻟﻤﺎءاﻟﻤﺸﺎر
ﻟﻬﺎﺑﺎﻟﺤﺮفAﻓﻲﻧﻬﺎﻳﺔﺧﺮﻃﻮموارﺑﻄﻮه
ﺑ
ـ
ﻤ
ـ
ﺤ
ـ
ﺒ
ـ
ﺲاﻟ
ـ
ﻤ
ـ
ﺎءاﻟ
ـ
ﺒ
ـ
ﺎردﺑ
ـ
ﻔ
ـ
ﺘ
ـ
ﺤ
ـ
ﺔﻣ
ـ
ﺴ
ـ
ﻨ
ـ
ﻨ
ـ
ﻪﺑ
ـ
ﺴ
ـ
ﻦ
3/4ﻏﺎز)اﻧﻈﺮاﻟﻰاﻟﺸﻜﻞ(
ﻗﺒﻞوﺻﻠﻪﺑﺎﻟﺠﻬﺎزاﺗﺮآﻮااﻟﻤﺎءﻳﺨﺮج
ﻣﻦاﻟﻤﺤﺒﺲﺣﺘﻰﺧﺮوجﻣﺎءﺻﺎﻓﻴﺔﻣﻦ
اﻟﻤﺤﺒﺲ.
2.اﺷﺒﻜﻮااﻟﺨﺮﻃﻮماﻟﺬيﻳﻐﺬياﻟﻐﺴﺎﻟﺔ
ﺑﺎﻟﻤﺎءوذﻟﻚﺑﺮﺑﻄﻪﺑﻤﺪﺧﻞاﻟﻤﺎءاﻟﻤﻮﺟﻮد
ﻓﻲﻇﻬﺮاﻟﻐﺴﺎﻟﺔﻣﻦاﻟﺨﻠﻒﻓﻲاﻟﻤﻨﻄﻘﺔ
اﻟﻌﻠﻴﺎﻋﻠﻰاﻟﻴﻤﻴﻦ.)اﻧﻈﺮاﻟﻰاﻟﺸﻜﻞ(
3.ﺧ
ـ
ﺬواﺣ
ـ
ﺬرآ
ـ
ﻢﻣ
ـ
ﻦﻻﻳ
ـ
ﻜ
ـ
ﻮناﻟ
ـ
ﺨ
ـ
ﺮﻃ
ـ
ﻮمﻣ
ـ
ﻄ
ـ
ﻮيأوﻣ
ـ
ﺨ
ـ
ﻨ
ـ
ﻮقﻓ
ـ
ﻲﻣ
ـ
ﻜ
ـ
ﺎنﻣ
ـ
ﺎﻋ
ـ
ﻠ
ـ
ﻰ
ﻃﻮلاﻣﺘﺪاده.
ﺿﻐﻂﺷﺒﻜﺔاﻟﻤﺎءﻳﺠﺐأنﺗﻜﻮنﺑﺎﻟﻘﻴﻢاﻟﺘﻲﺗﻜﻮنﻣﻌﻄﻴﺔوﻣﻜﺘﻮﺑﺔﻻﺋﺤﺔاﻟﺨﺼﺎﺋﺺ
اﻟﻔﻨﻴﺔﻟﻠﺠﻬﺎز)اﻧﻈﺮاﻟﻰاﻟﺼﻔﺤﺔاﻟﺠﺎﻧﺒﻴﺔ(
اذاآﺎنﻃﻮلﺧﺮﻃﻮمﺗﻐﺬﻳﺔاﻟﻐﺴﺎﻟﺔﺑﺎﻟﻤﺎءﻏﻴﺮآﺎﻓﻲاﺳﺘﻌﻴﻨﻮاﺑﻘﺴﻢاﻟﺼﻴﺎﻧﺔاﻟﻔﻨﻴﺔأو
اﻟﻤﺤﻼتاﻟﻤﺨﺘﺼﺔأوﻓﻨﻲﻣﺆهﻞﺑﺎﻟﻘﻴﺎمﺑﻌﻤﻠﻴﺎتاﻟﺼﻴﺎﻧﺔاﻟﻔﻨﻴﺔ.
A
16
اوﺻﻠﻮاﺧﺮﻃﻮمﺗﻔﺮﻳﻎاﻟﻤﺎءﻣﻦﺣﻮض
ﻏ
ـ
ﺴ
ـ
ﻴ
ـ
ﻞاﻟ
ـ
ﻐ
ـ
ﺴ
ـ
ﺎﻟ
ـ
ﺔﺑ
ـ
ﺪونﻃ
ـ
ﻮﻳ
ـ
ﻪ،ﺑ
ـ
ﻤ
ـ
ﺎﺳ
ـ
ﻮرة
ﺻ
ـ
ﺮفﻟ
ـ
ﻠ
ـ
ﻤ
ـ
ﺎء،أوﺑ
ـ
ﻤ
ـ
ﺼ
ـ
ﺮفﻣ
ـ
ﻮﺟ
ـ
ﻮدﻓ
ـ
ﻲ
اﻟﺤﺎﺋﻂﻋﻠﻰأنﻳﻜﻮنارﺗﻔﺎﻋﻪﻣﺎﺑﻴﻦ56
و001ﺳﻨﺘﻤﺘﺮﻋﻦﺳﻄﺢاﻷرض
أوﻗ
ـ
ﻮﻣ
ـ
ﻮاﺑ
ـ
ﻮﺿ
ـ
ﻌ
ـ
ﻪﻋ
ـ
ﻠ
ـ
ﻰﺣ
ـ
ﺎﻓ
ـ
ﺔﻣ
ـ
ﻐ
ـ
ﺴ
ـ
ﻠ
ـ
ﺔ
أوﺣ
ـ
ﻮضﺣ
ـ
ﻤ
ـ
ﺎم،ارﺑ
ـ
ﻄ
ـ
ﻮااﻟ
ـ
ﺨ
ـ
ﺮﻃ
ـ
ﻮم
ﺑ
ـ
ﺤ
ـ
ﺎﻣ
ـ
ﻞاﻟ
ـ
ﺨ
ـ
ﺮﻃ
ـ
ﻮماﻟ
ـ
ﺬيﻳ
ـ
ﻜ
ـ
ﻮنﻣ
ـ
ﺰودﻣ
ـ
ﻊ
اﻟﺠﻬﺎزﺑﻤﺤﺒﺲاﻟﻤﺎء)اﻧﻈﺮاﻟﻰاﻟﺸﻜﻞ(
اﻟﻄﺮفاﻟﺤﺮﻣﻦاﻟﺨﺮﻃﻮمﻳﺠﺐأنﻻ
ﻳﻜﻮنﻣﻐﻤﻮرﻓﻲاﻟﻤﺎء.
ﻏﻴﺮﻣﻨﺼﻮحاﺳﺘﺨﺪامﺧﺮاﻃﻴﻢﺗﻄﻮﻳﻞ،اذاآﺎنﻣﻦاﻟﻀﺮورياﺳﺘﺨﺪامﺧﺮاﻃﻴﻢ
اﻟ
ـ
ﺘ
ـ
ﻄ
ـ
ﻮﻳ
ـ
ﻞﻳ
ـ
ﺠ
ـ
ﺐأنﻳ
ـ
ﻜ
ـ
ﻮنﻗ
ـ
ﻄ
ـ
ﺮه
ـ
ﺬااﻟ
ـ
ﺨ
ـ
ﺮﻃ
ـ
ﻮمﻧ
ـ
ﻔ
ـ
ﺲﻗ
ـ
ﻄ
ـ
ﺮاﻟ
ـ
ﺨ
ـ
ﺮﻃ
ـ
ﻮماﻟ
ـ
ﺮﺋ
ـ
ﻴ
ـ
ﺴ
ـ
ﻲوﻳ
ـ
ﺠ
ـ
ﺐ
أنﻻﻳﺰﻳﺪﻃﻮﻟﻪﻋﻦ051ﺳﻨﺘﻤﺘﺮ.
65 - 100 cm
وﺻﻞاﻧﺒﻮبﺗﻔﺮﻳﻎاﻟﻤﺎءﻣﻦﺣﻮضﻏﺴﻴﻞاﻟﻐﺴﺎﻟﺔ
17
اﻟﺘﻮﺻﻴﻞﺑﺸﺒﻜﺔاﻟﺘﻴﺎراﻟﻜﻬﺮﺑﺎﺋﻲ
ﻗﺒﻞادﺧﺎلﻗﺎﺑﺲاﻟﺘﻴﺎراﻟﻜﻬﺮﺑﺎﺋﻲ)اﻟﺬآﺮ(ﺑﻤﻘﺒﺲاﻟﺘﻴﺎراﻟﻜﻬﺮﺑﺎﺋﻲ)اﻷﻧﺜﻰ(ﺗﺄآﺪوا
ﻣﻦأن:
ﻣﻘﺒﺲاﻟﺘﻴﺎراﻟﻜﻬﺮﺑﺎﺋﻲ)اﻷﻧﺜﻰ(ﻟﻬﺎﺧﻂأرضﻓﻌﺎلوﺧﺎﺿﻊاﻟﻰاﻟﻘﻮاﻧﻴﻦ
ﻣ
ـ
ﻘ
ـ
ﺒ
ـ
ﺲاﻟ
ـ
ﺘ
ـ
ﻴ
ـ
ﺎراﻟ
ـ
ﻜ
ـ
ﻬ
ـ
ﺮﺑ
ـ
ﺎﺋ
ـ
ﻲ)اﻷﻧ
ـ
ﺜ
ـ
ﻰ(ﻗ
ـ
ﺎدرﻋ
ـ
ﻠ
ـ
ﻰﺗ
ـ
ﺤ
ـ
ﻤ
ـ
ﻞاﻟ
ـ
ﻘ
ـ
ﺪرةاﻟ
ـ
ﻜ
ـ
ﻬ
ـ
ﺮﺑ
ـ
ﺎﺋ
ـ
ﻴ
ـ
ﺔاﻟ
ـ
ﻘ
ـ
ﺼ
ـ
ﻮى
اﻟ
ـ
ﻤ
ـ
ﻤ
ـ
ﺘ
ـ
ﺼ
ـ
ﺔﻣ
ـ
ﻦﻗ
ـ
ﺒ
ـ
ﻞاﻟ
ـ
ﺠ
ـ
ﻬ
ـ
ﺎزوﻳ
ـ
ﻜ
ـ
ﻮنﻣ
ـ
ﺸ
ـ
ﺎرﻟ
ـ
ﻬ
ـ
ﺎﻓ
ـ
ﻲﻻﺋ
ـ
ﺤ
ـ
ﺔاﻟ
ـ
ﺨ
ـ
ﺼ
ـ
ﺎﺋ
ـ
ﺺاﻟ
ـ
ﻔ
ـ
ﻨ
ـ
ﻴ
ـ
ﺔﻟ
ـ
ﻠ
ـ
ﺠ
ـ
ﻬ
ـ
ﺎز
)اﻧﻈﺮﺻﻔﺤﺔ91(.
ﻓﺮقﺟﻬﺪﺷﺒﻜﺔاﻟﻜﻬﺮﺑﺎءﻳﺠﺐأنﺗﻜﻮنﻓﻲاﻟﻘﻴﻢاﻟﺘﻲﺗﻜﻮنﻣﻮﺟﻮدةواﻟﻤﺸﺎرﻟﻬﺎ
ﻓﻲﻻﺋﺤﺔاﻟﺨﺼﺎﺋﺺاﻟﻔﻨﻴﺔﻟﻠﺠﻬﺎز)اﻧﻈﺮﺻﻔﺤﺔ91(.
ﻣﻘﺒﺲاﻟﺘﻴﺎراﻟﻜﻬﺮﺑﺎﺋﻲ)اﻷﻧﺜﻰ(ﻣﻼﺋﻢﻟﻘﺎﺑﺲاﻟﺘﻴﺎراﻟﻜﻬﺮﺑﺎﺋﻲ)اﻟﺬآﺮ(اﻟﻤﺰودﻣﻊ
اﻟﻐﺴﺎﻟﺔﻓﻲﺣﺎﻟﺔﻋﺪمﺗﻮاﻓﻘﻬﻢﻗﻮﻣﻮاﺑﻌﻤﻠﻴﺔﺗﻐﻴﻴﺮاﺣﺪاهﻤﺎ.
ﺟ
ـ
ﻬ
ـ
ﺎزآ
ـ
ﻢاﻟ
ـ
ﻜ
ـ
ﻬ
ـ
ﺮﺑ
ـ
ﺎﺋ
ـ
ﻲﻣ
ـ
ﺰودﺑ
ـ
ﻘ
ـ
ﺎﺑ
ـ
ﺲ)اﻟ
ـ
ﺬآ
ـ
ﺮ(ﻣ
ـ
ﺼ
ـ
ﻬ
ـ
ﻮروﻗ
ـ
ﺎدرﻋ
ـ
ﻠ
ـ
ﻰﺗ
ـ
ﺤ
ـ
ﻤ
ـ
ﻞﺗ
ـ
ﻴ
ـ
ﺎرآ
ـ
ﻬ
ـ
ﺮﺑ
ـ
ﺎﺋ
ـ
ﻲ
31أﻣﺒﻴﺮوﻳﻤﻜﻨﻜﻢادﺧﺎلهﺬااﻟﻘﺎﺑﺲﺑﻤﻘﺒﺲ)اﻻﻧﺜﻰ(ﻳﺘﻮاﻓﻖﻣﻌﺔﻟﻼﺳﺘﺨﺪاماﻟﻤﺒﺎﺷﺮ،
اﻗﺮؤوااﻟﺘﻌﻠﻴﻤﺎتاﻟﺘﺎﻟﻴﺔﻗﺒﻞاﺳﺘﺨﺪاماﻟﺠﻬﺎزاﻟﻜﻬﺮﺑﺎﺋﻲ.
اﻧ
ـ
ﺘ
ـ
ﺒ
ـ
ﺎه:اﻟ
ـ
ﺠ
ـ
ﻬ
ـ
ﺎزاﻟ
ـ
ﻜ
ـ
ﻬ
ـ
ﺮﺑ
ـ
ﺎﺋ
ـ
ﻲﻳ
ـ
ﺠ
ـ
ﺐأنﻳ
ـ
ﻜ
ـ
ﻮنﻣ
ـ
ﻮﺻ
ـ
ﻮلﺑ
ـ
ﺨ
ـ
ﻂأرضﻓ
ـ
ﻌ
ـ
ﺎل،اﻟ
ـ
ﻌ
ـ
ﻤ
ـ
ﻠ
ـ
ﻴ
ـ
ﺎت
اﻟﻤﺸﺮوﺣﺔأدﻧﺎههﻲﺗﻌﻠﻴﻤﺎتﻣﻮﺟﻪاﻟﻰﻓﻨﻲآﻬﺮﺑﺎﺋﻲﻣﺨﺘﺺ.
ﺗﻐﻴﻴﺮاﻟﻤﻨﺼﻬﺮة)اﻟﻔﻴﻮز(
ﻋ
ـ
ﻨ
ـ
ﺪﺗ
ـ
ﻐ
ـ
ﻴ
ـ
ﻴ
ـ
ﺮاﻟ
ـ
ﻤ
ـ
ﻨ
ـ
ﺼ
ـ
ﻬ
ـ
ﺮة)اﻟ
ـ
ﻔ
ـ
ﻴ
ـ
ﻮز(اﻟ
ـ
ﻤ
ـ
ﻌ
ـ
ﻄ
ـ
ﻮب،اﺳ
ـ
ﺘ
ـ
ﺨ
ـ
ﺪﻣ
ـ
ﻮاداﺋ
ـ
ﻤ
ـ
ﺎﻣ
ـ
ﻨ
ـ
ﺼ
ـ
ﻬ
ـ
ﺮة31اﻣ
ـ
ﺒ
ـ
ﻴ
ـ
ﺮ
ATSAﺧﺎﺿﻌﺔﻟﻠﻤﻘﻴﺎس2631SBوأﻋﻴﺪواﻏﻄﺎءاﻟﻤﻨﺼﻬﺮةاﻟﻰﻣﻜﺎﻧﻪاﻟﺬي
آ
ـ
ﺎنﻓ
ـ
ﻴ
ـ
ﻪ،ﻓ
ـ
ﻲﺣ
ـ
ﺎﻟ
ـ
ﺔﻓ
ـ
ﻘ
ـ
ﺪانه
ـ
ﺬااﻟ
ـ
ﻐ
ـ
ﻄ
ـ
ﺎءﻻﺗ
ـ
ﺴ
ـ
ﺘ
ـ
ﺨ
ـ
ﺪﻣ
ـ
ﻮااﻟ
ـ
ﻘ
ـ
ﺎﺑ
ـ
ﺲﺣ
ـ
ﺘ
ـ
ﻰاﻟ
ـ
ﺤ
ـ
ﺼ
ـ
ﻮلﻋ
ـ
ﻠ
ـ
ﻰ
هﺬااﻟﻐﻄﺎءوﺗﺮآﻴﺒﻪﻓﻲﻣﻜﺎﻧﻪ.
ﺗﻐﻴﻴﺮﻏﻄﺎءاﻟﻤﻨﺼﻬﺮات)اﻟﻔﻴﻮزات(:
اذاﺗﻢﺗﻐﻴﻴﺮﻏﻄﺎءاﻟﻔﻴﻮزاتﺗﺎآﺪواﻣﻦأنﻟﻮﻧﻪهﻮاﻟﻠﻮناﻟﺼﺤﻴﺢواﻟﻤﺸﺎرﻟﻪ
ﺑﻮاﺳﻄﺔاﻟﺮﻗﻢأواﻟﻜﺘﺎﺑﺔاﻟﻤﻠﻮﻧﺔاﻟﻤﻮﺟﻮدةﻋﻠﻰﻗﺎﻋﺪةاﻟﻘﺎﺑﺲ،ﻟﻘﻄﻊاﻟﻐﻴﺎر،اﺳﺘﻌﻴﻨﻮا
ﻣﺒﺎﺷﺮةﺑﻘﺴﻢاﻟﺼﻴﺎﻧﺔاﻟﻔﻨﻴﺔاﻟﻘﺮﻳﺐﻋﻠﻴﻜﻢ.
ﻓﻚاﻟﻘﺎﺑﺲ)اﻟﺬآﺮ(:
ﻓﻲﺣﺎﻟﺔأنﻳﻜﻮناﻟﺠﻬﺎزﻣﺰودﺑﻘﺎﺑﺲ)اﻟﺬآﺮ(ﻻﻳﻤﻜﻦﻓﻜﻪﻷﻧﻪﻣﺼﻬﻮروﺗﺮﻳﺪون
ﺗﻤﺮﻳﺮﺳﻠﻚاﻟﺘﻐﺬﻳﺔاﻟﻜﻬﺮﺑﺎﺋﻴﺔﻣﻦﺧﻼلﺛﻘﻮبأوﻓﺘﺤﺎتﺻﻐﻴﺮةﻻﻳﻤﺮﻣﻦﺧﻼﻟﻬﺎ
اﻟﻘﺎﺑﺲﻗﻮﻣﻮاﺑﺘﻐﻴﻴﺮاﻟﻘﺎﺑﺲاﻟﻤﺼﻬﻮرﺑﻘﺎﺑﺲﻳﻤﻜﻦﻓﻜﻪوﺗﺮآﻴﺒﻪوﻗﺎدرﻋﻠﻰﺗﺤﻤﻞ
31أﻣﺒﻴﺮوﻳﺤﻤﻞاﻟﺸﻌﺎرISB.
أو
وﺻ
ـ
ﻞﺳ
ـ
ﻠ
ـ
ﻚاﻟ
ـ
ﺘ
ـ
ﻐ
ـ
ﺬﻳ
ـ
ﺔاﻟ
ـ
ﻜ
ـ
ﻬ
ـ
ﺮﺑ
ـ
ﺎﺋ
ـ
ﻴ
ـ
ﺔﺑ
ـ
ﻤ
ـ
ﻨ
ـ
ﺒ
ـ
ﻊاﻟ
ـ
ﺘ
ـ
ﻴ
ـ
ﺎراﻟ
ـ
ﻜ
ـ
ﻬ
ـ
ﺮﺑ
ـ
ﺎﺋ
ـ
ﻲﺑ
ـ
ﻮاﺳ
ـ
ﻄ
ـ
ﺔﻣ
ـ
ﻔ
ـ
ﺘ
ـ
ﺎحﻗ
ـ
ﺎدرﻋ
ـ
ﻠ
ـ
ﻰ
ﺗ
ـ
ﺤ
ـ
ﻤ
ـ
ﻞ31أﻣ
ـ
ﺒ
ـ
ﻴ
ـ
ﺮ)وﺧ
ـ
ﺎﺿ
ـ
ﻊﻟ
ـ
ﻠ
ـ
ﻤ
ـ
ﻘ
ـ
ﻴ
ـ
ﺎس3375SB(ﻳ
ـ
ﻤ
ـ
ﻜ
ـ
ﻦاﻟ
ـ
ﻮﺻ
ـ
ﻮلاﻟ
ـ
ﻴ
ـ
ﻪﺑ
ـ
ﺪون
ﺗﺤﺮﻳﻚاﻟﺠﻬﺎزﻣﻦﻣﻜﺎﻧﻪ.
ازاﻟﺔاﻟﻘﺎﺑﺲ)اﻟﺬآﺮ(:
ﻗﺒﻞرﻣﻲاﻟﻘﺎﺑﺲاﺟﻌﻠﻮةﻏﻴﺮﻗﺎﺑﻞﻟﻼﺳﺘﻌﻤﺎلوذﻟﻚﺑﻜﺴﺮرؤوﺳﻪﺑﺤﻴﺚﻻﻳﻤﻜﻦ
ادﺧﺎﻟﻪداﺧﻞﺛﻘﻮبﻣﻘﺒﺲ)اﻻﻧﺜﻰ(ﺑﺸﻜﻞﻋﻔﻮي.
ﺗﻌﻠﻴﻤﺎتﻣﻦأﺟﻞﺗﻮﺻﻴﻞﺳﻠﻚاﻟﺘﻐﺬﻳﺔاﻟﻜﻬﺮﺑﺎﺋﻴﺔﺑﻘﺎﺑﺲ)اﻟﺬآﺮ(:
ﻣﻬﻢ:أﻟﻮاناﻷﺳﻼكاﻟﺘﻐﺬﻳﻪاﻟﻜﻬﺮﺑﺎﺋﻴﺔﺗﺸﻴﺮاﻟﻰاﻟﺘﺎﻟﻲ:
أﺻﻔﺮ/أﺧﻀﺮﺧﻂأرض
ازرقﻣﺤﺎﻳﺪ)ﻧﻴﻮﺗﺮل(
ﺑﻨﻲﺗﻐﺬﻳﺔ
وﻷنأﻟ
ـ
ﻮانﺳ
ـ
ﻠ
ـ
ﻚاﻟ
ـ
ﺘ
ـ
ﻐ
ـ
ﺬﻳ
ـ
ﺔاﻟ
ـ
ﻜ
ـ
ﻬ
ـ
ﺮﺑ
ـ
ﺎﺋ
ـ
ﻴ
ـ
ﺔﻳ
ـ
ﻤ
ـ
ﻜ
ـ
ﻦأنﻻﻳ
ـ
ﻄ
ـ
ﺎﺑ
ـ
ﻘ
ـ
ﻮااﻻﺷ
ـ
ﺎراتاﻟ
ـ
ﻤ
ـ
ﻠ
ـ
ﻮﻧ
ـ
ﺔاﻟ
ـ
ﺘ
ـ
ﻲ
ﺗﻌﺮفﻣﺮاﺑﻂاﻟﻘﺎﺑﺲ،اﺗﺒﻌﻮااﻟﺨﻄﻮاتاﻟﺘﺎﻟﻴﺔ:
أوﺻﻠﻮااﻟﺴﻠﻚاﻷﺻﻔﺮ/اﻷﺧﻀﺮﺑﺎﻟﻤﺮﺑﻂاﻟﻤﺸﺎرﻟﻪﺑﺎﻟﺤﺮفEأوﺑﺎﻟﺸﻌﺎرأو
اﻟﻠﻮناﻷﺧﻀﺮأواﻷﺻﻔﺮ/اﻷﺧﻀﺮ
أوﺻﻠﻮااﻟﺴﻠﻚاﻟﺒﻨﻲﺑﺎﻟﻤﺮﺑﻂاﻟﻤﺸﺎرﻟﻪﺑﺎﻟﺤﺮفLأوﺑﺎﻟﻠﻮناﻷﺣﻤﺮ.
أوﺻﻠﻮااﻟﺴﻠﻚاﻷزرقﺑﺎﻟﻤﺮﺑﻂاﻟﻤﺸﺎرﻟﻪﺑﺎﻟﺤﺮفNأوﺑﺎﻟﻠﻮناﻷﺳﻮد.
اذااﺳﺘﺨﺪﻣﺘﻢﻗﺎﺑﺲ)اﻟﺬآﺮ(31أﻣﺒﻴﺮ)3631SB(رآﺒﻮاﻣﻨﺼﻬﺮة)ﻓﻴﻮز(31
أﻣﺒﻴﺮﻓﻲاﻟﻤﻘﺒﺲأوﻓﻲاﻟﻤﻬﺎي
ْ
أوﻋﻠﻰﻟﻮﺣﺔاﻟﺘﻮزﻳﻊ.
ﻓ
ـ
ﻲﺣ
ـ
ﺎﻟ
ـ
ﺔاﻟ
ـ
ﺸ
ـ
ﻚﺑ
ـ
ﺎﻟ
ـ
ﺘ
ـ
ﻐ
ـ
ﺬﻳ
ـ
ﺔاﻟ
ـ
ﻜ
ـ
ﻬ
ـ
ﺮﺑ
ـ
ﺎﺋ
ـ
ﻴ
ـ
ﺔﻟ
ـ
ﺠ
ـ
ﻬ
ـ
ﺎزآ
ـ
ﻢاﺳ
ـ
ﺘ
ـ
ﺪﻋ
ـ
ﻮاﻓ
ـ
ﻨ
ـ
ﻲآ
ـ
ﻬ
ـ
ﺮﺑ
ـ
ﺎﺋ
ـ
ﻲﻣ
ـ
ﺨ
ـ
ﺘ
ـ
ﺺﻗ
ـ
ﺒ
ـ
ﻞ
وﺻﻞاﻟﺠﻬﺎزﺑﻤﻨﺒﻊاﻟﺘﻴﺎراﻟﻜﻬﺮﺑﺎﺋﻲ.
وﺻﻞﻗﺎﺑﺲ)اﻟﺬآﺮ(ﺑﺪﻳﻞ:
أﻟﻮاناﻷﺳﻼكاﻟﺘﻐﺬﻳﻪاﻟﻜﻬﺮﺑﺎﺋﻴﺔﺗﺸﻴﺮاﻟﻰاﻟﺘﺎﻟﻲ:
ازرقﻣﺤﺎﻳﺪ)ﻧﻴﻮﺗﺮل()N(
ﺑﻨﻲﺗﻐﺬﻳﺔ)L(
أﺻﻔﺮ/أﺧﻀﺮﺧﻂأرض)E(
ازاﻟﺔاﻟﺠﻬﺎزاﻟﻜﻬﺮﺑﺎﺋﻲاﻟﺒﻴﺘﻲ:
ﻋﻨﺪرﻣﻲﺟﻬﺎزآﻬﺮﺑﺎﺋﻲﺑﻴﺘﻲ،ﻳﺠﺐازاﻟﺔﻗﺎﺑﺲاﻟﺘﻴﺎراﻟﻜﻬﺮﺑﺎﺋﻲ)اﻟﺬآﺮ(وذﻟﻚ
ﺑ
ـ
ﻘ
ـ
ﺺﺳ
ـ
ﻠ
ـ
ﻚاﻟ
ـ
ﺘ
ـ
ﻐ
ـ
ﺬﻳ
ـ
ﺔاﻟ
ـ
ﻜ
ـ
ﻬ
ـ
ﺮﺑ
ـ
ﺎﺋ
ـ
ﻴ
ـ
ﺔﺑ
ـ
ﺄﻗ
ـ
ﺮبﻧ
ـ
ﻘ
ـ
ﻄ
ـ
ﺔﻣ
ـ
ﻤ
ـ
ﻜ
ـ
ﻨ
ـ
ﺔﻣ
ـ
ﻦاﻟ
ـ
ﻘ
ـ
ﺎﺑ
ـ
ﺲوﻗ
ـ
ﻮﻣ
ـ
ﻮاﺑ
ـ
ﺘ
ـ
ﺤ
ـ
ﻄ
ـ
ﻴ
ـ
ﻢ
رؤوساﻟﻘﺎﺑﺲآﻤﺎذآﺮﺳﺎﺑﻘﺎ.
VERDE &
GIALLO
MARRONE
BLU
fusibile
13 ampere
SERRAFILO
CROSSBAR
ﻣ
ـ
ﻨ
ـ
ﺼ
ـ
ﻬ
ـ
ﺮة31
أﻣﺒﻴﺮ
ﻣﺮﺑﻂﺳﻠﻚ
أﺧﻀﺮ
أﺻﻔﺮ
ﺑﻨﻲ
أزرق
!اﻟﻐﺴﺎﻟﺔﻻﺗﻮﺿﻊﻓﻲاﻟﺨﺎرجﺣﺘﻰﻟﻮآﺎناﻟﻤﻜﺎنﻣﻐﻄﻰوذﻟﻚﻷﻧﻪﻣﻦاﻟﺨﻄﺮﺗﺮك
اﻟﺠﻬﺎزﺗﺤﺖﻋﻮاﻣﻞاﻟﻄﻘﺺﻣﺜﻞاﻟﻤﻄﺮﺑﺮقرﻋﺪاﻟﻰاﺧﺮه.
!ﺑ
ـ
ﻌ
ـ
ﺪاﻻﻧ
ـ
ﻬ
ـ
ﺎءﻣ
ـ
ﻦﺗ
ـ
ﺮآ
ـ
ﻴ
ـ
ﺐاﻟ
ـ
ﺠ
ـ
ﻬ
ـ
ﺎزﻳ
ـ
ﺠ
ـ
ﺐأنﻳ
ـ
ﻜ
ـ
ﻮنﻣ
ـ
ﻦاﻟ
ـ
ﺴ
ـ
ﻬ
ـ
ﻞاﻟ
ـ
ﻮﺻ
ـ
ﻮلاﻟ
ـ
ﻰﻣ
ـ
ﻘ
ـ
ﺒ
ـ
ﺲ
اﻟﺘﻴﺎراﻟﻜﻬﺮﺑﺎﺋﻲ)اﻷﻧﺜﻰ(.
!ﻻﺗﺴﺘﺨﺪﻣﻮاﻣﻬﺎﻳﺌﺎتاوﻣﻘﺒﺲﻣﺘﻌﺪداﻟﺜﻘﻮبأواﺳﻼكﺗﻄﻮﻳﻞ.
!ﺳﻠﻚاﻟﺘﻐﺬﻳﺔاﻟﻜﻬﺮﺑﺎﺋﻴﺔﻳﺠﺐأنﻻﻳﻜﻮنﻣﻄﻮيأوﻣﺤﺸﻮرﺑﻴﻦاﻷﺛﺎث.
!ﺳ
ـ
ﻠ
ـ
ﻚاﻟ
ـ
ﺘ
ـ
ﻐ
ـ
ﺬﻳ
ـ
ﺔاﻟ
ـ
ﻜ
ـ
ﻬ
ـ
ﺮﺑ
ـ
ﺎﺋ
ـ
ﻴ
ـ
ﺔﻳ
ـ
ﺠ
ـ
ﺐأنﻳ
ـ
ﺘ
ـ
ﻢﺗ
ـ
ﺒ
ـ
ﺪﻳ
ـ
ﻠ
ـ
ﻪوﻗ
ـ
ﺖاﻟ
ـ
ﺤ
ـ
ﺎﺟ
ـ
ﺔﻓ
ـ
ﻘ
ـ
ﻂﻣ
ـ
ﻦﻗ
ـ
ﺒ
ـ
ﻞﻓ
ـ
ﻨ
ـ
ﻲﻣ
ـ
ﺨ
ـ
ﺘ
ـ
ﺺ
وﻣﺆهﻞﻟﻠﻘﻴﺎمﺑﻬﺬا.
اﻧﺘﺒﺎه:اﻟﺸﺮآﺔاﻟﺼﺎﻧﻌﺔﺗﺴﻘﻂﻋﻦﻧﻔﺴﻬﺎأيﻣﺴﺆوﻟﻴﺔﻋﻦأﺿﺮارﻗﺪﺗﺤﺼﻞﻣﻦ
ﻋﺪماﺗﺒﺎعواﺣﺘﺮامهﺬهﻗﻮاﻋﺪاﻷﻣﻦ.
أولدورةﻏﺴﻴﻞ
ﺑﻌﺪاﻻﻧﺘﻬﺎءﻣﻦﻋﻤﻠﻴﺔﺗﺮآﻴﺐاﻟﺠﻬﺎز،وﻗﺒﻞاﺳﺘﺨﺪاﻣﻪ،ﻗﻮﻣﻮاﺑﻌﻤﻠﻴﺔﻏﺴﻴﻞﻣﺴﺘﺨﺪﻣﻴﻦ
ﻣﺴﺤﻮقﻏﺴﻴﻞوﺑﺪونﻣﻼﺑﺲداﺧﻞاﻟﻐﺴﺎﻟﺔ،ﻣﺴﺘﺨﺪﻣﻴﻦﺑﺮﻧﺎﻣﺞاﻟﻐﺴﻴﻞﻋﻠﻰ09
درﺟﺔﻣﺌﻮﻳﺔﺑﺪونﻋﻤﻠﻴﺔﻏﺴﻴﻞﺑﺪاﺋﻴﺔ.
18
ﻣﻮاﺻﻔﺎتﻓﻨﻴﺔ
اﻟﻤﺪﻳﻞ
25VA
اﻷﺑﻌﺎد
اﻟﻌﺮض5.95ﺳﻨﺘﻤﺘﺮ
اﻻرﺗﻔﺎع58ﺳﻨﺘﻤﺘﺮ
اﻟﻌﻤﻖ5.25ﺳﻨﺘﻤﺘﺮ
اﻟﻘﺪرة
ﻣﻦ1اﻟﻰ5آﻐﻢ
اﻟﺘﻮﺻﻴﻼتاﻟﻜﻬﺮﺑﺎﺋﻴﺔ
ﻓﺮقﺟﻬﺪ022/032ﻓﻮﻟﺖ0-5هﻴﺮﺗﺰ
اﻟﻘﺪرةاﻟﻘﺼﻮىاﻟﻤﻤﺘﺼﺔﻣﻦﻗﺒﻞاﻟﺠﻬﺎز0002واط
اﻟﺘﻮﺻﻴﻼتاﻟﻬﻴﺪروﻟﻴﻜﻴﺔ
اﻟﻀﻐﻂاﻟﻘﺼﻮى1ﻣﻠﺒﺴﻜﺎل)01ﺑﺎر(
اﻟﻀﻐﻂاﻟﺪﻧﻴﺎ50.0ﻣﻴﻠﻴﺒﺴﻜﺎل)5.0ﺑﺎر(
ﻗﺪرةﺣﻮضاﻟﻐﺴﻴﻞ04ﻟﺘﺮ
ﺳﺮﻋﺔاﻟﻌﺼﺮاﻟﺪوراﻧﻴﺔ
ﺣﺘﻰ005دورةﻓﻲاﻟﺪﻗﻴﻘﺔ)06هﻴﺮﺗﺰ(
ﺑﺮاﻣﺞﺗﺠﺮﺑﺔاﻟﺠﻬﺎزﺣﺴﺐ
اﻟﻘﻮاﻋﺪ654CEI
ﺑ
ـ
ﺮﻧ
ـ
ﺎﻣ
ـ
ﺞ2،درﺟ
ـ
ﺔﺣ
ـ
ﺮارة06درﺟ
ـ
ﺔﻣ
ـ
ﺌ
ـ
ﻮﻳ
ـ
ﺔ،ﺗ
ـ
ﻤ
ـ
ﺖاﻟ
ـ
ﺘ
ـ
ﺠ
ـ
ﺮﺑ
ـ
ﺔ
ﺑﺤﻤﻞﻏﺴﻴﻞ5آﻐﻢ
هﺬااﻟﺠﻬﺎزﻳﻄﺎﺑﻖاﻟﻤﻮاﺻﻔﺎتاﻟﻤﻄﻠﻮﺑﺔﻣﻦﺳﻮقاﻟﺪول
اﻷورﺑﻴﺔاﻟﻤﺸﺘﺮآﺔ:
-ﺑﻤﺎﻳﺘﻌﻠﻖﺑﻔﺮقﺟﻬﺪﻣﻨﺨﻔﺾ
-ﺑﻤﺎﻳﺘﻌﻠﻖاﻟﺘﻮاﻓﻖاﻟﻜﻬﺮوﻣﻐﻨﺎﻃﻴﺴﻲ
06
19
ﺲﺑﻼﻤﻟا ﺔﻟﺎﺴﻏ ﻒﺻو
ﻟ
ـ
ﻮﺣ
ـ
ﺔاﻟ
ـ
ﻘ
ـ
ﻴ
ـ
ﺎدة
ﻣﻘﺒﺾ
اﻟﺒﺮاﻣﺠﺔ
زر
ﺗﺸﻐﻴﻞ/اﻃﻔﺎء
أزر
وﻇﺎﺋﻒ
ﻣﻘﺒﺾ
درﺟﺔاﻟﺤﺮارة
ﺣﻮضﻣﺴﺎﺣﻴﻖاﻟﻐﺴﻴﻞ
ﺣﻮضﻣﺴﺎﺣﻴﻖاﻟﻐﺴﻴﻞﻟﻮﺿﻊﻣﺴﺎﺣﻴﻖاﻟﻐﺴﻴﻞواﻟﻤﺴﺎﺣﻴﻖاﻻﺿﺎﻓﻴﺔ)اﻧﻈﺮ
ﺻﻔﺤﺔرﻗﻢ
أزراراﻟﻮﻇﺎﺋﻒﻻﺧﺘﻴﺎراﻟﻮﻇﺎﺋﻒاﻟﺘﻲﺗﻜﻮنﻣﺰودةﺑﻬﺎﻏﺴﺎﻟﺔاﻟﻤﻼﺑﺲ
زرﺗﺸﻐﻴﻞ/اﻃﻔﺎءFFO/NOﻟﺘﺸﻐﻴﻞواﻃﻔﺎءﻏﺴﺎﻟﺔاﻟﻤﻼﺑﺲ.
ﻣﺼﺒﺎحاﻧﺬارﺑﺎباﻟﻐﺴﺎﻟﺔﻣﻘﻔﻞﻟﻔﻬﻢاذاﻣﺎآﺎﻧﺖاﻟﻐﺴﺎﻟﺔﺗﻌﻤﻞ
ﻣﻘﺒﺾدرﺟﺔاﻟﺤﺮارةﻟﻮﺿﻊدرﺟﺔﺣﺮارةاﻟﻐﺴﻴﻞأواﻟﻘﻴﺎمﺑﻌﻤﻠﻴﺔاﻟﻐﺴﻴﻞﺑﻤﺎء
ﺑﺎرد)اﻧﻈﺮاﻟﻰﺻﻔﺤﺔ
ﻣﻘﺒﺾاﻟﺒﺮﻣﺠﺔﻟﻮﺿﻊاﻟﺒﺮاﻣﺞ)اﻧﻈﺮﺻﻔﺤﺔ
ﻗﻮﻣﻮاﺑﺘﺪوﻳﺮهﺬااﻟﻤﻘﺒﺾﻓﻘﻂﺑﺎﺗﺠﺎهدورانﻋﻘﺎرباﻟﺴﺎﻋﺔواﻟﺠﻬﺎزﻣﻄﻔﺄ
ﻣﺼﺒﺎح
ﺗﺸﻐﻴﻞ/اﻃﻔﺎء
20
(23
(22
(21

Other Ariston Washer manuals

Ariston AQXL 109 User manual

Ariston

Ariston AQXL 109 User manual

Ariston AW 129 NA Operating instructions

Ariston

Ariston AW 129 NA Operating instructions

Ariston ARXF 125 S User manual

Ariston

Ariston ARXF 125 S User manual

Ariston ARF 105 User manual

Ariston

Ariston ARF 105 User manual

Ariston AVTF 129 User manual

Ariston

Ariston AVTF 129 User manual

Ariston aqualtis aq113d 697d User manual

Ariston

Ariston aqualtis aq113d 697d User manual

Ariston WMD 843 User manual

Ariston

Ariston WMD 843 User manual

Ariston WMG 10437 User manual

Ariston

Ariston WMG 10437 User manual

Ariston AV 6 User manual

Ariston

Ariston AV 6 User manual

Ariston EXT 1400 User manual

Ariston

Ariston EXT 1400 User manual

Ariston AQXXL 109 User manual

Ariston

Ariston AQXXL 109 User manual

Ariston AW 149 User manual

Ariston

Ariston AW 149 User manual

Ariston AR6F 105 User manual

Ariston

Ariston AR6F 105 User manual

Ariston RNS7021HK User manual

Ariston

Ariston RNS7021HK User manual

Ariston AQXD 129 User manual

Ariston

Ariston AQXD 129 User manual

Ariston AVSD 109 User manual

Ariston

Ariston AVSD 109 User manual

Ariston AXD 100 User manual

Ariston

Ariston AXD 100 User manual

Ariston AQUALTIS AQ9F 29 U User manual

Ariston

Ariston AQUALTIS AQ9F 29 U User manual

Ariston AR6L 95 User manual

Ariston

Ariston AR6L 95 User manual

Ariston AVSL 85 User manual

Ariston

Ariston AVSL 85 User manual

Ariston MARGHERITA User manual

Ariston

Ariston MARGHERITA User manual

Ariston ALD 100 User manual

Ariston

Ariston ALD 100 User manual

Ariston WMG 1022B User manual

Ariston

Ariston WMG 1022B User manual

Ariston LBE 129 User manual

Ariston

Ariston LBE 129 User manual

Popular Washer manuals by other brands

Samsung WA70H4 S Series user manual

Samsung

Samsung WA70H4 S Series user manual

Electrolux Zanussi F1045 W Instruction booklet

Electrolux

Electrolux Zanussi F1045 W Instruction booklet

Haier HWM50-18 B user manual

Haier

Haier HWM50-18 B user manual

Alliance Laundry Systems Topload Washer installation instructions

Alliance Laundry Systems

Alliance Laundry Systems Topload Washer installation instructions

Graco PRO-WASH 112634 Instructions and parts list

Graco

Graco PRO-WASH 112634 Instructions and parts list

Electrolux EWN 1030 Instruction booklet

Electrolux

Electrolux EWN 1030 Instruction booklet

Hotpoint Ariston AVTXL 129 Instructions for use

Hotpoint Ariston

Hotpoint Ariston AVTXL 129 Instructions for use

Dexter Laundry T-675 EXPRESS PLUS Operator's manual

Dexter Laundry

Dexter Laundry T-675 EXPRESS PLUS Operator's manual

LG T1488NEHT1 owner's manual

LG

LG T1488NEHT1 owner's manual

GE Profile WPRE6100G Dimensions and installation information

GE

GE Profile WPRE6100G Dimensions and installation information

Samsung WF361BVBEWR/A1 user manual

Samsung

Samsung WF361BVBEWR/A1 user manual

Indesit TIDW 70210 Instruction & installation manual

Indesit

Indesit TIDW 70210 Instruction & installation manual

LG FH0H3NDNL 2 Series owner's manual

LG

LG FH0H3NDNL 2 Series owner's manual

GE McClary XBXR2080 owner's manual

GE

GE McClary XBXR2080 owner's manual

Seiki S Home SC-7000AU7TL instruction manual

Seiki

Seiki S Home SC-7000AU7TL instruction manual

LG WF-T1105DP owner's manual

LG

LG WF-T1105DP owner's manual

Logik L614WD13 Service manual

Logik

Logik L614WD13 Service manual

Samsung J1060A(V/S) Owner's instructions

Samsung

Samsung J1060A(V/S) Owner's instructions

manuals.online logo
manuals.online logoBrands
  • About & Mission
  • Contact us
  • Privacy Policy
  • Terms and Conditions

Copyright 2025 Manuals.Online. All Rights Reserved.