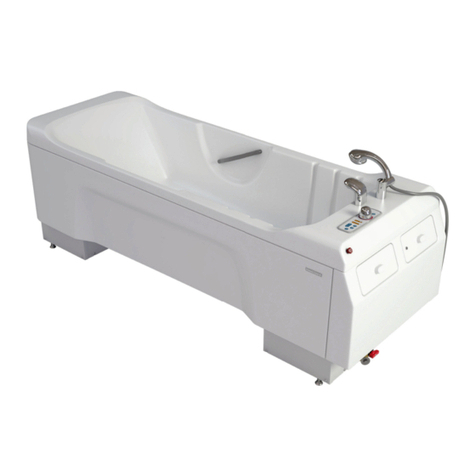
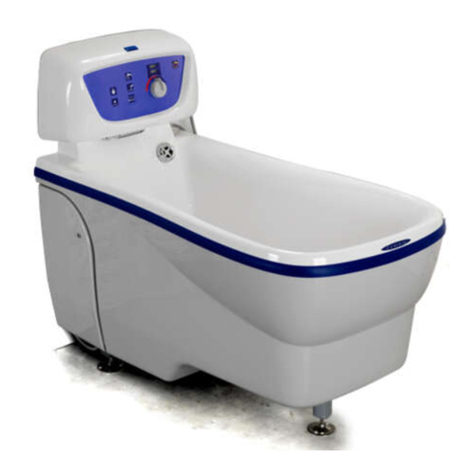
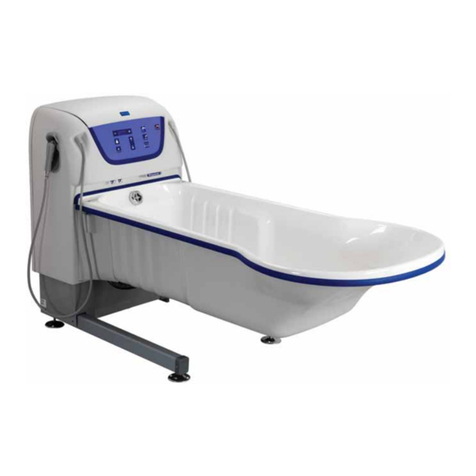
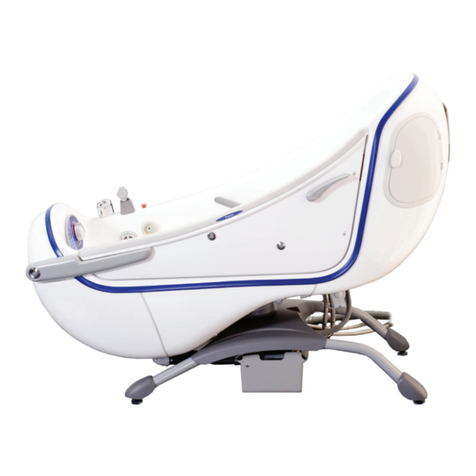
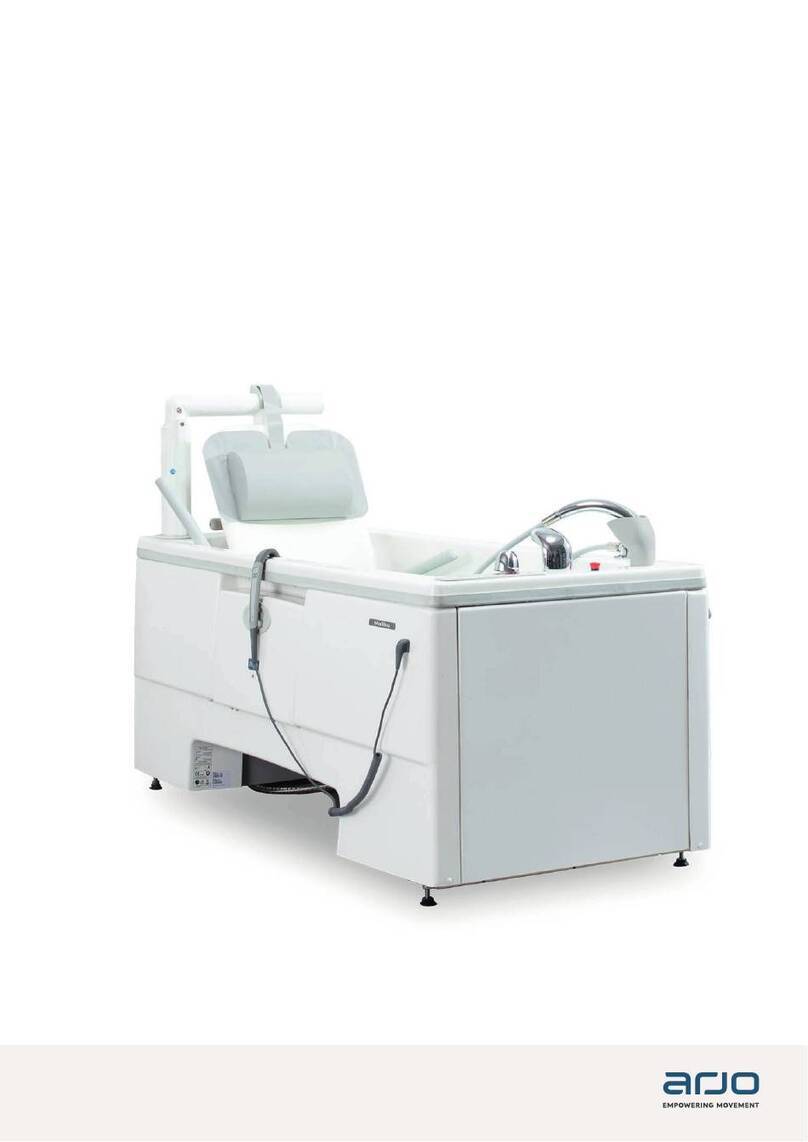
Arjo Classic Line 2 Instruction manual

ASSEMBLY AND INSTALLATION INSTRUCTIONS
Classic Line 2
06.ACL.00_3EN • 2023-09

Design Policy and Copyright
® and ™ are trademarks belonging to the Arjo group of companies.
© Arjo 2023.
As our policy is one of continuous improvement, we reserve the right to modify designs without prior notice.
The content of this publication may not be copied either whole or in part without the consent of Arjo.

3
Safety instructions ........................................................................................................................................ 4
Measurements and weights.......................................................................................................................... 5
Space requirements ..................................................................................................................................... 7
Unpacking and assembly ............................................................................................................................. 8
Electrical installation................................................................................................................................... 10
Drain installation......................................................................................................................................... 13
Water installation ........................................................................................................................................ 15
Calibration of the thermostat mixer............................................................................................................. 18
Connecting the disinfectant bottle .............................................................................................................. 21
7HFKQLFDOVSHFL¿FDWLRQV.............................................................................................................................. 22
Contents

SAFETY INSTRUCTIONS4
Warning means: Safety warning. Failure to
understand and obey this warning may result in
injury to you or to others.
Caution means: Failure to follow these instructions
may cause damage to all or parts of the system or
equipment.
Note means: This is important information for the
correct use of this system or equipment.
WARNING
CAUTION
NOTE
'H¿QLWLRQVLQWKLVPDQXDO
6DIHW\LQVWUXFWLRQV
0DNHVXUHWKDWWKHHOHFWULFDOVXSSO\FRPSRQHQWVDUHDFFRUGLQJWRWKHGDWDODEHO
0DNHVXUHWKDWWKHDVVHPEO\LVFDUULHGRXW
• E\TXDOL¿HGSHUVRQQHO
• in accordance with local codes.
• in accordance with local regulations.
0DNHVXUHQRWWRGLVDVVHPEOHWKHEDWKWXEGXULQJWKHLQVWDOODWLRQSURFHGXUH
:KHQWKHZRUNLVFRPSOHWHGFKHFNWKDW
• all details are assembled corresponding to the assembly instructions.
• all parts, which a user may come into contact with, are free from sharp edges.
• all hoses, pipes, and connections are intact and free from water leakage.
• all hoses and pipes are free from obstructions and moving parts.
• all system functions operate correctly

L
W
H
MEASUREMENTS AND WEIGHTS 5
0HDVXUHPHQWVDQGZHLJKWV
Classic Line 2 bathtub is delivered in one box.
MEASUREMENTS, BOX WITH CONTENTS
L = Length 2230 mm (87 3/4 in)
H = Height 1059 mm (41 3/4 in)
W = Width 910 mm (35 3/4 in)
WEIGHT, BOX WITH CONTENTS
Maximum weight 181 kg
WEIGHT CLASSIC LINE 2 BATHTUB
Bathtub weight
(excluding package)
141 kg (310.9 lb)
MEASUREMENT CLASSIC LINE 2 BATHTUB
Bathtub width 780 mm (31 in)
Bathtub lengh 2185 mm (86 in)
Maximum height from
ÀRRUWRULP
1030 ± 10 mm (40.1/2
in)
Minimum height from
ÀRRUWRULP
730 ± 10 mm (29 in)

MEASUREMENTS AND WEIGHTS6
B2
B3
B1
B4
B5
B6
7B
SIDE VIEW
A1
A2
A3
A4
FRONT VIEW
FRONT VIEW
Width between feet A1 655 mm
Width between lower covers A2 685 mm
Max width between upper covers A3 805 mm
Max width of bathtub A4 825 mm
SIDE VIEW
Width clearance, mid section B1 1285 mm
Length between feet B2 1910 mm
Length between lower covers B3 2040 mm
Max length of bathtub B4 2185 mm
Foot adjustment B5 40-55 mm
Height clearance, mid section B6 220–520* mm
+HLJKWIURPÀRRUWRKLJKHVWULP B7 785–1085* mm
* Height dimensions (B6, B7) have been measured of foot height B5 = 50mm.
If B5 has another value, then recalculate all height measurements according to the actuator stroke.

SPACE REQUIREMENTS 7
6SDFHUHTXLUHPHQWV
6SDFHUHTXLUHPHQWVDURXQGWKHEDWKWXE
The Classic Line 2 bathtub must always be installed according to the recommended space requirements,
this to provide optimal working conditions for caregiver and patient. Make sure to order the requested parts
depending on your setup.
1100 mm / 44 in 800 mm / 32 in
300 mm / 12 in
150 mm / 6 in
800 mm / 32 in
300 mm / 12 in
300 mm
12 in
2680 mm / 105 in
3135 mm / 123 in
Workspace for caregiver
Space if other products are required
NOTE
6SDFHIRUIXUQLWXUHDQGRWKHUSHUVRQDOLWHPVDUHQRWLQFOXGHGLQWKHVHPHDVXUHPHQWV
NOTE
7KHVHGLPHQVLRQVDUHDSSUR[LPDWHDQGXQOHVVRWKHUZLVHVWDWHGVKRXOGEHWUHDWHGDV
PLQLPXPUHTXLUHPHQWV

UNPACKING AND ASSEMBLY8
8QSDFNLQJDQGDVVHPEO\
3UHSDUDWLRQV
1. Remove the wooden lid
2. Remove the box covering the bathtub
CAUTION
7RDYRLGHTXLSPHQWGDPDJHZKHQXQSDFNLQJRIWKLVSURGXFWDOZD\VPDNHVXUHWKDW$//
VWDSOHVDUHIXOO\UHPRYHGZKHQUHPRYLQJWKHRXWHUFRYHU7KLVZLOOSUHYHQWGDPDJHWRWKH
ODPLQDWHVXUIDFH
A. Bathtub
B. Water hoses 1200 mm
Article #6270395 - hot water and cold water
C. Drain pipe
D. Bottle with disinfectant (optional)
E. Knob assembly kit
F. Shower handle
G. Shower hose
H. Drainage plug (not pictured)
I. 2 keys for disinfection lid (not pictured)
A
B
C
D
E
F
G
,QFOXGHGLQWKHER[

UNPACKING AND ASSEMBLY 9
%HIRUHLQLWLDOSRVLWLRQLQJ6WHSV
3ULRUWRPRYLQJWKHEDWKWXELQWRLWV¿QDOSRVLWLRQ
check:
• Water service, stop and mixing valves, lines, spout
etc. See chapter “Water installation” on page
15”.
• House drain system ready for hook-up.
See chapter “Drain installation” on page 13.
• Provision is made for electrical service to interior
control box.
See chapter “Electrical installation” on page 10.
1. Remove the bathtub from the pallet. Lift from
underneath the white cross beam running
between the feet, at both the head end and the
foot end of the bathtub, see Fig. 1. The upper part
RIWKHEDWKWXELVQRW¿[HGWRWKHORZHUSDUWRIWKH
bathtub.
2. Move the bathtub to its intended place.
3. Temporarily connect Classic Line 2 bathtub mains
cable to the mains power. See Fig 2.
See chapter “Electrical installation” on page 10.
4. Raise the bathtub to its highest position.
Disconnect the mains cable from the mains power.
See Fig. 3.
WARNING
7RDYRLGKDYLQJ¿QJHUVSLQFKHGREVHUYH
WKDWWKHXSSHUSDUWRIWKHEDWKWXEFDQPRYH
DJDLQVWWKHORZHUSDUW
WARNING
7RDYRLGLQMXU\EHIRUHOLIWLQJ&ODVVLF/LQH
PDNHVXUHWRFKHFNWKHZHLJKWVRWKDWLWLV
LQDFFRUGDQFHZLWKORFDOFRGHV
NOTE
&RQQHFWWKHEDWKWXEPDLQVFDEOHWRWKH
PDLQVSRZHUDIWHUWKHZDWHULQVWDOODWLRQ
DQGWKHGUDLQLQVWDOODWLRQDUHFRPSOHWHG
Cable to main power
)LJ
)LJ
)LJ
Lift at this point
Lift at this point

ELECTRICAL INSTALLATION10
(OHFWULFDOLQVWDOODWLRQ
WARNING
$OOSOXPELQJDQGHOHFWULFDOZRUNPXVWEH
FDUULHGRXWE\TXDOL¿HGSHUVRQQHODFFRUGLQJ
WRUHJXODWLRQVDQGORFDOFRGHV.
WARNING
7RDYRLGULVNRIHOHFWULFDOVKRFNWKLV
HTXLSPHQWPXVWRQO\EHFRQQHFWHGWRD
VXSSO\PDLQVZLWKSURWHFWLYHHDUWK
WARNING
7KHXQLWPXVWEHFRQWLQXRXVO\SRZHUHG
DQGFRQQHFWHGWRDQHOHFWULFDOSRZHU
GLVFRQQHFWLRQGHYLFHDQGWRVHSDUDWHIXVH
ZLWKJURXQGIDXOWLQWHUUXSWHULQDFFRUGDQFH
ZLWKORFDOFRGHVDQGUHJXODWLRQV
WARNING
7KHXQLWPXVWEHFRQWLQXRXVO\SRZHUHG
DQGFRQQHFWHGWRDQHOHFWULFDOSRZHU
GLVFRQQHFWLRQGHYLFHDQGWRVHSDUDWHIXVH
ZLWKJURXQGIDXOWLQWHUUXSWHULQDFFRUGDQFH
ZLWKORFDOFRGHVDQGUHJXODWLRQV
WARNING
7KHSURGXFWPXVWEHSURWHFWHGE\DJURXQG
IDXOWFLUFXLWLQWHUUXSWHUQRWVXSSOLHG
WARNING
&KHFNWKDWWKHHOHFWULFDOVXSSO\
FRUUHVSRQGVZLWKWKHLQIRUPDWLRQRQWKH
GDWDODEHO
WARNING
7KHPDLQVFRQQHFWLRQFDEOHVKDOOEH
DGHTXDWHO\SURYLGHGZLWKDGGLWLRQDO
PHFKDQLFDOSURWHFWLRQERWKRQWKHGLVWDQFH
RYHURQWKHÀRRUDQGRQWKHZDOO
WARNING
7KHPDLQVFRQQHFWLRQFDEOHVKDOOEH
SURWHFWHGDJDLQVWEHLQJUXQRYHUE\
HTXLSPHQWZLWKFDVWRUV
WARNING
7KHPDLQVFRQQHFWLRQFDEOHVKDOOEH
SURYLGHGZLWKDGHTXDWHVWUDLQUHOLHI
WARNING
7KHPDLQVFRQQHFWLRQFDEOHW\SHVKDOOEH
VHOHFWHGVRWKDWLWFDQZLWKVWDQGWKHKHDW
KXPLGLW\DQGFKHPLFDOORDGWKDWFDQEH
H[SHFWHGLQWKHORFDWLRQ

ELECTRICAL INSTALLATION 11
,03257$17
The unit/s must be connected to a surface fused
connection (minimum IPX4 rating), 10 amp supply of
230 volts AC50Hz single phase supply and meeting
EN 60601-1 the safety standard for medical electrical
equipment.
The power supply shall be through a RCD (Residual
Current Device) not exceeding 30mA in compliance
with IEE Regulations for electrical equipment in
bathrooms.
Alternatively the power supply may be through a
RCBO (Residual Current operated circuitbreaker with
integral over current protection).
See overleaf for further information
.NOTE
7KHVXUIDFHIXVHGFRQQHFWLRQXQLWRIWKH
¿[HGZLULQJLQVWDOODWLRQPXVWKDYHWKH
DSSURSULDWHHDUWKERQGLQJLQVWDOOHGDQGEH
SRVLWLRQHGLQ=21(RUVHH¿JXUHRQ
WKHQH[WSDJHSRVLWLRQ&DFFRUGLQJWR,((
5HJXODWLRQV
MAINS DISCONNECTION DEVICE
Permanently installed in wall. Visible and accessible at all times
Mains transient voltage 4 kV*
Creepage distance 3 mm*
Air clearance 1.8 mm*
Direction of movement Up and down, right and left, clockwise and
counterclockwise
* If local regulations are higher, then they have to be met.
,03257$17
It is the responsibility of the customer to provide the
FRUUHFWFHUWL¿FDWHGFRQQHFWLRQIRUWKH$UMRHQJLQHHU
to connect the unit.
If a booster Pump assembly is installed, the base
plate on which the pump assembly is mounted must
be earthed.
NOTE
6XSSOHPHQWDU\HDUWKERQGLQJZLOOEH
VXSSOLHGYLDFRQQHFWLQJWKHDSSOLDQFHE\
WKHÀH[WRWKHHDUWKWHUPLQDOLQWKHXQLW
DFFRUGLQJWR,((5HJXODWLRQIURP
%6
ELECTRICAL INSTALLATION DATA
0DUNHW 9ROWDJH )UHTXHQF\ 0DLQVVXSSO\IXVH
([WHUQDOIXVHV
0D[3RZHU&RQVXPSWLRQ RCD
Europe 230V single phase AC 50 Hz 10A 1000VA 30mA

ELECTRICAL INSTALLATION12
RCD
CONDUIT
A
C
B
CABLE FOR MAINS CONNECTION
EMERGENCY STOP BUTTON
(STANDARD FITMENT
INTEGRAL WITH BATH)
PULL SWITCH ISOLATOR
WITH NEON INDICATOR
SURFACE FUSED CONNECTION
WITH A MINIMUM IP RATING OF IPX4
(POSITIONED IN ZONE 1 OR 2)
RCBO or
FUSED 13 AMP SUPPLY
230 VOLT 50 Hz
(POSITIONED TO SUIT
REQUIREMENTS)
(OHFWULFDO¿WWLQJVWREHVXSSOLHGE\FXVWRPHUDUH
A. Ceiling mounted pull switch isolator with indicator (Double Pole with 3 mm air gap) to BS EN 60669-1,
(was BS 3676).
B. RCD (Residual Current Device) not exceeding 30mA to BS EN 61008-1 in compliance with IEE
Regulations for electrical equipment in bathrooms. Alternatively a RCBO (Residual current operated
circuit breaker with integral over current protection) to BSEN 61009-1 may be used. To help in
choosing a suitable device the Power consumption of the bathtub is 1000VA and at initial switch on the
EDWKWXEGUDZVDSHDNFXUUHQWRI$IRUDGXUDWLRQRIPLOOLVHFRQGV:KHQ¿WWLQJD5&%2WRDYRLG
QXLVDQFHWULSSLQJLWPD\EHQHFHVVDU\WR¿WD$P$XQLW$VXUIDFHIXVHGFRQQHFWLRQXQLWZLWKD
minimum IP rating of IPX4 in compliance with IEE Regulations for electrical equipment in bathrooms.
$$IXVHVKRXOGEH¿WWHG
C. 10A surface fused connection unit with a minimum IP rating of IPX4 in compliance with IEE
5HJXODWLRQVIRUHOHFWULFDOHTXLSPHQWLQEDWKURRPV$$IXVHVKRXOGEH¿WWHG
If there is a requirement for a Booster Pump or a Multi Clean disinfection module then a separate 10A
surface fused connection should be provided for each unit. In both instances a 5A fuse should be
¿WWHG
Refer to Arjo Technical Support in further detail is required.

DRAIN INSTALLATION 13
'UDLQLQVWDOODWLRQ
DRAINAGE REQUIREMENTS
The bathtub must be connected to a drainage. Use
an air gap bracket, if needed.
Connections must be done in accordance with local
regulations.
'UDLQLQVWDOODWLRQDOWHUQDWLYHV
2SWLRQ
1. Cut the drain pipe to a suitable length according
WRWKHÀRRUGUDLQ6HH)LJDQG,QVWDOODQDLU
gap bracket, if needed. Remove the drain trap if
not needed.
2. Insert both drain pipes to the water trap.
See Fig. 7.
)LJ
)LJ
)LJ
)LJ
Recommended area
IRUÀRRUVLQNGUDLQ

DRAIN INSTALLATION14
2SWLRQ
,IWKHZDWHUWUDSLVSODFHGGLUHFWO\RYHUWKHÀRRUGUDLQ
the installation can be done as shown in order to
shorten the distance between the water trap and the
ÀRRUGUDLQSee Fig. 8 and 9.
1. Remove the water trap. Remove the two screws
holding the drain bracket and turn it upside down.
See Fig. 8.
2. Screw the water trap in place.See Fig. 9.
If the drain pipe is to be mounted under the bathtub
chassis, turn the nut on each foot to raise the bathtub
chassis. See Fig. 10.
)LJ
)LJ
)LJ

WATER INSTALLATION 15
:DWHULQVWDOODWLRQ
NOTE
&RQQHFWLRQKRVHPPIRUERWK
KRWZDWHUDQGFROGZDWHU
NOTE
)OXVKWKHFRQQHFWLRQKRVHVSULRUWR
FRQQHFWLQJWRWKHLQOHWYDOYHRIWKHEDWKWXE
WATER SUPPLY REQUIREMENT
Max. static pressure 6 bar (600 kPa, 87 psi)
Min. dynamic pressure 1 bar (100 kPa, 15 psi)
0LQÀRZVXSSO\SLSH 25 l/min (5.5 gal/min)
50 l/min CW + HW (11 gal/min CW + HW)
Cold water temperature 8–20°C (46–68°F)
Hot water temperature 60–80°C (140–176°F)
The system is designed for maximum 80°C
WATER CONNECTION REQUIREMENT
Cold/Hot water connection from wall 3/4” B.S.P Male
&RQQHFWZLWKVKXWRႇYDOYHVEHWZHHQXQLWDQGVXSSO\QHWPLQLPXPWKURXJKPP
*XLGDQFHIRUFRUUHFWLQVWDOODWLRQRIZDWHUKRVH
IMPORTANT
• The water hoses must be installed within sight.
• They must not be walled up, installed in narrow
tunnels or in places where they cannot be
reached and inspected.
• The water hoses must not be insulated or
covered with insulating material. See Fig. 11.
)LJ

WATER INSTALLATION16
IMPORTANT
• Do not install water hoses in tension or in torsion.
See Fig. 12.
• Do not install water hoses with bending radius (R)
less than those quoted in the illustration.
See Fig. 13:
)LJ
)LJ
L
R
DE
R > 4DE L > 4DE
:DWHU6XSSO\
The water supply can be arranged according to two
main alternatives.
2SWLRQ:DWHUFRQQHFWLRQIURPÀRRU
2SWLRQ: Water connection from wall.
+RZWRFRQQHFWKRVHV
VWHSV
1. Move and raise the bath so that the water inlets
can be reached and connected.
2. Connect the water hoses to the water outlets in
WKHZDOORULQWKHÀRRU
3.
Turn the handles to the closed position (vertical)
then connect the other end of the hot water hose
to the hot bathtub inlet (red handle) and other end
of the cold water hose to the cold bathtub inlet
(blue handle). See Fig. 14.
4. Turn the handles to the open position (horizontal).
5. Push Classic Line 2 bathtub back into place.
NOTE
)OXVKWKHFRQQHFWLRQKRVHVSULRUWR
FRQQHFWLQJWRWKHLQOHWYDOYHRIWKH
EDWKWXE
NOTE
:KHQWLJKWHQLQJWKHQXWRQWKHZDWHU
KRVHDOZD\VFRXQWHUWLJKWHQRQWKHLQOHW
YDOYHQXWWRDYRLGEHQGLQJWKHVKHHW
PHWDODURXQGWKHLQOHWYDOYH
)LJ
Blue handle -
Cold water inlet
Red handle -
Hot water inlet

WATER INSTALLATION 17
$LULQWKH03$SXPS
Due to the possibility of air in the MPA pump
6316295, after connecting the bathtub, perform
the venting the following way:
1. 8QVFUHZWKHYHQWSOXJDQGOHWWKHZDWHUÀRZ
out.
2. After the water has been drained, close the
cap and let the pump run for a few minutes.
3. In a situation where the pump will still have air
in it - repeat the whole operation.
If the pump is not working or the pump’s fuse
has blown - perform manual start-up through the
service hole (located at the back of the pump -
UDGLDWRU8VHDÀDWKHDGVFUHZGULYHU

CALIBRATION OF THE THERMOSTAT MIXER18
&DOLEUDWLRQRIWKHWKHUPRVWDWPL[HU
WARNING
)DLOXUHWRFDOLEUDWHWKHWKHUPRVWDWPL[HUFDQOHDGWRDVFDOGLQJLQFLGHQWZLWKSRVVLEOHLQMXULHV
WARNING
0DNHVXUHWKDWWKH+27ZDWHUVXSSO\KDVDVWDEOHWHPSHUDWXUHDQGUHSUHVHQWVWKHPD[LPXP
KRWZDWHUWHPSHUDWXUHDYDLODEOHEHIRUHWKHFDOLEUDWLRQSURFHGXUHVWDUWV
NOTE
$OZD\VXVHDFDOLEUDWHGWKHUPRPHWHUWRFKHFNZDWHUWHPSHUDWXUHVDJDLQVWWKHSDQHOGLVSOD\
YDOXH
&DOLEUDWLRQ
VWHSV
1. Remove the calibration label fastened on the
control panel. See Fig. 15.
2. 3UHVVWKH%DWKWXE¿OOLQJ212))EXWWRQWRVWDUW
¿OOLQJ6HH)LJ
3.
Turn the Calibration knob (A) JUDGXDOO\ counter
clockwise and wait for the temperature display to
read 43–44°C. See Fig. 17.
4. Measure the temperature with an external
thermometer. Use only a calibrated external
thermometer with an accuracy of ± 0.5°C.
5. Leave the water running for 30 seconds while
measuring the water temperature to make sure
the temperature is stable.
Continue with the steps on the next page
NOTE
&DOLEUDWLRQLVWREHGRQHDIWHUWKH
LQVWDOODWLRQLVFRPSOHWHGDQGWKHPDLQV
SRZHULVFRQQHFWHG
NOTE
:DWHUWHPSHUDWXUHDERYH&ZLOO
DFWLYDWHWKHVFDOGLQJSURWHFWLRQ
NOTE
.HHSLQPLQGWKDWD¿OOZDWHUWHPSHUDWXUH
RI&ZLOOUHVXOWLQDPD[LPXPVKRZHU
WHPSHUDWXUHDURXQG&
)LJ
)LJ
A
)LJ
NOTE
5HPHPEHUWRFDOLEUDWHWKHWKHUPRVWDWLFPL[HUDIWHUHYHU\LQVWDOODWLRQ

CALIBRATION OF THE THERMOSTAT MIXER 19
6. 3UHVVWKH%DWKWXE¿OOLQJ212))EXWWRQWRVWRS
¿OOLQJ
7. Press the Shower ON/OFF button to start the
shower. See Fig. 18.
8. Measure the shower water temperature with an
external thermometer. Use only an calibrated
external thermometer with an accuracy of
± 0.5°C. Make sure the water temperature
reaches 40–41°C.
9. Adjust the shower water temperature, if needed,
by turning the Calibration knob counter-clockwise
to raise the temperature or clockwise to lower the
temperature. See Fig. 19.
10. 3UHVVWKH6KRZHU212))EXWWRQWRWXUQRႇWKH
shower when the temperature has reached
40–41°C according to the external thermometer.
11. Find the assembly kit. See Fig. 20.
A - Black stop ring
B - Water temperature settings knob
C - Plug
D - Screw
12. From the assembly kit, take out the black stop
ring (A), see Fig. 20, from the bag.
13. Attach the black stop ring to the calibration knob.
See Fig. 21.
14. Make sure the stop peg (E) is positioned
according to the illustration, see Fig. 22.
The stop peg should be positioned right under the
indicated center line marking.
15. From the assembly kit take out the Water
temperature settings knob (B). See Fig. 20.
)LJ
)LJ
A
B
CD
)LJ
)LJ
E
)LJ

CALIBRATION OF THE THERMOSTAT MIXER20
16. Push the Water temperature settings knob onto
the Calibration knob.
17. Make sure the stop peg on the under side of the
Water temperature settings knob (B) is placed
right above the stop peg (E) on the black stop
ring, see Fig. 23.
18. Turn the Water temperature settings knob to cold
and then back to maximum hot.
19. 3UHVVWKH%DWKWXE¿OOLQJ212))EXWWRQDQG
check that the set temperature value doesn’t
exceed 44°C. Reposition the black stop ring, if
needed.
20. 3UHVVWKH%DWKWXE¿OOLQJ212))EXWWRQWRWXUQ
RႇWKHZDWHU
21. From the assembly kit take out the the screw (D)
and the plug (C). Tighten the Water temperature
settings knob with the screw and cover the screw
with the plug. See Fig. 24.
NOTE
7KLVSUHYHQWVWKH:DWHUWHPSHUDWXUH
VHWWLQJVNQREIURPWXUQLQJFRXQWHU
FORFNZLVHSDVWWKHHQGRIWKHVHW
PD[LPXPKRWZDWHUWHPSHUDWXUH
)LJ
)LJ
B
E
C
D
Other manuals for Classic Line 2
1
Table of contents
Other Arjo Bathtub manuals
Popular Bathtub manuals by other brands

MAAX
MAAX Origin installation instructions

Clou
Clou Solium II installation instructions

Avantopool
Avantopool Kinos Installation and user manual

Kohler
Kohler Mira Flight Freestanding Bath Installation & user guide

Active Birth Pools
Active Birth Pools Active Birth Pool Installation guidelines

CAHABA
CAHABA ZEYA CA401005-WH manual