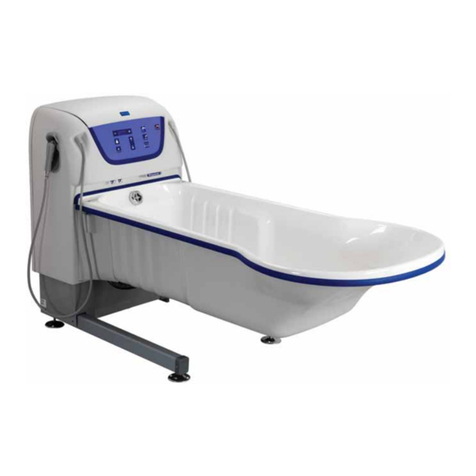
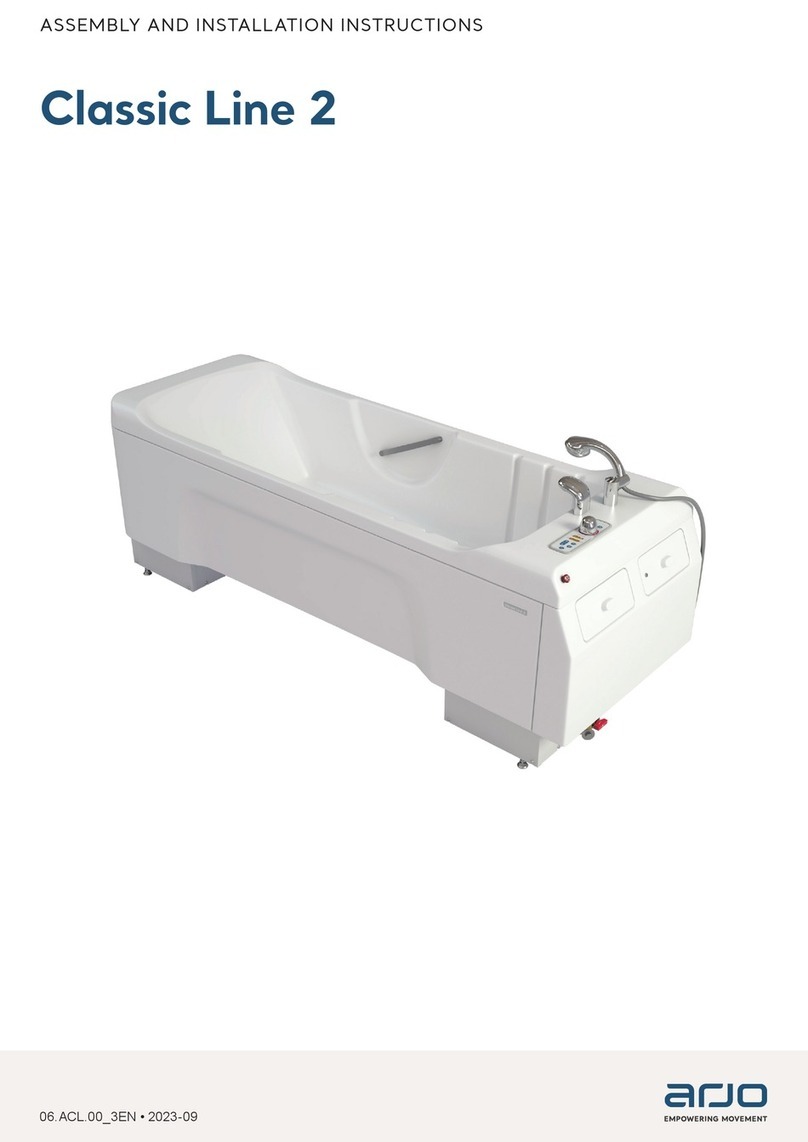
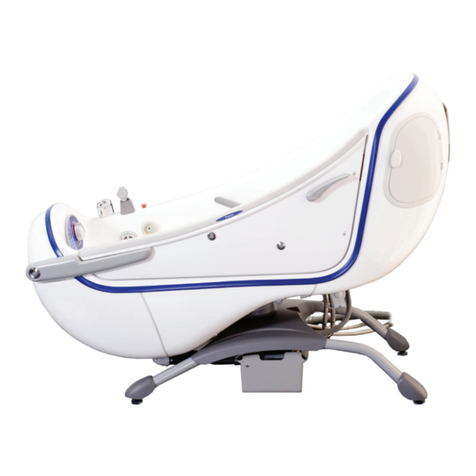
Arjo Classic Line 2 User manual

INSTRUCTIONS FOR USE
Classic Line 2
04.ACL.00_1EN • 08/2020

2
Design Policy and Copyright
® and ™ are trademarks belonging to the Arjo group of companies.
© Arjo 2020.
As our policy is one of continuous improvement, we reserve the right to modify designs without prior notice.
The content of this publication may not be copied either whole or in part without the consent of Arjo.
WARNING
To avoid injury, always read this Instructions for use and accompanied documents
before using the product.
Mandatory to read the Instructions for use.

3
Contents
Foreword...............................................................................5
Intendeduse............................................................................7
Safetyinstructions.......................................................................8
Preparations...........................................................................10
Partsdesignation.......................................................................12
Productdescription.....................................................................14
Controlpanel............................................................................14
LEDindications .......................................................................14
FunctionslockON/OFF.................................................................14
RaiseorlowertheClassicLine2bathtub...................................................15
Water temperature setting knob...........................................................15
%DWKWXE¿OOLQJ .........................................................................15
ShowerON/OFF ......................................................................16
Temperaturedisplay....................................................................16
Scaldingprotection ....................................................................16
AirSpasystem(optional)................................................................17
Disinfectionbutton(optional).............................................................18
Bathtub................................................................................18
Disinfectionunit(optional) ...............................................................18
Disinfectionsprayhandle................................................................19
$XWRÀXVKIXQFWLRQ .....................................................................19
Drainplugcontrolknob .................................................................20
Emergencystopfunction................................................................20
Grabhandles.........................................................................20
Footrest .............................................................................21
Emergency lowering (optional). . . . . . . . . . . . . . . . . . . . . . . . . . . . . . . . . . . . . . . . . . . . . . . . . . . . . . . . . . . . 21
Allowedcombinations...................................................................22
Preparationsbeforebathingpatient .......................................................23
Bathepatientusingabathliftchair........................................................24
Bathepatientusingabathlifttrolley.......................................................30
Cleaninganddisinfection................................................................34
Replacedisinfectantbottle(bathtubswithdisinfectionunit) .......................................36
Cleananddisinfectwithaspraybottle .......................................................38
Cleananddisinfectwithdisinfectionunit ......................................................41
Careandpreventivemaintenance.........................................................46
Troubleshooting........................................................................50

4
Alarmandsounds ......................................................................51
7HFKQLFDOVSHFL¿FDWLRQV .................................................................52
Labels.................................................................................56
/LVWRIVWDQGDUGVDQGFHUWL¿FDWHV .........................................................58
Electromagneticcompatibility............................................................59
Partsandaccessories...................................................................62

5FOREWORD
Foreword
Thank you for purchasing Arjo equipment
Customer contact information
For questions regarding this product, supplies, maintenance, or additional information about Arjo
products and service, please contact Arjo or an Arjo authorised representative, or visit www.arjo.com.
Please read and fully understand the Instructions for Use (IFU) before
using Classic Line 2™ bathtub
Information in this IFU is necessary to perform the proper operation and maintenance of the equipment.
It will help to protect your product and make sure that the equipment performs to your satisfaction. The
information in this IFU is important for your safety and must be read and understood to help prevent
SRVVLEOHLQMXU\8QDXWKRULVHGPRGL¿FDWLRQVRQDQ\$UMRHTXLSPHQWFDQDIIHFWVDIHW\$UMRZLOOQRW
be held responsible for any accidents, incidents or lack of performance that occur as a result of any
XQDXWKRULVHGPRGL¿FDWLRQWRLWVSURGXFWV
Service and support
A service routine must be performed on Classic Line 2 bathtub to make sure the safety and operating
procedures of your product. See section “Care and preventive maintenance” on page 46.
If you require further information, please contact Arjo for comprehensive support and service programs
to maximize the long-term safety, reliability and value of the product. Contact Arjo for replacement
parts. Contact information appears on the last page of this IFU.
Serious incident
If a serious incident occurs in relation to this medical device, affecting the user, or the patient then the
user or patient should report the serious incident to the medical device manufacturer or the distributor.
In the European Union, the user should also report the serious incident to the Competent Authority in
the member state where they are located.
'H¿QLWLRQVLQWKLV,)8
WARNING
CAUTION
NOTE
Warning means: Safety warning. Failure to understand
and obey this warning may result in injury for you or
others.
Caution means: Failure to follow these instructions
may cause damage to all or parts of the system or
equipment.
Note means: This is important information for the
correct use of this system or equipment.

Intentionally left blank

7INTENDED USE 7INTENDED USE
Intended use
Classic Line 2 bathtub is intended for bathing and showering residents in hospitals and long-term care
facilities under the supervision of trained skilled nursing staff in accordance with instructions outlined in
the Instructions for Use (IFU). Classic Line 2 bathtub must be disinfected according to the instructions
established in this IFU.
&ODVVLF/LQHEDWKWXEVKRXOGRQO\EHXVHGIRUWKHSXUSRVHVSHFL¿HGLQWKLV,QVWUXFWLRQVIRU8VH$Q\
other use is prohibited.
Patient assessment
We recommend that facilities establish regular assessment routines. Caregivers should assess each
patient according to the following criteria prior to use:
• The weight of occupant and water should not exceed the Safe Working Load (SWL) of the Classic
Line 2 bathtub – 415 kg (882 lb).
• The patient’s weight must not exceed 182 kg (401 lb).
• Active and semi-active patients (i.e. able to sit upright self-supported on the side of a bed or toilet)
and completely bedridden patients can use the bath. Correct transfer equipment shall be used.
If a patient does not meet these criteria an alternative equipment shall be used.
Indication for use
This bath is used for general cleaning, relaxation and for hydrotherapy to relieve pain.
Installation requirements
The equipment must be installed by appropriately trained personnel according to the Assembly and
Installation Instructions. Requirements in the Assembly and Installation Instructions can only be
superseded by local code.
Expected service life
The expected lifetime of this equipment, unless otherwise stated is ten (10) years, subject to required
SUHYHQWDWLYHPDLQWHQDQFHDVVSHFL¿HGLQWKHVHFWLRQ&DUHDQGSUHYHQWLYHPDLQWHQDQFHRQSDJH
and the Assembly and Installation Instructions.

8 SAFETY INSTRUCTIONS8 SAFETY INSTRUCTIONS
Safety instructions
WARNING
To avoid falling, make sure that the patient is
positioned in accordance with this IFU.
WARNING
7RDYRLGH[SORVLRQRU¿UHQHYHUXVHWKH
equipment in oxygen rich environment,
LQSUHVHQFHRIKHDWVRXUFHRUÀDPPDEOH
anaesthetic gases.
WARNING
To avoid electric shock, never use other
electrical equipment near this device other
WKDQVSHFL¿HGLQWKH,)8
WARNING
To avoid entrapment of the patients or
caregivers legs or feet, make sure that they
are kept clear of all obstacles.
WARNING
To avoid injury or strangulation, make sure
that the patient is not left unattended at any
time.
WARNING
To avoid entrapment, make sure to keep the
patients hair, arms and feet close to the body
and use designated grab supports during any
movement.
WARNING
To prevent cross-contamination, always
follow the disinfection instructions in this
IFU.
WARNING
To avoid the equipment from tipping and the
patient from falling, do not use the equipment
RQÀRRUZLWKUHFHVVHGGUDLQVKROHVRUVORSHV
exceeding a ratio of 1:50 (1.15°).
WARNING
To avoid eye and skin damage during the
cleaning and the disinfection process, always
use protective glasses and protective gloves.
If contact occurs rinse with plenty of water.
If eyes or skin becomes irritated, contact a
physician. Always read the material safety
data sheet of the disinfectant.
WARNING
To prevent scalding, always check the water
temperature with your bare hand before
directing the water on the patient. Do not use
gloves as it may insulate to the extent that the
water temperature can be misjudged. Point
WKHÀRZRIWKHZDWHUDZD\IURPWKHSDWLHQW

9SAFETY INSTRUCTIONS
WARNING
To avoid electric shock, make sure that the
equipment is connected to:
• Continuously powered supply mains with
protective earth.
• Separate fuse and ground fault circuit
interrupter (GFCI)
• A mains disconnection device
All installations must be in accordance with
local codes and regulations.
WARNING
To avoid entrapment never put your hand or
other body parts under the bathtub when
raising or lowering the bathtub.
NOTE
All drainage, water and electrical installation
ZRUNVKRXOGEHFDUULHGRXWE\TXDOL¿HG
personnel, in accordance to Assembly
and Installation Instructions with local and
national regulations.
NOTE
A medical assessment of the patient must be
made to ensure his/her suitability to use this
product.

10 PREPARATIONS10 PREPARATIONS
Preparations
Site preparations
3ULRUWRLQVWDOODWLRQRI&ODVVLF/LQHEDWKWXEWKHÀRRUDQGZDOOVZLWKLQWKHUHTXLUHGDUHDPXVWEH
¿QLVKHGVHHWKHLQVWUXFWLRQLQWKH6LWH3UHSDUDWLRQGRFXPHQW
6WHSVEHIRUH¿UVWXVH
(8 steps)
1. Make sure that the Classic Line 2 bathtub has been installed according to the Assembly and
Installation Instructions.
2. Check that all parts of the product are supplied. Compare to section Parts designation on page
12. If any part is missing or damaged – do NOT use the product.
3. Read the IFU.
4. Perform a functionality test according to section Care and preventive maintenance on page 46.
5. Disinfect the product according to section Cleaning and disinfection on page 34.
6. Choose a designated area, where the IFU should be kept and is easily accessible at all times.
7.
Make sure the thermostatic mixer has been calibrated according to the Assembly and Installation
,QVWUXFWLRQVE\DQ$UMRWHFKQLFLDQRUTXDOL¿HGSHUVRQQHO
8. Make sure to have a rescue plan ready in case of a patient emergency.
WARNING
7RSUHYHQWVFDOGLQJPDNHVXUHWKDWWKHZDWHUPL[HUKDVEHHQFDOLEUDWHG&RQ¿UPWKDW
responsible organisation has established calibration routines.

11PREPARATIONS 11PREPARATIONS
Steps before every use
(4 steps)
1. Check that all parts are in place. Compare to section Parts designation on page 12.
2. Check Classic Line 2 bathtub and accessories for damage.
3. If any part is missing or damaged – do NOT use the product.
4.
Before every use, make sure Classic Line 2 bathtub is cleaned and disinfected according to section
Cleaning and disinfection on page 34.
WARNING
To prevent cross-contamination always follow the disinfection instructions in this IFU.
NOTE
If you have any questions, please contact your local Arjo representative for support and
service. The contact information (Arjo addresses) is listed on the last page of this IFU.

12 PARTS DESIGNATION
Parts designation
1. Control panel
2. Filling spout
3. Shower handle with holder
4. Footrest
5. Air Spa system nozzles (optional)
6. Grab handles
12 14
15 16
13
17 18
12. Emergency stop button
Integrated disinfection unit (optional)
13. Cover A
14. Cover B with lock (2 keys included)
(Covers only included with disinfection unit.)
15. Disinfection spray handle
16. Flow meter
17. Bottle suction cap
18. Disinfectant bottle
7. Footrest grooves
8. $XWR¿OOVHQVRU
9. Drain plug control knob (with surface
RYHUÀRZ
10. Water temperature sensor
11. Drainage plug
1
2
3
45 6
Bathtub
78 9
11
10

13PARTS DESIGNATION
1. Mains power LED indicator
2. Battery LED indicator (Battery optional)
3. Functions lock ON/OFF
4. Water temperature setting knob
5. Temperature display –bathtub water
6. Scalding temperature LED indicator
7. 7HPSHUDWXUHGLVSOD\±¿OOLQJVKRZHU
8. Shower ON/OFF
9. %DWKWXE¿OOLQJ212))
10. Lower bathtub
11. Raise bathtub
12. Air Spa system ON//intensity/OFF (optional)
13. Disinfection ON/OFF (optional)
Control panel
1
13
11
10
12
2
3
4
5
6
7
8
9

14 PRODUCT DESCRIPTION
Product description
Control panel
LED indications
See Figure 1.
Mains power LED
• No LED, mains off
• Green LED, mains on
Battery LED
• Green LED, battery OK
• *UHHQ/('ÀDVKLQJEDWWHU\LVFKDUJLQJ
• Yellow LED, battery low
• No LED, Battery needs replacement or is
disconnected. No operation is possible.
Battery optional.
If the battery fails to work during a power failure
(no Mains LED indication), contact your Arjo
technician.
The battery must be checked regularly by authorised
personnel, see section Care and preventive
maintenance on page 46.
Functions lock ON/OFF
See Figure 2.
Press and hold the Functions lock ON/OFF button
for 3 seconds to disable all control panel buttons,
preventing involuntary activation of functions.
Activated Functions lock ON is indicated by a yellow
LED.
Push and hold for another 3 seconds to re-enable all
the functions.
Figure 1
Figure 2
Mains power LED Battery LED

15PRODUCT DESCRIPTION
Figure 3
Figure 5
Figure 4
Raise or lower the Classic Line 2 bathtub
See Figure 3.
To raise Classic Line 2 bathtub press and hold the
Raise bathtub button, up arrow.
To lower the Classic Line 2 bathtub press and hold
the Lower bathtub button, down arrow.
Water temperature setting knob
See Figure 4.
To adjust the water temperature:
• Turn clockwise for colder water.
• Turn counterclockwise for warmer water.
%DWKWXE¿OOLQJ
See Figure 5.
$FWLYDWH&ODVVLF/LQHEDWKWXE¿OOLQJE\SXVKLQJWKH
%DWKWXE¿OOLQJ212))EXWWRQ
&ODVVLF/LQHEDWKWXELVHTXLSSHGZLWKDQDXWR¿OO
IXQFWLRQWKDW¿OOVWRWKHKHLJKWRIWKHDXWR¿OOVHQVRU
2QFHWKH¿OOLQJOHYHOLVUHDFKHGWKHZDWHUVWRSV
automatically.
3XVKWKH%DWKWXE¿OOLQJ212))EXWWRQDJDLQDQG
¿OOLQJFRQWLQXHVIRUPLQXWH
3XVKWKH%DWKWXE¿OOLQJ212))EXWWRQDWDQ\WLPHWR
VWRSWKHZDWHUÀRZ
WARNING
To prevent the device in use from tipping,
do not raise or lower other equipment close
to it and be aware of stationary object when
raising and lowering the bathtub.

16 PRODUCT DESCRIPTION
Shower ON/OFF
See Figure 6.
Press the Shower ON/OFF button to activate the
shower.
Turn off by pushing the Shower ON/OFF button
again.
The shower water temperature is adjusted by turning
the Water temperature setting knob.
Temperature display
See Figure 7.
There are two temperature displays.
• The top display (A) indicates the water
temperature in the Classic Line 2 bathtub.
• The lower display (B) indicates the water
WHPSHUDWXUHRIWKH&ODVVLF/LQHEDWKWXE¿OOLQJRU
the shower.
Scalding protection
See Figure 7.
Classic Line 2 bathtub is equipped with an electronic
scalding protection, that automatically shuts off the
water if a dangerous temperature level is detected,
above or equal to 45 °C. The water shuts off earlier if
there is a higher incoming water temperature. When
triggered the LED indicator (C) between the displays
ÀDVKHV\HOORZWKHWHPSHUDWXUHGLVSOD\ÀDVKHVDQGD
beeping is heard.
NOTE
Make sure the shower handle is placed in the
holder facing the bottom of the bathtub to
prevent water from spraying outside of the
EDWKWXELQDXWRÀXVKPRGH
Figure 6
Figure 7
37.0°C
37.0°C
A
B
C

17PRODUCT DESCRIPTION
Scalding protection not working
See Figure 8.
If Scalding protection does not work no temperature
is shown on the display. Contact an Arjo service
technician.
Air Spa system (optional)
See Figure 9.
Classic Line 2 bathtub with Air Spa system provides
a gentle massaging effect which is intended to
support relaxation as well as give a pleasant sensory
experience.
The massage effect is obtained by injecting air
through air jets into the Classic Line 2 bathtub water.
The Air Spa system has two intensity settings.
How to use the Air Spa system (3 steps)
See Figure 9.
1. Press the Air Spa system ON/intensity/OFF
button on the control panel and the air blower
starts at minimum intensity.
2. Push the button again to increase to maximum
intensity.
3. Push the button again to stop.
Air Spa System turns off automatically after
30 minutes.
NOTE
The recommended maximum treatment with
the Air Spa system is 15 minutes.
NOTE
Operating the Air Spa system with soapy
water can cause excessive foaming.
Figure 9
Figure 8
--.-°C
--.-°C

18 PRODUCT DESCRIPTION
Disinfection button (optional)
See Figure 10.
Press the Disinfection ON/OFF button for 5 seconds
to activate the disinfection unit.
The LED indicator (A) turns on when the disinfection
function is activated.
When the disinfectant liquid level is low the LED
LQGLFDWRULVÀDVKLQJJUHHQDQGDQDODUPVRXQGVIRU
5 seconds.
Disinfection is disabled if there is water in the Classic
Line 2 bathtub or another function is activated.
Bathtub
Disinfection unit (optional)
See Figure 11.
The disinfection unit is located at the foot end behind
the two covers A and B.
See Figure 12.
The disinfection spray handle (D) and the
ÀRZPHWHU(LVORFDWHGEHKLQGWKHFRYHU$FORVHVW
WRWKHHPHUJHQF\EXWWRQ7KHÀRZPHWHULQGLFDWHVWKH
PL[LQJUDWLRRIWKHGLVLQIHFWDQWÀXLG
The disinfectant bottle (F) is located behind the cover
(B) that has a lock (C).
NOTE
Disinfection starts automatically for
the Air Spa system when pressing the
Disinfection ON/OFF button.
WARNING
To prevent cross-contamination, always
follow the disinfection instructions in this
IFU.
Figure 10
Figure 12
A
Figure 11
ACB
80
80
7070
50
50
40
40
30
30
2020
DE F

19PRODUCT DESCRIPTION
Figure 13
Disinfection spray handle
See Figure 13.
The disinfection spray handle has a trigger (G) to
PLQLPL]HOHDNLQJDQGLPSURYHÀRZFRQWURO
• Press the trigger on the handle to spray.
• +ROGWKHWULJJHUIRUFRQVWDQWÀRZ
$XWRÀXVKIXQFWLRQ
&ODVVLF/LQHEDWKWXELVHTXLSSHGZLWKDQDXWRÀXVK
function that prevents stagnating water in the water
system.
7KHDXWRÀXVKIXQFWLRQVWDUWVKRXUVDIWHUWKHODVW
use of Classic Line 2 bathtub and then every 24
hours if Classic Line 2 bathtub is not used.
NOTE
7KHDXWRÀXVKIXQFWLRQÀXVKHVZDWHUWKURXJK
ERWKWKH¿OOLQJVSRXWDQGWKHVKRZHUKDQGOH
Make sure the drain is open.
NOTE
Make sure the shower handle is placed in the
holder facing the bottom of the bathtub to
SUHYHQWZDWHUIURPVSUD\LQJRQWKHÀRRUZKHQ
LQDXWRÀXVKPRGH
NOTE
Do not leave the bathtub with the emergency
stop pressed down since it disables the
DXWRÀXVKIXQFWLRQ
G

20 PRODUCT DESCRIPTION
Drain plug control knob
See Figure 14.
To open and close the drainage plug (A), turn the
drain plug control knob (B) in the Classic Line 2
bathtub.
Open – clockwise
Close – counterclockwise
The drain control knob is also equipped with a built-in
RYHUÀRZGUDLQ
Emergency stop function
See Figure 15.
In case of an emergency, all functions can be
stopped by pushing the red emergency stop button.
Do not use the emergency stop button as an
212))EXWWRQDVLWGLVDEOHVWKHDXWRÀXVKIXQFWLRQ
To reset the emergency stop function, turn the red
emergency stop button clockwise until it pops up.
Grab handles
See Figure 16.
Grab handles provide additional support for the
patient during the bathing routine.
NOTE
Do not leave the bathtub with the emergency
stop pressed down since it disables the
DXWRÀXVKIXQFWLRQ
Figure 14
Figure 15
Figure 16
A
B
Other manuals for Classic Line 2
1
Table of contents
Other Arjo Bathtub manuals
Popular Bathtub manuals by other brands

American Standard
American Standard Williamsburg Elite Whirlpool 2805EC Specification sheet

Laufen
Laufen PALOMBA manual

Kohler
Kohler 1198326-2-A Installation and care guide

Clou
Clou Solium I CL/05.70010 installation instructions

glass 1989
glass 1989 pop 180/110 Manaul

Altair
Altair 51251-BAT-WH-FB MAINTENANCE INSTRUCTIONS MANUAL

treesse
treesse GEN-X installation manual

DURAVIT
DURAVIT Luv 700434 Series installation instructions

Villeroy & Boch
Villeroy & Boch Antheus Installation and operating instructions

Swiss Madison
Swiss Madison SM-AB551 installation instructions

Kinedo
Kinedo ICONIK 01 instructions

Guillens
Guillens Jacuzzi Whirlpool Bath TARA N820000 quick start guide