Arkaos Kling-Force LED User manual

Kling-Force LED®
User Guide
ARKAOS® S.A. - www.arkaospro.com

Introduction
Kling-Force® is the new hardware platform built by
ArKaos, around the combination of a powerful processor
and a hardware network switch. It creates a robust and
efficient Kling-Net network.
The platform is daisy chainable to distribute video over
ethernet via plug and play without any complex setup.
Kling-Net® is a protocol developed and patented by ArKaos. It allows a media server to control and
configure LEDs.
Software Compatibility
A media server driving Kling-Net devices can be based on those softwares running on macOS and
Windows : GrandVJ, MediaMaster and LEDMaster.
Box Content
Kling-Force LED interface
Power Supply Connector
8 LED Strip Connectors
User Guide
Safety Warning Card
Kling-Force Warranty Policy
Support
For the latest information and updates about the product, please visit www.arkaos.com/kling-force.
1

Product Description
There are now many digitally addressable LED strips on the market with various densities, formats and
prices. Kling-Force LED makes it easy and affordable to drive them from an ArKaos software acting as a
media server.
The interface has one power connector and lets you drive 8 LED tapes:
The power supply is external so that the user can pick the right voltage and power for his installation.
At 5V, power can be up to 200W and at 12V it can reach 480W.
The interface is only distributing the power without converting it, to avoid heating up. The
input voltage must always match the output voltage requirement to power the LEDs. The
interface will not convert 12V into 5V for instance.
Each output has 4 wires because the interface does support many formats of LEDs:
- Power (+5 to +12 Vdc)
- Clock
- Data
- GND (0V)
2

LED Strips Wiring
There are two families of digitally addressable LED strips, with 3 and 4 wires. The difference is only the
presence or not of a clock signal.
For the 3 wires familly you will need to connect a minimum of 2 wires: GND and Data.
For the 4 wires familly you will need to connect a minimum of 3 wires: GND Data and Clock.
Depending of your installation, you can either power the LED strips directly through the interface or you
can add one or more power supplies directly on the LED strips.
To power the LED strips through the interface you must connect the V+.
If you power directly the LED Strips, then you should not connect the V+.
Powering the LED Strips through the Kling-Force LED
This is the recommended way to drive LED Strips because it reduces the number of connections.
3

The clock signal is only needed if the LED strip has a clock input.
It is not safe to connect a power supply with a voltage that doesn’t match the LED Strip
specifications. The Kling-Force itself will accept between +5 to +12V and regulate it for its
internal electronics but not to power LED Strips.
Powering the LED Strips individually
If your LED Strips come with an individual power supply you must wire them in this way:
If there are individual power supplies for the LED Strips, you should not connect the V+ to
the Kling-Force interface, but straight to the V+ of the LED Strip power supply.
The GND and Data must always be connected. The clock must be connected if your LED Strip has a
clock input.
4

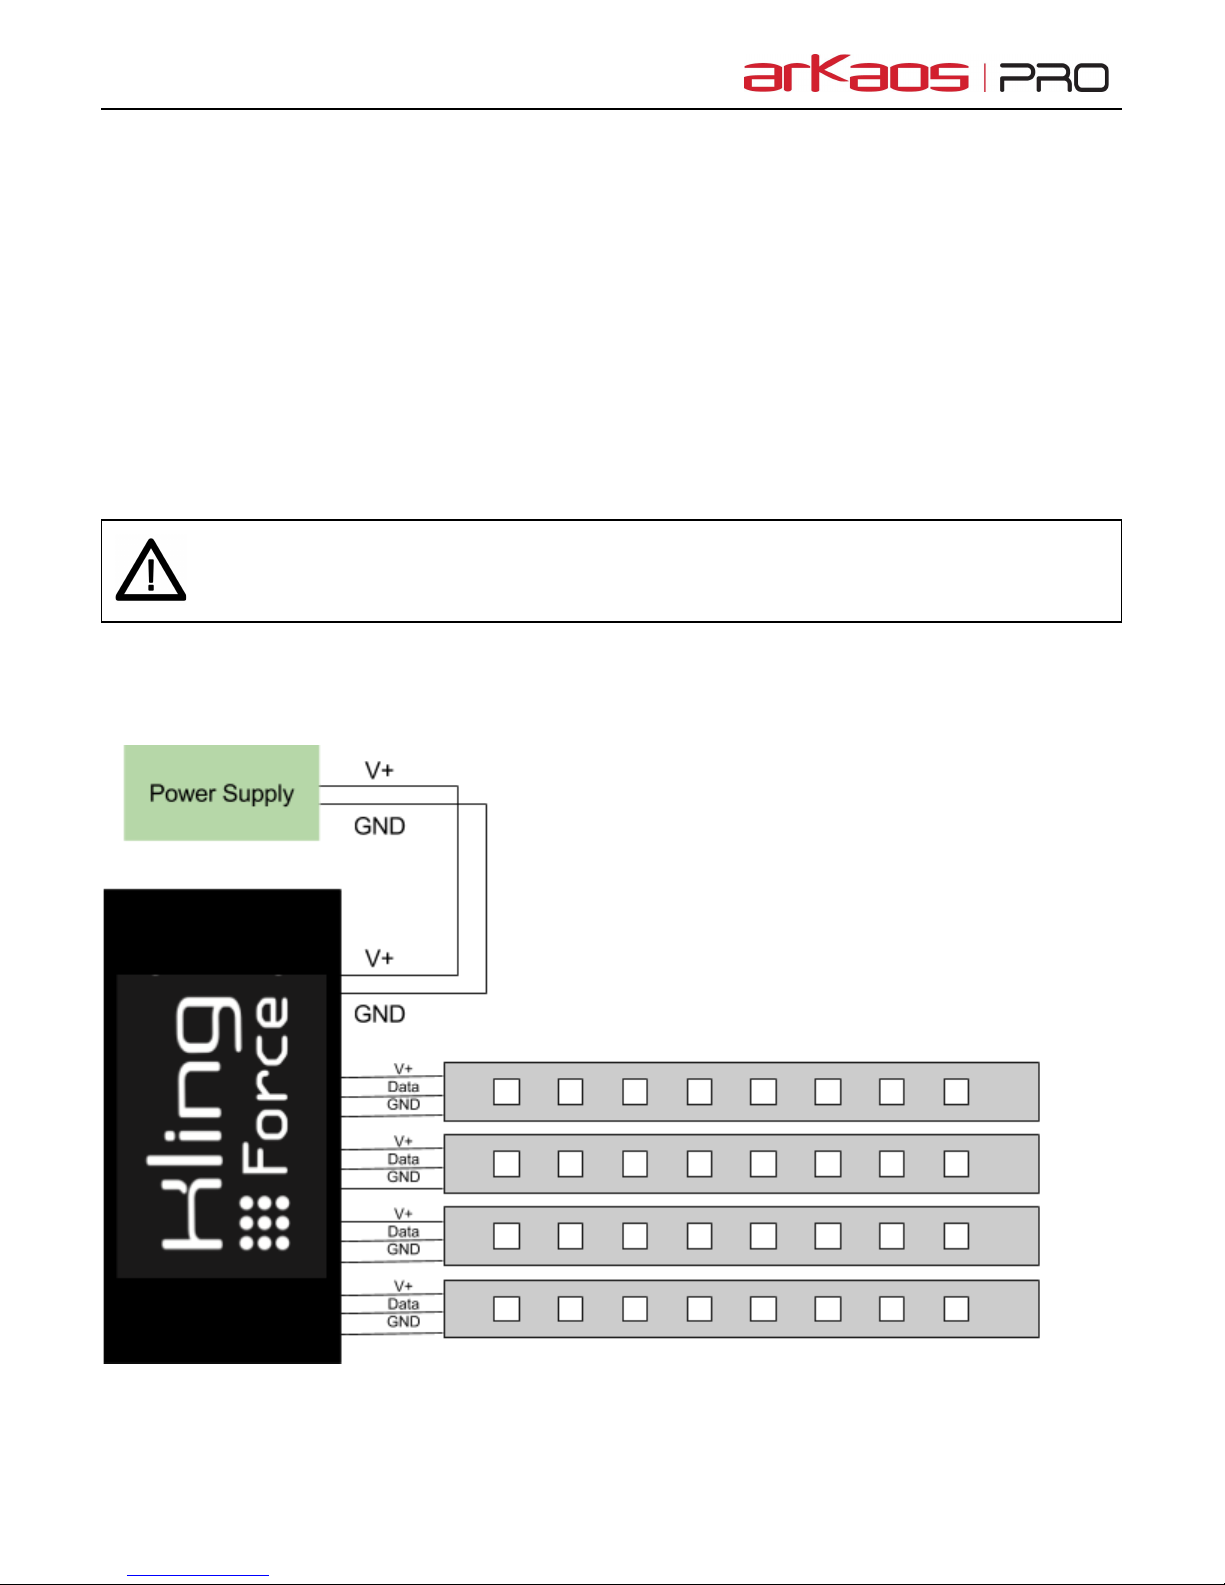
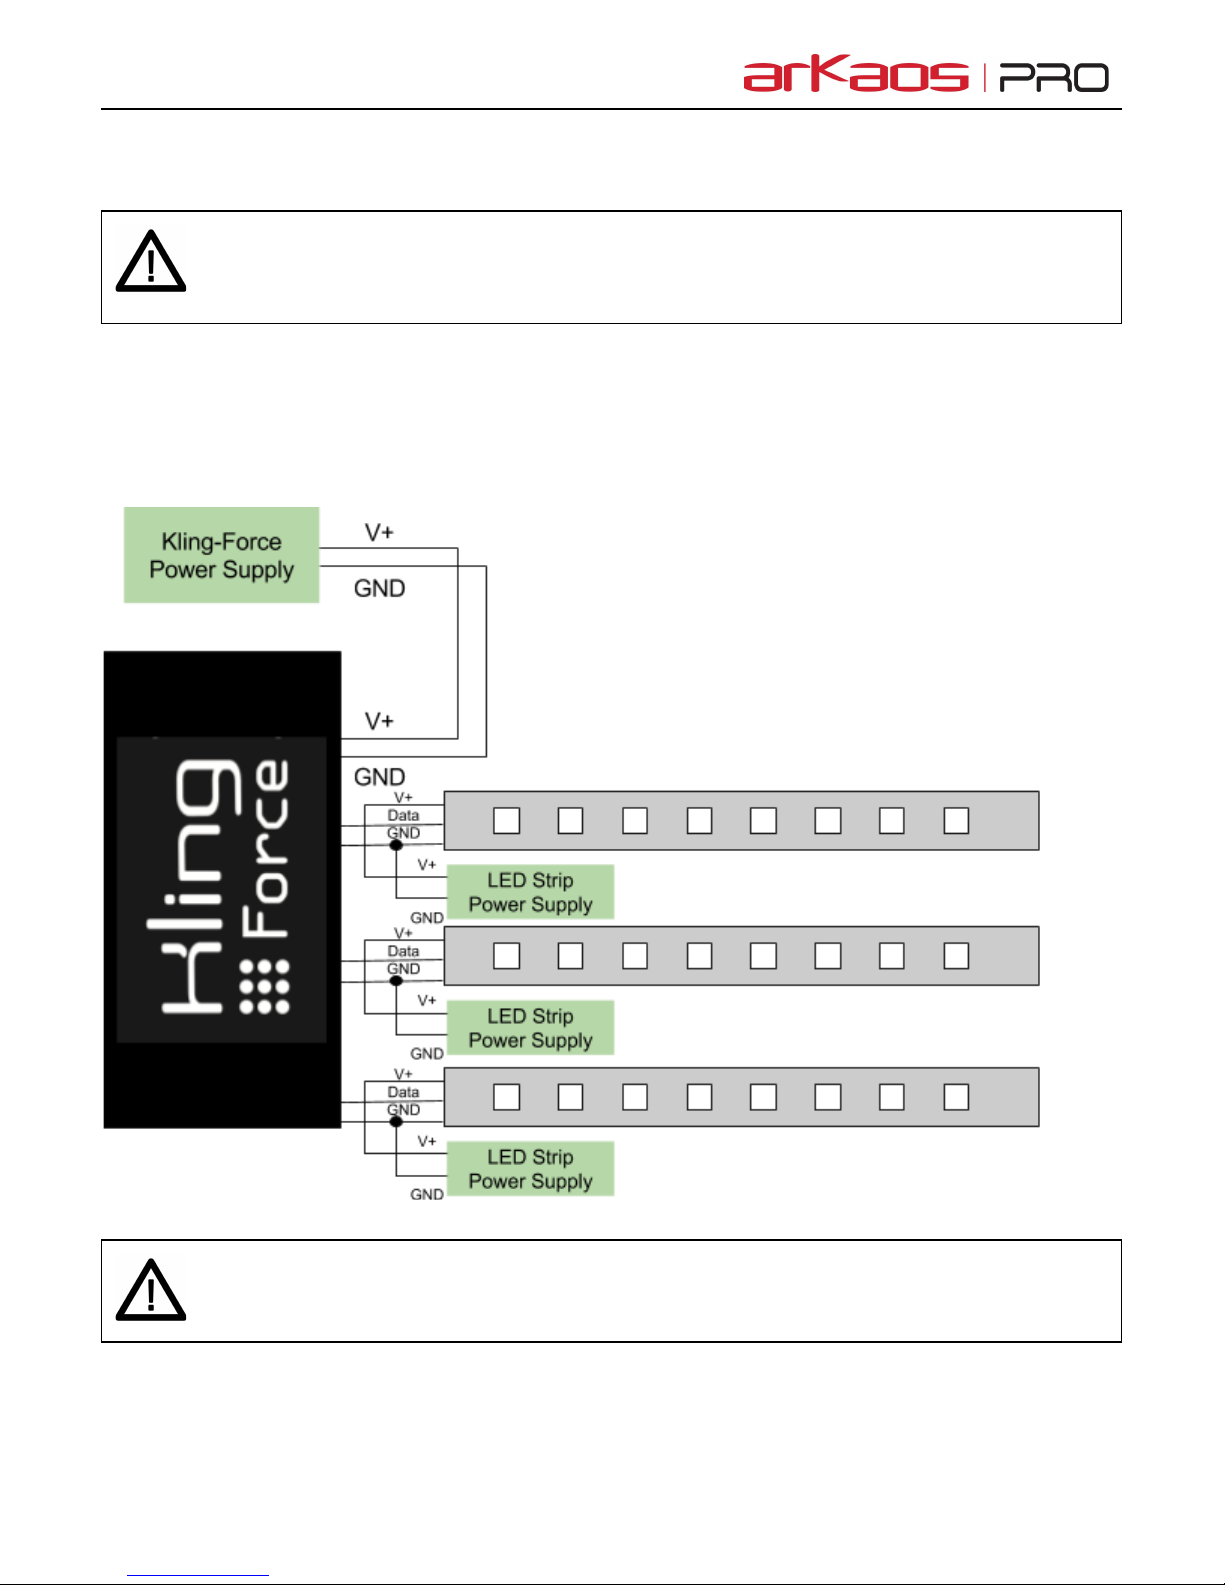
Connecting the Power Supply
For +5V, the power supply needs to deliver a minimum of 200W.
For +12V, the power supply needs to deliver a minimum of 480W.
ArKaos recommends two models of power supplies in the HRP serie from MEAN WELL, one for +5V and
one for +12V. They offer short circuit, overload, overvoltage and overtemperature protections.
They also have a built-in remote sense function. It allows to ensure that the voltage entering the interface
is regulated at the connector of the Kling-Force and not at the output of the power supply. When you
send 40A even on a short wire the voltage will drop. The sense function guarantee that exactly +5V or
+12V is at the connector of the Kling-Force.
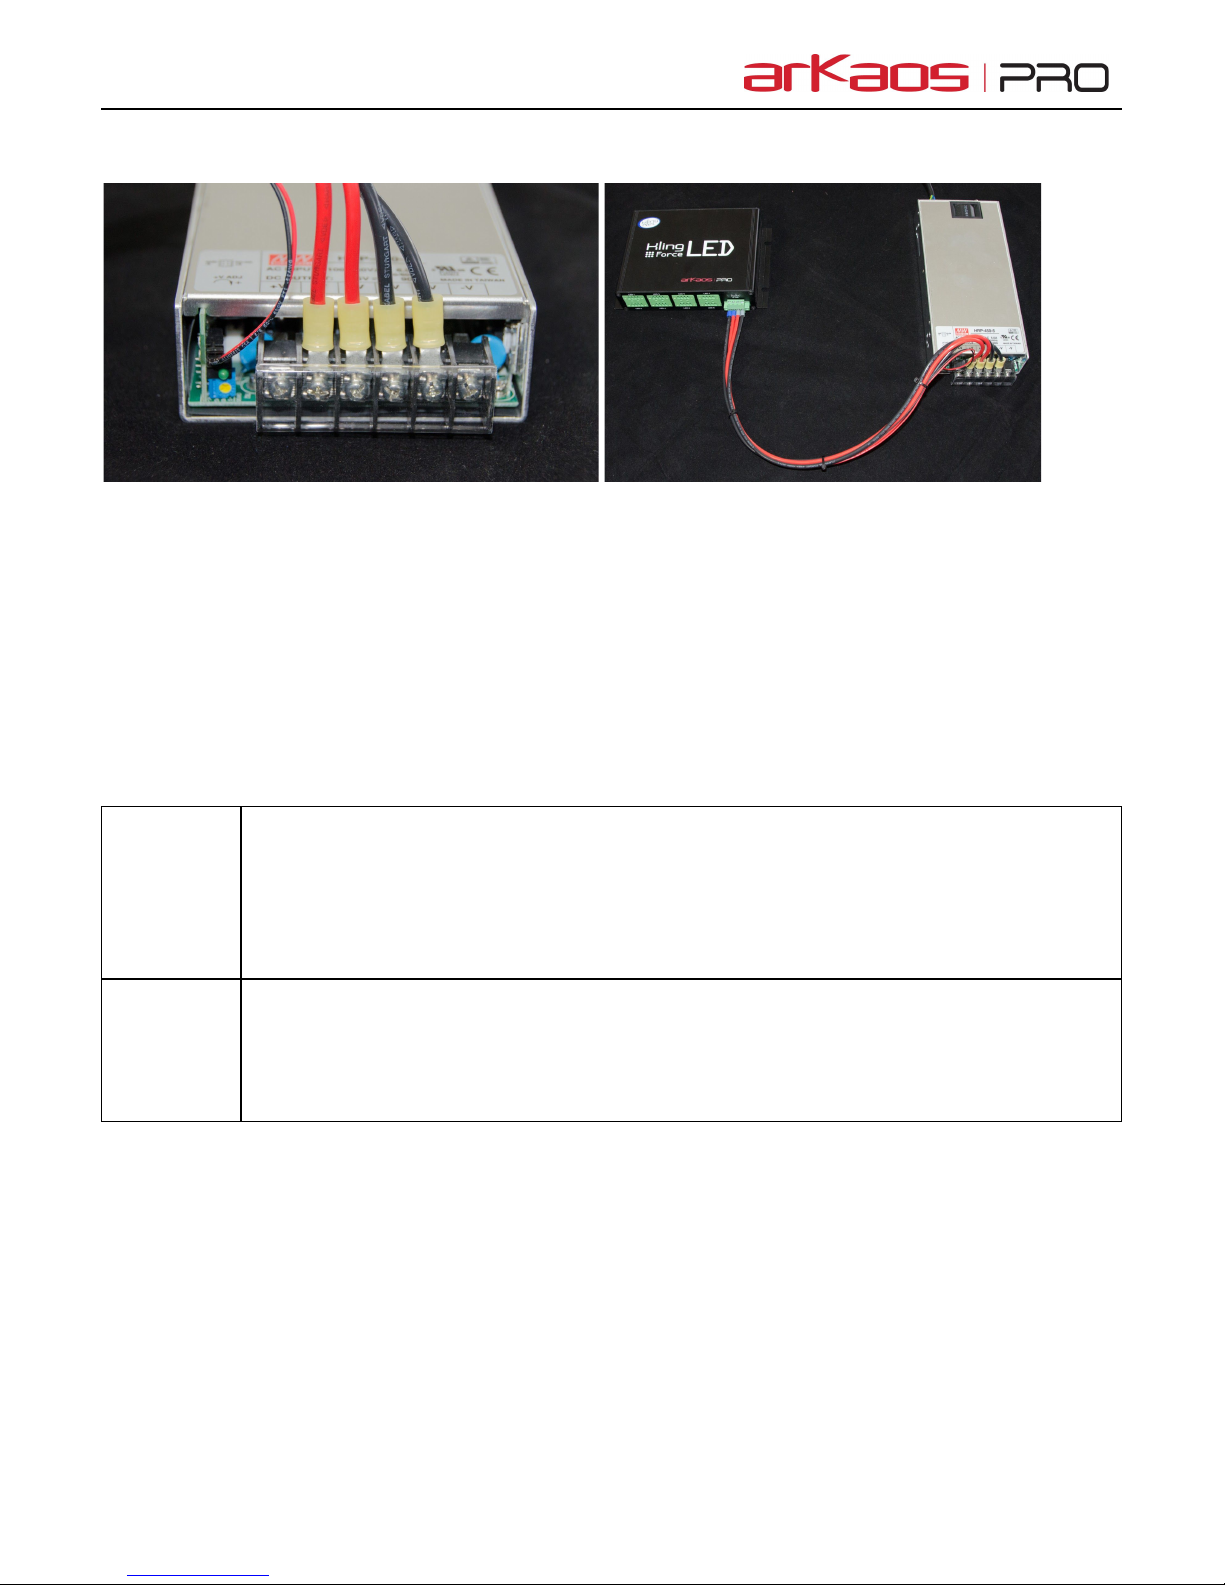
ArKaos has designed a special cable to transport the 40A and the sense signal:
To ensure the best regulation you need 4 wires for the 40A and 2 wires for the sense signal.
The cable is designed to be assembled with both the main and the sense connectors:
5

Introduction to mapping LED strips
The Kling-Force interfaces are presented in ArKaos software as nodes with editable properties. The
interface needs to know how many pixels are connected to each LED Strip output and also lets user
select from many supported protocols.
Supported LED Strip Protocols
For +5V
- 3 wires APA104 800Khz
- 3 wires W2812 family 800Khz
- 3 wires UCS2912 RGBW 800Khz
- 3 wires TM1803 400KHz
- 4 wires APA 101 - APA102C
For +12V
- 4 wires LPD6803
- 3 wires INK1003 800Khz
- 3 wires UCS1903 800Khz
- 3 wires TM182
The interface can simultaneously support 2 different protocols: one for the outputs from 1 to 4 and one
for outputs 5 to 8.
Selecting a wrong protocol is safe and will not damage any LED strips.
6

Mapping LED strips with LEDMaster
LEDMaster version 1.2.x or above is required to support Kling-Force LED interfaces.
First select the Kling-Force interface in the Connected Nodes list.
Then select the right protocol and define for each output the length of the line strips.
Finally drag and drop LED lines in the Connected Devices to the canvas.
7

Mapping LED strips with GrandVJ or MediaMaster
The minimal version to use with a Kling-Force LED is GrandVJ 2.3.x and MediaMaster 5.1.x
First select the Kling-Force interface in the Connected Nodes list.
Then select the right protocol and define for each output the length of the line strips.
Finally drag and drop LED lines in the Connected Devices to the canvas.
8

Appendix
Technical Specifications
Control Protocol
Ethernet / Kling-Net protocol
Ethernet Switch
2 ports Hardware Gigabit Switch
Daisy chaining
Up to 50 devices
Rack Mounting
Yes [178mm Rail Spacing]
LED Outputs
8 outputs / Maximum 5A per output
Power supply
External (not provided)
Dimensions
190mm×130mm×39mm
Weight
480g - 1.05lb
Trademarks and Licenses
ArKaos Pro, Kling-Force, MediaMaster, GrandVJ and LEDMaster are trademarks of ArKaos S.A..
Mac and OS X are trademarks of Apple Inc.
Windows is a registered trademark of Microsoft Corporation.
All other product or company names are trademarks or registered trademarks of their respective owners.
9
Table of contents