manuals.online logo
Brands
  1. Home
  2. •
  3. Brands
  4. •
  5. Armitage Shanks
  6. •
  7. Bathroom Fixture
  8. •
  9. Armitage Shanks S688467 User manual

Armitage Shanks S688467 User manual

S0201 9506075 Hinged Support Rail 80cm
S0206 9506076 Toilet Roll Holder for Hinged Support Rail
Markwik21 lever operated
Sequential thermostatic wall
mounted shower mixer
INSTALLER: After installation please pass this instruction booklet to user
IMPORTANT
BEFORE CONNECTION, FLUSH WATER THROUGH PIPEWORK TO REMOVE
ALL DEBRIS ETC. WHICH COULD DAMAGE THE VALVE MECHANISM
INSTALLATION
INSTRUCTIONS
A6529AA Markwik21 exposed shower mixer
AS 4032.1 WMK 25821
SAI Global
WaterMark
TM
Hinged support rail 80cm
and toilet roll holder
Markwik21 lever operated
Sequential thermostatic wall
mounted shower mixer
INSTALLER: After installation please pass this instruction booklet to user
IMPORTANT
BEFORE CONNECTION, FLUSH WATER THROUGH PIPEWORK TO REMOVE
ALL DEBRIS ETC. WHICH COULD DAMAGE THE VALVE MECHANISM
INSTALLATION
INSTRUCTIONS
A6529AA Markwik21 exposed shower mixer
AS 4032.1 WMK 25821
SAI Global
WaterMark
TM
Anti-Bacterial
Polyurethane Backrest Pad –
Rail not Included




1 x Back Rest Pad (excluding Rail)
1 x poly bag containing :
1 x Allen Key
2 x U Shaped Brackets
8 x Grub Screws

1. Remove back rest pad from box and locate brackets, 8 x grub screws
and Allen Key
2. Position the backrest rail (not supplied) in place
3. Start by tightening 2 screws per bracket. (See point 4 below)
4. Tighten screws diagonally opposite to each other per bracket (see 3rd
image) to ensure the bracket is tightened evenly onto the pad surface.
5. Repeat this process for the other 4 screws.
6. After all 8 screws have been tightened, check the pad is rmly xed
horizontally & vertically on the backrest rail.
7. Before using/sitting against the pad check it is rmly xed to the
backrest rail.


CUSTOMER CARE HELPLINE:
+44 (0)844 543 6170
CUSTOMER CARE FAx:
+44 (0)844 543 6171
CUSTOMER CARE EMAIL:
[email protected]
   



specication without notice.







11 CLEANING CHROME SURFACES
  
  
  
  




CUSTOMER CARE HELPLINE:
+44 (0)844 543 6170
CUSTOMER CARE FAx:
+44 (0)844 543 6171
CUSTOMER CARE EMAIL:
[email protected]
    



specication without notice.







11 CLEANING CHROME SURFACES
  
  
  
  


Made in Great Britain
REECE PRODUCT QUALITY GUARANTEE
You have purchased a product from Reece Australia Pty Ltd
ABN 84 004 097 090 (“Reece”). This product is covered by a
5 year replacement product warranty and a 12 month warranty
over spare parts and labour.
5 YEAR PRODUCT WARRANTY
This warranty covers faults in the construction, material and
assembly of finished products. Products which are within 5
years from the date of purchase, found upon inspection by an
authorised Reece representative to be defective in construction,
material or assembly, will be repaired or exchanged with an
equivalent product free of charge. Replaced items become
Reece’s property.
ONE YEAR SPARE PARTS WARRANTY
Spare parts which are within 1 year from the date of purchase
found upon inspection by an authorised Reece representative
to be defective in construction, material or assembly will be
replaced free of charge. Replaced items become Reece’s
property.
AVAILABILITY OF REPLACEMENT PRODUCTS
AND SPARE PARTS
All replacement products and spare parts will be available for
collection without charge to the customer at the nearest Reece
branch to the customer’s location, or elsewhere as agreed
between the customer and Reece.
LABOUR
The labour for the replacement of products that are within one
year from the date of purchase found upon inspection by an
authorised Reece representative to be defective in construction,
material or assembly, and in relation to all spare parts to which
this warranty applies, will be supplied by Reece or the relevant
supplier using licensed plumbers engaged by Reece or the
relevant supplier
WARRANTY CONDITIONS
This warranty will apply only under all of the following
conditions:
• Theitemhasbeeninstalledbyalicensedplumber
• Failureisduetoafaultinthemanufactureoftheproduct
• Proofofpurchase(includingthedateofpurchase)is 
provided
• Theinstallationoftheproductisinaccordancewiththe
instructions provided
• Theproducthasbeeninstalledinvalidapplicationsas
stated in accordance with the recommended use
This warranty does not cover products purchased as an
ex-display without being fully checked and tested for sale
by the manufacturer.
This warranty does not include faults caused by:
• Unsuitableorimproperuse
• Incorrectinstallationorinstallationnotinaccordance
with the instructions provided
• Installationorpartinstallationbyanypersonotherthana
 LICENSEDPLUMBERwhoissuitablyqualifiedtoinstallthe
 product,oraLicensedElectricianwhereapplicable.
• Normalwearandtear
• Inadequateorcompletelackofmaintenance
• Chemical,electrochemicalorelectricalinfluences
• Harshdetergentsorabrasivecleanersusedon
product finishes
EXCLUSIONS
To the fullest extent permitted by law, Reece excludes all liability
for damage or injury to any person, damage to any property,
and any indirect consequential or other loss or damage.
CLAIM PROCEDURE
Forallwarrantyqueriescustomersaretocontactthebranch
where the product was purchased. These details can be found
on your purchase invoice.
General contact details for Reece are as follows:
Reece Australia Pty Ltd
 118BurwoodHwy
 BurwoodVIC3125
 +61392740000
[email protected]
The benefits given by this warranty are in addition to the other
rights and remedies that consumers may have under the
AustralianConsumerLawandanyotherapplicablelaws.
Our goods come with guarantees that cannot be excluded
undertheAustralianConsumerLaw.Youareentitledtoa
replacement or refund for a major failure and for compensation
for any other reasonably foreseeable loss or damage. You
are also entitled to have the goods repaired or replaced if the
goods fail to be of acceptable quality and the failure does not
amount to a major failure.
SHOWER-BACKREST-GRABRAIL-ARMITAGE-5
Don’t risk it, use a licensed plumber.™
5
YEAR
Q
U
A
L
I
T
Y
G
U
A
R
A
N
T
E
E

Other Armitage Shanks Bathroom Fixture manuals

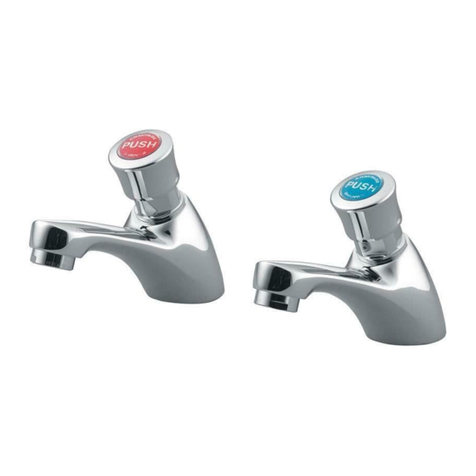
Armitage Shanks SANDRINGHAM SELF CLOSING TAP S7029AA User guide

Armitage Shanks

Armitage Shanks SANDRINGHAM SELF CLOSING TAP S7029AA User guide

Popular Bathroom Fixture manuals by other brands

Kohler Mira Sport Max J03G Installation and user guide

Kohler

Kohler Mira Sport Max J03G Installation and user guide

Moen 186117 Series installation guide

Moen

Moen 186117 Series installation guide

Hans Grohe Raindance Showerpipe 27235000 Instructions for use/assembly instructions

Hans Grohe

Hans Grohe Raindance Showerpipe 27235000 Instructions for use/assembly instructions

Signature Hardware ROUND SWIVEL BODY SPRAY 948942 Install

Signature Hardware

Signature Hardware ROUND SWIVEL BODY SPRAY 948942 Install

fine fixtures AC3TH installation manual

fine fixtures

fine fixtures AC3TH installation manual

LIXIL HP50 Series quick start guide

LIXIL

LIXIL HP50 Series quick start guide

KOLO ATOL PLUS installation manual

KOLO

KOLO ATOL PLUS installation manual

Hans Grohe PuraVida 15073000 Instructions for use/assembly instructions

Hans Grohe

Hans Grohe PuraVida 15073000 Instructions for use/assembly instructions

Toto TS111B8 Installation and owner's manual

Toto

Toto TS111B8 Installation and owner's manual

Kohler K-1158-H2 Homeowner's guide

Kohler

Kohler K-1158-H2 Homeowner's guide

Coram Showers OFFSET QUADRANT manual

Coram Showers

Coram Showers OFFSET QUADRANT manual

baliv DU-2010 manual

baliv

baliv DU-2010 manual

odass OD-1710 instruction manual

odass

odass OD-1710 instruction manual

Oxygenics Evolution Easy installation instructions

Oxygenics

Oxygenics Evolution Easy installation instructions

Bradley Express SS Series installation instructions

Bradley

Bradley Express SS Series installation instructions

Helvex TH-974 installation guide

Helvex

Helvex TH-974 installation guide

DURAVIT C.1 C15240 0090 Instructions for mounting and use

DURAVIT

DURAVIT C.1 C15240 0090 Instructions for mounting and use

Sunshower PURE SOLO manual

Sunshower

Sunshower PURE SOLO manual

manuals.online logo
manuals.online logoBrands
  • About & Mission
  • Contact us
  • Privacy Policy
  • Terms and Conditions

Copyright 2025 Manuals.Online. All Rights Reserved.