manuals.online logo
Brands
  1. Home
  2. •
  3. Brands
  4. •
  5. Aroma
  6. •
  7. Rice Cooker
  8. •
  9. Aroma ARC-830CA User manual

Aroma ARC-830CA User manual

Other Aroma Rice Cooker manuals

Aroma Big Chef ARC-1033E User manual

Aroma

Aroma Big Chef ARC-1033E User manual

Aroma ARC-814 User manual

Aroma

Aroma ARC-814 User manual

Aroma ARC-805 Technical specifications

Aroma

Aroma ARC-805 Technical specifications

Aroma ARC-946 Use and care manual

Aroma

Aroma ARC-946 Use and care manual

Aroma ARC-743-1NG User manual

Aroma

Aroma ARC-743-1NG User manual

Aroma ARC-926SBD User manual

Aroma

Aroma ARC-926SBD User manual

Aroma ARC-850D Use and care manual

Aroma

Aroma ARC-850D Use and care manual

Aroma ARC-302NG User manual

Aroma

Aroma ARC-302NG User manual

Aroma ARC-994SB User manual

Aroma

Aroma ARC-994SB User manual

Aroma Big Chef ARC-1033E User manual

Aroma

Aroma Big Chef ARC-1033E User manual

Aroma ARC-805RB User manual

Aroma

Aroma ARC-805RB User manual

Aroma ARC-820SW Use and care manual

Aroma

Aroma ARC-820SW Use and care manual

Aroma ARC-940SB User manual

Aroma

Aroma ARC-940SB User manual

Aroma ARC-838TC User manual

Aroma

Aroma ARC-838TC User manual

Aroma Professional ARC-2000 User manual

Aroma

Aroma Professional ARC-2000 User manual

Aroma ARC-687D-1NG User manual

Aroma

Aroma ARC-687D-1NG User manual

Aroma ARC-737-1G User manual

Aroma

Aroma ARC-737-1G User manual

Aroma Big Chef ARC-1024E User manual

Aroma

Aroma Big Chef ARC-1024E User manual

Aroma ARC-1616 User manual

Aroma

Aroma ARC-1616 User manual

Aroma ARC-747-1NG User manual

Aroma

Aroma ARC-747-1NG User manual

Aroma ARC-733-1NGR User manual

Aroma

Aroma ARC-733-1NGR User manual

Aroma ARC-856 User manual

Aroma

Aroma ARC-856 User manual

Aroma ARC-1030SB User manual

Aroma

Aroma ARC-1030SB User manual

Aroma Professional ARC-2000A User manual

Aroma

Aroma Professional ARC-2000A User manual

Popular Rice Cooker manuals by other brands

Tiger JPT-H10S operating instructions

Tiger

Tiger JPT-H10S operating instructions

bene casa BC-43923 User manual and  recipe book

bene casa

bene casa BC-43923 User manual and recipe book

Zojirushi NMDC-R10 operating instructions

Zojirushi

Zojirushi NMDC-R10 operating instructions

Cuckoo CR-0351F series operating instructions

Cuckoo

Cuckoo CR-0351F series operating instructions

TECHWOOD TCRV-2504 instruction manual

TECHWOOD

TECHWOOD TCRV-2504 instruction manual

Sencor SRM 2800SS user manual

Sencor

Sencor SRM 2800SS user manual

Philips HD4760 instructions

Philips

Philips HD4760 instructions

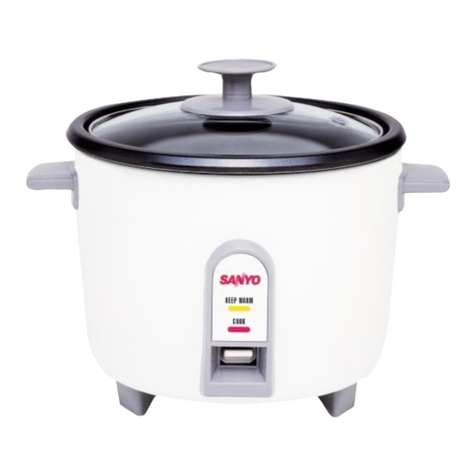
Sanyo EC-234 instruction manual

Sanyo

Sanyo EC-234 instruction manual

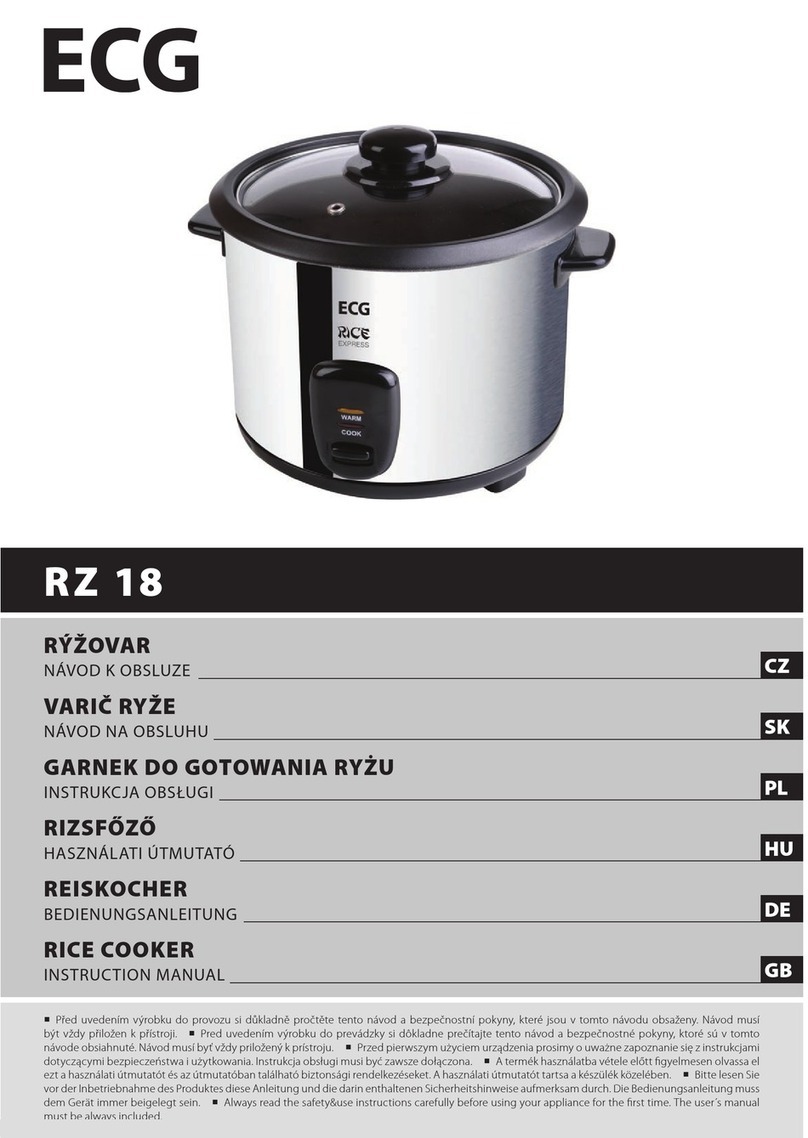
ECG RZ 18 instruction manual

ECG

ECG RZ 18 instruction manual

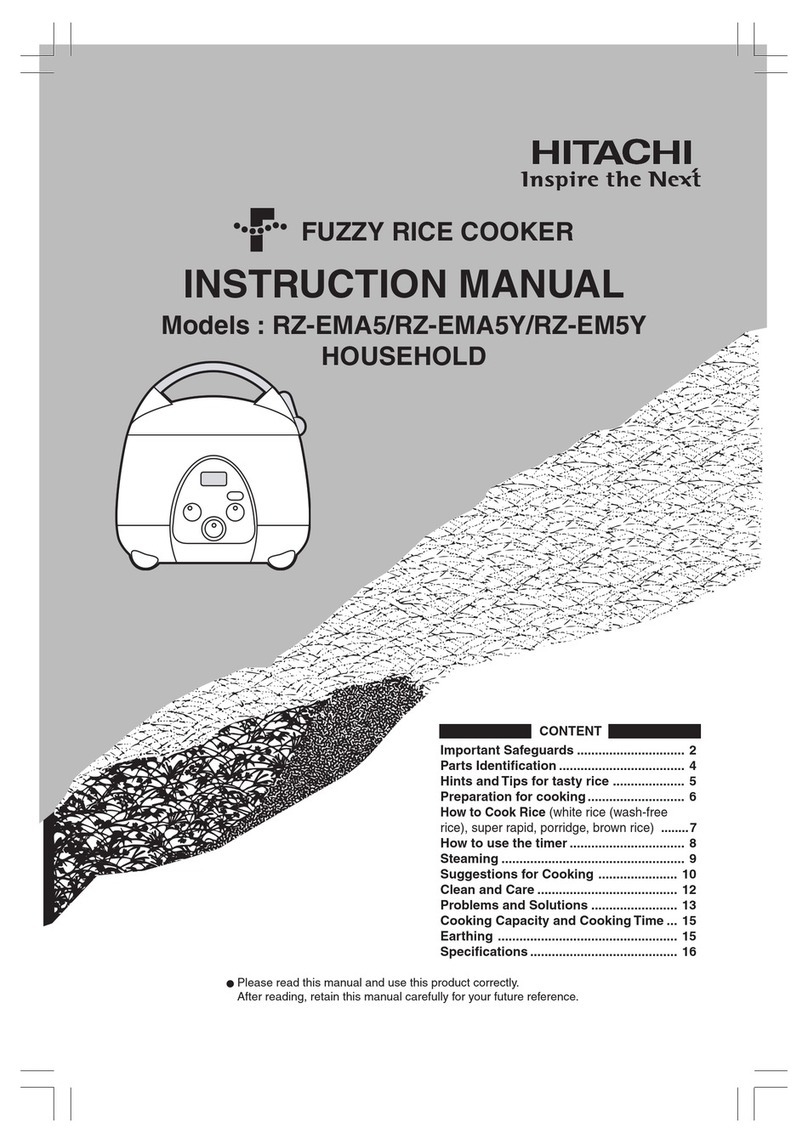
Hitachi RZ-EMA5 instruction manual

Hitachi

Hitachi RZ-EMA5 instruction manual

Kambrook Rice Master KRC410BSS Instruction booklet

Kambrook

Kambrook Rice Master KRC410BSS Instruction booklet

Proctor-Silex RC13 manual

Proctor-Silex

Proctor-Silex RC13 manual

Cuckoo CRP-M1059F Series operating instructions

Cuckoo

Cuckoo CRP-M1059F Series operating instructions

Imusa GAU-00022 instruction manual

Imusa

Imusa GAU-00022 instruction manual

Cuchen PM061 Series manual

Cuchen

Cuchen PM061 Series manual

Tatung TRC-10UDW user manual

Tatung

Tatung TRC-10UDW user manual

Midea MB-YJ30CM instruction manual

Midea

Midea MB-YJ30CM instruction manual

Cuisinart CRC-400 INSTRUCTION AND RECIPE BOOKLET

Cuisinart

Cuisinart CRC-400 INSTRUCTION AND RECIPE BOOKLET

manuals.online logo
manuals.online logoBrands
  • About & Mission
  • Contact us
  • Privacy Policy
  • Terms and Conditions

Copyright 2025 Manuals.Online. All Rights Reserved.

10-Cup Digital Rice
Cooker & Food Steamer
Instruction Manual
ARC-830CA
www.AromaCo.com
Cuiseur à riz et cuiseur
vapeur numérique pour
aliments, capacité de 10
tasses
Mode d'emploi
ARC-830CA
www.AromaCo.com
Congratulations on your purchase of the 10-Cup Digital Rice Cooker
and Food Steamer.
Aroma has simplified the art of cooking perfect, fluffy rice down to the push of a
button. Just add the desired amount of rice, the appropriate amount of water
and turn it on. The machine will automatically switch to warming mode when
the rice is done. The convenient digital delay timer can be set up to 15 hours
ahead of time, so delicious rice is ready when you are. This versatile appliance
can simmer soups and stews; it will even make a cake!
This rice cooker also comes equipped with a steam tray. Ideal for preparing
nutritious, well-balanced meals, steaming locks in food’s natural flavor, moisture
and nutrients without the use of added oils or fats. Included in this instruction
manual is a handy steaming reference to guide you through the preparation of
nearly all your favorite vegetables and meats. Steam vegetables or meat and
cook rice simultaneously, all in one easy-to-use appliance!
This manual contains instructions for the use of your new rice cooker as well as
some additional information about rice. For recipe suggestions or more kitchen
solution ideas, please visit us online at www.AromaCo.com.
Please read all the instructions before first use.
Published By:
Aroma Housewares Co.
6469 Flanders Drive
San Diego, CA 92121
U.S.A.
1-800-276-6286
www.aromaco.com
© 2007 Aroma Housewares Company All rights reserved.
Félicitations pour l'achat de votre cuiseur à riz et cuiseur vapeur numérique pour
aliments d'une capacité de 10 tasses.
Aroma a simplifié l'art de cuire un riz parfait et gonflant en pressant tout
simplement sur un bouton. Il vous suffit d'ajouter la quantité de riz voulue, la
quantité d'eau appropriée et de mettre l'appareil en marche. Il se mettra
automatiquement en mode « Maintien au chaud » une fois que le riz sera cuit. Sa
minuterie numérique à retardateur vous donne l'avantage de pouvoir le
programmer jusqu'à 15 heures à l'avance, de sorte qu'un riz délicieux vous attend
quand vous êtes prêt(e) à le consommer. Cet appareil polyvalent vous permet
de faire mijoter des soupes et des ragoûts, et même de faire des gâteaux!
Ce cuiseur à riz est également fourni avec un plateau vapeur. Idéal pour
préparer des repas nutritifs, bien équilibrés; la cuisson à la vapeur conserve la
saveur naturelle, la teneur en humidité et les éléments nutritifs des aliments, sans
utilisation additionnelle d'huiles ou de graisses. Ce mode d'emploi comprend un
guide de référence pratique de la cuisson à la vapeur pour vous faciliter la
préparation de presque tous vos légumes et viandes favoris. Faites cuire des
légumes ou de la viande à la vapeur et faites cuire du riz simultanément, le tout
dans un seul appareil facile d'utilisation!
Ce mode d'emploi contient des instructions pour l'utilisation de votre nouveau
cuiseur à riz, ainsi que des informations additionnelles sur le riz. Pour obtenir des
suggestions de recettes ou d'autres idées de solutions pour la cuisine, veuillez
consulter notre site Internet à www.AromaCo.com.
Veuillez lire toutes les instructions avant la première utilisation.
Publié par :
Aroma Housewares Co.
6469 Flanders Drive
San Diego, CA 92121
É.-U.
1-800-276-6286
www.aromaco.com
© 2007 Aroma Housewares Company Tous droits réservés
CONSERVEZ CES INSTRUCTIONS
1
IMPORTANT SAFEGUARDS
Basic safety p ecautions should always be followed when using elect ical
appliances, including the following:
1. Important: Read all instructions
carefully before first use.
2. Do not touch hot surfaces. Use the
handles or knobs.
3. Use only on a level, dry and heat-
resistant surface.
4. To protect against electrical shock,
do not immerse cord, plug or the
appliance in water or any other
liquid.
5. Close supervision is necessary when
the appliance is used by or near
children.
6. Unplug from outlet when not in use
and before cleaning. Allow unit to
cool before putting on or taking off
parts, and before cleaning the
appliance.
7. Do not operate any appliance with
a damaged cord or plug or after
the appliance malfunctions or has
been damaged in any manner.
Return the appliance to the nearest
authorized service facility for
examination, repair or adjustment.
8. The use of accessory attachments
not recommended by the
appliance manufacturer may result
in fire, electrical shock or injury.
9. Do not use outdoors.
10. Do not let cord touch hot surfaces
or hang over the edge of a counter
or table.
11. Do not place on or near a hot
burner or in a heated oven.
12. Do not use the appliance for other
than its intended use.
13. Extreme caution must be used when
moving the appliance containing
hot water or other liquids.
14. Do not touch, cover or obstruct the
steam valve on the top of the rice
cooker as it is extremely hot and
may cause burns.
15. Use only with a 120V AC power
outlet.
16. Always unplug from the base of the
wall outlet. Never pull on the cord.
17. The rice cooker should be operated
on a separate electrical circuit from
other operating appliances. If the
electrical circuit is overloaded with
other appliances, the appliance
may not operate properly.
18. Always make sure the outside of the
inner cooking pot is dry prior to use.
If cooking pot is returned to cooker
when wet, it may damage or cause
the product to malfunction.
19. Use extreme caution when opening
the lid during or after cooking. Hot
steam will escape and may cause
burns.
20. Rice should not be left in the rice pot
with the keep warm function on for
more than 12 hours.
21. To prevent damage or deformation,
do not use the inner pot on a
stovetop or burner.
22. To disconnect, turn any control to
“OFF”, then remove plug from wall
outlet.
23. To reduce the risk of electrical shock,
cook only in the removable
container provided.
SAVE THESE INSTRUCTIONS
1
IMPORTANTES MESURES DE PRÉCAUTION
Les consignes de sécu ité de base doivent toujou s êt e suivies lo s de l'utilisation
d'appa eils élect iques, y comp is les mesu es suivantes :
1. Important : lisez attentivement toutes les instructions avant la première utilisation.
2. Ne touchez pas les surfaces chaudes. Utilisez les poignées ou les boutons.
3. Utilisez uniquement sur une surface plane, sèche et résistante à la chaleur.
4. Pour éviter une électrocution, n'immergez pas le fil, la fiche ou l'appareil dans l'eau
ou tout autre liquide.
5. Une supervision attentive est nécessaire lorsque l'appareil est utilisé par des enfants
ou près d'enfants.
6. Débranchez l'appareil de la prise de courant lorsqu'il n'est pas utilisé et avant de
le nettoyer. Laissez l'appareil se refroidir avant d'ajouter ou de retirer des pièces, et
avant de nettoyer l'appareil.
7. Ne mettez pas en marche un appareil dont le fil ou la fiche est endommagé,
ou après que l'appareil ait mal fonctionné ou qu'il ait été endommagé d'une
manière ou d'une autre. Renvoyez l'appareil au centre de service agréé le plus
proche pour qu'il soit examiné, réparé ou ajusté.
8. L'utilisation d'accessoires non recommandés par le fabricant de l'appareil pourrait
provoquer un incendie, une électrocution ou des blessures.
9. N'utilisez pas l'appareil à l'extérieur.
10. Ne laissez pas le fil toucher des surfaces chaudes ou pendre par-dessus le coin
d'un comptoir ou d'une table.
11. Ne mettez pas l'appareil sur ou à proximité d'un brûleur chaud ou dans un four
chauffé.
12. N'utilisez pas l'appareil à une fin autre que celle qui est prévue.
13. D'extrêmes précautions doivent être prises pour déplacer l'appareil lorsqu'il
contient de l'eau chaude ou d'autres liquides.
14. Ne touchez pas, ne couvrez pas, ou n'obstruez pas la valve d'évacuation de la
vapeur qui se trouve sur le dessus du cuiseur à riz, car elle est extrêmement
chaude et peut provoquer des brûlures.
15. Utilisez l'appareil uniquement avec une prise de courant de 120 V CA.
16. Saisissez toujours la fiche pour débrancher de la prise de courant murale. Ne tirez
jamais sur le fil.
17. Il est nécessaire de faire fonctionner le cuiseur à riz sur un circuit électrique
différent de celu qui est utilisé pour d'autres appareils électriques. Si le circuit
électrique est exagérément sollicité par d'autres appareils électriques, l'appareil
risque de ne pas fonctionner correctement.
18. Assurez-vous toujours que l'extérieur du bol interne de cuisson est sec avant
l'utilisation.
Si le bol de cuisson est replacé dans le cuiseur en étant mouillé, il risque
d'endommager le produit ou être la cause de son mauvais fonctionnement.
1. A short power-supply cord is provided to reduce the risks resulting from
becoming entangled in or tripping over a longer cord.
2. Longer extension cords are available and may be used if care is exercised in
their use.
3. If a longer extension cord is used:
a. The marked electrical rating of the extension cord should be at least as
great as the electrical rating of the appliance.
b. The longer cord should be arranged so that it will not drape over the
counter top or tabletop where it can be pulled by children or tripped over
unintentionally.
2
This appliance has a polarized plug (one blade is wider than the other); follow
the instructions below:
To reduce the risk of electric shock, this plug is intended to fit into a polarized
outlet only one way. If the plug does not fit fully into the outlet, reverse the
plug. If it still does not fit, contact a qualified electrician. Do not attempt to
modify the plug in any way.
If the supply cord is damaged, it must be replaced by the manufacturer, its
service agent or a similarly qualified person in order to avoid a hazard.
This appliance is for household use only.
SHORT CORD INSTRUCTIONS
POLARIZED PLUG
19. Prenez d'extrêmes précautions en soulevant le couvercle pendant ou après
la cuisson. De la vapeur chaude s'échappera et pourrait provoquer de
brûlures.
20. Il ne faut pas laisser de riz dans le bo à riz en conservant la fonction « maintien au
chaud » activée pendant plus de 12 heures.
21. Pour éviter qu'il ne s'endommage ou ne se déforme, n'utilisez pas le bol interne sur
un
fourneau ou brûleur.
22. Pour déconnecter, mettre n'importe quelle commande sur la position «ARRÊT »,
puis
retirer la fiche de la prise de courant 120 VCA.
23. Pour réduire le risque d'électrocution, faites cuire uniquement dans le récipient
démontable fourni avec l'appareil.
IMPORTANTES MESURES DE PRÉCAUTION
CONSERVEZ CES INSTRUCTIONS
2
3
PARTS IDENTIFICATION
1
4
23
5
12
13 14
15 16
1. Lid Release Button
2. Handle
3. Steam Vent
4. Lid
5. Condensation Collector
6. Delay Timer Button
7. Cook Indicator Light
8. Cook Button
9. Digital Delay Timer Display
10. Warm Indicator Light
11. Warm/Off Button
12. Inner Pot
13. Rice Measurement Cup
14. Rice Paddle
15. Soup Ladle
16. Steam Tray
6
7
8
9
10
11
1. Un fil court d'alimentation électrique est fourni pour réduire les risques
d'enchevêtrement ou de trébuchement à la suite de l'utilisation d'un fil plus
long.
2. Des rallonges plus longues sont disponibles et peuvent être utilisées avec
prudence.
3. Si une rallonge plus longue est utilisée :
a. Les caractéristiques de tension nominale indiquées sur la rallonge doivent
être au moins égales aux caractéristiques de tension nominale de
l'appareil.
b. Le fil plus long doit être disposé de manière à ne pas pendre par-dessus le
comptoir ou la table, car des enfants peuvent le tirer ou il peut être la
cause de trébuchements involontaires.
3
Cet appareil a une fiche polarisée (une lame est plus large que l'autre); suivre
les instructions ci-dessous :
Pour réduire le risque d'électrocution, cette fiche ne peut s'insérer dans une
prise polarisée que dans un seul sens. S'il n'est pas possible d'insérer à fond la
fiche dans la prise, inverser les lames de côté. Si la fiche ne peut toujours pas
s'insérer dans la prise, il faut alors communiquer avec un électricien qualifié.
N'essayez pas de modifier la fiche d'aucune manière.
Si le fil d'alimentation est endommagé, il doit être remplacé par le fabricant,
son agent préposé aux réparations et à l'entretien, ou une autre personne
qualifiée pour éviter une situation dangereuse.
Cet appareil est destiné à une utilisation domestique
uniquement.
INSTRUCTIONS POUR LE FIL COURT
FICHE POLARISÉE
NE PAS LAISSER LE FIL PENDRE!
TENIR À
L'ÉCART DES
ENFANTS!
4
1. Read all instructions and important safeguards.
2. Remove all packaging materials and make sure items are received in good
condition.
3. Tear up all plastic bags as they can pose a risk to children.
4. Wash lid, steam vent and accessories in warm soapy water. Rinse and dry
thoroughly.
5. Remove inner pot from rice cooker and clean with warm soapy water. Rinse
and dry thoroughly before returning to cooker.
6. Wipe body clean with a damp cloth.
•Do not use abrasive cleaners or scouring pads.
•Do not immerse the rice cooker base, cord or plug in water at any time.
USING YOUR RICE COO ER
Before First Use:
To Cook Rice:
1. Using the measuring cup provided, measure out the desired amount of rice. One
full, level cup of uncooked rice will yield 2 cups of cooked rice. The measuring cup
provided adheres to rice industry standards (180mL) and is not equal to one U.S.
cup.
2. Rinse rice in a separate container until the water becomes relatively clear; drain.
3. Place rinsed rice in the inner pot.
4. Using measuring cup provided or the water measurement lines located inside the
inner pot, add the appropriate amount of water. If you are making brown rice,
follow the special instructions for brown rice located on page 8 of this manual.
5. For softer rice, allow rice to soak for 10-20 minutes prior to cooking.
6. Making sure that the exterior of the inner pot is clean, dry and free of debris, set the
inner pot in the rice cooker. Close the lid and plug the power cord into a wall outlet.
* To avoid loss of steam and longe cooking times, do not open the lid at
any point du ing the cooking p ocess.
7. Press “COOK” button. The “COOK” light will illuminate. When the rice is finished, a
chime will sound to alert you. The unit will automatically switch to warm mode and
the “WARM” light will illuminate.
8. After cooking, allow rice to stand for 5-10 minutes without removing the lid. This will
ensure that the rice is cooked thoroughly.
9. The rice cooker will remain in warm mode until it is unplugged. Be sure to unplug the
cord from the wall outlet when not in use.
* It is important that the outside surface of the inner pot is completely clean and dry
before it is placed into the rice cooker. Water, food, or other substances on the pot will
come into contact with the heating element and may cause damage to the product.
4
IDENTIFICATION DES PIÈCES
1
4
23
5
12
13 14
15 16
1. Bouton de dégagement
du couvercle
2. Poignée
3. Évent à vapeur
4. Couvercle
5. Collecteur de
condensation
6. Bouton de la minuterie à
retardement
7. Témoin lumineux pour la
fonction « Cuisson »
8. Bouton « Cuisson »
9. Affichage numérique de
la minuterie à
retardement
10. Témoin lumineux pour la
fonction « Maintien au
chaud »
11. Bouton « Maintien au
chaud/Arrêt »
12. Bol interne
13. Tasse de mesure du riz
14. Spatule à riz
15. Louche à soupe
16. Plateau vapeur
6
7
8
10
11
5
USING YOUR RICE COO ER
To Use Delay Timer:
1. Press the “DELAY TIMER” button (in 1-hour increments) until it displays the
number of hours in which you would like your rice to be finished cooking.
2. Press “COOK” after you have made your choice.
3. Press the “WARM/OFF” button to cancel your choice and reset.
NOTE
The digital display on this unit is for the delay timer function only. When
the delay timer is not in use, the display will show two lines (See illustration
below).
To Steam Food:
1. When steaming only, add the appropriate amount of water to the inner pot
according to the food to be cooked. A convenient steaming guide has been
provided beginning on page 9, for reference.
2. Place food into the steam tray. Smaller foods may be placed in a heat-proof
dish and then placed into the steam tray.
3. Making sure that the outside surface of the inner pot is completely clean and
dry, set the inner pot into the body of the rice cooker then place the steam
tray into the inner pot. Close the lid and plug the power cord into a wall
outlet.
4. Press the “COOK” button. The cook indicator light will illuminate.
5. When steaming is complete, the unit will automatically switch to keep warm
mode. We recommend keeping food on warm mode no longer than 5-10
minutes to avoid over cooking.
6. The rice cooker will remain on warm mode until it is unplugged. Be sure to
unplug the cord from the wall outlet when not in use.
DELAY
TIMER
WARM
OFF COOK
5
1. Lisez toutes les instructions et mesures de précaution
2. Enlevez tous les matériaux d'emballage et vérifiez que les articles sont reçus en
bon état.
3. Déchirez tous les sacs en plastique, car ils peuvent présenter un danger pour
les enfants.
4. Lavez le couvercle, l'évent à vapeur et les accessoires dans de l'eau chaude
savonneuse. Rincez-les et essuyez-les jusqu'à ce qu'ils soient complètement
secs.
5. Enlevez le bol interne du cuiseur à riz et lavez-le avec de l'eau chaude
savonneuse. Rincez-le et essuyez-le jusqu'à ce qu'il soit complètement sec
avant de le remettre dans le cuiseur.
6. Essuyez le corps de l'appareil avec un chiffon humide pour le nettoyer.
• N'utilisez pas d'agents nettoyants abrasifs ou de tampons à récurer.
• N'immergez jamais le socle du cuiseur à riz, le fil ou la fiche dans l'eau.
UTILISATION DE VOTRE CUISEUR À RIZ
AVANT LA PREMIÈRE UTILISATION:
USING YOUR RICE COO ER
CAUTION:
• Open the lid only when necessary.
• If cooking pot is returned to cooker when wet it will damage this product,
causing it to malfunction.
To Steam Food And Cook Rice Simultaneously:
One of the most convenient features of this rice cooker is the ability to both cook
rice and steam food simultaneously, ideal for creating delicious all-in-one meals.
1. Place the desired amount of rice and appropriate amount of water into the
inner pot. See “To Cook Rice” on page 4 for details. Do not attempt to cook
more than 8 cups (uncooked) of rice when using the steam tray
simultaneously. The steam tray will not fit.
2. Place the inner pot into the unit and begin to cook the rice.
3. Refer to the steaming guides for vegetables (page 9) or meat (page 10) for
hints and approximate steaming times. It is best to insert the food to be
steamed toward the end of the rice cooking cycle so that your meal is fresh
and warm all at once.
4. Place your choice of vegetables or meat into the steam tray. Open the lid,
using caution as steam escaping will be extremely hot, and place the steam
tray into the rice cooker.
5. Close the lid and allow the cooker to resume cooking.
6. Once food has been steamed for the appropriate time open the lid. Use
caution when opening lid as steam escaping will be extremely hot. Remove
the steam tray and check food to be sure it has been thoroughly cooked.
Exercise caution when removing the steam tray, as it will be hot.
7. Close the lid of the rice cooker and allow rice to continue to cook until done.
The unit will chime when rice is ready and switch to keep warm mode.
8. The rice cooker will remain on warm mode until it is unplugged. Be sure to
unplug the cord from the wall outlet when not in use.
6
NOTE
It is possible to steam at any point during the rice cooking cycle.
However, it is recommended that you steam during the end of the
cycle so that steamed food does not grow cold or become soggy
before the rice is ready.
Cuisson Du Riz :
1. En utilisant la tasse de mesure fournie, mesurez la quantité de riz désirée. Une tasse
remplie à ras bord de riz non cuit donne 2 tasses de riz cuit. La tasse de mesure
fournie est conforme aux normes de l'industrie du riz (180 mL) et n'équivaut pas à
une tasse de mesure américaine.
2. Rincez le riz dans un récipient séparé jusqu'à ce que l'eau soit relativement claire;
égouttez.
3. Placez le riz rincé dans le bol interne.
4. En utilisant la tasse de mesure fournie ou les lignes de graduation pour l'eau situées
sur la surface intérieure du bol interne, ajoutez la quantité d'eau appropriée. Si vous
faites du riz brun, suivez les instructions particulières pour le riz brun que vous
trouverez à la page 9 de ce mode d'emploi.
5. Pour un riz plus tendre, laissez le riz tremper pendant 10 à 20 minutes avant de le
cuire.
6. En s'assurant que l'extérieur du bol interne est propre, sec et exempt de débris,
installez le bol interne dans le cuiseur à riz. Fermez le couvercle et branchez le fil
électrique dans la prise de courant murale.
* Pour éviter une perte de vapeur et des temps de cuisson prolongés, ne soulevez pas
du tout le couvercle pendant le processus de cuisson.
7. Appuyez sur le bouton « CUISSON ». Le témoin lumineux « CUISSON » va s'allumer.
Quand le riz sera cuit, une sonnerie retentira pour vous prévenir. L'appareil se mettra
automatiquement en mode « Maintien au chaud » et le témoin lumineux « MAINTIEN
AU CHAUD » s'allumera.
8. Après la cuisson, laissez le riz reposer pendant 5 à 10 minutes sans retirer le
couvercle. Ceci permettra de s'assurer que le riz est entièrement cuit.
9. Le cuiseur à riz restera en mode « Maintien au chaud » jusqu'à ce qu'il soit
débranché. Veillez à débrancher le fil de la prise électrique murale lorsque
l'appareil n'est pas utilisé.
* Il est important que la surface extérieure du bol interne soit entièrement
propre et sèche avant que le bol interne ne soit placé dans le cuiseur à riz.
L'eau, les aliments, ou d'autres substances qui se trouveraient sur le bol
entreraient en contact avec l'élément chauffant et risqueraient
d'endommager le produit.
UTILISATION DE VOTRE CUISEUR À RIZ
6
Always unplug unit and allow to cool completely befo e cleaning.
1. Remove the inner cooking pot. Wash it in warm, soapy water using a sponge
or dishcloth.
2. Rinse and dry thoroughly.
3. Repeat process with steam tray and other provided accessories.
4. Wipe the underside of the lid with a warm, damp cloth. Dry with a soft cloth.
5. Wipe the body of the rice cooker and the underside of the lid clean with a
damp cloth.
6. To clean the steam vent (clean after each use):
• Pull out the steam vent as shown in Diagram 1.
• Empty and wash the steam vent in warm, soapy
water. Rinse thoroughly.
• Dry the steam vent with a soft cloth.
• Reinsert the steam vent for next use.
•Do not use harsh abrasive cleaners, scouring pads or products that are not
considered safe to use on non-stick coatings.
•This appliance is NOT dishwasher safe. Inner pot and accessories are NOT
dishwasher safe.
7
HOW TO CLEAN
HELPFUL HINTS
1. Rinse rice before placing it into the inner pot to remove excess bran and
starch. This will help reduce browning and sticking to the bottom of the
pot.
2. If you have experienced any sticking with the type of rice you are using,
try adding a light coating of vegetable oil or non-stick spray to the
bottom of the inner pot before adding rice.
3. As there are many different kinds of rice available (see About Rice on
page 11), rice/water measurements may vary slightly.
4. For softer rice, allow it to soak for 10-20 minutes prior to cooking.
COO ING GUIDE
Diagram 1
7
UTILISATION DE VOTRE CUISEUR À RIZ
Pour Utiliser La Minuterie à Retardement :
1. Appuyez sur le bouton « MINUTERIE À RETARDEMENT » (par incréments d'une
heure) jusqu'à ce qu'il affiche le nombre d'heures pendant lesquelles vous
désirez que votre riz ait fini de cuire.
2. Appuyez sur « CUISSON » après avoir effectué votre choix.
3. Appuyez sur le bouton « MAINTIEN AU CHAUD/ARRÊT » pour annuler votre
choix et remettre l'appareil à zéro.
REMARQUE
L'affichage numérique de cet appareil ne sert qu'à la fonction de minuterie
à retardement. Lorsque la minuterie à retardement n'est pas utilisée,
l'affichage indique deux lignes (voir l'illustration ci-dessous).
Cuisson Des Aliments à La Vapeur :
1. Pour une cuisson à la vapeur uniquement, ajoutez la quantité d'eau
appropriée dans le bol interne, en fonction de l'aliment à cuire. Un guide
pratique de cuisson à la vapeur est présenté à partir de la page 11, à des fins
de référence.
2. Placez l'aliment dans le plateau vapeur. Les petits aliments peuvent être
disposés dans un plat qui résiste à la chaleur et placés ensuite sur le plateau
vapeur.
3. En vous assurant que la surface extérieure du bol interne est entièrement
propre et sèche, placez le bol interne dans le corps du cuiseur à riz et mettez
ensuite le plateau vapeur dans le bol interne. Fermez le couvercle et
branchez le fil électrique dans la prise de courant murale.
4. Appuyez sur le bouton « CUISSON » Le témoin lumineux cuisson va s'allumer.
5. Lorsque la cuisson à la vapeur est terminée, l'appareil se met
automatiquement en mode « Maintien au chaud ». Nous recommandons de
ne pas maintenir les aliments en mode « Maintien au chaud » pendant plus de
5 à 10 minutes pour éviter une surcuisson.
6. Le cuiseur à riz restera en mode « Maintien au chaud » jusqu'à ce qu'il soit
débranché. Veillez à débrancher le fil de la prise électrique murale lorsque
l'appareil n'est pas utilisé.
DELAY
TIMER
WARM
OFF COOK
UNCOO ED
RICE
WHITE RICE
WATER WITH
MEASURING CUP
WHITE RICE
WATERLINE
INSIDE POT APPROX COO ED
RICE YIELD
2 Cups 2-1/2 Cups Line 2 4 Cups
3 Cups 3-1/2 Cups Line 3 6 Cups
4 Cups 4-1/2 Cups Line 4 8 Cups
5 Cups 5-1/2 Cups Line 5 10 Cups
6 Cups 6-1/2 Cups Line 6 12 Cups
7 Cups 7-1/2 Cups Line 7 14 Cups
8 Cups 8-1/2 Cups Line 8 16 Cups
9 Cups 9-1/2 Cups LIne 9 18 Cups
10 Cups 10-1/2 Cups Line 10 20 Cups
White Rice/Water Measurement Chart:
8
COO ING GUIDE
*Due to the extra water needed to cook brown rice, the maximum amount
of brown rice that may be cooked at one time is 8 cups.
UNCOO ED
RICE
BROWN RICE
WATER WITH MEASURING
CUP APPROX COO ED RICE YIELD
2 Cups 3 Cups 4 Cups
3 Cups 4-1/4 Cups 6 Cups
4 Cups 5-1/2 Cups 8 Cups
5 Cups 6-3/4 Cups 10 Cups
6 Cups 8 Cups 12 Cups
7 Cups 9-1/4 Cups 14 Cups
8 Cups 10-1/2 Cups 16 Cups
Brown Rice/Water Measurement Chart:
SPECIAL INSTRUCTIONS
• Brown rice, wild rice and rice mixes vary in their make-up. Some variations
may require longer cooking times and/or additional water in order to
achieve optimum results. Refer to the individual package instructions for
cooking suggestions.
• The measuring cup included adheres to rice industry standards (180mL)
and is not equal to one U.S. cup. The chart above refers to cups of
rice/water according to the measuring cup provided.
• Do not place more than 10 cups of uncooked rice (8 cups if brown rice)
into this appliance at one time. The maximum capacity of this unit is 10
cups raw rice (8 cups if brown rice) which yields 20 cups of cooked rice
(16 cups brown rice).
UTILISATION DE VOTRE CUISEUR À RIZ
ATTENTION :
• Soulevez le couvercle uniquement quand cela est nécessaire.
• Si le bol de cuisson est remis dans le cuiseur tout en étant mouillé, il
endommagera ce produit, entraînant son mauvais fonctionnement.
Cuisson à la vapeur des aliments et cuisson du riz
simultanément :
Une des caractéristiques les plus pratiques de ce cuiseur à riz est sa capacité de
cuire du riz et de cuire à la vapeur d'autres aliments simultanément, ce qui est
idéal pour créer de délicieux repas complets.
1. Placez la quantité de riz désirée et la quantité d'eau appropriée dans le bol
interne. Reportez-vous à la « Cuisson du riz », en page 5, pour plus de détails.
N'essayez pas de cuire plus de 8 tasses de riz (non cuit) si vous utilisez
simultanément le plateau vapeur. Il ne sera pas possible d'installer le plateau
vapeur.
2. Placez le bol interne dans l'appareil et commencez à faire cuire le riz.
3. Reportez-vous aux guides de cuisson à la vapeur pour les légumes (page 11)
ou la viande (page 12) qui vous donnent des conseils et les temps de cuisson
à la vapeur approximatifs. Le mieux est d'introduire les aliments à cuire à la
vapeur vers la fin du cycle de cuisson du riz pour que votre repas soit à la fois
fraîchement préparé et chaud.
4. Placez les légumes ou la viande de votre choix dans le plateau vapeur.
Soulevez prudemment le couvercle, car la vapeur qui s'échappe est
extrêmement chaude, et placez le plateau vapeur dans le cuiseur à riz.
5. Fermez le couvercle et laissez le cuiseur reprendre la cuisson.
6. Une fois que les aliments ont été cuits à la vapeur pendant la durée de temps
appropriée, soulevez le couvercle. Soulevez prudemment le couvercle, car la
vapeur qui s'échappe est extrêmement chaude. Retirez le plateau vapeur et
vérifiez si les aliments sont cuits complètement. Soyez très prudent en retirant le
plateau vapeur, car il sera chaud.
7. Remettez le couvercle du cuiseur à riz et laissez le riz cuire entièrement.
L'appareil sonnera quand le riz sera prêt et passera au mode « Maintien au
chaud ».
8. Le cuiseur à riz restera en mode « Maintien au chaud » jusqu'à ce qu'il soit
débranché. Veillez à débrancher le fil de la prise électrique murale lorsque
l'appareil n'est pas utilisé.
8
REMARQUE
Il est possible de cuire à la vapeur à n'importe quel moment au cours du
cycle de cuisson du riz. Il est cependant recommandé de cuire à la vapeur
au cours de la fin du cycle pour que les aliments qui sont cuits à la vapeur
ne refroidissent pas ou ne deviennent pas trop mous avant que le riz ne soit
prêt.