Sighting your bow
10 yard Target shooting
Start by taking a few shots at your target while aiming with your top sight pin. Ensure that you are holding the bow steady and drawing the bow
consistently. You want to try and group the arrows together as closely as possible. At this stage it doesn’t matter if the arrows are not in the center
of the target.
First adjust the windage, or where the arrow lands left or right of the bull’s-eye. Screw the sight pin in toward the bow’s riser if the arrows are landing
to the right of the bull’s-eye. If the arrows land to the left, screw the sight pin out, away from the riser. Continue to shoot groups of arrows to make
nal adjustments to the windage until the arrows are centered on the bull’s-eye.
The next step is to adjust the elevation of your group of shots. Adjust the sight pin elevation by loosening the retaining nut and sliding the pin up or
down in its slot. If the group of arrows is below the bull’s-eye, lower the pin. If the group of arrows is above the bull’s-eye, raise the pin. Tighten the
retaining nut once the adjustment is made. Only make small adjustments to the sight pin each time.
20 Yard Target shooting
The steps to site in your bow at 20 yards are exactly the same as for 10 yards except you will be adjusting the lower sight pin.
Arrow Precision, LLC Inferno Crossbows and Youth Archery Set One Year Limited Warranty
The manufacturer warrants the archery set to be free from defects in material and workmanship under
normal use and service for 1 year from date of purchase. The warranty does not cover damage resulting from abuse or misuse,
repairs or alterations performed by anyone other than the manufacturer or authorized service center, or damage
occurring in transit. Not covered are strings, cables, and other items which require periodic replacement. Damage
resulting from dry ring (ring unit without a arrow), whether intentional or accidental; including instances where the arrow is not seated
properly resulting in damage to the limbs, cables, wheels, string, etc.
For warranty service, the unit should be well packed to avoid damage in transit, including a description of the
difculty, and shipped postage prepaid to Arrow Precision, LLC at the address below. Arrow Precision, LLC will
repair or replace at no charge and return postage prepaid. For customers living outside the United States,
Arrow Precision, LLC will provide standard warranty service. However, inbound & outbound
shipping cost is the responsibility of the consumer. If failure was caused by misuse, alterations, accident, or abnormal
conditions of operation, an estimate for repairs will be submitted for your approval prior to work being performed.
Include a copy of the original sales receipt, along with the form below and mail to
Arrow Precision, LLC in order to register your product and activate your warranty.
If you have questions concerning this product or warranty, contact Arrow Precision, LLC and ask for warranty assistance.
Arrow Precision, LLC
1619 W Washington Street
Allentown, PA 18102
Model Name __________________________ Date Purchased_________________
Last Name____________________________ First Name_____________________
Street Address____________________________________________________________
City_________________________________ State__________ Zip Code_____________
Email: __________________________________________________________________
Dealer Name__________________________ City ___________________ State_______
Price Paid_____________________________ Intended Use________________________ (hunting, target, other)
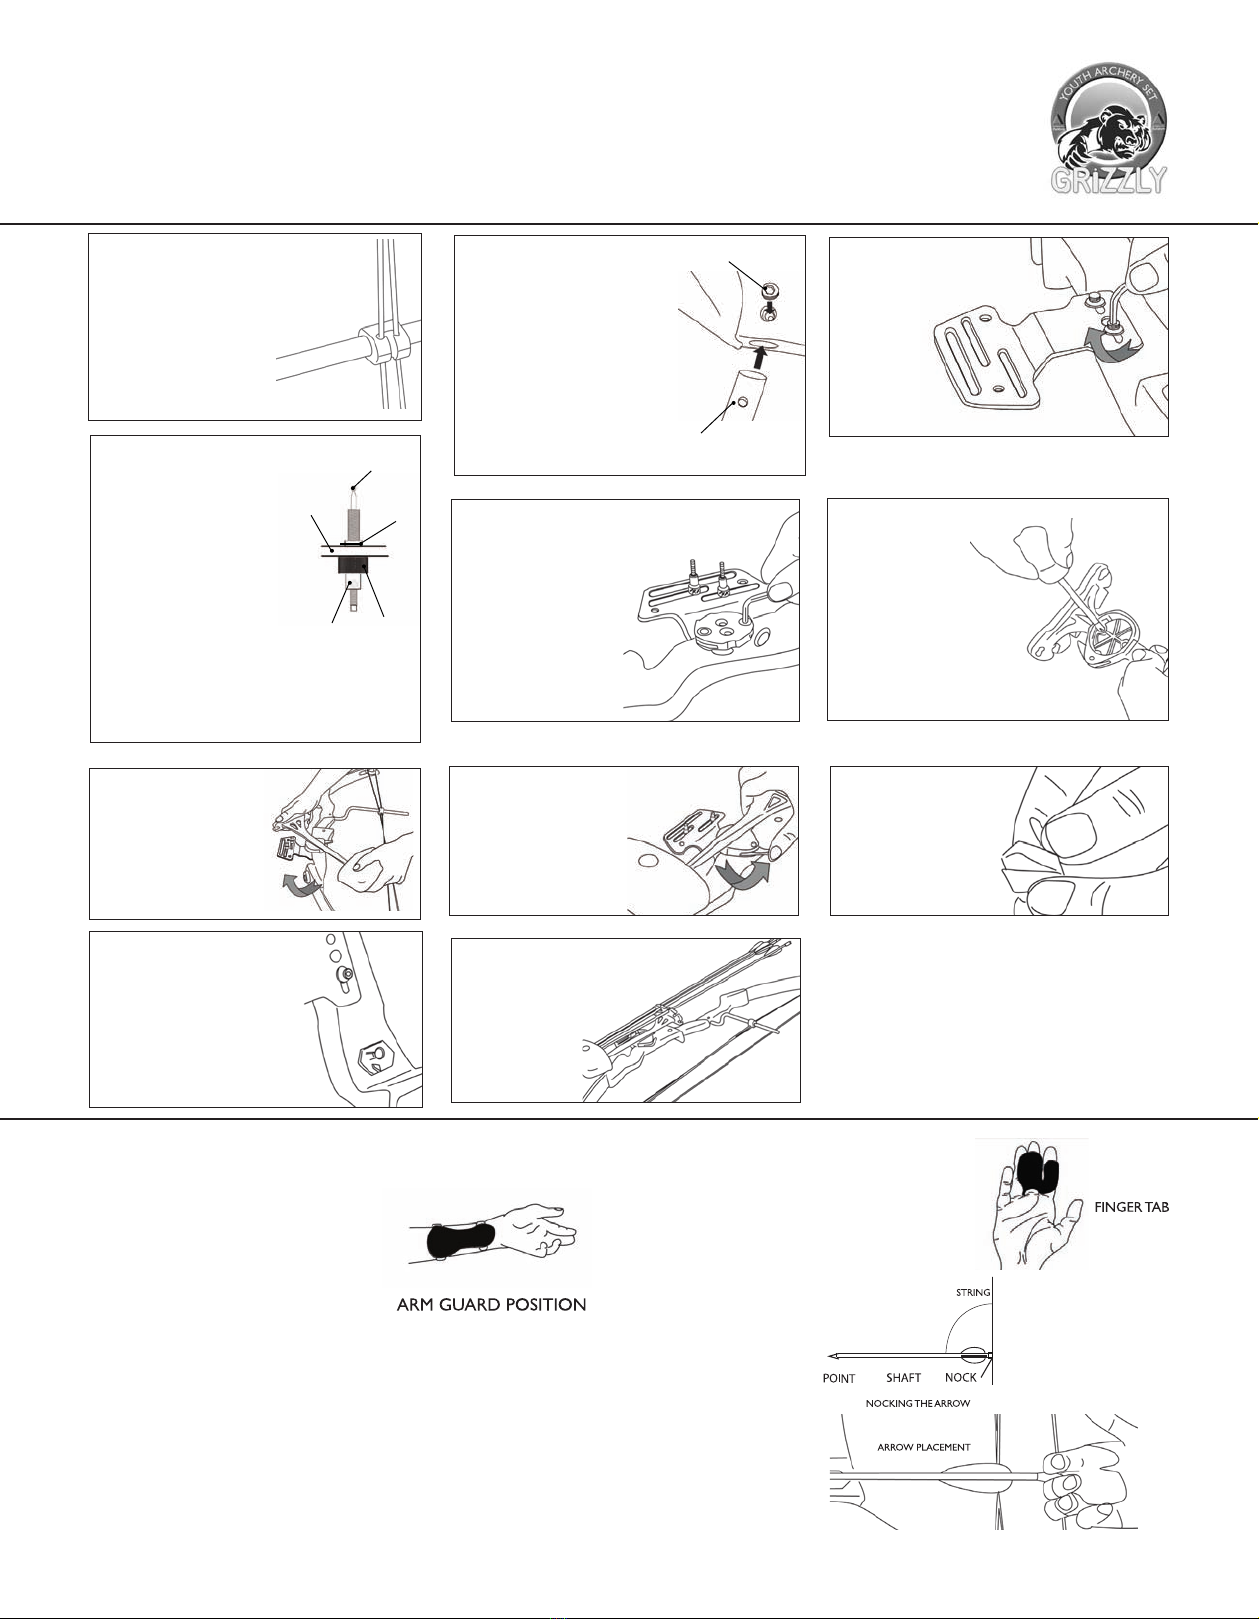
STEP 14:
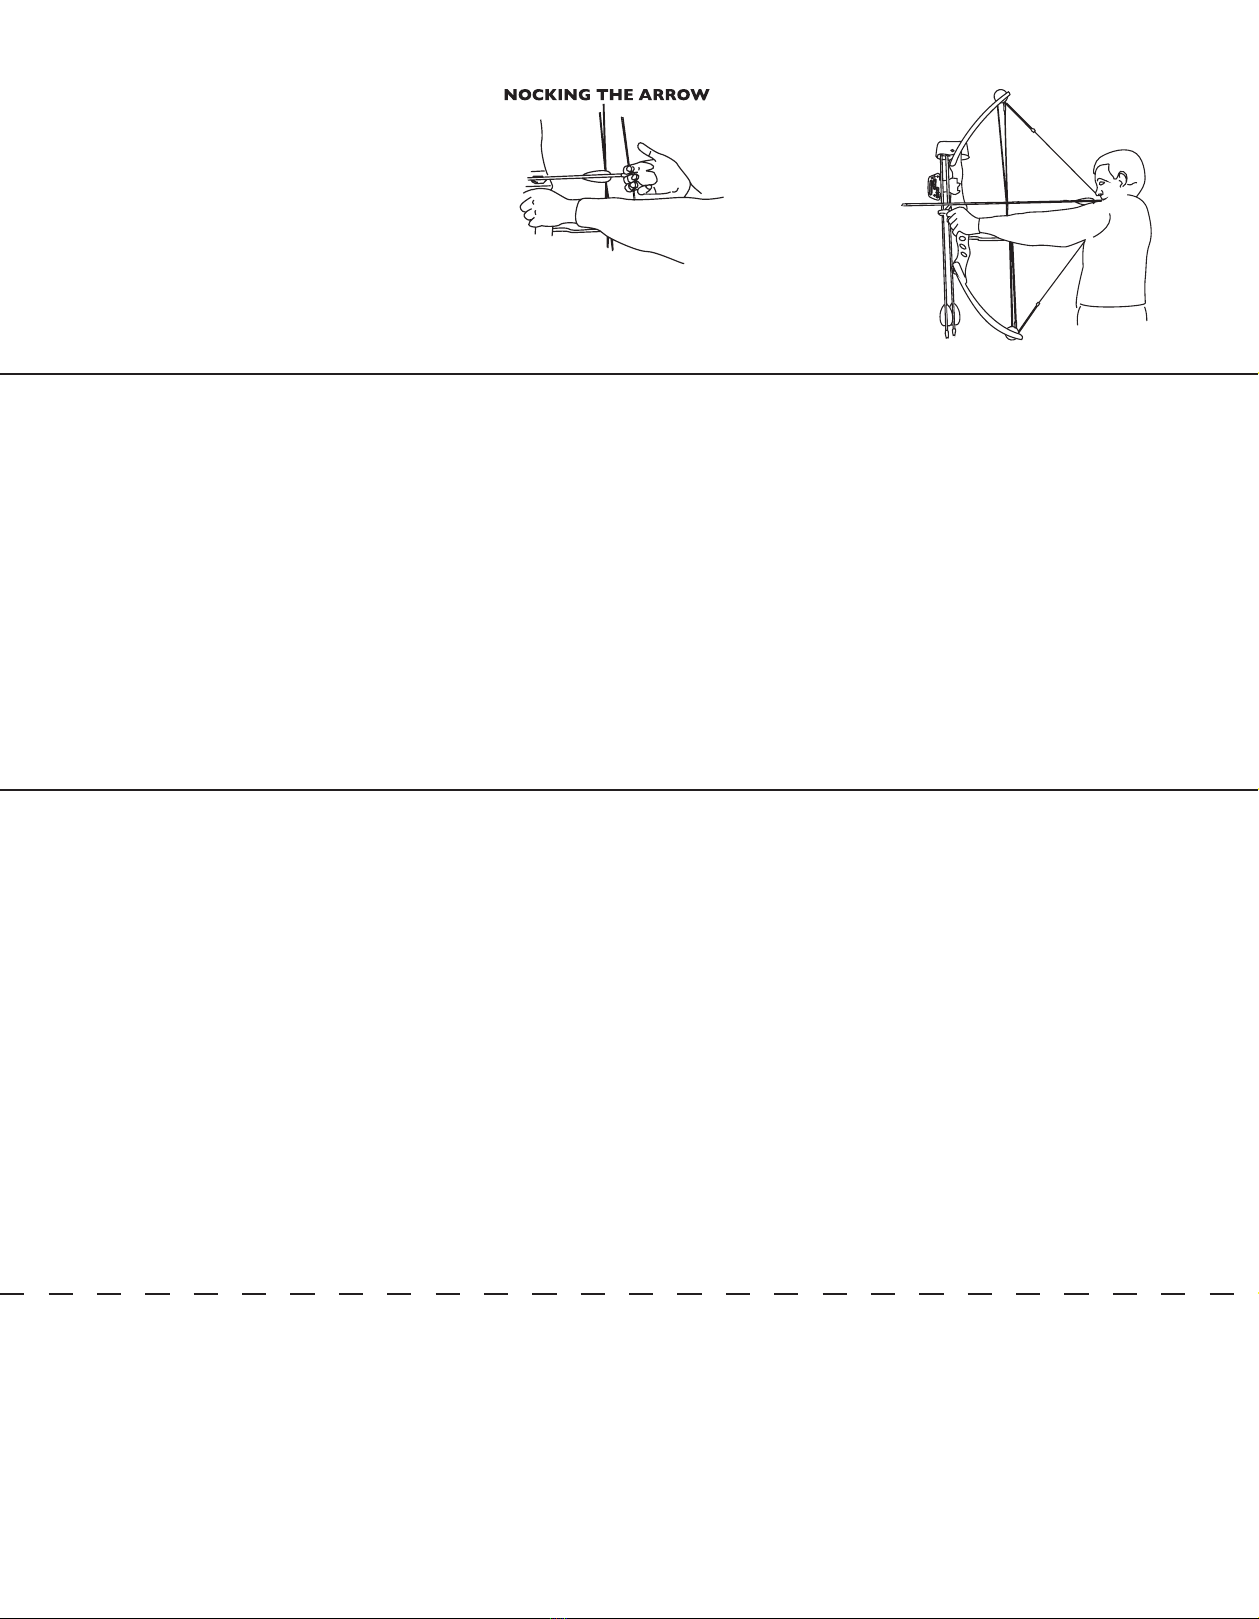
SHOOTING THE BOW
Hook three ngers on the string. The fore nger above
the arrow and middle and ring nger below the arrow.
Draw the bowstring back to your jaw, your fore nger
should be positioned at the corner of your mouth. This
position is referred to as the anchor point.
Stand at a right angle to the target. If you are a right handed user, position your left shoulder
towards the target. Your shoulders should line up with an imaginary line drawn from the center of the target.
A comfortable stance is important.Aim at the intended target, making sure it safe then release the string.
Never draw back
and release your
bow without an
arrow in place.
Telephone (610) 437-7138
Fax (610) 437-7139
Email: sales@arrow-precision.com
www.arrow-precision.com