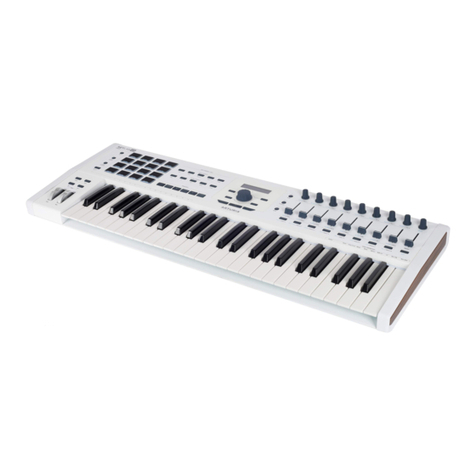
Arturia KEYSTEP PRO User manual

USER MANUAL

Special Thanks
DIRECTION
Frédéric Brun Philippe Cavenel Sébastien Colin
ENGINEERING
Yannick Bellance Sébastien Colin Yannick Dannel
INDUSTRI LIZ TION
Jérôme Blanc Lionel Ferragut
TEST
Maxime udfray
Florian Marin
Benjamin Renard
Jean-Baptiste rthus
Victor Morello
BET TEST
Boele Gerkes
Gustavo Lima
Mark Dunn
Maxime Dangles
Paul Steinway
Tom Hall
Tony Flyingsquirrel
Chuck Zwicky
Terry Marsden
M NU L
Gert Braakman ( uthor)
Camille D LEM NS
Rob Stuart
Holger Steinbrink
Charlotte Métais
Minoru Koike
DESIGN
Sébastien Rochard
Edouard Madeuf
Maxime udfray
Jean-Baptiste rthus
Glen Darcey
DesignBox
Frédéric Brun
Yannick Bellance
© RTURI S – 2020 – ll rights reserved.
26 avenue Jean Kuntzmann
38330 Montbonnot-Saint-Martin
FR NCE
www.arturia.com
Information contained in this manual is subject to change without notice and does not
represent a commitment on the part of rturia. The software described in this manual is
provided under the terms of a license agreement or non-disclosure agreement. The software
license agreement specifies the terms and conditions for its lawful use. No part of this
manual may be reproduced or transmitted in any form or by any purpose other than
purchaser’s personal use, without the express written permission of RTURI S. .
ll other products, logos or company names quoted in this manual are trademarks or
registered trademarks of their respective owners.
Product version: 1.0
Revision date: 27 April 2020

Thank you for purchasing the Arturia KeyStep Pro!
This manual covers the features and operation of rturia’s KeyStep Pro. KeyStep Pro is
a full-featured standalone keyboard controller complete with four polyphonic sequencers,
four arpeggiators, a wide-ranging set of USB, MIDI and CV connections and our Slimkey
keyboard that provides maximum playability with a minimal footprint.
KeyStep Pro is designed for the electronic musician looking for a reliable hardware product
that will give them fast hands-on control over up to four devices at once. Each device
can be played directly through the keyboard or controlled by one of the four sequencers/
arpeggiators. Devices can also be controlled through USB, two independent MIDI outputs
or four sets of CV and Gate outputs, giving users the ability to control nearly any kind of
electronic musical instrument available today.
In this package you will find:
• One KeyStep Pro controller, with a serial number and unlock code on the bottom.
You will need this information in order to register your KeyStep Pro.
• One "worldwide" power supply with interchangeable leads
• One USB cable
• The Quick Start Guide for KeyStep Pro
Be sure to register your KeyStep Pro as soon as possible! There is a sticker on the bottom
panel that contains the serial number of your unit and an unlock code. These are required
during the online registration process. You may want to record these elsewhere or take a
photo of the sticker in case it becomes damaged.
Registering your KeyStep Pro provides the following benefits:
• ccess to the latest version of the MIDI Control Center software
• Special offers restricted to KeyStep Pro owners

Special Message Section
Specifications Subject to Change:
The information contained in this manual is believed to be correct at the time of printing.
However, rturia reserves the right to change or modify any of the specifications without
notice or obligation to update the hardware that has been purchased.
IMPORTANT:
The product and its software, when used in combination with an amplifier, headphones or
speakers, may be able to produce sound levels that could cause permanent hearing loss.
DO NOT operate for long periods of time at a high level or at a level that is uncomfortable.
If you encounter any hearing loss or ringing in the ears, you should consult an audiologist.
NOTICE:
Service charges incurred due to a lack of knowledge relating to how a function or feature
works (when the product is operating as designed) are not covered by the manufacturer’s
warranty, and are therefore the owner's responsibility. Please study this manual carefully
and consult your dealer before requesting service.
Precautions include, but are not limited to, the following:
1. Read and understand all the instructions.
2. lways follow the instructions on the instrument.
3. Before cleaning the instrument, always remove the USB and power cables.
When cleaning, use a soft and dry cloth. Do not use gasoline, alcohol, acetone,
turpentine or any other organic solutions; do not use a liquid cleaner, spray or
cloth that is too wet.
4. Do not use the instrument near water or moisture, such as a bathtub, sink,
swimming pool or similar place.
5. Do not place the instrument in an unstable position where it might accidentally
fall over.
6. Do not place heavy objects on the instrument. Do not block openings or vents
of the instrument; these locations are used for air circulation to prevent the
instrument from overheating. Do not place the instrument near a heat vent at any
location with poor air circulation.
7. Do not open or insert anything into the instrument that may cause a fire or
electrical shock.
8. Do not spill any kind of liquid onto the instrument.
9. lways take the instrument to a qualified service center. You will invalidate your
warranty if you open and remove the cover, and improper assembly may cause
electrical shock or other malfunctions.
10. Do not use the instrument with thunder and lightning present; otherwise it may
cause long distance electrical shock.
11. Do not expose the instrument to hot sunlight.
12. Do not use the instrument when there is a gas leak nearby.
13. rturia is not responsible for any damage or data loss caused by improper
operation of the instrument.

Introduction
Congratulations on your purchase of the Arturia KeyStep Pro!
This fantastic keyboard controller gives you everything you need to quickly and easily
control up to four devices (virtual instruments, hardware synthesizers, modular synthesizers
or drum machines) at once. Its standalone design means that you can use it with or without
a computer and its four powerful sequencers/arpeggiators are sure to spark interesting
musical ideas and capture your best performances.
ll the essential features of a professional keyboard controller are here, including aftertouch,
pitch and modulation touch-strips, and clearly labeled buttons and knobs that are sensibly
laid out for fast, intuitive access. The Slimkey keyboard features great-feeling keys that are
smaller than standard piano keys but still large enough to allow for maximum playability
across multiple octaves. These keys make the product smaller and more portable but—make
no mistake—KeyStep Pro is built like a tank so that it can be taken on tour with confidence.
We hope the four polyphonic sequencers will unleash your most interesting musical ideas.
The RGB LED indicators above each key give you immediate visual feedback of exactly
what each sequencer is doing. You can specify the exact pitch, length, velocity, timing and
randomness of a sequence step through touch-sensitive knobs with surrounding indicator
LED rings. The dedicated note tie, transposition, overdubbing and hold buttons bring
immediacy and power to the sequencers. You can even set independent lengths for each of
the four sequencers for amazing polyrhythmic fun! Breath new life in your sequences by
playing them in a different key. Transpose them intelligently, they'll remain in key during
transpose. Invert them, Shift them forward or backwards in time. Then send it all out on the
four Voices to your Modular system.
The arpeggiators have many inspiring modes of operation beyond the basic (up/down)
modes. The HOLD function lets you easily create complex arpeggiations with up to 32
notes (!) and the step timing can be manipulated in realtime. Experiment with rpeggiators
like you've never done before! Create and mix the output of three arpeggiators playing
simultaneously. Mix arpeggios playing at different speeds.Finally, the scale quantization and
chord memory features will make you seem like even more of a musical monster than you
already are!
Use the Drum track to create complex polymeter rhythms; rhythms of different lengths
playing on 24 channels. Or use the first 8 channels to trigger drum units on your modular
system. Use the control tracks of the four sequencers to control filters, envelope stages,
reverb times on your external synths.
ll of its features are one SHIFT/CLICK away. There's no menu diving. If you need to change
settings there's a configuration menu, but it's a set and forget thing. The real stuff that
makes your music come to life is always at your fingertips. nd what features they are!
Four sequencers, that can play huge stacked chords in every step. dvanced step editing;
take the chord stored in a step and change only the notes you want to change in that chord.
In addition to the standard MIDI ports, there is a second MIDI port that you use to control
more gear or a DMX light controller.
KeyStep Pro has a massive number of uses thanks to its simultaneous USB, MIDI, CV/Gate
connections. Each of the its four tracks can output on USB, MIDI or CV/Gate simultaneously.
Each track on KeyStep Pro has control voltage (CV) outputs for Pitch, Gate and an extra
"modulation" CV output that allows for more creative sound design by letting you control
things like controlling velocity, filter cutoff, or any other parameter of your choosing. The first
track of KeyStep Pro can be set to function as a drum or "trigger" sequencer with 8 separate
CV gate outputs that you can use with analog drum machines or your modular synthesizer.

The powerful synchronization features let you use KeyStep Pro as a master clock source or
to have it synchronize itself to incoming USB, MIDI or CV synchronization signals. KeyStep
Pro can send and receive clock signals and even has a separate clock reset CV output jack
so that your external analog gear always remains firmly synchronized in both tempo
and
phase (loops and sequences always start on the "one" together).
Our MIDI Control Center (MCC) software allows you to dive deep into the KeyStep Pro's
features and to reconfigure the product so that it works best for you and your setup. MCC
really opens up a lot of options and we have dedicated an entire chapter of this guide so
that you can understand all of the powerful options.
The Keystep Pro is a USB MIDI Class Compliant device. What does that mean and why
is it important? It means you can connect it to any other MIDI Class Compliant device
without having to install drivers. Only when connecting to an iPad you will need a camera
connection cable or a USB to lightning cable. rturia has a great line of iPad synthesizers
such as the iMini, the iSem, the iProphet and the iSpark. It's worth checking them out.
Be sure to visit www.arturia.com. That’s the place to go for the latest firmware and to
download the MIDI Control Center. You’ll also find links to our tutorials and F Qs.
KeyStep Pro is easy to use, so you’ll probably start experimenting with it right out of the box.
However, please be sure to read this manual even if you are an experienced user as we
describe many useful tips that will help you get the most out of your purchase. We're sure
you will find KeyStep Pro to be a great source of musical inspiration and we hope you'll use
it to its fullest potential.
Happy music making!
The Arturia team

Table Of Contents
1. Welcome and introduction .................................................................................................................................... 5
1.1. fascinating adventure..................................................................................................................................................... 5
1.2. bout reading manuals..................................................................................................................................................... 5
2. Installation....................................................................................................................................................................... 6
2.1. Usage Precautions................................................................................................................................................................ 6
2.2. Warning ...................................................................................................................................................................................... 6
2.3. Register your Instrument................................................................................................................................................ 6
2.4. Connecting the KeyStep Pro to the World ........................................................................................................... 6
3. Basic Operations .......................................................................................................................................................... 7
3.1. Plug and Play........................................................................................................................................................................... 7
3.1.1. Slimkey Keyboard ........................................................................................................................................................................................................ 7
3.1.2. Keyboard MIDI Channel Selection................................................................................................................................................................... 8
3.1.3. Pitch and Mod Touch Strips................................................................................................................................................................................... 9
3.1.4. The HOLD Button .......................................................................................................................................................................................................... 9
3.1.5. Sustain Pedal .................................................................................................................................................................................................................. 9
3.1.6. Octave - / Octave + .................................................................................................................................................................................................. 10
3.2. Record and Play a Sequence.................................................................................................................................... 10
3.2.1. Time Division ................................................................................................................................................................................................................... 11
3.3. Using the rpeggiator ..................................................................................................................................................... 12
3.4. Scales & Chords .................................................................................................................................................................. 13
3.5. Creating Splits ...................................................................................................................................................................... 13
4. KeyStep Pro Overview............................................................................................................................................ 14
4.1. Making the Connections.................................................................................................................................................. 14
4.1.1. ... with a Computer...................................................................................................................................................................................................... 14
4.1.2. ... with External Devices.......................................................................................................................................................................................... 15
4.1.3. ...with an iPad®............................................................................................................................................................................................................. 15
4.1.4. nalog Connections (CV and Gate) ............................................................................................................................................................... 16
4.1.5. MIDI Connections ....................................................................................................................................................................................................... 17
4.1.6. Clock In/Out................................................................................................................................................................................................................... 21
4.1.7. Master or Slave ........................................................................................................................................................................................................... 22
4.2. Front Panel Overview..................................................................................................................................................... 24
4.2.1. Tempo Section............................................................................................................................................................................................................. 24
4.2.2. Transport Section ..................................................................................................................................................................................................... 26
4.2.3. Built-in Metronome Speaker ............................................................................................................................................................................. 26
4.2.4. SHIFT Button ............................................................................................................................................................................................................... 26
4.2.5. Control Section............................................................................................................................................................................................................ 27
4.2.6. Track Sections (4x) .................................................................................................................................................................................................. 28
4.2.7. rrangement Section ............................................................................................................................................................................................ 30
4.2.8. The Step Edit Button ................................................................................................................................................................................................ 31
4.2.9. Step Buttons.................................................................................................................................................................................................................. 31
4.2.10. The Main Encoders (5x)..................................................................................................................................................................................... 32
4.2.11. Keyboard Section .................................................................................................................................................................................................... 34
4.2.12. The Looper ................................................................................................................................................................................................................... 37
4.2.13. Keyboard ..................................................................................................................................................................................................................... 38
4.2.14. SHIFT Functions ...................................................................................................................................................................................................... 39
4.2.15. The Sequence Extend Section........................................................................................................................................................................ 45
4.3. Back Panel Overview...................................................................................................................................................... 46
4.3.1. Pitch, Velo/Mod & Gate Outputs....................................................................................................................................................................... 46
4.3.2. Drum Gates................................................................................................................................................................................................................... 47
4.3.3. Clock Section............................................................................................................................................................................................................... 48
4.3.4. MIDI Section................................................................................................................................................................................................................ 48
4.3.5. Metronome Section................................................................................................................................................................................................. 49
4.3.6. Sustain Pedal Input ................................................................................................................................................................................................ 49
4.3.7. USB and Power Section ...................................................................................................................................................................................... 50
4.3.8. Kensington Lock Port............................................................................................................................................................................................ 50
5. Making Tracks .............................................................................................................................................................. 51
5.1. Sequencer / rpeggiator (or Drum) Tracks ....................................................................................................... 51
5.2. The Three rpeggiators.................................................................................................................................................. 51
5.2.1. What is an rpeggiator?....................................................................................................................................................................................... 51
5.2.2. HOLD and the rpeggiator ................................................................................................................................................................................ 52

5.2.3. Editing an rpeggio ................................................................................................................................................................................................ 52
5.2.4. rpeggiator Features............................................................................................................................................................................................. 53
5.2.5. Making the Most of the rpeggiators........................................................................................................................................................... 57
5.3. The Four Sequencers...................................................................................................................................................... 58
5.3.1. Exploring the Sequencers .................................................................................................................................................................................... 58
5.3.2. Recording ....................................................................................................................................................................................................................... 61
5.3.3. Editing Steps................................................................................................................................................................................................................ 64
5.3.4. Advanced editing ..................................................................................................................................................................................................... 66
5.3.5. Working with Patterns........................................................................................................................................................................................... 67
5.3.6. Copy, Paste & Erase (Steps).............................................................................................................................................................................. 69
5.3.7. Copy, & Paste (Pages)........................................................................................................................................................................................... 70
5.4. The Drum Sequencer........................................................................................................................................................ 71
5.4.1. Drum vs. Seq Comparison .................................................................................................................................................................................... 71
5.4.2. Gates and Triggers................................................................................................................................................................................................... 73
5.4.3. Creating Drum Patterns........................................................................................................................................................................................ 74
5.4.4. Rhythmic Examples................................................................................................................................................................................................ 82
5.5. Special Features................................................................................................................................................................. 85
5.5.1. Scales................................................................................................................................................................................................................................ 85
5.5.2. Chord Mode ................................................................................................................................................................................................................. 88
5.5.3. Using Sync................................................................................................................................................................................................................... 90
6. What is a Project?..................................................................................................................................................... 91
6.1. Managing Projects.............................................................................................................................................................. 91
6.1.1. Loading a Project ........................................................................................................................................................................................................ 91
6.1.2. Saving a Project ......................................................................................................................................................................................................... 92
6.1.3. Copying a Project...................................................................................................................................................................................................... 92
6.1.4. Erasing a Project........................................................................................................................................................................................................ 93
6.2. ll about Tracks .................................................................................................................................................................. 93
6.2.1. Selecting a Track ....................................................................................................................................................................................................... 94
6.2.2. Muting a Track............................................................................................................................................................................................................ 94
6.2.3. Soloing a Track .......................................................................................................................................................................................................... 94
6.2.4. Creating Splits ............................................................................................................................................................................................................ 94
6.3. Patterns.................................................................................................................................................................................... 95
6.3.1. Selecting a Pattern ................................................................................................................................................................................................... 95
6.3.2. Managing Patterns.................................................................................................................................................................................................. 95
6.3.3. Copy, Paste & Erase Sequencer Patterns ................................................................................................................................................ 96
6.3.4. Copy, Paste & Erase of Drum Patterns....................................................................................................................................................... 97
6.3.5. Erasing Patterns......................................................................................................................................................................................................... 97
6.3.6. Undo.................................................................................................................................................................................................................................. 98
6.4. rranging................................................................................................................................................................................ 98
6.4.1. Chains............................................................................................................................................................................................................................... 98
6.4.2. Scenes .......................................................................................................................................................................................................................... 100
6.4.3. Wait to Load .............................................................................................................................................................................................................. 102
6.4.4. Step Skip ...................................................................................................................................................................................................................... 102
6.4.5. Top-Down..................................................................................................................................................................................................................... 103
6.4.6. Bottom-Up ................................................................................................................................................................................................................... 104
6.4.7. Top-Down or Bottom-up?.................................................................................................................................................................................. 104
6.4.8. Other things to try.................................................................................................................................................................................................. 104
7. Timing............................................................................................................................................................................. 105
7.1. Tempo ...................................................................................................................................................................................... 105
7.1.1. Making it Swing.......................................................................................................................................................................................................... 105
7.1.2. Metronome................................................................................................................................................................................................................... 106
7.1.3. Tap tempo..................................................................................................................................................................................................................... 106
7.2. Sync.......................................................................................................................................................................................... 107
7.2.1. Sequencer Sync........................................................................................................................................................................................................ 108
7.3. Sync/Clock and Reset Outputs ............................................................................................................................... 108
7.3.1. Stop, Start & Continue........................................................................................................................................................................................... 108
8. Control Mode ............................................................................................................................................................. 109
8.1. What is Control Mode? ................................................................................................................................................ 109
8.1.1. What are CC# values?.......................................................................................................................................................................................... 109
8.1.2. CC# Patterns ............................................................................................................................................................................................................... 110
8.2. Control Mode as D W utomation ......................................................................................................................... 111
8.2.1. Using CC# Patterns to Store and Playback CC Values ..................................................................................................................... 111

8.2.2. Recording Control Changes in Step Edit Mode:.................................................................................................................................... 112
8.2.3. Controlling Parameters in a D W ................................................................................................................................................................. 114
8.2.4. More about CC# Patterns ................................................................................................................................................................................... 115
8.2.5. Visual Feedback ........................................................................................................................................................................................................ 115
8.2.6. Realtime Recording of CC# values............................................................................................................................................................... 116
8.2.7. Erasing CC# Values................................................................................................................................................................................................. 116
8.2.8. The Live Track............................................................................................................................................................................................................. 116
8.3. Front Panel Functions..................................................................................................................................................... 117
8.3.1. The Tempo/Fine Encoder ..................................................................................................................................................................................... 117
8.3.2. Tap Tempo/Metronome Button........................................................................................................................................................................ 117
8.3.3. The Swing/Offset Encoder................................................................................................................................................................................. 117
8.3.4. Transport Section ..................................................................................................................................................................................................... 117
9. KeyStep Pro Configuration ................................................................................................................................ 118
9.1. The Utility Menu................................................................................................................................................................... 118
9.1.1. MIDI Channels ............................................................................................................................................................................................................. 118
9.1.2. Sync.................................................................................................................................................................................................................................... 119
9.1.3. Metronome .................................................................................................................................................................................................................... 119
9.1.4. Launch Quantize...................................................................................................................................................................................................... 120
9.1.5. MIDI Settings ............................................................................................................................................................................................................. 120
9.1.6. CV Settings.................................................................................................................................................................................................................... 122
9.1.7. Controller....................................................................................................................................................................................................................... 123
9.1.8. Looper Touch Strip................................................................................................................................................................................................... 124
9.1.9. Drum Map..................................................................................................................................................................................................................... 125
9.1.10. Miscellaneous.......................................................................................................................................................................................................... 125
9.2. MIDI Control Center....................................................................................................................................................... 126
9.2.1. MIDI Control Center Basics............................................................................................................................................................................... 126
9.2.2. Device Projects ......................................................................................................................................................................................................... 127
9.3. Project Browser ................................................................................................................................................................ 128
9.3.1. Building a Project Library................................................................................................................................................................................... 128
9.3.2. Revise a Template................................................................................................................................................................................................... 128
9.3.3. Revise a Pattern....................................................................................................................................................................................................... 129
9.4. Store To/Recall From.................................................................................................................................................... 130
9.4.1. Storing a Project to the KeyStep Pro.......................................................................................................................................................... 130
9.4.2. Recall a Project from the KeyStep Pro....................................................................................................................................................... 131
9.4.3. Template Utilities ...................................................................................................................................................................................................... 131
9.5. Device Settings.................................................................................................................................................................. 132
9.5.1. Midi Channel............................................................................................................................................................................................................... 132
9.5.2. Sync ................................................................................................................................................................................................................................ 133
9.5.3. Metronome ................................................................................................................................................................................................................. 133
9.5.4. Launch Quantize .................................................................................................................................................................................................... 133
9.5.5. MIDI Settings ............................................................................................................................................................................................................ 134
9.5.6. CV Gate Settings ..................................................................................................................................................................................................... 135
9.5.7. Controller...................................................................................................................................................................................................................... 135
9.5.8. Touch Strip ................................................................................................................................................................................................................... 136
9.5.9. Drum Map .................................................................................................................................................................................................................... 137
9.5.10. Misc................................................................................................................................................................................................................................ 137
10. KeyStep Pro and your Modular system ................................................................................................ 138
10.1. The Modular dventure.............................................................................................................................................. 139
10.2. Hardware or Software?............................................................................................................................................ 139
10.3. Using MIDI to Control Modules in VCV Rack............................................................................................. 140
10.3.1. KeyStep Control Mode and VCV Rack .................................................................................................................................................... 140
10.4. CV/Gate Functions ....................................................................................................................................................... 142
10.5. Voices 1-4: Pitch, Velocity and Gate .................................................................................................................. 142
10.6. Routing Signals............................................................................................................................................................... 143
10.6.1. Shift Magic................................................................................................................................................................................................................. 143
10.6.2. CV/Gate Signals: D W Configuration ..................................................................................................................................................... 144
10.6.3. CV/Gate Specifications..................................................................................................................................................................................... 144
10.7. Drum Gates....................................................................................................................................................................... 145
10.7.1. Which Keys Do I Use? ...................................................................................................................................................................................... 145
10.7.2. Can my D W send Drum Gate Signals? ............................................................................................................................................. 145
10.7.3. How Should I Route the Signals? .............................................................................................................................................................. 146
10.7.4. Drum Gate Specifications ............................................................................................................................................................................... 146

11. Declaration of Conformity................................................................................................................................ 147
12. Software License greement........................................................................................................................ 148

1. WELCOME AND INTRODUCTION
The Keystep Pro is an advanced third-generation controller and sequencing station. It is both
compact and versatile, with unique features that will spark your imagination and creativity
in a new way. It enables you to connect to all your studio and performance gear and control
it in ways you never thought possible.
Controllers have come a long way. The first generation of controllers could transmit MIDI
pitch and velocity over the 16 MIDI channels, not much more. The second generation
added complex step- and real-time sequencing features and was capable of connecting to
your D W in special ways, allowing you to control multiple parameters of VSTi's (virtual
instruments, including synths).
This third-generation controller adds control options for modular systems. The Keystep Pro
has four tracks each with CV, velocity/modulation and gate output. You can employ each of
these tracks as a melodic sequencer, arpeggiator or drum sequencer. It lets you play, record
edit and add to your sequences on the fly, with a clear and easy-to-understand workflow
that encourages your creativity. Each pattern can be up to 64 steps long. You can chain up
to 16 patterns together for live performances or jamming. The Scenes feature enables you to
save and recall configuration states. It's a lifesaver if you need to quickly change from one
setup to another. Couple this with the advanced chord options and scale quantisation and
you'll begin to understand why it will soon become your favourite controller.
1.1. A fascinating adventure
s soon as you start experimenting with the Keystep Pro, you'll be faced with many
questions: How do I make connections? What are the difference between Real-time and
Step recording?
The answers to these questions come slowly: you'll find many of the answers in this manual
and many others by reading online forums, sharing and comparing user experiences and,
most importantly, by diving in and experimenting. Whatever you do, take the time to get to
know the Keystep Pro inside out.
To sustain the fascination you feel, learn the functions of the Keystep Pro one by one and
test your knowledge continuously. The Keystep Pro is an advanced controller with many
levels of understanding. It offers a unique way to experience the reward that comes with
being able to create the sounds as you imagine them.
1.2. About reading manuals
Reading manuals can mean much more than familiarizing yourself with an instrument.
Yes, it is excellent for learning, but it serves another purpose that is much less understood:
creating the basis for inspiration.
Inspiration can flourish when you have many little pieces of knowledge 'online' in your
mind, so that you can interconnect and crosslink them; it widens the scope of your creativity.
It also helps to look at the current state of your knowledge as something that needs to be
maintained and expanded. Reading a manual, again and again, causes a quantum shift in
what you absorb from it. You are building a living model of the controller in your brain.
Reading a manual the first time helps you to get acquainted with the parameters of an
instrument; what does a knob do and how does it affect the sound of external modules or
synths? Second and third readings will give you a better understanding of the structure of
the Keystep Pro. Beyond that, reading becomes a source of creative input that inspires you
to think of new ways to use this unique controller and sequencing station.
Arturia - User Manual Keystep Pro - Welcome and introduction 5

2. INSTALLATION
2.1. Usage Precautions
The Keystep Pro uses an external power adapter. Do not use any power supply or adapter
other than the unit provided by rturia. rturia accepts no responsibility for damage caused
by the use of an unauthorized power supply.
2.2. Warning
Do not place this product in a place or position where anyone might walk on, trip over,
or roll anything over power cords or connecting cables. The use of an extension cord is
not recommended. However, if you must use one, make sure that the cord can handle
the maximum current needed by this product. Please consult a local electrician for more
information on your power requirements. This product should be used only with accessories
supplied or recommended by rturia. When used with any such products, please observe
all safety markings and instructions that accompany them.
2.3. Register your Instrument
Registering your instrument establishes your legal ownership of it, which entitles you to
access the rturia Technical Support service and to be informed of updates. dditionally,
you can subscribe to the rturia newsletter to be informed of rturia-related news as well
as promotional offers. Connect to your rturia account, go to the section My Registered
Products, then add the Keystep Pro by entering its serial number, as printed on the sticker
located under the controller.
2.4. Connecting the KeyStep Pro to the World
lways power-off all audio gear before making any connections. Failing to do so may
damage your speakers, the Keystep Pro, or the other audio equipment. fter completing all
connections, set all volume levels to zero. Power-on the various devices, with your audio
amplifier or monitoring system last, then raise the volumes to a comfortable listening level.
Here is an overview of the Keystep Pro connectors:
Purpose Connector type
MIDI input (1x) 5-pin DIN connector
MIDI outputs (2x) 5-pin DIN connectors
USB Standard USB type B
Power DC input: internal Ø 2.1 mm, external Ø 5.5 mm
6 Arturia - User Manual Keystep Pro - Installation

3. BASIC OPERATIONS
3.1. Plug and Play
Connect the KeyStep Pro to your computer or an external device as shown in the image
below and you're ready to go! Here are a few pointers to make the most of your first session.
3.1.1. Slimkey Keyboard
The Slimkey keyboard is both velocity- and pressure-sensitive (sometimes called
aftertouch). You can specify the velocity curve and aftertouch response using the MIDI
Control Center and the Utility menu. Refer to Chapter 9 [p.118] for details.
Arturia - User Manual Keystep Pro - Basic Operations 7

3.1.2. Keyboard MIDI Channel Selection
The KeyStep Pro can transmit notes and other MIDI messages on 16 channels numbered
from 1 to 16. Each of the four tracks of the KeyStep Pro transmits on its own channel: Track 1
on MIDI channel 1, and Tracks 2, 3 and 4 on MIDI channels 2, 3 and 4, respectively. Track 1
is a special case because it has both a melodic sequencer and a drum sequencer. When in
sequencer mode, Track 1 transmits on MIDI channel 1; when in Drum mode it transmits on
MIDI channel 10. Most MIDI devices default to receiving on MIDI channel 1, so connecting
an external device and playing notes on Track 1 will usually trigger a response from the
external device.
♪: If the external device does not respond, that may be because it is set to a MIDI channel that
doesn't match the current KeyStep Pro MIDI channel. First check the MIDI channel setting of the
external device. If the channels do not match and you want to set the KeyStep Pro to another MIDI
channel, you'll have to go into the Utility menu.
In the Utility menu, you can set all the configuration options of the KeyStep Pro, including
the MIDI transmit functions. Like most fine-tune functions on the KeyStep Pro, you access
it with the SHIFT key. SHIFT functions are printed in blue and can usually be found below
buttons. In this case, the Utility function sits under the Project button. - Hold SHIFT + Project
(Utility), the Utility menu will light up
- Turn the selection encoder to scroll down to 'MIDI channels' - Now push the selection
button, and scroll down to Track 1 output, push once more and select the MIDI channel you
want to transmit on - Press SHIFT + Exit repeatedly to exit Utility
8 Arturia - User Manual Keystep Pro - Basic Operations

3.1.3. Pitch and Mod Touch Strips
The Pitch and Mod touch strips are similar to standard wheels in how they work, except that
you slide your finger backward or forward along the strip instead of rotating a wheel.
3.1.3.1. The Pitch Strip
The Pitch strip has a center zone in which slight finger movements produce no change.
Moving your finger forward bends the pitch upward, and moving it backward bends the
pitch downward. When you lift your finger, the Pitch bend value snaps back to zero.
3.1.3.2. The Mod Strip
The Mod strip works like a mod wheel: from minimum to maximum. Placing your finger at
the bottom of the Mod strip (the end closest to you) produces no modulation, and moving
your finger all the way up (to the end furthest from you) causes maximum modulation. The
Mod strip differs from the Pitch strip in that it does not snap to zero when you lift your finger.
3.1.4. The HOLD Button
The HOLD button enables the rpeggiator to keep playing after you take your fingers off the
keys. But there's another way to use it: while HOLD mode is active, you can keep adding
notes to an arpeggio as long as you continue holding down at least one key.
For an in-depth look at the rpeggiator, refer to chapter 5 [p.51].
3.1.5. Sustain Pedal
If you have a momentary footswitch, plug it into the Sustain jack socket on the rear panel.
If it works the wrong way around, disconnect KeyStep Pro from its power source and then
reconnect it. KeyStep Pro will sense the polarity of the pedal, and it should work fine after
that.
There are several configuration options for the Sustain pedal in the The MIDI Control Center
[p.126].
Arturia - User Manual Keystep Pro - Basic Operations 9

3.1.6. Octave - / Octave +
Pushing one of the Octave select buttons will transpose the keyboard pitch by as much as
two octaves up or down. To reset the keyboard octave shift back to zero, press both buttons
simultaneously.
3.2. Record and Play a Sequence
The KeyStep Pro features four (!) sequencers; one on each track. Let's record something on
Track 1:
• Press the Track 1 button; it will light up in green
• Select 'Seq' on this track if it isn't selected already
• Now hold the 'Record' button and press the 'Play' button; the step buttons' LEDs
now become active and cycle from Step 1 to Step 16 continuously. We are about
to create our first sequence pattern. Each track can hold 16 of these patterns.
The sequencer is in loop mode, so press a few keys and they will be added to the loop. The
KeyStep Pro sequencers are polyphonic, so pressing a chord instead of a single note will
enter it into the loop. Notice that all notes are recorded with the velocity at which you play
them.
t this point, you can start to 'play around' with your sequence. When you look carefully,
you'll see sequence modifiers printed in blue under the step buttons. - Hold the SHIFT key
(the leftmost button on the KeyStep Pro) and press 'Semi Up' or 'Semi Down' and hear how
your sequence is transposed up or down in semitones (half steps) on the fly.
There are a few other things to try here: SHIFT + Invert will create a mirror image of your
sequence. The last notes will become the first and vice versa. Press SHIFT + Invert once
more to restore the natural order of things (:-)).
It does not stop here: you can shift the looping sequence as a whole one step to the left or
right. To shift to the right, hold SHIFT and press Nudge>. note in the first position of the
loop will move to the second position; a note in the last position will wrap around to the first
position.
10 Arturia - User Manual Keystep Pro - Basic Operations

You can make adjustments to the tempo in quantized 1 BPM increments by turning the
Tempo knob. If you need to make finer adjustments, hold SHIFT and turn the Tempo knob.
This will increment and decrement the tempo in 0.01 steps.
3.2.1. Time Division
There's another row of blue shift modifiers printed above the keys of the keyboard. In the
centre, right above the 'middle C' key, you'll find a series of time-division options, ranging
from 1/4 to 1/32. To change the current time division, hold SHIFT and press the appropriate
key on the keyboard. What happens now is that you change the rhythmic relationship of the
sequence relative to the tempo: quarter notes (one step per beat), eighth notes (two steps
per beat), and so on. Triplet values are also an option (1/4T, 1/8T, etc.); if you're already in 1/
8 then press SHIFT+Triplet, you'll get into 1/8 triplet mode.
There's a lot of potential for creative fun here. In Chapter 5 [p.51], we'll show you how to copy
the pattern of one sequence to another sequence. Imagine starting with a simple pattern,
copying it to the three other sequencers, modifying those copies with Invert, Nudge and
Transpose, then running them simultaneously with the first sequence. You get the idea ...
Arturia - User Manual Keystep Pro - Basic Operations 11

3.3. Using the Arpeggiator
n arpeggio is a chord of which you repeatedly play the individual notes. It's what you hear
when you hold a chord on a guitar and pluck the strings from top to bottom or the other
way around. major part of learning to play the guitar is figuring out how to play different
fingerpicking/arpeggio styles. The arpeggiators on the KeyStep Pro do all these things for
you. Each KeyStep Pro track, except Track 1, has an arpeggiator.
To play an arpeggio, activate a track (try Track 2), press the rp button then hold down a
chord. Now press the 'Play' button and your arpeggio will start. It's rather tiresome to hold
keys down, especially if what you really want is to change your arpeggio, or if you want to
tweak parameters on your modular system or synth that is connected to the KeyStep Pro.
Pressing HOLD lets you lift your fingers off the keys without stopping the arpeggio. What's
more, once HOLD is active and if you keep at least one key pressed down, you can add
notes to the arpeggio; just press one or more keys and the note(s) and its/their velocity will
be added to the arpeggio. You can add up to 16 notes to an arpeggio.
gain, there's a lot to discover here, so try some of these:
• SHIFT + rp to change the 'strum' pattern of your arpeggio
• SHIFT + Time Division (1/4th, 1/8th, 1/16th, 1/32th)
• SHIFT + Scale. Selecting another scale will instantly change the tonal focus of
your arpeggio.
nd there's even more: the Gate, Velocity and Randomness encoders! Tweaking the Gate
knob will lengthen or shorten the gate time, Velocity will add or subtract (surprise!) velocity,
and Randomness will inject random notes into your arpeggio. Press the Play/Pause button
again to pause the arpeggio pattern; press it once more to resume playback from where
you stopped.
12 Arturia - User Manual Keystep Pro - Basic Operations

3.4. Scales & Chords
Some of the most interesting features of the KeyStep Pro are its scale and chord options,
which we'll cover in more detail in Chapter 5 [p.51], but to get an idea of the impact they
have on your sequences and arpeggios, try this neat trick while your sequence or arpeggio
is running.
Let's try this in Track 2:
• ctivate Track 2 by pressing its button
• Hold SHIFT + (Scale)-minor. The Scale selectors are located just above the
keyboard. For example, you activate the minor scale with SHIFT + C4 (the third
'C' from the left.) Try some of the other Scale selectors to hear the different types
of scale.
Chord mode is equality fascinating: - Stop everything that's playing by pressing the 'Stop'
button - Hold SHIFT +Tie/Rest (Chord) and play a chord - Release all the keys of the chord -
Let go of the SHIFT + Chord buttons - Play any key on the keyboard
If, for example, you still have the minor scale selected, as explained above, any key you
play on the keyboard will generate a minor chord! Can you arpeggiate this chord and thus
create an arpeggiated minor chord? Yes, of course you can!
3.5. Creating Splits
You could have an arpeggio play on the lower part of the keyboard and a sequence on the
upper part. How? By creating a keyboard split.
• Hold down the two track buttons of the tracks that you want to be part of the
split. The track button you press first will be assigned to the upper part of the
keyboard, the other one to the lower part. For example, if you want the sequence
on Track 1 to play in the upper part, you need to press the Track 1 button first.
• While holding down both track buttons, press an appropriate key on the
keyboard to select the split point.
♪: If at a later moment you want to check where the split point is, press the same two track buttons
simultaneously. The KeyStep Pro will display the ranges in the colour of the tracks that are part of the
split. Press the split key once more to deactivate the split.
We'll cover all these features in more depth in Chapter 6 [p.91].
Arturia - User Manual Keystep Pro - Basic Operations 13

4. KEYSTEP PRO OVERVIEW
In this chapter, we'll guide you through the front and back panels and explain the functions
of all the knobs and connections on these panels. It's a reference chapter. If you're eager to
start exploring your KeyStep Pro and want to dive right in, continue to Chapter 5 [p.51], where
you can learn how to use the sequencers and the arpeggiators. This chapter is mainly for
reference; you can return here if you need to know more about a specific function, knob,
strip, connection or menu.
4.1. Making the Connections
There are countless ways to connect the KeyStep Pro with your music-making gear. It's
impossible to cover every scenario in this guide, but here are some typical setups:
4.1.1. ... with a Computer
The KeyStep Pro is a USB class-compliant controller, so at its most basic level it can be
connected to any computer with a USB port, through which it receives its DC power supply,
and can be used as an input device for various applications. The downloadable MIDI Control
Center software lets you choose which MIDI messages will be sent by the mod strip and
also enables you to specify global KeyStep Pro parameters.
However, the KeyStep Pro can also be used in standalone mode without a computer
connected! In this case, simply use the provided 12V DC power supply adaptor.
WARNING!: lthough the KeyStep Pro might seem to work OK when you power it up with a
powerbank, we strongly advise you NOT to power it this way. The KeyStep Pro needs a lot
of current for its LEDs and analog output. Using a defective or partially charged powerbank
could damage the KeyStep Pro.
CV Gate outputs
14 Arturia - User Manual Keystep Pro - KeyStep Pro Overview
Other manuals for KEYSTEP PRO
2
Table of contents
Other Arturia Controllers manuals
Popular Controllers manuals by other brands

Festo
Festo CMMP-AS-C2-3A Mounting and installation guide

LG
LG PRCKA0 installation manual

Rockwell Automation
Rockwell Automation Allen-Bradley OneGear user manual

Wolverine Airsoft
Wolverine Airsoft STORM Disassemble guide

Brooks
Brooks Granville-Phillips Convectron 316 Series instruction manual

SAL
SAL PC206BS/R/BTAM quick start guide