2
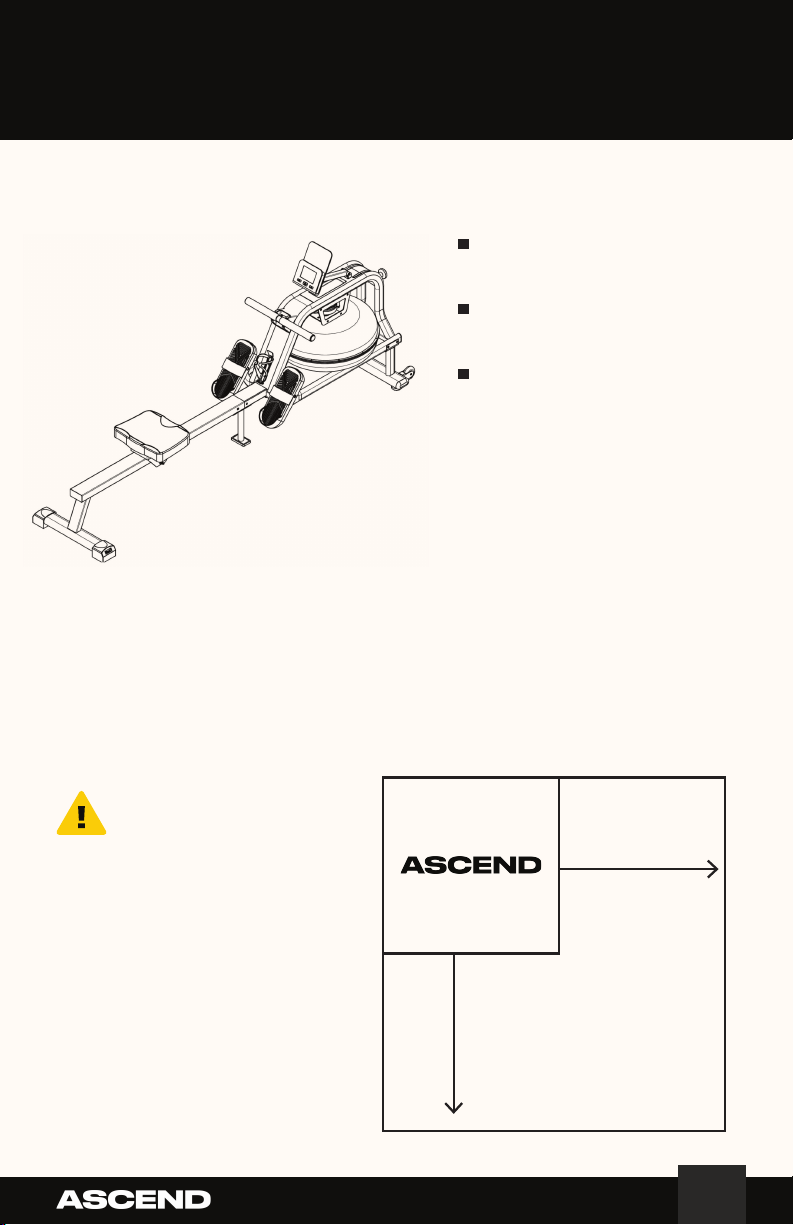
ASCEND R-300 PERFORMANCE ROWER
. Keep bystanders and children away from the product being serviced, at all times.
. Make sure that the repair is done in an appropriate workspace away from foot traffic and exposure
to bystanders.
. Disconnect all power to the machine before you service it. (This includes the batteries) .
. Some components of the equipment can be heavy or awkward. Enlist the service of a second
person when you do maintenance steps involving these components. Do not try to do heavy or
awkward steps on your own.
. Use only replacement parts and hardware that are supplied or approved by Ascend. Failure to use
Ascend-approved replacement parts can adversely affect the safety and functionality of the
equipment creating a risk to users and will void the warranty.
. Be sure that all warning stickers and instructional placards applied to the product stay present and
in good condition when doing maintenance or replacing components. If at any time the Warning
labels become loose, unreadable, or dislodged, replace the labels. If purchased in US/Canada, contact
Customer Service for replacement labels. If purchased outside US/Canada, contact your local distrib-
utor for them.
. Do not try to change the design or functionality of the machine being serviced as this can adversely
affect user safety.
. Do not put the machine back in service until all shrouds, instructions, warning labels and correct
functionality have been verified and tested for correct performance.
.Before starting your training, consult your doctor to determine whether your health and physical
condition are suitable for the product. Because bad conditions can pose risks to your health and
safety or prevent you from using the product correctly.
. If you are taking a medication that affects your heart rate and blood pressure, your doctor's advice
is extremely important.
This icon means a potentially hazardous situation which, if not avoided, could result in
death or serious injury. Read and understand all Warnings on this machine.
Read and understand the Service Manual before working on the machine. Failure to obey
the instructions and safety warnings could cause injury to the service technician or
bystanders.
BEFORE SERVICING OR USING THIS EQUIPMENT, OBEY THE FOLLOWING WARNINGS:
NOTICE: This document provides important safety instructions, adjustments, and general trouble-
shooting information for the maintenance of the ASCEND R-300 Performance Rower.
If you need assistance, please call Ascend Customer Service (if purchased in US/Canada) or your local
distributor (if purchased outside US/Canada).
SAFETY INSTRUCTIONS