Ascon Tecnologic - TC32- - OPERATING INSTRUCTIONS - PAG. 2
The instrument can be equipped with an internal or exter-
nal buzzer (connected to the Out2 output) to signal the
counting end.
The instrument programming can be done through 3 front
keys where there is also the programmable key for the
Start/Stop/Reset commands.
The operating parameters programming can take place,
as well as from the keyboard, also through the A01 device
connected to the TTL port (standard) or through an NFC
communication device (optional).
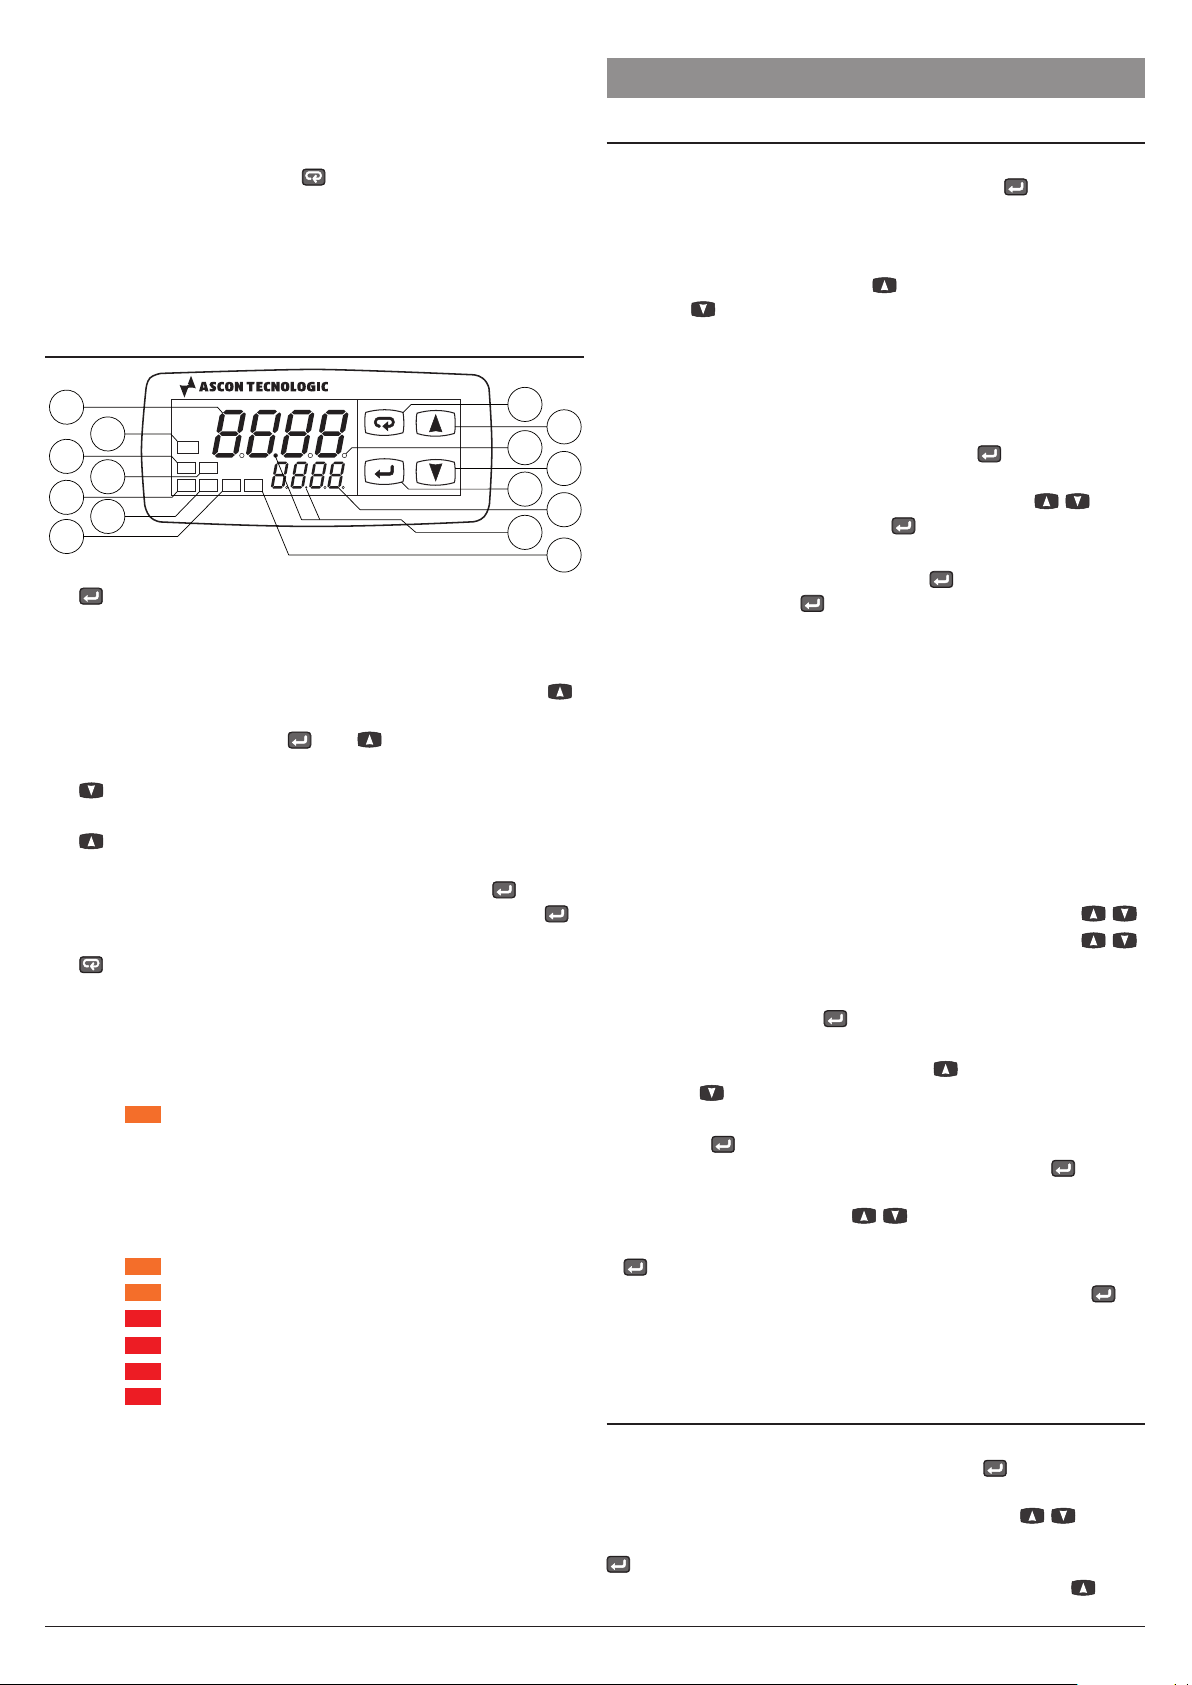
1.2 Front panel description
TC32
CNT
InC
TC
InR
Start/Stop
Reset
12
18
14
15
4
52
3
7
9
11
13
6
10
12
1
:
Pressed and released allows to set the time delays
(if programmed with t.ed parameter). Pressed for 5 s
enters the parameters program mode, pressed again
accesses the parameters edit mode and confirms values.
In programming mode can be used together with the
key to change the parameters programming level. When
the keyboard is locked, and keys hold pressed
together for 5 s, unlock the keyboard;
2
:
In parameteres program mode is used to decrease
the setting values and to select the parameters;
3
:
In parameteres program mode is used to increase
the setting values and to select the parameters. In
programming mode can be used together with key to
change parameters level. Pressed together with the
key for 5 s allows the keyboard unlock;
4 Start/Stop/Reset:Can be used for Start/Stop/Reset
count commands as programmed using the t.UF parameter;
5 LED SET: In normal operating mode lights up when a
key is pressed to signal the key pressure. In program-
ming mode is used to indicate the parameter program-
ming level;
6 LED
:Indicates: count in progress (flashing with a
1 s frequency if used as timer, steady ON if counter),
count interrupted (steady ON if used as timer) or the
reset status (OFF);
7 CNT Display: Shows the value of the count in progress;
8 SET Display: Shows the Active Set point value;
9 LED
:When lit he instrument is used as a Timer;
10 LED
:When lit he instrument is used as a Counter;
11 LED
:Out1 output status: ON (lit), OFF (not lit);
12 LED
:Out2 output status: ON (lit), OFF (not lit);
13 LED
:CNT input status;
14 LED
:RST input status;;
15 Timer separator point: Indicates the separation be-
tween hours and minutes, minutes and seconds, sec-
onds and hundredths of a second when the instrument
operates as a Timer.
2. PROGRAMMING
2.1 Set Points (timings) programming
The normal programming mode of the delay times (Set
Times) occurs by pressing and releasing the key, the up-
per display starts showing s.t1 (if the instrument is working
as a Timer) or s.C1 (if the instrument is working as a Coun-
ter)and the lower display shows programmed value.
To change the value press the key to increase the number
shown or to decrease it. These 2 keys normally act in one
digit steps a time, but if kept pressed for more than 1 s the
value increases or decreases faster and after 2 more seconds
in the same condition, the speed further increases in order
to quickly reach the desired value. However, through t.edt
parameter (Timer) or t.EdC (Counter) it is possible to define
if and which Set Points can be set with the short key.
A
further option provides the setting of S.T1 or s.t2
(Timer)/S.C1
or S.C2 (Counter)
Set Point value only, using the / keys
without pressing in advance the key (t.Ed = 8/9).
t.ed parameter can assume a value between oF and 9:
oF No Set Point can be set with the short key (if pressed
and released, the key has no effect);
1 Only s.t1/
S.C1
Set Point can be set with this procedure;
2 Only s.t2/
S.C2
Set Point can be set with this procedure;
3 Both s.t1 and s.t2/
S.C1
and
S.C2
Set Points can be set
with this procedure;
4 Only s.t3/
Str
Set Point can be set with this procedure;
5 s.t1 and s.t3/
S.C1
and
S.tr
Set Points can be set with
this procedure;
6 s.t2 and s.t3/
S.C2
and
S.tr
Set Points can be set with
this procedure;
7 s.t1, s.t2 and s.t3
/
S.C1
,
S.C2
and
S.tr
Set Points can be set
with this procedure;
8 s.t1/
S.C1
Set Point value can be set directly using / ;
9 s.t2/
S.C2
Set Point value can be set directly using / .
For example, in case the parameter t.Edt or t.Edt = 1or 3,
the procedure is the following:
–Press and release the key, the display shows s.t1/
S.C1
alternated to its value.
–To change the Set Point, press the key to increase the
value or to decrease it.
–If tEd/t.Edt =
1
, once the desired value has been set,
press the button to exit the fast programming mode. If
tEd/t.Edt =
3
, pressing and releasing again the but-
ton the display shows S.t2/
S.C2
alternated to its value. To
change the value use the / keys as for the S.t1 value.
–Once the Set Point time has been programmed, press the
key to exit the Set Point programming mode.
To exit the fast Set Point programming mode press the
key after the last Set Point time has been displayed or press-
ing no buttons for about 10 s, after which the display returns
to normal operation.
2.2 Standard mode parameters setting
To access the instrument functionning parameters when
password protection is disabled, press the key for 5 s,
after which the display shows the code that identifies the first
programmable parameter, at this point use the / keys
to select the parameter that is to be changed, then press the
key, the upper display shows the parameter code and
the lower one its value that can be changed with the and