manuals.online logo
Brands
  1. Home
  2. •
  3. Brands
  4. •
  5. Asko
  6. •
  7. Washer
  8. •
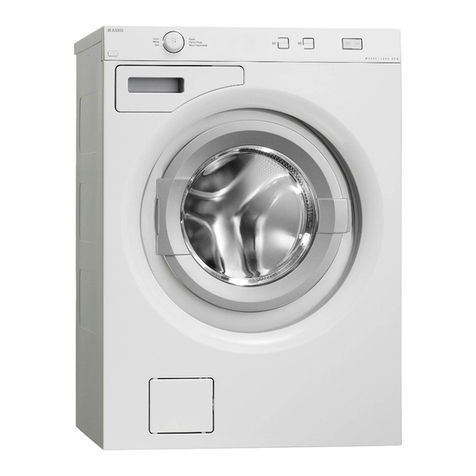
  9. Asko W4114C/1/2 User manual

Asko W4114C/1/2 User manual

Other Asko Washer manuals

Asko W6441 User manual

Asko

Asko W6441 User manual

Asko W6441 Service manual

Asko

Asko W6441 Service manual

Asko WL6532 XXL User manual

Asko

Asko WL6532 XXL User manual

Asko W6661 User manual

Asko

Asko W6661 User manual

Asko PROFESSIONAL WMC844PG User manual

Asko

Asko PROFESSIONAL WMC844PG User manual

Asko WMC Assembly instructions

Asko

Asko WMC Assembly instructions

Asko W6022 User manual

Asko

Asko W6022 User manual

Asko W6222 User manual

Asko

Asko W6222 User manual

Asko W600 User manual

Asko

Asko W600 User manual

Asko PROFESSIONAL WMC84P User manual

Asko

Asko PROFESSIONAL WMC84P User manual

Asko W6884 Eco User manual

Asko

Asko W6884 Eco User manual

Asko WM25 User manual

Asko

Asko WM25 User manual

Asko W6903 User manual

Asko

Asko W6903 User manual

Asko WT63 Series User manual

Asko

Asko WT63 Series User manual

Asko W6021 User manual

Asko

Asko W6021 User manual

Asko WM90 User manual

Asko

Asko WM90 User manual

Asko W6424 User manual

Asko

Asko W6424 User manual

Asko W6564W-NOR User manual

Asko

Asko W6564W-NOR User manual

Asko W20864R User manual

Asko

Asko W20864R User manual

Asko PROFESSIONAL WMC622PG User manual

Asko

Asko PROFESSIONAL WMC622PG User manual

Asko W640 User manual

Asko

Asko W640 User manual

Asko W6098XSUK1 User manual

Asko

Asko W6098XSUK1 User manual

Asko W6461 User manual

Asko

Asko W6461 User manual

Asko PROFESSIONAL WMC943VS User manual

Asko

Asko PROFESSIONAL WMC943VS User manual

Popular Washer manuals by other brands

Zanussi ZWF 14080 W user manual

Zanussi

Zanussi ZWF 14080 W user manual

Zanussi FV 825 N Instruction booklet

Zanussi

Zanussi FV 825 N Instruction booklet

LG WM8000HVA Specifications

LG

LG WM8000HVA Specifications

Whirlpool 3RGSC9400 Use and care guide

Whirlpool

Whirlpool 3RGSC9400 Use and care guide

Zanussi TJ 1284 H instruction manual

Zanussi

Zanussi TJ 1284 H instruction manual

AEG KO-LAVAMAT 74740 User information

AEG

AEG KO-LAVAMAT 74740 User information

Beko WSRE7512PRA user manual

Beko

Beko WSRE7512PRA user manual

Whirlpool LA5OOOXP Use and care guide

Whirlpool

Whirlpool LA5OOOXP Use and care guide

Miele PW 6207 operating instructions

Miele

Miele PW 6207 operating instructions

GE GE Profile WWSE3160AAA Specifications

GE

GE GE Profile WWSE3160AAA Specifications

Bush WMNB712EB instruction manual

Bush

Bush WMNB712EB instruction manual

ALLIANCE UW60AV Information manual

ALLIANCE

ALLIANCE UW60AV Information manual

Bosch WAN280H3 User manual and installation instructions

Bosch

Bosch WAN280H3 User manual and installation instructions

Maytag MAT15MNAW installation instructions

Maytag

Maytag MAT15MNAW installation instructions

LG T2109VSAL owner's manual

LG

LG T2109VSAL owner's manual

Indesit IWC 61481 Instructions for use

Indesit

Indesit IWC 61481 Instructions for use

Electrolux EWF12843 user manual

Electrolux

Electrolux EWF12843 user manual

Indesit WIN 70 Instructions for use

Indesit

Indesit WIN 70 Instructions for use

manuals.online logo
manuals.online logoBrands
  • About & Mission
  • Contact us
  • Privacy Policy
  • Terms and Conditions

Copyright 2025 Manuals.Online. All Rights Reserved.

INSTRUCTIONS FOR USE
WM85.1
Carefully read the instructions for use before using the washing machine.
Washing machine
W4114C/1/2
2
Original instructions
The following symbols are used throughout the manual and they have the following meanings:
Information, advice, tip, or recommendation Warning – danger of hot surface
Warning – general danger Warning – danger of fire
Warning – danger of electric shock
See Quick guide on the last page.
Dear Customer,
We thank you for purchasing this quality ASKO product.
We hope it meets all your expectations. Scandinavian design combines pure lines, everyday functionality,
and high quality. These are the key characteristics of all our products, and the reason why they are highly
appreciated across the globe.
We kindly recommend you to read these instructions before using the appliance for the first time. The
instruction manual also includes information on how you can help protect the environment.
TABLE OF CONTENTS
Safety precautions 3
Washing machine description 6
Detergent compartment 6
Before using the appliance for the first time 7
Installation and connection 9
Tips before washing 16
Washing process, step by step (1 – 8) 18
System settings 30
Special features 33
Cleaning and maintenance 34
Errors – what to do? 38
Service 43
Technical information 44
Program table 46
Table washing mode/temperature 48
Table options 49
Disposal 50
Quick guide 51
3
GENERAL
Please read the instruction manual and save it for future reference.
• Please do not use the washing machine if you have not read and
understood these instructions or use first.
• Failure to observe the instructions for use or inappropriate use of the
washing machine may result in damage to the laundry or machine, or injury
to the user. Keep the instruction manual handy, near the washing machine.
• Instructions for use are available on our website at www.asko.com.
• Your washing machine is intended solely for household use.
• The appliance has to be connected to the water and power supply by a
trained expert.
• Any repair and maintenance pertaining to safety or performance should be
done by trained experts.
• To avoid hazard, damaged power cord may only be replaced by the
manufacturer, authorized service technician, or other authorized person.
• After installation, the washing machine should stand still for two hours before
it is connected to the power mains.
• The washing machine may not be connected to the power mains using an
extension cord.
• Do not connect the washing machine to an electrical outlet intended for an
electric shaver or hair dryer.
• To connect the washing machine to water supply, make sure to use the
supplied water supply hose and gaskets. Water pressure has to be between
0.1 and 1 MPa (approximately 1–10 kp/cm2, 1-10 bar, 10–100 N/cm2).
• Always use a new water supply hose to connect the appliance to water
supply; do not reuse an old water supply hose.
• After the washing cycle, close the water tap and pull out the washing
machine plug from the power socket.
• Only use the washing machine for washing laundry, as described in the
instruction manual. The machine is not intended for dry cleaning.
• In case of incorrect appliance connection, incorrect use, or servicing by an
unauthorized person, the user shall bear the cost of any damage.
• Only use detergents intended for the washing machine!
• Only use agents for machine washing and care of laundry. We shall not be
responsible for any damages or discolouration of gaskets and plastic parts
resulting from incorrect use of bleaching or colouring agents.
SAFETY PRECAUTIONS
4
• Bleaches that contain chlorine can be replaced with oxygen-based bleaches.
Otherwise, a neutralization cycle should be performed by running the Cotton
program at the highest temperature. For best results, use hydrogen peroxide
or oxygen-based detergents.
• Do not use colourants (dyes) or bleaching substances (substances
for discolouration or removal of colourants) as they contain sulphuric
compounds that could cause corrosion.
• Excessive use of products containing chlorine compounds increases the
risk of premature failure of appliance components. This depends on the
concentration of chlorine, exposure time, and temperature.
• Do not use detergents that contain solvents as this could lead to release
of poisonous gases, damage to the machine, and risk of fire and explosion.
• Before using the appliance for the first time, remove the transport bolts and
all other transport protection devices. See chapter "BEFORE FIRST USE /
Transport protection".
• The machine is not intended for use by persons (including children) with
physical or mental impairments, or persons with lacking experience and
knowledge. These persons should be instructed about the use of the
appliance by a person responsible for their safety.
• Emergency door opening tool is located on the back side of the dispenser.
• Maximum washing capacity in kg is indicated on the rating plate (or in the
PROGRAM TABLE).
CHILD SAFETY
• Do not allow small children to play with the washing machine.
• Before closing the washing machine door and running the program, make
sure there is nothing except laundry in the drum (e.g. if a child climbed into
the washing machine drum and closed the door from the inside).
• Keep the detergent and conditioner out of reach of children.
• Activate the child lock. See chapter "SYSTEM SETTINGS, section Child
Lock".
• Do not let children younger than three years to come near the
appliance, unless they are under constant supervision.
• The washing machine is made in compliance with all relevant safety
standards. This washing machine may be used by children aged 8 years and
above and by persons with reduced physical, sensory or mental capabilities
or lack of experience and knowledge, but only if they are supervised during
the use of the appliance, if they have been provided relevant instructions
regarding safe use of the washing machine, and if they understand the
5
hazards of inappropriate use. Make sure children do not play with the
appliance. Make sure the children do not clean the washing machine or
perform any maintenance tasks without supervision.
DANGER OF HOT SURFACE
• At higher washing temperatures, the door glass will heat up. Be careful to
avoid burns. Make sure children do not play near the door glass.
WATER OVERFLOW PROTECTION
• If the water level in the appliance rises above the normal level, then the
excessive water level protection will be activated. It will shut offthe water
supply and start pumping out the water. If the water level does not decrease
in 60 seconds, the program will be interrupted (see chapter "ERRORS –
WHAT TO DO?").
TRANSPORTING / STORAGE DURING THE WINTER
If you transport or store the appliance in vehicles or rooms that are not heated
and where the temperature could drop to below freezing point, please do the
following:
• Clean the drain pump filter. See chapter "CLEANING AND MAINTENANCE".
• Close the water supply to the washing machine, undo the water supply hose
from the water supply tap, and wait until the water flows out of the tap and the
hose.
• After the drain pump filter is emptied, there can still be a small amount of
water in the machine. This, however, does not affect the quality and will not
damage the appliance.
• If the washing machine is to be transported, transport protection has to be
re-installed before transport (See chapter BEFORE USING THE APPLIANCE
FOR THE FIRST TIME).
SAVE THESE INSTRUCTIONS FOR FUTURE REFERENCE!
6
1. Main switch (ON/OFF)
2. Program selector knob
3. Display unit
4. Program settings buttons
5. Button (start/pause)
6. Detergent compartment
7. QR and AUID code (on the inside of the washing
machine door)
8. Rating plate with information about the washing
machine (on the inside of the washing machine
door)
9. Washing machine door
10. Drain filter cover
11. Water release hose
12. Drain filter pump (installed behind the drain
pump filter)
WASHING MACHINE DESCRIPTION
DETERGENT COMPARTMENT
15
910
267834
1211
1
4
5
3
2
1. Prewash compartment
2. Compartment for main wash liquid
detergent.
Use the foldable barrier (3).
2. Compartment for main wash powder
detergent.
Do not use the foldable barrier (3).
4. Softener / conditioner compartment
5. Tab for detergent compartment removal
7
PACKAGING
Remove all packaging.
Please sort the materials in compliance with local recommendations (see chapter ”DISPOSAL”).
TRANSPORT PROTECTION
Before using the appliance, remove the three transport bolts and plastic plugs which protect the appliance
during transport.
1Release and remove the bolts as shown in the
figures.
2To remove the plastic plugs holding the bolts,
squeeze them and then pull them out.
12 3 3Remove the caps from the plastic plugs. Push the
caps over the three holes in which the plastic plugs
were inserted. Save the bolts and plastic plugs if you
have to transport your washing machine in the future.
If you wish to transport the washing machine, reinstall the bolts and plastic caps to lock the machine. This
will prevent any damage to the machine due to vibrations during transport. If you have lost the transport bolts
or plastic caps, replacements can be ordered at your dealer.
Art. No. ID:
270698 Bolt
551188 Plastic cap (transport lock)
Please order three pieces of each item!
BEFORE USING THE APPLIANCE FOR THE FIRST TIME
8
CLEANING
Disconnect the washing machine from the power mains and open the door. Clean the washing machine drum
with a damp cloth and a mild detergent.
Connect the washing machine to the power mains and run the dedicated drum cleaning program. See
chapter "WASHING PROCESS; STEP BY STEP (1–8)" /STEP 5: CHOOSE THE PROGRAM.
No program can be started while the door is open.
SETTINGS BEFORE FIRST USE
After connecting the washing machine and power it for the first time, you will be asked to do following
settings:
Language selection
Press the button 2 or the program selector knob to scroll the list of languages. Confirm your selection by
pressing the OK button.
The amount of detergent depends on the hardness of water. For details, see the detergent packaging.
Please contact your local water supply company to check the water hardness in your area.
Before it dispatched from the factory, every appliance is tested.
As a result, there may be some residual water left in the drain pump filter. This, however, does not affect the
quality and will not damage the appliance.
9
INSTALLATION AND CONNECTION
POSITIONING THE WASHING MACHINE
The washing machine can be installed as a built-
in (integrated) or a free-standing unit. Place the
machine on a level surface so that the power outlet
on the wall is accessible.
Before connecting the washing machine to the
power mains, wait for at least 2 hours until it reaches
room temperature.
If the appliance is installed on a plinth or a
similar structure, then the appliance must be fixed to
it, to avoid the risk of falling.
ASKO original accessories are available for this
purpose, complete with fixing instructions.
Built-in washing machine
The washing machine can be integrated under a
worktop with a height of 900–950 mm. Leave 5 cm
of room around the entire perimeter of the appliance,
including between the back edge of the upper cover
and the wall behind it.
Free-standing appliance
If you have a dryer of suitable dimensions (by
another dryer manufacturer), use the vacuum feet
to stack it on top of the washing machine, or place it
next to it.
Clearances around the washing machine
min. 50 mm
min. 50 mm
min. 50 mm
10
Opening the washing machine door (top view)
376 mm
1057 mm
110°
Stacking an ASKO dryer on top of an ASKO
washing machine
To stack an ASKO dryer on top of a washing
machine, use the extra vacuum feet and the tipping
guard (A+B), supplied in the cardboard box in the
ASKO dryer drum. If the washing machine and
dryer are not of matching dimensions or if you
have installed a hidden helper between the two
appliances, then binding plates are available as
optional accessories at the service unit.
AB
Ventilation Requirements of ASKO laundry
concept or closet installation
ASKO's front panel controls make it possible to
install the washers and dryers in a cabinet or closet.
Make sure there is clearance between appliances
and cabinet or wall and 25 mm minimum clearance
between the rear edge of the appliance top panel
and the cabinet or wall.
When closet or cabinet is closed by the door, we
recommend louvered doors, to ensure proper
ventilation.
Otherwise there must be ventilation openings on
the door. See illustration of dimension for ventilation
openings below:
12 mm
25 mm
65 mm
635 mm
1550 mm
35 mm 50 mm
12 mm
465 mm
65 mm
Ensure the dryer door can be opened without
hindrance after installation.
The cool air intake panel at the front of the dryer
must not be blocked or covered. Doing so could
cause a fault.
Disregarding of instructions influences on
appliance performance and may also result in failure
of the appliance.