PAGE 7
User Manual WS-400 / February 2011 © ASL Intercom BV .
10.1.2 Wireless Beltpack Settings
d. With the Channel Select switch at the rear of
the beltpack, select the TX/RX channel
according to the WS-200 or WS-400 setting
e. Connect a headset to the beltpack and insert
fully charged batteries. When the beltpack is
switched on, a single short tone should be
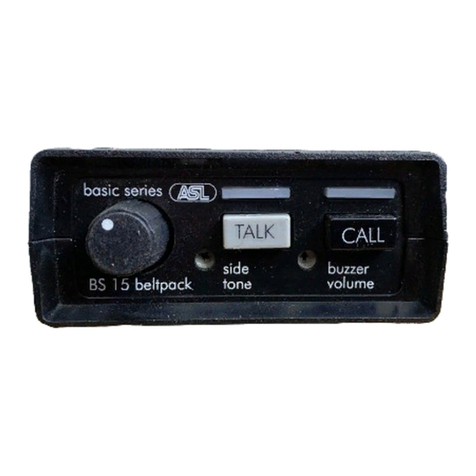
heard and both LED‟s on the front panel of the
unit flash for half a second. This indicates that
the beltpack is functioning properly.
f. When one pushes the CALL or the TALK
button, the LED‟s on the front panel are lit and
the green LED of the corresponding TX/RX
module in the base station is lit. It proofs the
beltpack has connection with the base station
g. Turn down the OWN VOICE Volume trimmer at
the side panel of the beltpack (counter-
clockwise)
h. Set the volume control of the beltpack at
approximately 50%
i. Push the TALK button on the beltpack, talk into
the headset microphone and listen to your own
voice (you might hear a small delay )
j. Adjust the side tone trimmer at the referring
TX/RX module in the base station so that the
level of your own voice is as low as possible
k. Adjust the OWN VOICE trimmer on the
beltpack so that the level of your own voice is to
your liking.
10.2 ASL WIRELESS CONNECTED TO A 4-WIRE INTERCOM SYSTEM
10.2.1 Base Station Settings
a. Give each TX/RX module in the base station its
own TX/RX channel by rotating the „Channel
select‟ switch. Try to avoid TX/RX channels to
be physically next to each other, e.g. when two
WS-400‟s are in your wireless system, try to set
them in this order: TX/RX channels 2, 4, 6, 8, 1,
3, 5, 7. If one uses a WS-200 with only two
beltpacks, use TX/RX channels 1 and 6
b. Make sure the interface mode switch at the rear
of the base station is set to “4-WIRE”
The internal party line is now disconnected.
c. Connect the 4-wire intercom system via the
XLR-3 connectors at the rear panel of the base
station. Each XLR-3 male connector (signal out)
and female connector (signal in) connects each
TX/RX module to an input/output of the a 4-wire
intercom system.
10.2.2 Wireless Beltpack Settings
d. With the Channel Select switch at the rear of
the beltpack, select the TX/RX channel
according to the WS-200 or WS-400 setting.
e. Connect a headset to the beltpack and insert
fully charged batteries. When the beltpack is
switched on, a single short tone should be
heard and both LED‟s on the front panel of the
unit flash for half a second. This indicates that
the beltpack is functioning properly.
f. When one pushes the CALL or TALK button,
the LED‟s on the front panel are lit and the
green LED of the corresponding TX/RX module
in the base station is lit.
It proofs the beltpack has connection with the
base station.
g. Turn down the OWN VOICE Volume trimmer at
the side panel of the beltpack (counter-
clockwise)
h. Push the TALK button on the beltpack, talk into
the headset microphone and listen to your own
voice
i. Turn up the volume of your own voice by
adjusting the OWN VOICE trimmer to a level of
your liking
10.3 ASL WIRELESS CONNECTED TO A PARTY LINE INTERCOM SYSTEM
10.3.1 Base Station Settings
a. Give each TX/RX module in the base station its
own TX/RX channel by rotating the „Channel
select‟ switch. Try to avoid TX/RX channels to
be physically next to each other, e.g. when two
WS-400‟s are in your wireless system, try to set
them in this order: TX/RX channels 2, 4, 6, 8, 1,
3, 5, 7. If one uses a WS-200 with only two
beltpacks, use TX/RX channels 1 and 6
b. Make sure the interface mode switch at the rear
of the base station is set to “PARTY LINE”.
c. Connect the party line intercom system via the
XLR-3 connectors at the rear panel of the base
station. Each XLR-3 male and female pair may
connect each TX/RX module to a channel of
the party line intercom system (see also section
10.3.3). Everywhere this connection is made,
the internal party line is interrupted
d. Turn down the side tone trimmers (counter
clockwise).
