manuals.online logo
Brands
  1. Home
  2. •
  3. Brands
  4. •
  5. aspenhome
  6. •
  7. Indoor Furnishing
  8. •
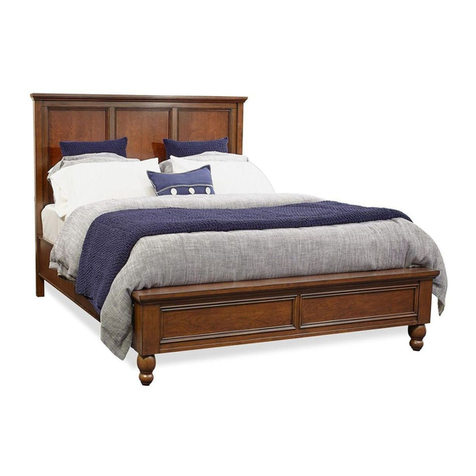
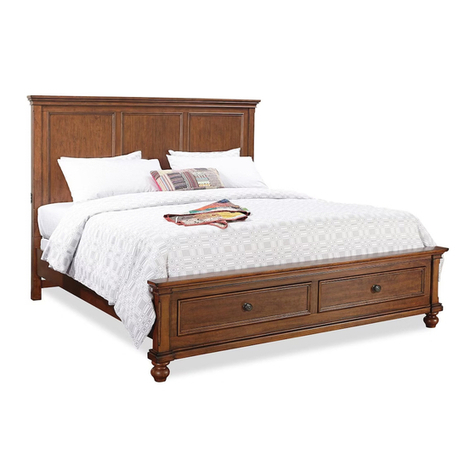
  9. aspenhome Queen Panel HB I317-400 User manual

aspenhome Queen Panel HB I317-400 User manual

ITEMNO:I317-400Queen Panel HB
I317-402 QueenRails
I317-403 Queen LowProfileFB
Thankyouforpurchasingthisqualityproduct.Besuretocheckallpacking material carefullyfor
small partsthatmaycomelooseinsidethe cartonduringshipment.
UNIT SHOULDBE INSTALLEDBY2ORMORE PERSONS.
All Bedsneedtobeset upinthe exact final
locationsothatafterfull assemblyit will not
needtobemoved. Moving thebedwill cause
thesupportlegstomoveoutofperpendicular
(90degree),weakenthesupportsystem, and
may allowthebedtocollapse.
aspenhome
RASSEMBLYINSTRUCTIONS
MADEINVIETNAM
ah
BEFORE USING THISPRODUCT PLEASEREAD, UNDERSTAND, AND FOLLOWTHESEINSTRUCTIONS.
Save these instructionsforfuture reference.
FORINDOORUSEONLY
TOOLSREQUIRED (NOTPROVIDED)
PHILLIPSSCREWDRIVER
I317-403
I317-402
I317-400
HARDWARELIST:I317-400
1PC
No.
A
B
C
D
E
Description Sketch Quantity
Bolt 5/16" x2-3/16"
Lock Washer5/16"
FlatWasher5/16" x3/4"
Allen Wrench 5mm
8PCS
COMPONENTSLIST:I317-400
1PC
No.
1
2
3
4
5
Description Sketch Quantity
Headboard
Leftleg
Rightleg
Woodstretcher
Centersupportleg 1PC
1PC
1PC
1PC
COMPONENTSLIST:I317-402
No.
1
2
Description Sketch Quantity
Bed rails
Slats 4PCS
2PCS
HARDWARELIST:I317-402
8PCS
No.
F
G
H
I
J
Description Sketch Quantity
1PC
8PCS
K8PCS
8PCS
Hanger Bolt 5/16"x 3-1/8"
HexNut5/16"
HexWrench
Wood Screw M4x1-3/16"
Lock Washer5/16"
Bolt 5/16" x1-9/16"
FlatWasher5/16" x5/8" 8PCS
14 PCS
14 PCS
Page1/4
03-18-2021
COMPONENTSLIST:I317-403
No.
1
2
Description Sketch Quantity
Footboard
SupportLeg(forslats) 4PCS
1PC
6PCS
aspenhome
RASSEMBLYINSTRUCTIONS
MADEINVIETNAM
ah
STEP3:Attachthecentersupport leg
toheadboardandwoodstretcherby
using4bolts(A),lockwashers(C) and
flat washers(D).
STEP2: Attachthewoodstretchertothelegsbyusing2bolts(A), lock washers(C)
andflatwashers(D).
STEP1: Laytheheadboardfacedownonasoftsurface.Attachthe left leg and right leg to
headboardbyusing8bolts(B),lockwashers(C)andflatwashers(D).
LeftLeg
RightLeg
A
C
D
E
B
C
D
E
A
C
D
E
CenterSupportLeg
03-18-2021
Page2/4
ITEMNO:I317-400Queen Panel HB
I317-402 QueenRails
I317-403 Queen LowProfileFB
aspenhome
RASSEMBLYINSTRUCTIONS
MADEINVIETNAM
ah
G
HIJ
F
03-18-2021
Page3/4
ITEMNO:I317-400Queen Panel HB
I317-402 QueenRails
I317-403 Queen LowProfileFB
STEP6: Attachthesupportlegswithlevelerstothe slats.
Adjustthelevelersonbottomofsupportlegswhen
necessary. SupportLeg
Leveler
ThisEndUp
Slat
STEP5:Screwthebolts(F)intoHB&FB.Makesuretheslatbearerisinthe position (a).
Alignthe boltswiththe holesintheendofsiderailsandattach theside railstoHB&FBusing
flatwashers(H),lockwashers(G)andhexnuts(I).Thenuseahexwrenchtotighten all the nuts.
Headboard
Slatbearer
Side Rail
Makesuretheslatbeareris
inthe position (a).
Position b
Position a
STEP4:Theslatbearershavebeenattachedinposition (b) approximately 2"fromthetop of the side
railsforusewithastoragefootboard.Theslatbearersmustbemovedintoposition (a)based on
thisbedconfiguration.Removetheboltsandscrewsfromtheslatbearers and side railsasshown
below.Thenre-attachtheslatbearerstothesiderailsinposition(a)withbolts, lock washers, flat
washers,andscrews. Caution:Donotovertightenboltsasthismayloosenthethreaded
insertsinthesiderails.
b
a
aspenhome
RASSEMBLYINSTRUCTIONS
MADEINVIETNAM
ah
FUNCTIONALITYINSTRUCTION
I317-403
I317-402
I317-400
SinglePoweredUSBPort
for Charging on bothsides
03-18-2021
Page4/4
ITEMNO:I317-400Queen Panel HB
I317-402 QueenRails
I317-403 Queen LowProfileFB
STEP7: Arrangetheslatsontheslatbearers equallyand
attachtotheslatbearerswithwoodscrews (K).
WoodScrews(K)
ITEMNO:I317-400Queen Panel HB
I317-402 QueenRails
I317-403DQueen Storage FB
Thankyouforpurchasingthisqualityproduct.Besuretocheckallpacking material carefullyfor
small partsthatmaycomelooseinsidethe cartonduringshipment.
UNIT SHOULDBE INSTALLEDBY2ORMORE PERSONS.
All Bedsneedtobeset upinthe exact final
locationsothatafterfull assemblyit will not
needtobemoved. Moving thebedwill cause
thesupportlegstomoveoutofperpendicular
(90degree),weakenthesupportsystem, and
may allowthebedtocollapse.
aspenhome
RASSEMBLYINSTRUCTIONS
MADEINVIETNAM
ah
BEFORE USING THISPRODUCT PLEASEREAD, UNDERSTAND, AND FOLLOWTHESEINSTRUCTIONS.
Save these instructionsforfuture reference.
FORINDOORUSEONLY
TOOLSREQUIRED (NOTPROVIDED)
PHILLIPSSCREWDRIVER
I317-403D
I317-402
I317-400
HARDWARELIST:I317-400
1PC
No.
A
B
C
D
E
Description Sketch Quantity
Bolt 5/16" x2-3/16"
Lock Washer5/16"
FlatWasher5/16" x3/4"
Allen Wrench 5mm
8PCS
COMPONENTSLIST:I317-400
1PC
No.
1
2
3
4
5
Description Sketch Quantity
Headboard
Leftleg
Rightleg
Woodstretcher
Centersupportleg 1PC
1PC
1PC
1PC
COMPONENTSLIST:I317-402
No.
1
2
Description Sketch Quantity
Bed rails
Slats 4PCS
2PCS
HARDWARELIST:I317-402
8PCS
No.
F
G
H
I
J
Description Sketch Quantity
1PC
8PCS
K8PCS
8PCS
HARDWARE LIST:I317-403D
No.
L
M
N
O
P
Description Sketch Quantity
Lock Washer5/16"
Allen Wrench 5mm 1PC
8PCS
FlatWasher5/16" x3/4"
COMPONENTSLIST:I317-403D
1PC
No.
1
2
3
4
5
Description Sketch Quantity
Footboard
Supportleg(forcenterrail)
Supportleg(forpedestal)
Decking
Centerrail
1PC
2PCS
3PCS
4PCS
8PCS
8PCS
Hanger Bolt 5/16"x 3-1/8"
HexNut5/16"
HexWrench
Wood Screw M4x1-3/16"
Lock Washer5/16"
Bolt 5/16" x1-9/16"
Wood Screw M4 x1"
Bolt 5/16"x1-3/16" 8PCS
FlatWasher5/16" x5/8" 8PCS
6PCS
14 PCS
14 PCS
Page1/5
03-18-2021
aspenhome
RASSEMBLYINSTRUCTIONS
MADEINVIETNAM
ah
STEP3:Attachthecentersupport leg
toheadboardandwoodstretcherby
using4bolts(A),lockwashers(C) and
flat washers(D).
STEP2: Attachthewoodstretchertothelegsbyusing2bolts(A), lock washers(C)
andflatwashers(D).
STEP1: Laytheheadboardfacedownonasoftsurface.Attachthe left leg and right leg to
headboardbyusing8bolts(B),lockwashers(C)andflatwashers(D).
LeftLeg
RightLeg
A
C
D
E
B
C
D
E
A
C
D
E
CenterSupportLeg
ITEMNO:I317-400Queen Panel HB
I317-402 QueenRails
I317-403DQueen Storage FB
03-18-2021
Page2/5
aspenhome
RASSEMBLYINSTRUCTIONS
MADEINVIETNAM
ah
ITEMNO:I317-400Queen Panel HB
I317-402 QueenRails
I317-403DQueen Storage FB
STEP4:Screwthebolts(F)intoHB&FB.Makesuretheslatbearerisinthe UPPER position.
Alignthe boltswiththe holesintheendofsiderailsandattach theside railstoHB&FBusing flat
washer(H),lockwashers(G)andnuts(I).Thenuseahexwrench(J)totighten all the nuts.
Makesuretheslatbeareris
inthe UPPER position.
G
HIJ
F
M
L
Centerrail
O
CenterRail
SupportLeg
(forcenterrail)
Leveler
STEP6:Attach2supportlegs(forcenterrail)tothe
centerrailusing4bolts(L),lockwashers(M)and flat
washers(N).UsetheAllenWrench(O)totighten all
ofthebolts.
N
Centerrail M
L
ON
03-18-2021
Page3/5
STEP5:Attachcenterrailtothefootboardandcentersupportlegofheadboardusing 4bolts(L),
lockwashers(M)andflatwashers(N).
STEP8: Putthedeckingovertheslats,securedeckingtotheslatswithwood screws (P)through
the pre-drilled holesinthedecking asshownbelow.
Makesurethatthereisaslat
underthepre-drilled hole.
P
Decking
Pre-drilledhole
Slat
Decking
Decking
Theslatshouldsupport
bothpiecesofdecking.
aspenhome
RASSEMBLYINSTRUCTIONS
MADEINVIETNAM
ah
WoodScrews(K)
ITEMNO:I317-400Queen Panel HB
I317-402 QueenRails
I317-403DQueen Storage FB
STEP7: Arrangeslatsontheslatbearersandthenlaydeckingontop ofthe slats. Make surethe
slatsarepositionedalongthe seams ofthedecking asshowninthedetail inSTEP8underthe
pre-drilledhole.Removethedeckingandattachslatstotheslatbearers withwood screws (K).
03-18-2021
Page4/5
aspenhome
RASSEMBLYINSTRUCTIONS
MADEINVIETNAM
ah
ITEMNO:I317-400Queen Panel HB
I317-402 QueenRails
I317-403DQueen Storage FB
FUNCTIONALITYINSTRUCTION
Cedar-linedStorageDrawers
I317-403D
I317-402
I317-400
SinglePoweredUSBPort
for Charging on bothsides StandardQueen Bed
03-18-2021
Page5/5
Page1/4
ITEMNO:I317-404King Panel HB
I317-406 King Rails
I317-410 Cal King Rails
I317-407 King LowProfileFB
Thankyouforpurchasingthisqualityproduct.Besuretocheckallpacking material carefullyfor
small partsthatmaycomelooseinsidethe cartonduringshipment.
UNIT SHOULDBE INSTALLEDBY2ORMORE PERSONS.
All Bedsneedtobeset upinthe exact final
locationsothatafterfull assemblyit will not
needtobemoved. Moving thebedwill cause
thesupportlegstomoveoutofperpendicular
(90degree),weakenthesupportsystem, and
may allowthebedtocollapse.
aspenhome
RASSEMBLYINSTRUCTIONS
MADEINVIETNAM
ah
BEFORE USING THISPRODUCT PLEASEREAD, UNDERSTAND, AND FOLLOWTHESEINSTRUCTIONS.
Save these instructionsforfuture reference.
FORINDOORUSEONLY
TOOLSREQUIRED (NOTPROVIDED)
PHILLIPSSCREWDRIVER
I317-407
I317-406
I317-404
HARDWARELIST:I317-404
1PC
No.
A
B
C
D
E
Description Sketch Quantity
Lock Washer5/16"
FlatWasher5/16" x3/4"
Allen Wrench 5mm
14 PCS
14 PCS
COMPONENTSLIST:I317-404
1PC
No.
1
2
3
4
5
Description Sketch Quantity
Headboard
Leftleg
Rightleg
Woodstretcher
Centersupportleg 1PC
1PC
1PC
1PC
COMPONENTSLIST:I317-406
No.
1
2
Description Sketch Quantity
Bed rails
Slats 5PCS
2PCS
HARDWARELIST:I317-406/410
8PCS
No.
F
G
H
I
J
Description Sketch Quantity
1PC
8PCS
K10 PCS
8PCS
COMPONENTSLIST:I317-407
No.
1
2
Description Sketch Quantity
Footboard 1PC
Hanger Bolt 5/16"x 3-1/8"
HexNut5/16"
HexWrench
Wood Screw M4x1-3/16"
Lock Washer5/16"
FlatWasher5/16" x5/8" 8PCS
I317-410
COMPONENTSLIST:I317-410
No.
1
2
Description Sketch Quantity
Bed rails
Slats 5PCS
2PCS
L8PCS
Wood Cap(onlyfor410)
6PCS
Bolt 5/16" x2-3/16" 8PCS
Bolt 5/16" x1-9/16"
03-18-2021
SupportLeg(forslats) 5PCS
3Centerrail(Long) 1PC
aspenhome
RASSEMBLYINSTRUCTIONS
MADEINVIETNAM
ah
Page2/4
STEP3:Attachthecentersupport leg
toheadboardandwoodstretcherby
using4bolts(A),lockwashers(C) and
flat washers(D).
STEP2: Attachthewoodstretchertothelegsbyusing2bolts(A), lock washers(C)
andflatwashers(D).
STEP1: Laytheheadboardfacedownonasoftsurface.Attachthe left leg and right leg to
headboardbyusing8bolts(B),lockwashers(C)andflatwashers(D).
LeftLeg
RightLeg
A
C
D
E
B
C
D
E
A
C
D
E
CenterSupportLeg
03-18-2021
ITEMNO:I317-404King Panel HB
I317-406 King Rails
I317-410 Cal King Rails
I317-407 King LowProfileFB
aspenhome
RASSEMBLYINSTRUCTIONS
MADEINVIETNAM
ah
Page3/4
The outsideholesmatchto6/6standardkingrails,
the insideholesmatchto6/0Calkingbed rails.
03-18-2021
ITEMNO:I317-404King Panel HB
I317-406 King Rails
I317-410 Cal King Rails
I317-407 King LowProfileFB
STEP4:Theslatbearershavebeenattachedinposition (b) approximately 2"fromthetop of the side
railsforusewithastoragefootboard.Theslatbearersmustbemovedintoposition (a)based on
thisbedconfiguration.Removetheboltsandscrewsfromtheslatbearers and side railsasshown
below.Thenre-attachtheslatbearerstothesiderailsinposition(a)withbolts, lock washers, flat
washers,andscrews. Caution:Donotovertightenboltsasthismayloosenthethreaded
insertsinthesiderails.
b
a
STEP6: Attachthesupportlegswithlevelerstothe slats.
Adjustthelevelersonbottomofsupportlegswhen
necessary. SupportLeg
Leveler
ThisEndUp
Slat
G
HIJ
F
Slatbearer
Side Rail
Position b
Position a
STEP5:Screwthebolts(F)intoHB&FB.Makesuretheslatbearerisinthe position (a).
Alignthe boltswiththe holesintheendofsiderailsandattach theside railstoHB&FBusing
flatwashers(H),lockwashers(G)andhexnuts(I).Thenuseahexwrenchtotighten all the nuts.
Makesuretheslatbeareris
inthe position (a).
aspenhome
RASSEMBLYINSTRUCTIONS
MADEINVIETNAM
ah
Page4/4
03-18-2021
ITEMNO:I317-404King Panel HB
I317-406 King Rails
I317-410 Cal King Rails
I317-407 King LowProfileFB
STEP7: Arrangetheslatsontheslatbearers equallyand
attachtotheslatbearerswithwoodscrews (K).
WoodScrews(K)
FUNCTIONALITYINSTRUCTION
STEP8: ForCal Kingbed,insertwood capsintotheholeson
headboardandfootboard.ForregularKingbed, skipthisstep.
Wood Cap (L)
StandardKing Bed
I317-404
I317-407
I317-406
I317-404
I317-407
I317-410
CalKingBed
SinglePoweredUSBPort
for Charging on bothsides
Page1/5
ITEMNO:I317-404King Panel HB
I317-406 King Rails
I317-410 Cal King Rails
I317-407DKingStorage FB
Thankyouforpurchasingthisqualityproduct.Besuretocheckallpacking material carefullyfor
small partsthatmaycomelooseinsidethe cartonduringshipment.
UNIT SHOULDBE INSTALLEDBY2ORMORE PERSONS.
All Bedsneedtobeset upinthe exact final
locationsothatafterfull assemblyit will not
needtobemoved. Moving thebedwill cause
thesupportlegstomoveoutofperpendicular
(90degree),weakenthesupportsystem, and
may allowthebedtocollapse.
aspenhome
RASSEMBLYINSTRUCTIONS
MADEINVIETNAM
ah
BEFORE USING THISPRODUCT PLEASEREAD, UNDERSTAND, AND FOLLOWTHESEINSTRUCTIONS.
Save these instructionsforfuture reference.
FORINDOORUSEONLY
TOOLSREQUIRED (NOTPROVIDED)
PHILLIPSSCREWDRIVER
I317-407D
I317-406
I317-404
HARDWARELIST:I317-404
1PC
No.
A
B
C
D
E
Description Sketch Quantity
Lock Washer5/16"
FlatWasher5/16" x3/4"
Allen Wrench 5mm
14 PCS
14 PCS
COMPONENTSLIST:I317-404
1PC
No.
1
2
3
4
5
Description Sketch Quantity
Headboard
Leftleg
Rightleg
Woodstretcher
Centersupportleg 1PC
1PC
1PC
1PC
COMPONENTSLIST:I317-406
No.
1
2
Description Sketch Quantity
Bed rails
Slats 5PCS
2PCS
HARDWARELIST:I317-406/410
8PCS
No.
F
G
H
I
J
Description Sketch Quantity
1PC
8PCS
K10 PCS
8PCS
HARDWARE LIST:I317-407D
No.
M
N
O
P
Description Sketch Quantity
Lock Washer5/16"
Allen Wrench 5mm 1PC
7PCS
FlatWasher5/16" x3/4"
COMPONENTSLIST:I317-407D
1PC
No.
1
2
3
4
5
Description Sketch Quantity
Footboard
Supportleg(forcenterrail)
Supportleg(forpedestal)
Decking
Centerrail(Short)
1PC
2PCS
3PCS
3PCS
6
8PCS
8PCS
Hanger Bolt 5/16"x 3-1/8"
HexNut5/16"
HexWrench
Wood Screw M4x1-3/16"
Lock Washer5/16"
Wood Screw M4 x1"
Bolt 5/16"x1-3/16" 8PCS
FlatWasher5/16" x5/8" 8PCS
I317-410
COMPONENTSLIST:I317-410
No.
1
2
Description Sketch Quantity
Bed rails
Slats 5PCS
2PCS
3Centerrail(Long) 1PC
L8PCS
Wood Cap(onlyfor410)
QFiller
6PCS
Bolt 5/16" x2-3/16" 8PCS
Bolt 5/16" x1-9/16"
03-18-2021
2PCS
aspenhome
RASSEMBLYINSTRUCTIONS
MADEINVIETNAM
ah
Page2/5
STEP3:Attachthecentersupport leg
toheadboardandwoodstretcherby
using4bolts(A),lockwashers(C) and
flat washers(D).
STEP2: Attachthewoodstretchertothelegsbyusing2bolts(A), lock washers(C)
andflatwashers(D).
STEP1: Laytheheadboardfacedownonasoftsurface.Attachthe left leg and right leg to
headboardbyusing8bolts(B),lockwashers(C)andflatwashers(D).
LeftLeg
RightLeg
A
C
D
E
B
C
D
E
A
C
D
E
CenterSupportLeg
ITEMNO:I317-404King Panel HB
I317-406 King Rails
I317-410 Cal King Rails
I317-407DKingStorage FB
03-18-2021
aspenhome
RASSEMBLYINSTRUCTIONS
MADEINVIETNAM
ah
STEP4:Screwthebolts(F)intoHB&FB.Makesuretheslatbearerisinthe UPPER position.
Alignthe boltswiththe holesintheendofsiderailsandattach theside railstoHB&FBusing flat
washer(H),lockwashers(G)andnuts(I).Thenuseahexwrench(J)totighten all the nuts.
N
M
Centerrail
P
CenterRail
SupportLeg
(forcenterrail)
Leveler
N
MO
Page3/5
The outsideholesmatchto6/6standardkingrails,
the insideholesmatchto6/0Calkingbed rails.
Makesuretheslatbeareris
inthe UPPER position.
ITEMNO:I317-404King Panel HB
I317-406 King Rails
I317-410 Cal King Rails
I317-407DKingStorage FB
STEP5:The standardkingcentersupport isinthe StorageFootboardcarton, and theCal king
centerrail isinthe CalKing siderailcarton.Attachtheappropriatecenterrail tothe footboard
andcentersupportlegofheadboardusing4bolts(M),lockwashers(N)and flat washers(O).
STEP6:Attach2supportlegs(forcenterrail)tothe
centerrailusing4bolts(M),lockwashers(N) and flat
washers(O).UsetheAllenWrench(P)totighten all
ofthebolts.
O
P
03-18-2021
G
HIJ
F
Centerrail
STEP9: Putthedeckingovertheslats,
securedeckingtothe slatswithwood
screws(Q)throughthepre-drilledholesin
the deckingasshownbelow.
aspenhome
RASSEMBLYINSTRUCTIONS
MADEINVIETNAM
ah
WoodScrews(K)
Page4/5
STEP7: Arrangeslatsontheslat bearers
and thenlay thedecking on topofthe slats.
Makesurethetopand bottomslatsare
situatedunderneaththepre-drilled holesas
shownbelowinSTEP9.Remove the
deckingandattach slatstotheslatbearers
withwoodscrews(K).
Filler
Notch
STEP8: FortheCalKingbed,bothfillerboardsare
notched. Usingautilityknifeonlycutoffthesmall piece
at the notch on oneofthefillerboards. Thiscut off filler
boardwillbeplacedat the foot ofthe bedgoingfromleft
toright asshownonthe rightsidebelowinSTEP9.For
the standardKingbed,skipthisstepandarrangethe
deckingboardsonshownonthe left sidebelow.
ITEMNO:I317-404King Panel HB
I317-406 King Rails
I317-410 Cal King Rails
I317-407DKingStorage FB
Makesurethatthereisaslat
underthepre-drilled hole.
Q
Decking
Pre-drilledhole
StandardKing Bed
CalKingBed
Decking Decking Decking
03-18-2021
Decking
Decking
Decking
aspenhome
RASSEMBLYINSTRUCTIONS
MADEINVIETNAM
ah
Page5/5
FUNCTIONALITYINSTRUCTION
Cedar-linedStorageDrawers
STEP10:ForCal Kingbed,insertwood capsintotheholeson
headboardandfootboard.ForregularKingbed, skipthisstep.
Wood Cap (L)
ITEMNO:I317-404King Panel HB
I317-406 King Rails
I317-410 Cal King Rails
I317-407DKingStorage FB
I317-407D
I317-406
I317-404
I317-410
SinglePoweredUSBPort
for Charging on bothsides
Cedar-linedStorageDrawers
I317-407D
I317-404
SinglePoweredUSBPort
for Charging on bothsides
03-18-2021
StandardKing Bed
CalKingBed

This manual suits for next models

2

Other aspenhome Indoor Furnishing manuals
aspenhome I256-9130 User manual

aspenhome

aspenhome I256-9130 User manual

aspenhome Combo File IHP-378-FSL User manual

aspenhome

aspenhome Combo File IHP-378-FSL User manual

aspenhome I240-400-RIV User manual

aspenhome

aspenhome I240-400-RIV User manual

aspenhome I205-9140 User manual

aspenhome

aspenhome I205-9140 User manual

aspenhome Counter Height Side Chair I256-6643S User manual

aspenhome

aspenhome Counter Height Side Chair I256-6643S User manual

aspenhome IHP-366-FSL/KHA User manual

aspenhome

aspenhome IHP-366-FSL/KHA User manual

aspenhome I256-3025 User manual

aspenhome

aspenhome I256-3025 User manual

aspenhome I215-297 User manual

aspenhome

aspenhome I215-297 User manual

aspenhome I07-284-WBR User manual

aspenhome

aspenhome I07-284-WBR User manual
aspenhome I206-454 User manual

aspenhome

aspenhome I206-454 User manual

aspenhome I597-412 User manual

aspenhome

aspenhome I597-412 User manual

aspenhome I218-468-WHT User manual

aspenhome

aspenhome I218-468-WHT User manual

aspenhome I249-412-TAL User manual

aspenhome

aspenhome I249-412-TAL User manual

aspenhome I256-9101 User manual

aspenhome

aspenhome I256-9101 User manual

aspenhome ICF-378 User manual

aspenhome

aspenhome ICF-378 User manual

aspenhome I3048-444P User manual

aspenhome

aspenhome I3048-444P User manual
aspenhome I256-450 User manual

aspenhome

aspenhome I256-450 User manual

aspenhome I260-9140 Quick start guide

aspenhome

aspenhome I260-9140 Quick start guide

aspenhome IHP-360T-FSL User manual

aspenhome

aspenhome IHP-360T-FSL User manual

aspenhome I251-360T-1 User manual

aspenhome

aspenhome I251-360T-1 User manual

aspenhome I227-462 User manual

aspenhome

aspenhome I227-462 User manual

aspenhome I242-338 User manual

aspenhome

aspenhome I242-338 User manual

aspenhome I349-9201-WST User manual

aspenhome

aspenhome I349-9201-WST User manual

aspenhome I224-307 User manual

aspenhome

aspenhome I224-307 User manual

Popular Indoor Furnishing manuals by other brands

Wren Kitchens WALL UNIT 672 L Corner Assembly guide

Wren Kitchens

Wren Kitchens WALL UNIT 672 L Corner Assembly guide

Santalucia Mobili Night PRATICO Snow quick start guide

Santalucia Mobili

Santalucia Mobili Night PRATICO Snow quick start guide

Serene Upholstered Divan Ottoman Base Assembly instruction guide

Serene

Serene Upholstered Divan Ottoman Base Assembly instruction guide

Redgum BASICS STEP B68S user manual

Redgum

Redgum BASICS STEP B68S user manual

Next THORNLEY 609129 Assembly instructions

Next

Next THORNLEY 609129 Assembly instructions

CUGGL CANTERBURY CHEST Care & instruction manual

CUGGL

CUGGL CANTERBURY CHEST Care & instruction manual

Notável Móveis PANEL EROS 52130 Assembly instructions

Notável Móveis

Notável Móveis PANEL EROS 52130 Assembly instructions

RiverRidge Bayfield 06-116 White Assembly instructions

RiverRidge

RiverRidge Bayfield 06-116 White Assembly instructions

Safavieh Furniture SEA8031-F manual

Safavieh Furniture

Safavieh Furniture SEA8031-F manual

CS Schmal 89 40 Series manual

CS Schmal

CS Schmal 89 40 Series manual

MUMA PADUA Assembly instructions

MUMA

MUMA PADUA Assembly instructions

Gami BROOKLYN H53 manual

Gami

Gami BROOKLYN H53 manual

Article SALINAS Assembly instructions

Article

Article SALINAS Assembly instructions

Cello Toulun instruction manual

Cello

Cello Toulun instruction manual

VEVOR SR191276 user manual

VEVOR

VEVOR SR191276 user manual

Schulz Speyer 307500 Assembly guide

Schulz Speyer

Schulz Speyer 307500 Assembly guide

Next AMELIA 939924 Assembly instructions

Next

Next AMELIA 939924 Assembly instructions

Steelcase Garland Round Table Top with aDisk Base Installation

Steelcase

Steelcase Garland Round Table Top with aDisk Base Installation

manuals.online logo
manuals.online logoBrands
  • About & Mission
  • Contact us
  • Privacy Policy
  • Terms and Conditions

Copyright 2025 Manuals.Online. All Rights Reserved.