manuals.online logo
Brands
  1. Home
  2. •
  3. Brands
  4. •
  5. aspenhome
  6. •
  7. Indoor Furnishing
  8. •
  9. aspenhome I206-412 User manual

aspenhome I206-412 User manual

Page1/4
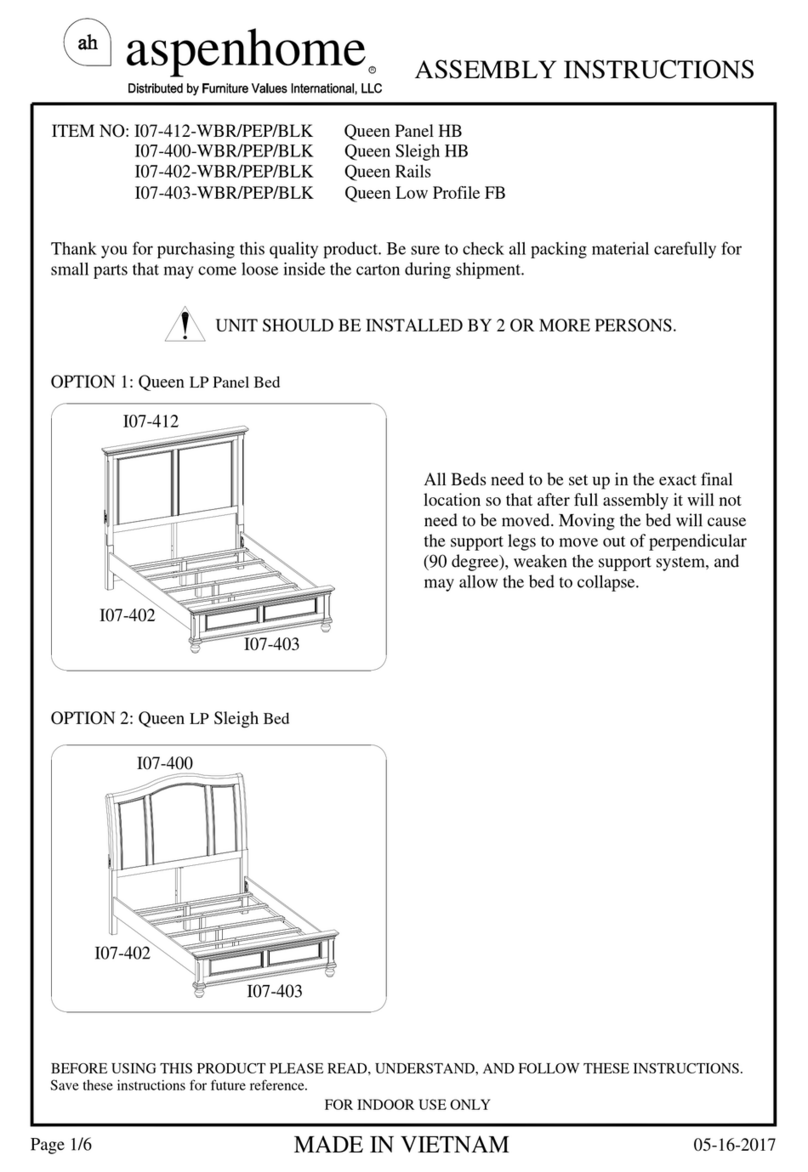
Thankyouforpurchasingthisqualityproduct.Besuretocheckallpacking material carefullyfor
small partsthatmaycomelooseinsidethe cartonduringshipment.
UNIT SHOULDBE INSTALLEDBY2ORMORE PERSONS.
All Bedsneedtobeset upinthe exact final
locationsothatafterfull assemblyit will not
needtobemoved. Moving thebedwill cause
thesupportlegstomoveoutofperpendicular
(90degree),weakenthesupportsystem, and
may allowthebedtocollapse.
aspenhome
RASSEMBLYINSTRUCTIONS
MADEINVIETNAM
ah
BEFORE USING THISPRODUCT PLEASEREAD, UNDERSTAND, AND FOLLOWTHESEINSTRUCTIONS.
Save these instructionsforfuture reference.
FORINDOORUSEONLY
TOOLSREQUIRED (NOTPROVIDED)
PHILLIPSSCREWDRIVER
I206-403
I206-402
I206-412
COMPONENTSLIST:I206-412
1PC
No.
1
2
3
4
5
Description Sketch Quantity
Headboard
LeftLeg
RightLeg
WoodStretcher
CenterSupportLeg 1PC
1PC
1PC
1PC
COMPONENTSLIST:I206-402
No.
1
2
Description Sketch Quantity
Bed rails
Slats 4PCS
2PCS
COMPONENTSLIST:I206-403
No.
1Description Sketch Quantity
Footboard 1PC
HARDWARELIST:I206-402
8PCS
No.
F
G
H
I
J
Description Sketch Quantity
HangerBolt 5/16" x3-1/2"
HexNut5/16"
HexWrench 12mm 1PC
Wood Screw M4x1-1/2" 8PCS
8PCS
8PCS
8PCS
Lock Washer5/16"
FlatWasher5/16" x1/2"
HARDWARELIST:I206-412
1PC
No.
A
B
C
D
Description Sketch Quantity
Bolt 5/16" x2"
Lock Washer5/16"
FlatWasher5/16" x3/4"
Allen Wrench M4
E
ITEMNO:I206-412Queen Panel HB
I206-402 Queen Rails
I206-403 QueenLowProfileFB
24PCS
SupportLeg(forslats)
8PCS
8PCS
8PCS
Bolt 1/4"x1-3/8"
Lock Washer1/4"
FlatWasher1/4" x3/4"
8PCS
8PCS
8PCS
K
L
M
05-06-2021
aspenhome
RASSEMBLYINSTRUCTIONS
MADEINVIETNAM
ah
Page2/4
04-15-2021
WoodStretcher
STEP1: Laytheheadboardfacedownonasoftsurface. Attach the left legandright legto
headboardbyusing8bolts(A),lockwashers(B)andflatwashers(C). Donot completely
tighten bolts.
STEP2:Attachthewoodstretchertothe legsbyusing4bolts(E),lockwashers(F)and flat
washers(G).Completelytighten all bolts.
STEP3:Attachthecentersupportlegtoheadboardandwoodstretcherby using 4bolts(E),
lockwashers(F)andflatwashers(G).
ITEMNO:I206-412Queen Panel HB
I206-402 Queen Rails
I206-403 QueenLowProfileFB
Left Leg
RightLeg
HBBackside
A
B
C
D
E
F
G
D
HBBackside
HBBackside
CenterSupportLeg
E
F
G
D
aspenhome
RASSEMBLYINSTRUCTIONS
MADEINVIETNAM
ah
Page3/4
STEP5:Screwthebolts(H)intoHB&FB.Makesuretheslatbearerisinthe position (a).
Alignthe boltswiththe holesintheendofsiderailsandattach theside railstoHB&FBusing
FlatWasher (I),lockwashers(J)andnuts(K).Thenuseahexwrenchtotighten all the nuts.
Side Rail
Headboard
Slatbearer
Side Rail
H
Makesuretheslatbeareris
inthe position (a).
K
Position b
Position a
IJL
ITEMNO:I206-412Queen Panel HB
I206-402 Queen Rails
I206-403 QueenLowProfileFB
b
a
STEP4:Theslatbearershavebeenattachedinposition (b) approximately 2"fromthetop of the side
railsforusewithastoragefootboard.Theslatbearersmustbemovedintoposition (a)based on
thisbedconfiguration.Removetheboltsandscrewsfromtheslatbearers and side railsasshown
below.Thenre-attachtheslatbearerstothesiderailsinposition(a)withbolts, lock washers, flat
washers,andscrews. Caution:Donotovertightenboltsasthismayloosenthethreaded
insertsinthesiderails.
STEP6:Attachthesupportlegswithlevelerstothe slats.
Adjustthelevelersonbottomofsupportlegswhen
necessary. SupportLeg
Leveler
ThisEndUp
Slat
05-06-2021
aspenhome
RASSEMBLYINSTRUCTIONS
MADEINVIETNAM
ah
Page4/4
ITEMNO:I206-412Queen Panel HB
I206-402 Queen Rails
I206-403 QueenLowProfileFB
STEP7:Arrangetheslatsontheslatbearers equallyand
attachtotheslatbearerswithwood screws (M).
FUNCTIONALITYINSTRUCTION
Wood Screws (M)
I206-403
I206-402
I206-412
DoublePowered USB
PortforCharging on
bothsides
04-15-2021
Page1/5
Thankyouforpurchasingthisqualityproduct.Besuretocheckallpacking material carefullyfor
small partsthatmaycomelooseinsidethe cartonduringshipment.
UNIT SHOULDBE INSTALLEDBY2ORMORE PERSONS.
All Bedsneedtobeset upinthe exact final
locationsothatafterfull assemblyit will not
needtobemoved. Moving thebedwill cause
thesupportlegstomoveoutofperpendicular
(90degree),weakenthesupportsystem, and
may allowthebedtocollapse.
aspenhome
RASSEMBLYINSTRUCTIONS
MADEINVIETNAM
ah
BEFORE USING THISPRODUCT PLEASEREAD, UNDERSTAND, AND FOLLOWTHESEINSTRUCTIONS.
Save these instructionsforfuture reference.
FORINDOORUSEONLY
TOOLSREQUIRED (NOTPROVIDED)
PHILLIPSSCREWDRIVER
I206-403D
I206-402
I206-412
COMPONENTSLIST:I206-412
1PC
No.
1
2
3
4
5
Description Sketch Quantity
Headboard
LeftLeg
RightLeg
WoodStretcher
CenterSupportLeg 1PC
1PC
1PC
1PC
COMPONENTSLIST:I206-402
No.
1
2
Description Sketch Quantity
Bed rails
Slats 4PCS
2PCS
COMPONENTSLIST:I206-403D
1PC
No.
1
2
3
4
Description Sketch Quantity
Footboard
SupportLeg(forcenterrail)
Decking
Centerrail
1PC
2PCS
4PCS
HARDWARE LIST:I206-403D
No.
L
M
NDescription Sketch Quantity
Lock Washer1/4"
Allen Wrench 4mm 1PC
8PCS
FlatWasher1/4" x3/4"
Wood Screw M4 x1"
Bolt 1/4"x1-3/8" 8PCS
8PCS
8PCS
O
HARDWARELIST:I206-402
8PCS
No.
H
I
J
Description Sketch Quantity
HangerBolt 5/16" x3-1/2"
HexNut5/16"
HexWrench 12mm 1PC
Wood Screw M4x1-1/2" 8PCS
8PCS
K
8PCS
8PCS
Lock Washer5/16"
FlatWasher5/16" x1/2"
ITEMNO:I206-412Queen Panel HB
I206-402 Queen Rails
I206-403DQueen Storage FB
F
G
HARDWARELIST:I206-412
1PC
No.
A
B
C
D
Description Sketch Quantity
Bolt 5/16"x2"
Lock Washer5/16"
FlatWasher5/16" x3/4"
Allen Wrench M4
E
8PCS
8PCS
8PCS
Bolt 1/4"x1-3/8"
Lock Washer1/4"
FlatWasher1/4" x3/4"
8PCS
8PCS
8PCS
P
Q
R
05-06-2021
aspenhome
RASSEMBLYINSTRUCTIONS
MADEINVIETNAM
ah
Page2/5
ITEMNO:I206-412Queen Panel HB
I206-402 Queen Rails
I206-403DQueen Storage FB
WoodStretcher
STEP1: Laytheheadboardfacedownonasoftsurface. Attach the left legandright legto
headboardbyusing8bolts(A),lockwashers(B)andflatwashers(C). Donot completely
tighten bolts.
STEP2:Attachthewoodstretchertothe legsbyusing4bolts(E),lockwashers(F)and flat
washers(G).Completelytighten all bolts.
STEP3:Attachthecentersupportlegtoheadboardandwoodstretcherby using 4bolts(E),
lockwashers(F)andflatwashers(G).
Left Leg
RightLeg
HBBackside
A
B
C
D
E
F
G
D
HBBackside
HBBackside
CenterSupportLeg
E
F
G
D
04-15-2021
aspenhome
RASSEMBLYINSTRUCTIONS
MADEINVIETNAM
ah
Page3/5
STEP4:Screwthebolts(H)intoHB&FB.Makesuretheslatbearerisinthe position (b).
Alignthe boltswiththe holesintheendofsiderailsandattach theside railstoHB&FBusing
FlatWasher (I),lockwashers(J)andnuts(K).Thenuseahexwrenchtotighten all the nuts.
Side Rail
STEP5:Attachcenterrailtothefootboardandcentersupportlegofheadboardusing 4bolts(N),
lockwashers(O)andflatwashers(P).
STEP6:Attach2supportlegs(forcenterrail)tothe
centerrailusing4bolts(N),lockwashers(O) and flat
washers(P).UsetheAllenWrench(Q)totighten all
ofthebolts.
P
NO
Centerrail
Centerrail
Leveler
CenterRail
SupportLeg
(forcenterrail)
Q
Headboard
Slatbearer
Side Rail
H
Makesuretheslatbeareris
inthe position (b).
K
Position b
Position a
IJ
QOP
ITEMNO:I206-412Queen Panel HB
I206-402 Queen Rails
I206-403DQueen Storage FB
L
N
05-06-2021
aspenhome
RASSEMBLYINSTRUCTIONS
MADEINVIETNAM
ah
Page4/5
STEP8: Putthedeckingovertheslats, secure
deckingtotheslatswithwoodscrews (R) through
the pre-drilled holesinthedecking asshownbelow.
STEP7:Arrangeslatsontheslatbearers and then
lay deckingontop oftheslats. Makesuretheslats
arepositionedalongtheseamsofthe decking as
showninthe detailinSTEP8underthe
pre-drilledhole. Remove thedecking andattach
slatstotheslatbearerswithwood screws (M).
Slat
Decking
Decking
Theslatshouldsupport
bothpiecesofdecking.
R
Decking
Pre-drilledhole
Makesurethatthereisaslat
underthepre-drilled hole.
Cedar-linedstoragedrawer
withheavy dutyballbearing slide
I206-412
I206-402
I206-403D
FUNCTIONALITYINSTRUCTION
Double Powered USBPortfor
Charging on bothsides
WoodScrews(M)
ITEMNO:I206-412Queen Panel HB
I206-402 Queen Rails
I206-403DQueen Storage FB
Cedar-linedstoragedrawer
withregularslide
04-15-2021
Hook
Drawerrail
Push this tab in
To remove the drawer, please remove the set screwson two sides
ofthe drawers. Push the tab in toward the drawerand lift up the
drawerto move out.
To install the drawer, please extend the slidesall the way out. Set
the drawerbox into cabinet rail and slide back so the drawerrail
goesunderthe hook in cabinet rail. Then snap the tab into drawer
rail and replace set screws.
Set screw
Cabinet rail
InstructionfortheDrawerwithHeavyDutyBall Bearing Slide
aspenhome
RASSEMBLYINSTRUCTIONS
MADEINVIETNAM
ah
ITEMNO:I206-412Queen Panel HB
I206-402 Queen Rails
I206-403DQueen Storage FB
Page5/5
04-15-2021
Page1/4
Thankyouforpurchasingthisqualityproduct.Besuretocheckallpacking material carefullyfor
small partsthatmaycomelooseinsidethe cartonduringshipment.
UNIT SHOULDBE INSTALLEDBY2ORMORE PERSONS.
All Bedsneedtobeset upinthe exact final
locationsothatafterfull assemblyit will not
needtobemoved. Moving thebedwill cause
thesupportlegstomoveoutofperpendicular
(90degree),weakenthesupportsystem, and
may allowthebedtocollapse.
aspenhome
RASSEMBLYINSTRUCTIONS
MADEINVIETNAM
ah
BEFORE USING THISPRODUCT PLEASEREAD, UNDERSTAND, AND FOLLOWTHESEINSTRUCTIONS.
Save these instructionsforfuture reference.
FORINDOORUSEONLY
TOOLSREQUIRED (NOTPROVIDED)
PHILLIPSSCREWDRIVER
I206-407
I206-406
I206-415
I206-410
COMPONENTSLIST: I206-415
1PC
No.
1
2
3
4
5
Description Sketch Quantity
Headboard
LeftLeg
RightLeg
WoodStretcher
CenterSupportLeg 1PC
1PC
1PC
1PC
COMPONENTSLIST: I206-406
No.
1
2
Description Sketch Quantity
Bed rails
Slats 5PCS
2PCS
COMPONENTSLIST: I206-410
No.
1
2
Description Sketch Quantity
Bed rails
Slats 5PCS
2PCS
3
COMPONENTSLIST: I206-407
No.
1
2
Description Sketch Quantity
Footboard 1PC
5PCS
HARDWARELIST:I206-406/410
8PCS
No.
H
I
J
Description Sketch Quantity
HangerBolt 5/16" x3-1/2"
HexNut5/16"
HexWrench 12mm 1PC
Wood Screw M4x1-1/2" 10 PCS
8PCS
K
8PCS
8PCS
Wood Cap(onlyfor410) 8PCS
FlatWasher5/16" x1/2"
Lock Washer5/16"
ITEMNO:I206-415King Panel HB
I206-406 King Rails
I206-410 Cal King Rails
I206-407 KingLowProfileFB
SupportLeg(forslats)
Centerrail(Long) 1PC
F
G
HARDWARELIST:I206-415
1PC
No.
A
B
C
D
Description Sketch Quantity
Bolt 5/16"x2"
Lock Washer5/16"
FlatWasher5/16" x3/4"
Allen Wrench M4
E
8PCS
8PCS
8PCS
Bolt 1/4"x1-3/8"
Lock Washer1/4"
FlatWasher1/4" x3/4"
8PCS
8PCS
8PCS
L
M
N
05-06-2021
aspenhome
RASSEMBLYINSTRUCTIONS
MADEINVIETNAM
ah
Page2/4
STEP1: Laytheheadboardfacedownonasoftsurface. Attach the left legandright legto
headboardbyusing8bolts(A),lockwashers(B)andflatwashers(C). Donot completely
tighten bolts.
STEP2:Attachthewoodstretchertothe legsbyusing4bolts(E),lockwashers(F)and flat
washers(G).Completelytighten all bolts.
STEP3:Attachthecentersupportlegtoheadboardandwoodstretcherby using 4bolts(E),
lockwashers(F)andflatwashers(G).
ITEMNO:I206-415King Panel HB
I206-406 King Rails
I206-410 Cal King Rails
I206-407 KingLowProfileFB
LeftLeg
RightLeg
A
B
C
D
WoodStretcher
HBBackside
E
F
G
D
HBBackside
CenterSupportLeg E
F
G
D
04-15-2021
aspenhome
RASSEMBLYINSTRUCTIONS
MADEINVIETNAM
ah
Page3/4
Side Rail
The outsideholesmatchto6/6standardkingrails,
the insideholesmatchto6/0Calkingbed rails.
Headboard
Slatbearer
Side Rail
Makesuretheslatbeareris
inthe position (a).
Position b
Position a
H
K
IJ
STEP5:Screwthebolts(H)intoHB&FB.Makesuretheslatbearerisinthe position (a).
Alignthe boltswiththe holesintheendofsiderailsandattach theside railstoHB&FBusing
FlatWasher (I),lockwashers(J)andnuts(K).Thenuseahexwrenchtotighten all the nuts.
STEP4:Theslatbearershavebeenattachedinposition (b) approximately 2"fromthetop of the side
railsforusewithastoragefootboard.Theslatbearersmustbemovedintoposition (a)based on
thisbedconfiguration.Removetheboltsandscrewsfromtheslatbearers and side railsasshown
below.Thenre-attachtheslatbearerstothesiderailsinposition(a)withbolts, lock washers, flat
washers,andscrews. Caution:Donotovertightenboltsasthismayloosenthethreaded
insertsinthesiderails.
ITEMNO:I206-415King Panel HB
I206-406 King Rails
I206-410 Cal King Rails
I206-407 KingLowProfileFB
STEP6:Attachthesupportlegswithlevelerstothe slats.
Adjustthelevelersonbottomofsupportlegswhen
necessary. SupportLeg
Leveler
ThisEndUp
Slat
L
b
a
05-06-2021
aspenhome
RASSEMBLYINSTRUCTIONS
MADEINVIETNAM
ah
Page4/4
STEP8: ForCal Kingbed,insertwood capsintotheholeson
headboardandfootboard.ForregularKingbed, skipthisstep.
WoodCap(N)
FUNCTIONALITYINSTRUCTION
I206-415
Double Powered USB
PortforChargingon
bothsides
STEP7:Arrangetheslatson the slat
bearersequallyandattachtothe slat
bearerswithwoodscrews(M).
ITEMNO:I206-415King Panel HB
I206-406 King Rails
I206-410 Cal King Rails
I206-407 KingLowProfileFB
Wood Screws (M)
I206-415
I206-407
I206-407
I206-410
I206-406
04-15-2021
Page1/6
Thankyouforpurchasingthisqualityproduct.Besuretocheckallpacking material carefullyfor
small partsthatmaycomelooseinsidethe cartonduringshipment.
UNIT SHOULDBE INSTALLEDBY2ORMORE PERSONS.
All Bedsneedtobeset upinthe exact final
locationsothatafterfull assemblyit will not
needtobemoved. Moving thebedwill cause
thesupportlegstomoveoutofperpendicular
(90degree),weakenthesupportsystem, and
may allowthebedtocollapse.
aspenhome
RASSEMBLYINSTRUCTIONS
MADEINVIETNAM
ah
BEFORE USING THISPRODUCT PLEASEREAD, UNDERSTAND, AND FOLLOWTHESEINSTRUCTIONS.
Save these instructionsforfuture reference.
FORINDOORUSEONLY
TOOLSREQUIRED (NOTPROVIDED)
PHILLIPSSCREWDRIVER
I206-407D
I206-406
I206-415
I206-410
COMPONENTSLIST: I206-415
1PC
No.
1
2
3
4
5
Description Sketch Quantity
Headboard
LeftLeg
RightLeg
WoodStretcher
CenterSupportLeg 1PC
1PC
1PC
1PC
COMPONENTSLIST: I206-406
No.
1
2
Description Sketch Quantity
Bed rails
Slats 5PCS
2PCS
COMPONENTSLIST: I206-410
No.
1
2
Description Sketch Quantity
Bed rails
Slats 5PCS
2PCS
3Centerrail(Long) 1PC
COMPONENTSLIST: I206-407D
1PC
No.
1
2
3
4
5
Description Sketch Quantity
Footboard
SupportLeg(forcenterrail)
Decking
Centerrail(Short)
1PC
2PCS
3PCS
Filler 2PCS
HARDWARE LIST:I206-407D
No.
L
M
N
Description Sketch Quantity
Lock Washer1/4"
Allen Wrench 4mm 1PC
5PCS
FlatWasher1/4" x3/4"
Wood Screw M4 x1"
Bolt 1/4"x1-3/8" 8PCS
8PCS
8PCS
O
P
HARDWARELIST:I206-406/410
8PCS
No.
H
I
J
Description Sketch Quantity
HangerBolt 5/16" x3-1/2"
HexNut5/16"
HexWrench 12mm 1PC
Wood Screw M4x1-1/2" 10 PCS
8PCS
K
8PCS
8PCS
Wood Cap(onlyfor410) 8PCS
FlatWasher5/16" x1/2"
Lock Washer5/16"
ITEMNO:I206-415King Panel HB
I206-406 King Rails
I206-410 Cal King Rails
I206-407DKingStorage FB
F
G
HARDWARELIST:I206-415
1PC
No.
A
B
C
D
Description Sketch Quantity
Bolt 5/16"x2"
Lock Washer5/16"
FlatWasher5/16" x3/4"
Allen Wrench M4
E
8PCS
8PCS
8PCS
Bolt 1/4"x1-3/8"
Lock Washer1/4"
FlatWasher1/4" x3/4"
8PCS
8PCS
8PCS
Q
R
S
05-06-2021
aspenhome
RASSEMBLYINSTRUCTIONS
MADEINVIETNAM
ah
Page2/6
ITEMNO:I206-415King Panel HB
I206-406 King Rails
I206-410 Cal King Rails
I206-407DKingStorage FB
STEP1: Laytheheadboardfacedownonasoftsurface. Attach the left legandright legto
headboardbyusing8bolts(A),lockwashers(B)andflatwashers(C). Donot completely
tighten bolts.
STEP2:Attachthewoodstretchertothe legsbyusing4bolts(E),lockwashers(F)and flat
washers(G).Completelytighten all bolts.
STEP3:Attachthecentersupportlegtoheadboardandwoodstretcherby using 4bolts(E),
lockwashers(F)andflatwashers(G).
LeftLeg
RightLeg
A
B
C
D
WoodStretcher
HBBackside
E
F
G
D
HBBackside
CenterSupportLeg E
F
G
D
04-15-2021
aspenhome
RASSEMBLYINSTRUCTIONS
MADEINVIETNAM
ah
Page3/6
Side Rail
The outsideholesmatchto6/6standardkingrails,
the insideholesmatchto6/0Calkingbed rails.
Leveler
CenterRail
SupportLeg
(forcenterrail)
Headboard
Slatbearer
Side Rail
Makesuretheslatbeareris
inthe position (b).
Centerrail
Position b
Position a
H
K
IJ
STEP4:Screwthebolts(H)intoHB&FB.Makesuretheslatbearerisinthe position (b).
Alignthe boltswiththe holesintheendofsiderailsandattach theside railstoHB&FBusing
FlatWasher (I),lockwashers(J)andnuts(K).Thenuseahexwrenchtotighten all the nuts.
STEP5:Attachcenterrailtothefootboardandcentersupportlegofheadboardusing 4bolts(O),
lockwashers(P)andflatwashers (Q).
ITEMNO:I206-415King Panel HB
I206-406 King Rails
I206-410 Cal King Rails
I206-407DKingStorage FB
P
OQ
STEP6:Attach2supportlegs(forcenterrail)tothe
centerrailusing4bolts(O),lockwashers (P)and flat
washers(Q).UsetheAllenWrench(R)totighten all
ofthebolts.
R
P
OQ
R
05-06-2021
aspenhome
RASSEMBLYINSTRUCTIONS
MADEINVIETNAM
ah
Page4/6
Filler Notch
STEP8:FortheCalKingbed,bothfilerboardsarenotched.
Usingautilityknifeonlycutoffthesmall pieceat the notch on
oneofthefillerboards.Thiscutofffillerboardwill be placed at
the foot ofthe bedgoingfromleft toright asshownonthe right
sidebelowinSTEP9.ForthestandardKingbed,skipthisstep
andarrangethedeckingboardsasshownonthe left side below.
STEP9: Putthedeckingovertheslats,securedeckingtotheslatswithwood screws (S)through
the pre-drilled holesinthedecking asshownbelow.
STEP10:ForCal Kingbed,insertwood capsintotheholeson
headboardandfootboard.ForregularKingbed, skipthisstep. WoodCap(N)
STEP7:Arrangeslatsontheslatbearers and
thenlaythe deckingontop oftheslats. Make
surethetop andbottomslatsaresituated
underneaththepre-drilledholesasshownbelow
inSTEP9.Remove thedecking andattachslats
totheslatbearerswithwoodscrews (M).
Make sure thatthere is a slat
underthepre-drilledhole.
S
Decking
Pre-drilledhole
CalKingBed
StandardKing Bed
WoodScrews(M)
Decking
ITEMNO:I206-415King Panel HB
I206-406 King Rails
I206-410 Cal King Rails
I206-407DKingStorage FB
Decking Decking
Decking Decking
Decking
04-15-2021
aspenhome
RASSEMBLYINSTRUCTIONS
MADEINVIETNAM
ah
Page5/6
FUNCTIONALITYINSTRUCTION
I206-410
I206-407D
I206-415
I206-407D
I206-415
I206-406
Double PoweredUSBPort
forCharging on bothsides
Double PoweredUSBPort
forCharging on bothsides
ITEMNO:I206-415King Panel HB
I206-406 King Rails
I206-410 Cal King Rails
I206-407DKingStorage FB
Cedar-linedstoragedrawer
withheavy dutyballbearing slide Cedar-linedstoragedrawer
withregularslide
Cedar-linedstoragedrawer
withheavy dutyballbearing slide Cedar-linedstoragedrawer
withregularslide
04-15-2021
Hook
Drawerrail
Push this tab in
To remove the drawer, please remove the set screwson two sides
ofthe drawers. Push the tab in toward the drawerand lift up the
drawerto move out.
To install the drawer, please extend the slidesall the way out. Set
the drawerbox into cabinet rail and slide back so the drawerrail
goesunderthe hook in cabinet rail. Then snap the tab into drawer
rail and replace set screws.
Set screw
Cabinet rail
InstructionfortheDrawerwithHeavyDutyBall Bearing Slide
aspenhome
RASSEMBLYINSTRUCTIONS
MADEINVIETNAM
ah
Page6/6
ITEMNO:I206-415King Panel HB
I206-406 King Rails
I206-410 Cal King Rails
I206-407DKingStorage FB
04-15-2021

This manual suits for next models

2

Other aspenhome Indoor Furnishing manuals
aspenhome 107-463-WBR User manual

aspenhome

aspenhome 107-463-WBR User manual

aspenhome IKJ-412-KD User manual

aspenhome

aspenhome IKJ-412-KD User manual

aspenhome Queen Panel HB I317-400 User manual

aspenhome

aspenhome Queen Panel HB I317-400 User manual

aspenhome ICB-6324-BCH User manual

aspenhome

aspenhome ICB-6324-BCH User manual

aspenhome I260-9140W User manual

aspenhome

aspenhome I260-9140W User manual

aspenhome I644-456 User manual

aspenhome

aspenhome I644-456 User manual

aspenhome I39-378 User manual

aspenhome

aspenhome I39-378 User manual

aspenhome IHP-360T-FSL User manual

aspenhome

aspenhome IHP-360T-FSL User manual
aspenhome I349-297H-WST User manual

aspenhome

aspenhome I349-297H-WST User manual

aspenhome I221-303 User manual

aspenhome

aspenhome I221-303 User manual

aspenhome I248-307-1 User manual

aspenhome

aspenhome I248-307-1 User manual

aspenhome I256-303 User manual

aspenhome

aspenhome I256-303 User manual

aspenhome I349-6641S-WST User manual

aspenhome

aspenhome I349-6641S-WST User manual

aspenhome I597-225 User manual

aspenhome

aspenhome I597-225 User manual

aspenhome I349-6050-WST User manual

aspenhome

aspenhome I349-6050-WST User manual

aspenhome I91-332 User manual

aspenhome

aspenhome I91-332 User manual

aspenhome I251-360T-1 User manual

aspenhome

aspenhome I251-360T-1 User manual

aspenhome Credenza I91-318 User manual

aspenhome

aspenhome Credenza I91-318 User manual

aspenhome I287-9150 User manual

aspenhome

aspenhome I287-9150 User manual

aspenhome I251-316-1 User manual

aspenhome

aspenhome I251-316-1 User manual

aspenhome I256-412 User manual

aspenhome

aspenhome I256-412 User manual

aspenhome Nesting I597-9101 User manual

aspenhome

aspenhome Nesting I597-9101 User manual

aspenhome Liv360 I215-9140 User manual

aspenhome

aspenhome Liv360 I215-9140 User manual

aspenhome IUAB-301-1 User manual

aspenhome

aspenhome IUAB-301-1 User manual

Popular Indoor Furnishing manuals by other brands

Rapidline SHUSH30+ Assembly instructions

Rapidline

Rapidline SHUSH30+ Assembly instructions

Coaster 723609 Assembly instructions

Coaster

Coaster 723609 Assembly instructions

Velux Solar SST manual

Velux

Velux Solar SST manual

Teknik Barrister Home Instruction booklet

Teknik

Teknik Barrister Home Instruction booklet

Monarch Specialties I 3727 Assembly instructions

Monarch Specialties

Monarch Specialties I 3727 Assembly instructions

Lightolier SN STRIP specification

Lightolier

Lightolier SN STRIP specification

Ameriwood HOME Aaron 9448196PCOM instruction manual

Ameriwood HOME

Ameriwood HOME Aaron 9448196PCOM instruction manual

Grohe Axor Specification sheet

Grohe

Grohe Axor Specification sheet

Sorelle Berkly Nightstand Assembly instruction

Sorelle

Sorelle Berkly Nightstand Assembly instruction

Leggett & Platt Symmetry EZ Owners manual and set-up guide

Leggett & Platt

Leggett & Platt Symmetry EZ Owners manual and set-up guide

Plusmed pM-AD02 instruction manual

Plusmed

Plusmed pM-AD02 instruction manual

SAFAVIEH COUTURE Jamie KNT4108B manual

SAFAVIEH COUTURE

SAFAVIEH COUTURE Jamie KNT4108B manual

BOLTON Windsor Twin Assembly instructions

BOLTON

BOLTON Windsor Twin Assembly instructions

Regalo HideAway 5010 HD instructions

Regalo

Regalo HideAway 5010 HD instructions

Home Decorators Collection 2448-500 Use and care guide

Home Decorators Collection

Home Decorators Collection 2448-500 Use and care guide

Multay Marseille MB10 Assembly instruction

Multay

Multay Marseille MB10 Assembly instruction

Winsome 93418 R6 manual

Winsome

Winsome 93418 R6 manual

Teknion Casegoods BC MHRB installation guide

Teknion

Teknion Casegoods BC MHRB installation guide

manuals.online logo
manuals.online logoBrands
  • About & Mission
  • Contact us
  • Privacy Policy
  • Terms and Conditions

Copyright 2025 Manuals.Online. All Rights Reserved.