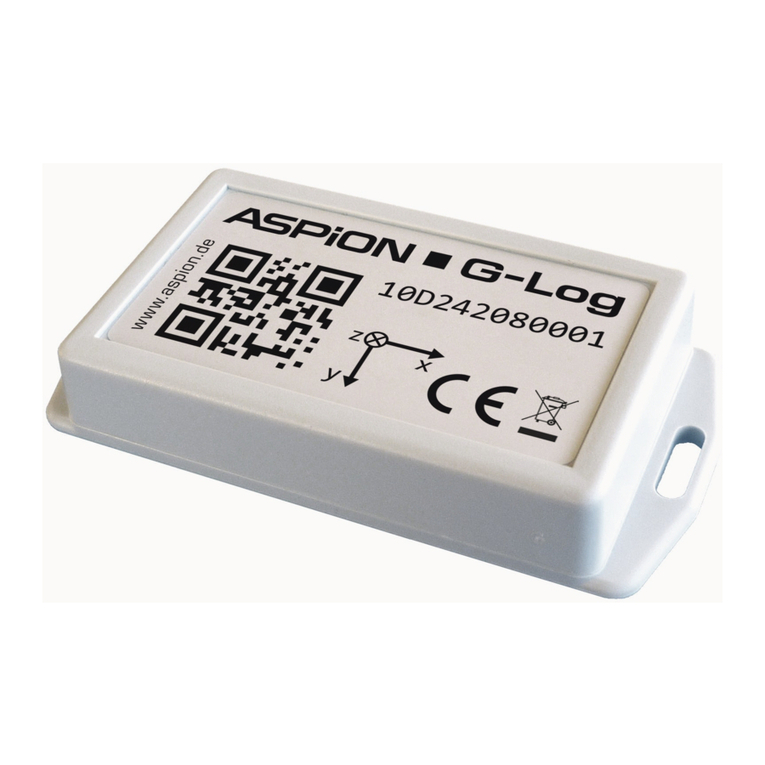
Aspion G-Log Series User manual

User manual
for the ASPION G-Log product family
Find updates, FAQs and more useful information
online in our ASPION customer portal at
www.aspion.de
ASPION GmbH 76149 Karlsruhe Germany
Wireless. Inexpensive. Long lasting.
Reliable recording of shocks
during transport
Monitoring shocks and climate during transport
Reliable recording of shocks during transport

Contents / General description
User manual –Version 5/6-21 Copyright© ASPION GmbH Page 2
Contents
Contents ............................................................................................................................................................ 2
ASPION G-Log shock sensors............................................................................................................................. 4
0. General description................................................................................................................................... 4
1. Variants ..................................................................................................................................................... 5
2. Export information.................................................................................................................................... 5
3. Technical specifications............................................................................................................................. 6
3.1 ASPION G-Log and ASPION G-Log Waterproof ................................................................................. 6
3.2 ASPION G-Log 2................................................................................................................................. 7
4. Conformity declarations............................................................................................................................ 8
5. Mounting................................................................................................................................................. 10
5.1 Mounting orientation...................................................................................................................... 10
5.2 Housing dimensions and mounting template................................................................................. 10
6. Battery replacement for ASPION G-Log 2 ............................................................................................... 11
7. Disposal ................................................................................................................................................... 12
8. Card reader (NFC).................................................................................................................................... 12
9. Security notes.......................................................................................................................................... 12
ASPION G-Log Manager –PC software............................................................................................................ 13
1. System requirements .............................................................................................................................. 13
2. Installation............................................................................................................................................... 13
2.1 Getting ready for installation: .NET framework and card reader................................................... 13
2.2 Installing the ASPION G-Log Manager PC software ........................................................................ 13
2.3 Installing updates............................................................................................................................ 14
2.4 Deinstalling the software................................................................................................................ 14
2.5 Information about product version ................................................................................................ 14
3. Before getting started ............................................................................................................................. 15
3.1 General overview of the user interface .......................................................................................... 15
3.2 Important: Setting the sensor types ............................................................................................... 15
4. Operating the sensor............................................................................................................................... 17
4.1 Defining the settings ....................................................................................................................... 17
4.2 Transferring data to sensor............................................................................................................. 18
5. Usage list ................................................................................................................................................. 20

Contents / General description
User manual –Version 5/6-21 Copyright© ASPION GmbH Page 3
6. Creating and editing profiles................................................................................................................... 22
6.1 Profile settings for ASPION G-Log ................................................................................................... 22
6.2 Profile settings for ASPION G-Log 2 ................................................................................................ 25
7. Global settings......................................................................................................................................... 29
8. Reading the sensor.................................................................................................................................. 31
9. Stopping the sensor................................................................................................................................. 33
10. Data analysis............................................................................................................................................ 34
10.1 Content, overview and functions.................................................................................................... 34
10.2 Shock events ................................................................................................................................... 36
10.3 Shock details ................................................................................................................................... 38
10.4 Shock details with shock/vibration testing in accord. with IEC 60721-3-2 for ASPION G-Log 2..... 39
10.5 Orientation...................................................................................................................................... 41
10.6 Map view......................................................................................................................................... 42
10.7 Temperature events with ASPION G-Log........................................................................................ 43
10.8 Climate events with ASPION G-Log 2.............................................................................................. 44
11. Help, errors and problem solving............................................................................................................ 47
11.1 Problems with the NFC card reader and Windows 7...................................................................... 48
11.2 Support Infotool.............................................................................................................................. 49
ASPION G-Log App for smartphones............................................................................................................... 50
1. Description and installation .................................................................................................................... 50
1.1 Reading out data via App................................................................................................................ 50
1.2 Short descriptions for customers.................................................................................................... 51
2. App functions .......................................................................................................................................... 52
2.1 Stopping the sensor via the App –available only for Android........................................................ 53
2.2 Display of events is protected by PIN ............................................................................................. 53
Configuration program for administration...................................................................................................... 54
Overview.......................................................................................................................................................... 54
Start configuration program............................................................................................................................ 54
Contact and support........................................................................................................................................ 55
Manufacturer .................................................................................................................................................. 55

ASPION G-Log shock sensors / General description
User manual –Version 5/6-21 Copyright© ASPION GmbH Page 4
ASPION G-Log shock sensors
0. General description
With the ASPION G-Log shock sensor, you can record shocks, vibrations and climate data. It offers
a 3-axes accelerometer and, depending on the product variant, an integrated temperature and humidity
sensor. The following table shows you the available software versions and variants. You can reuse the
sensor a number of times and for different transports.
Using the ASPION G-Log Manager computer software, you can define thresholds and operate the sensor.
When reading out data from the sensor, the software displays the measured values. Data is transferred
wirelessly to and from the sensor using Near Field Communication (NFC) technology and a card reader
which is connected via a USB interface to the computer. To easily read out a sensor, you can use the
additional ASPION G-Log Apps for smartphones free of charge; ASPION G-Log 2 can additionally be read out
via Bluetooth (BLE). Data is easily sent from the App via e-mail or automatically (ASPION G-Log Premium).
The ASPION G-Log Manager computer software then quickly analyses and further processes your data.
Each sensor has a unique ID which can be found on the label and in the QR code or in the barcode.
The solution contains the following components:
ASPION G-Log shock sensor USB card reader ASPION G-Log Manager
in different variants for activation/operation PC software on USB stick
is mounted to the transported goods (opt. Download aspion.de)
PC software ASPION G-Log Manager for Windows 7 and later App for Android and iOS smartphones

ASPION G-Log shock sensors / Variants
User manual –Version 5/6-21 Copyright© ASPION GmbH Page 5
1. Variants
The following table lists the available variants of ASPION G-Log sensors. It will give you an overview about
the essential characteristics and differences. The ASPION G-Log Manager computer software as well as the
apps can be used for all sensor variants.
* ASPION G-Log Waterproof is the waterproof variant of ASPION G-Log.
The following descriptions apply to all ASPION G-Log sensors. Important differences or sections referring to
the ASPION G-Log 2 variant are explicitly described and marked in blue font.
2. Export information
The following export information applies to all ASPION G-Log sensors and variants.
Characteristic
ASPION G-Log
ASPION G-Log
Waterproof*
ASPION G-Log 2
Accelerometer
Temperature sensor
Humidity sensor (rel. humidity)
–
–
Circular buffer for events (shock, climate data)
286
286
950
Shock events with details (9 shocks)
Shock/vibration testing in accordance with
IEC 60721-3-2
–
–
Wireless data transfer via NFC
(Near Field Communication)
Wireless data transfer via BLE
(Bluetooth Low Energy)
–
–
ABS housing with protection
IP 50
IP 65/67
IP 50
Battery
Replaceable by
manufacturer
Not
replaceable
Replaceable by
user
Export information
Product tariff code
Country of origin
Data regarding legal control
▪9031 8080
▪EU (DE)
▪Al = no, ECCN = no

ASPION G-Log shock sensors / Technical specifications
User manual –Version 5/6-21 Copyright© ASPION GmbH Page 6
3. Technical specifications
3.1 ASPION G-Log and ASPION G-Log Waterproof
Description
Details
Accelerometer
3 axes: x, y and z
up to ±24 g per axis
Measuring frequency
▪Up to ±16 g, 2.5% accuracy
Extendable up to ±24 g with 3.5% accuracy,
verified by a testing facility
▪0.2 g resolution
▪Adjustable threshold from 2 g to 12 g
▪Between 25 Hz and 1,600 Hz
Temperature sensor
Calibrated internally, by
manufacturer
▪-30°C ... +60°C with accuracy of ± 2°C
▪1°C resolution
▪Lower and upper threshold freely definable
Memory/logging
Non-volatile memory
Event triggered
▪Capacity: 286 events in circular buffers
▪Saves first and 8 highest peak events with
details permanently
Data transfer and
analysis
Wireless via NFC with
PC software and App
▪Data is transferred to sensor via NFC and can
then be analyzed
▪Configuration and analysis with PC software
and NFC-enabled reading devices
Near Field
Communication (NFC)
NFC Tag (Type 4)
▪ISO/IEC 14443B compatible
▪13.56 MHz RF interface
Battery
CR2032 3V Lithium 225 mAh
replaceable by manufacturer
(does not apply to
Waterproof version)
▪Battery life depends on data rate; up to 1.5
years; e.g. 1 year for 100 Hz; battery life may
be shorter for lower temperatures
▪Battery power level at delivery: full
▪Battery consumption when not active: 5%
per year for indicated storage conditions
▪No declaration required
Operating conditions
Temperature range
Storage
▪-30°C ... +60°C
▪5°C … +40°C, humidity: max. 85%
Housing and mounting
ABS housing; Screw mounting
M3 ISO 7380 FL; optional:
industrial adhesive tape
▪Dimensions: 88 mm x 45 mm x 16 mm
▪Distance of mounting holes: 80 mm
▪Maximum tightening torque: 0.4 - 0.5 Nm
Variants
Standard, IP 50 protection
Waterproof,
IP 65/67 protection
▪Weight: approx. 35 g
▪Penetration of fluids is to be prevented
(Corrosion damage/short circuit)
▪Weight: approx. 50 g, dustproof and
waterproof
Approvals/Standards
EC - Declaration of
Conformity
(CE marking)
▪RED Directive 2014/53/EU
▪ROHS Directive 2011/65/EU and WEEE
▪RTCA/DO160E Section 21 Category H

ASPION G-Log shock sensors / Technical specifications
User manual –Version 5/6-21 Copyright© ASPION GmbH Page 7
3.2 ASPION G-Log 2
Description
Details
Accelerometer
3 axes: x, y and z
up to ±24 g per axis
Measuring frequency
DIN EN IEC 60721-3-2
▪Up to ±16 g, 2.5% accuracy
Extendable up to ±24 g with 3.5% accuracy,
verified by a testing facility
▪0.2 g resolution
▪Adjustable threshold from 2 g to 12 g
▪Between 25 Hz and 1,600 Hz
▪Shock/vibration testing 2M4 / 2M5 / 2M6
Temperature sensor
Calibrated by manufacturer
▪-40°C to +85°C, with 0.2°C accuracy
▪0.1°C resolution
▪Lower and upper threshold freely definable
Humidity sensor
Calibrated by manufacturer
▪0% rH … 100% rH, non-condensing
▪3% rH accuracy; 0.1% rH resolution
▪Definable threshold
Memory/logging
Non-volatile memory Event
and interval triggered
▪Capacity: 950 events in circular buffers
▪Shock details, permanently recorded with
first and 8 highest peak events
Data transfer and
analysis
Wireless via NFC with
PC software and App
▪Data transfer via NFC
▪Configuration and analysis with
PC software and NFC-enabled reading
devices
Near Field
Communication (NFC)
NFC Tag (Type 4)
▪ISO/IEC 14443B compatible
▪13.56 MHz RF interface
BLE for data transfer
Bluetooth Low Energy to read
out data via the app
▪Max. 10 meter range (in line-of-sight)
▪Min. Bluetooth 4.0 specification
▪Bluetooth Declaration ID: D047584
Battery
CR2032 3V Lithium 225 mAh
replaceable, recommended
manufacturer: Panasonic
▪Battery life depends on data rate, up to 1.5-2
years, e.g. 1 year for 100 Hz; battery life may
be shorter for lower temperatures
▪Battery power level at delivery: full
▪Battery consumption when not active: 5%
per year for indicated storage conditions
▪No declaration required
Operating conditions
Temperature range
Storage temperature range
Humidity range
▪-30°C ... +60°C
▪5°C … +40°C
▪0% rH … 100% rH, non-condensing
Housing and mounting
ABS housing; screw mounting
M3 ISO 7380 FL; or industrial
adhesive tape
▪Dimensions: 88 mm x 45 mm x 16 mm
▪Distance of mounting holes: 80 mm
▪Maximum tightening torque: 0.4 - 0.5 Nm

ASPION G-Log shock sensors / Conformity declarations
User manual –Version 5/6-21 Copyright© ASPION GmbH Page 8
4. Conformity declarations
Please go to our customer portal to download the conformity declarations for the ASPION shock sensors:
www.aspion.de. Please find more explanations according to the regulations in the following paragraphs.
FCC / ISED Regulatory Statements:
This chapter contains the required regulatory notices.
This product contains:
FCC ID: SQGBL652. This ID is printed on the front label of the product.
IC ID: 3147A-BL652. This ID is printed on the front label of the product.
FCC / ISED compliance statement
This device complies with Part 15 of the FCC Rules and Industry Canada licence-exempt RSS standard(s).
Operation is subject to the following two conditions: (1) this device may not cause interference, and (2)
this device must accept any interference, including interference that may cause undesired operation of
the device.
Le présent appareil est conforme aux CNR d'Industrie Canada applicables aux appareils radio exempts de
licence. L'exploitation est autorisée aux deux conditions suivantes : (1) l'appareil ne doit pas produire de
brouillage, et (2) l'utilisateur de l'appareil doit accepter tout brouillage radioélectrique subi, même si le
brouillage est susceptible d'en compromettre le fonctionnement.
FCC / ISED Caution Statement for Modifications:
Aspion has not approved any changes or modifications to this device by the user. Any changes or
modifications could void the user’s authority to operate the equipment.
Aspion n’approuve aucune modification apportée à l’appareil par l’utilisateur, quelle qu’en soit la
nature.Tout changement ou modification peuvent annuler le droit d’utilisation de l’appareil par
l’utilisateur.
FCC / ISED Wireless notice
This device complies with FCC/ISED radiation exposure limits set forth for an uncontrolled environment and
meets the FCC radio frequency (RF) Exposure Guidelines and RSS-102 of the ISED radio frequency (RF)
Exposure rules. This transmitter must not be co-located or operating in conjunction with any other antenna
or transmitter.
Version
IP 50 protection
▪Sensor protection through membrane
▪Weight: approx. 35 g
▪Penetration of fluids is to be prevented
(Corrosion damage/short circuit)
Approvals/Standards
EC Declaration of Conformity
(CE marking)
FCC Applicable Standard
IC (Canada)
SRRC (China)
▪RED Directive 2014/53/EU
▪ROHS Directive 2011/65/EU and WEEE
▪REACH Directive 2009/1907/EU
▪FCC CFR Title 47 Part 15 Subpart B
▪Contains FCC ID: SQGBL652
▪ICES-003 Contains IC: 3147A-BL652
▪CMIIT ID: 2019DJ6772
▪RTCA/DO160E Section 21 Category H

ASPION G-Log shock sensors / Conformity declarations
User manual –Version 5/6-21 Copyright© ASPION GmbH Page 9
Le présent appareil est conforme à l'exposition aux radiations FCC / ISED définies pour un environnement
non contrôlé et répond aux directives d'exposition de la fréquence de la FCC radiofréquence (RF) et RSS-
102 de la fréquence radio (RF) ISED règles d'exposition. L'émetteur ne doit pas être colocalisé ni
fonctionner conjointement avec à autre antenne ou autre émetteur.
FCC Information for a Class A (industrial use) digital device
This equipment has been tested and found to comply with the limits for a Class A digital device, pursuant to
Part 15 of the FCC rules. These limits are designed to provide reasonable protection against harmful
interference when the equipment is operated in a commercial environment.
This equipment generates, uses and can radiate radio frequency energy and, if not installed and used in
accordance with the instructions, may cause harmful interference to radio communications.
Operation of this equipment in a residential area is likely to cause harmful interference, in which case the
user will be required to correct the interference at his own expense.
FCC Mobile Device RF Exposure Statement
This device is only authorized for use in a mobile application. At least 20 cm of separation distance between
the (Product Name) device and the user's body must be maintained at all times.

ASPION G-Log shock sensors / Mounting
User manual –Version 5/6-21 Copyright© ASPION GmbH Page 10
5. Mounting
5.1 Mounting orientation
To ensure that you can correctly assign the axes in the
event of shock events, pay attention to the axes during
assembly.
Recommended mounting
▪On steel: M3 ISO 7380 FL
▪On wood/sheet metal: flathead screws with a
maximum thread diameter of 3.5 mm (e.g. DIN 7981)
▪Maximum tightening torque: 0.4 - 0.5 Nm
Alternatively, you can use industrial adhesive tape
(e.g. 3M) for fixing.
When mounting the ASPION G-Log 2, make sure that you do not damage the lateral membrane used to
protect the humidity sensor from splashing water.
5.2 Housing dimensions and mounting template
Housing cross section
Housing dimensions
To easily mount the sensor, copy this mounting template (scale: 1:1).
Dimensions in millimeters

ASPION G-Log shock sensors / Battery replacement for ASPION G-Log 2
User manual –Version 5/6-21 Copyright© ASPION GmbH Page 11
6. Battery replacement for ASPION G-Log 2
As soon as the battery of the ASPION G-Log 2 is exhausted, the sensor can no longer be read out. But all
recorded data is stored in memory. To read the data and use the sensor again, replace the battery. Replace
the battery only on a clean, dry and non-conductive work surface. How to:
1. Open the housing by unscrewing the two screws on the bottom of the housing with a screwdriver.
2. Remove the battery using a blunt, non-metallic object (e.g. a pencil or plastic pen) from the holder
on the side of the housing edge. Avoid contact with electronic devices.
3. Insert a new battery of type CR2032, 3V/220 mAh in the holder, we recommend the manufacturer
Panasonic. Please note the polarity: the + side of the battery (label) is on top. When inserting the
battery, the two LEDs marked in the picture light up briefly. Screw down the housing again.
4. Wait 10 seconds before reading the sensor and check the battery capacity.
Please note: The sensor keeps its previously set state during the battery exchange and adopts this state
after the battery has been replaced.As soon as the battery is empty, the internal timer also stops.
Tips for battery replacement
Replace weak battery while sensor is active
If you replace a low battery of a sensor in an activated, running state, proceed quickly to avoid an excessive
time delay. The internal timer stops if no battery is inserted and continues to run from the time the new
battery is inserted.
Restoring the current time
As soon as the battery of a sensor is exhausted, the internal timer stops. You can reset the time after
battery replacement by reactivating it. If you do not immediately reinsert the sensor afterwards, we
recommend to stop the sensor. This significantly reduces battery consumption compared to a sensor in the
activated state.
Short flashing of
LEDs when inserting
the battery

ASPION G-Log shock sensors / Disposal
User manual –Version 5/6-21 Copyright© ASPION GmbH Page 12
7. Disposal
To comply with the European WEEE directive, no ASPION G-Log shock sensor must be disposed of
together with domestic waste. Please take the sensor to a municipal e-waste recycling center or
send it back to your supplier.
8. Card reader (NFC)
To operate the ASPION G-Log shock sensors, you require an Identiv uTrust 3700 F card reader with NFC
technology. You find a description on how to install this card reader in this user manual.
9. Security notes
▪The ASPION G-Log shock sensors are not designed for safety-relevant applications.
▪A sensor which is visibly damaged must not be operated. Please return sensors which do not operate
correctly or are damaged to your provider.
▪Prevent fluids from penetrating the device, as they may cause corrosion damage or short circuit. The
ASPION G-Log 2 is protected by a membrane at the lateral opening.
▪You must not open or modify the ASPION G-Log, or replace the battery itself of the ASPION G-Log.
The battery can be replaced by the manufacturer (this does not apply to the Waterproof variant).
The battery of the ASPION G-Log 2 can be replaced by the user. When replacing the battery, be careful
not to cause short circuits and follow the instructions.
▪Never use a sensor with leaking battery. Do avoid touching this sensor with your bare hands. If you had
contact to leaking fluids, thoroughly wash your hands. Make sure to remove the remaining electrolyte
using a damp cloth. Wash contaminated clothing that has come into contact with the electrolyte.
▪The manufacturer does not assume any liability for damages which were caused due to inappropriate
use or wrong operation.
▪The sensors are in compliance with the IEC 62368-1:2014 security standards.

ASPION G-Log Manager –PC software / System requirements
User manual –Version 5/6-21 Copyright© ASPION GmbH Page 13
ASPION G-Log Manager –PC software
1. System requirements
Please note the following system requirements for your PC system:
▪Windows operating system Version 7, 8.x or 10
▪Monitor with at least 1600 pixels horizontal resolution
▪.NET Framework V4.8 or later
▪USB connectivity for Identiv uTrust 3700 F card reader
2. Installation
The required files and programs to set up the software are stored on the ASPION USB stick. Connect it to
your USB slot. For the latest software versions and updates, additional product information and FAQs,
please go to our internal ASPION customer portal, at www.aspion.de .
Please note: You require administrator rights to install the software. Please contact your IT if necessary.
2.1 Getting ready for installation: .NET framework and card reader
▪If the .NET framework is not set up on your computer, you must first install it:
Double-click the dotNET Framework\NDP452-KB2901907-x86-x64-AllOS-ENU.exe file to execute it
▪Install the driver for the Identiv uTrust 3700 F card reader:
Double click the Smart Card Reader\Identiv uTrust V1.19.exe file to execute it; then connect the card
reader to the USB interface.
Important: Do not place the card holder on metallic underground (e.g. PC) as this negatively affects the NFC
technology.
2.2 Installing the ASPION G-Log Manager PC software
▪Installing ASPION G-Log Manager:
Double click theASPION_G-Log_Manager_Installer.msi file to execute it.
▪Depending on the operating system language, the program is automatically installed in English,
German, Italian or Chinese. You can make language changes via the configuration program, see user
manual Configuration.
The Setup Wizard opens. Please follow the steps of the wizard.
Starting the setup wizard.
Select a local data directory to which
you have write rights.

ASPION G-Log Manager –PC software / Installation
User manual –Version 5/6-21 Copyright© ASPION GmbH Page 14
Please note: To enable shared access for several users to profile and usage data, and also analyses, you use
one shared network drive for program data (→ see Configuration program for administration).
After you have successfully installed the software, ASPION G-Log Manager is displayed as link on your
desktop. Start the program with a double click. The program automatically starts with the Write sensor
function.
2.3 Installing updates
To install an update, follow the same steps as when installing the software for the first time, see ASPION G-
Log Manager –PC software, chapter 2.2, “Installing the ASPION G-Log Manager PC software“. The update
software automatically recognizes previously installed versions.
You can still work with data you have saved before, for example, saved profiles or analyses. Just select the
same storage location for your data that you have used before. You can also change the storage location via
the configuration tool, see Configuration program. In that way, you can access all previously created data
after an update has been made.
Starting the setup wizard for updates.
During update, select the same directory
to store data. In this way, all previously stored data will be
available to you in the new version.
2.4 Deinstalling the software
You can deinstall the software following the instructions of your operating system. Data, however, is not
deleted, so it is still available if you install the program again. To permanently delete data, you must delete
the respective data folder, see ASPION G-Log Manager –PC software, chapter 2.2, “Installing the ASPION G-
Log Manager PC software“.
2.5 Information about product version
To find out which software version of the ASPION G-Log Manager you are currently deploying, please click
on Legal information in the left pane.

ASPION G-Log Manager –PC software / Before getting started
User manual –Version 5/6-21 Copyright© ASPION GmbH Page 15
3. Before getting started
3.1 General overview of the user interface
The ASPION G-Log Manager always starts with the Write sensor function. The software user interface is
organized in three areas:
Functions Content area and associated function buttons List area
▪Depending on the function you have selected, the content area and the list area change. This especially
applies to the selected sensor types.
▪When calling a function, the corresponding first entry of the list area is automatically marked.
▪The entries in the list area are sorted by date: the entry with the latest date (e.g. created on, changed
on, read on) appears at the top.
3.2 Important: Setting the sensor types
The ASPION G-Log Manager is used to operate all ASPION G-Log sensors. Therefore, first set the sensor
type(s) that you are using: ASPION G-Log (incl. Waterproof) and/or ASPION G-Log 2. The important
differences are described in section 1, see ASPION G-Log shock sensor, chapter 1, Variants. Both sensor
types are selected after the installation.
The program will support you with exactly the functions you need to operate the respective sensor type.
The matching information is shown in the respective views and functions.
Please note: You can select the sensor type or operate both sensor types together at any time. The ASPION
G-Log Manager immediately applies the selected setting.
You set the sensor type or both sensor types as follows:

ASPION G-Log Manager –PC software / Before getting started
User manual –Version 5/6-21 Copyright© ASPION GmbH Page 16
Select Global settings in the left area.
Select the sensor type(s) you use:
ASPION G-Log and Waterproof = light gray housing ASPION G-Log 2 = blue housing
Save your selections by clicking Save.
Tip: Select only the sensor type which you are planning to use productively. This returns a better
overview of the necessary information and functions.

ASPION G-Log Manager –PC software / Operating the sensor
User manual –Version 5/6-21 Copyright© ASPION GmbH Page 17
4. Operating the sensor
4.1 Defining the settings
You define the sensor details for your shipment with the Write sensor function.
Select the Write sensor function in the left area
Define the following settings:
Enter any name for your shipment. This name is uniquely assigned to the shipment and the sensor and
displayed, for example, for analyses. If this field is not filled in, a sensor ID will automatically be
assigned.
Define a time when the sensor starts logging data: immediately or at a specific date/time in the future,
at the earliest after the next full hour.
Please note: the sensor consumes 5% of its battery capacity per year in delivery condition. If it was
used once and then deactivated, the battery consumption in a non-active state is increased to 25% per
year.
Define a time when the sensor stops logging data: manually via the Stop sensor function or
automatically at a specific date/time in the future. The sensor can also be stopped using the
smartphone App (Android), see ASPION G-Log App for smartphones.
By entering the planned usage time (weeks/optional), the program checks whether the battery life of
the sensor will be sufficient for the planned transportation time. If the capacity is insufficient, you will
receive a corresponding message.

ASPION G-Log Manager –PC software / Operating the sensor
User manual –Version 5/6-21 Copyright© ASPION GmbH Page 18
You enter a predefined profile for each shipment. This profile contains the sensor type, threshold
values, information on the battery life, and so on. You select the profile from the list area on the right.
The list view shows you all available profiles. If you have to select from a large number of available
profiles, you will quickly find the required profile using the search function.
Select the desired profile here. The profile details will immediately be displayed in the content area.
Only the profiles of the set sensor type will be listed, see ASPION G-Log Manager –PC software, chapter
3.2, “Important: Setting the sensor types”.
Please note: You change a profile with the Edit profiles function, see ASPION G-Log Manager –PC
software, chapter 6, "Creating and editing profiles".
Here, you will receive information about your global settings. If no information is displayed, the default
setting applies: shock values up to ± 16g are displayed; the ASPION G-Log App for smartphones displays
all events directly. A PIN to stop the sensor with the smartphone App is not entered.
With the Global settings function you define whether you display shock events up to ± 16 g (=
calibrated area) or up to ± 24 g. You can also define that events are displayed hidden when reading out
data with the ASPION G-Log App and that they are only displayed for the smartphone user when
entering a PIN.
Additionally, you can enter a PIN to stop the sensor with the smartphone App.
Please note: You make changes to the global settings with the Global settings function,
see ASPION G-Log Manager –PC-Software, chapter 7, "Global settings".
4.2 Transferring data to sensor
You transfer the selected settings by clicking the Write sensor button. Follow the
instructions of the program. Place the sensor you want to use with the label facing
upwards (label visible) on the card reader. If you use different sensor types, make
sure you select the correct sensor type, otherwise you receive an error message.
After successful writing, the sensor is read out and its current data is displayed in
the summary window.
Tip: Place the ASPION G-Log 2 sensor as illustrated in the picture to the right.
You will then receive the best results when exchanging data with the card reader.

ASPION G-Log Manager –PC software / Operating the sensor
User manual –Version 5/6-21 Copyright© ASPION GmbH Page 19
The sensor is now ready to be mounted.
Please note: You find explanations on how to mount the sensor and a mounting template in
ASPION G-Log shock sensors, chapter 5., “Mounting“.
States
Sensor is activated and records events
Sensor is not activated and does not record any events
Current battery life in percent; display at mouse over
Errors and problem solving
Possible error messages, causes and hints for problem solving, see ASPION G-Log Manager –PC software,
chapter 11, “Errors and problem solving”.

ASPION G-Log Manager –PC software / Usage list
User manual –Version 5/6-21 Copyright© ASPION GmbH Page 20
5. Usage list
The usage list shows all sensors that you have used with the Write sensor function including the defined
settings. Additionally, all sensors from which analyses were already made are marked. This helps you to
keep track of your activated sensors including all details at any time.
In the left area, select Usage list.
Select an entry from the list. If you have already analyzed a usage case, the program indicates it with
the symbol.
All details of the selected usage are displayed.
To delete a usage, select an entry from the list and click Delete. You can select a number of usages at
once by ticking the checkbox next to each usage. If available, you can directly go to an analysis with the
Go to data analysis button. You export usage data as PDF file with the Create PDF button, for example,
to send this information via e-mail. You can always export the currently selected usage. By clicking the
Status report button, you receive an Excel list with all usages including the available analyses. Report
example:
Other manuals for G-Log Series
1
This manual suits for next models
3
Table of contents
Other Aspion Measuring Instrument manuals
Popular Measuring Instrument manuals by other brands

Krone
Krone OPTISOUND 3030 C operating instructions

ATAGO
ATAGO PAL-32S instruction manual

Hanna Instruments
Hanna Instruments HI 95762C instruction manual

Omega
Omega iServer 2 Series user guide

horiba
horiba LAQUA-PC1100 instruction manual

Spectrum Technologies
Spectrum Technologies LightScout 3415Z product manual