- 2 - - 15 -
Safety Precautions
A separate, earthed power socket is required
for the power supply. Hold the plug – NOT
the electric cable – when unplugging the
washing machine. Do not insert
or remove the power plug with
wet hands. After installation of
the washing machine, the power
plug should be accessible.
Ensure the plug is removed and the taps
turned off in the following cases:
Power failure, cleaning, moving,
installation and when not in use.
If power cord or other parts of this machine
become damaged or faulty,
please contact a technician
to have it repaired. DO NOT
attempt repairs yourself as
this may cause personal
harm or void warranty.
CAUTION: If this appliance is
supplied from a cord extension set or
electrical portable outlet device, the
cord extension set or electrical
portable outlet device must be
positioned so that it is not subject to
splashing or ingress of moisture.
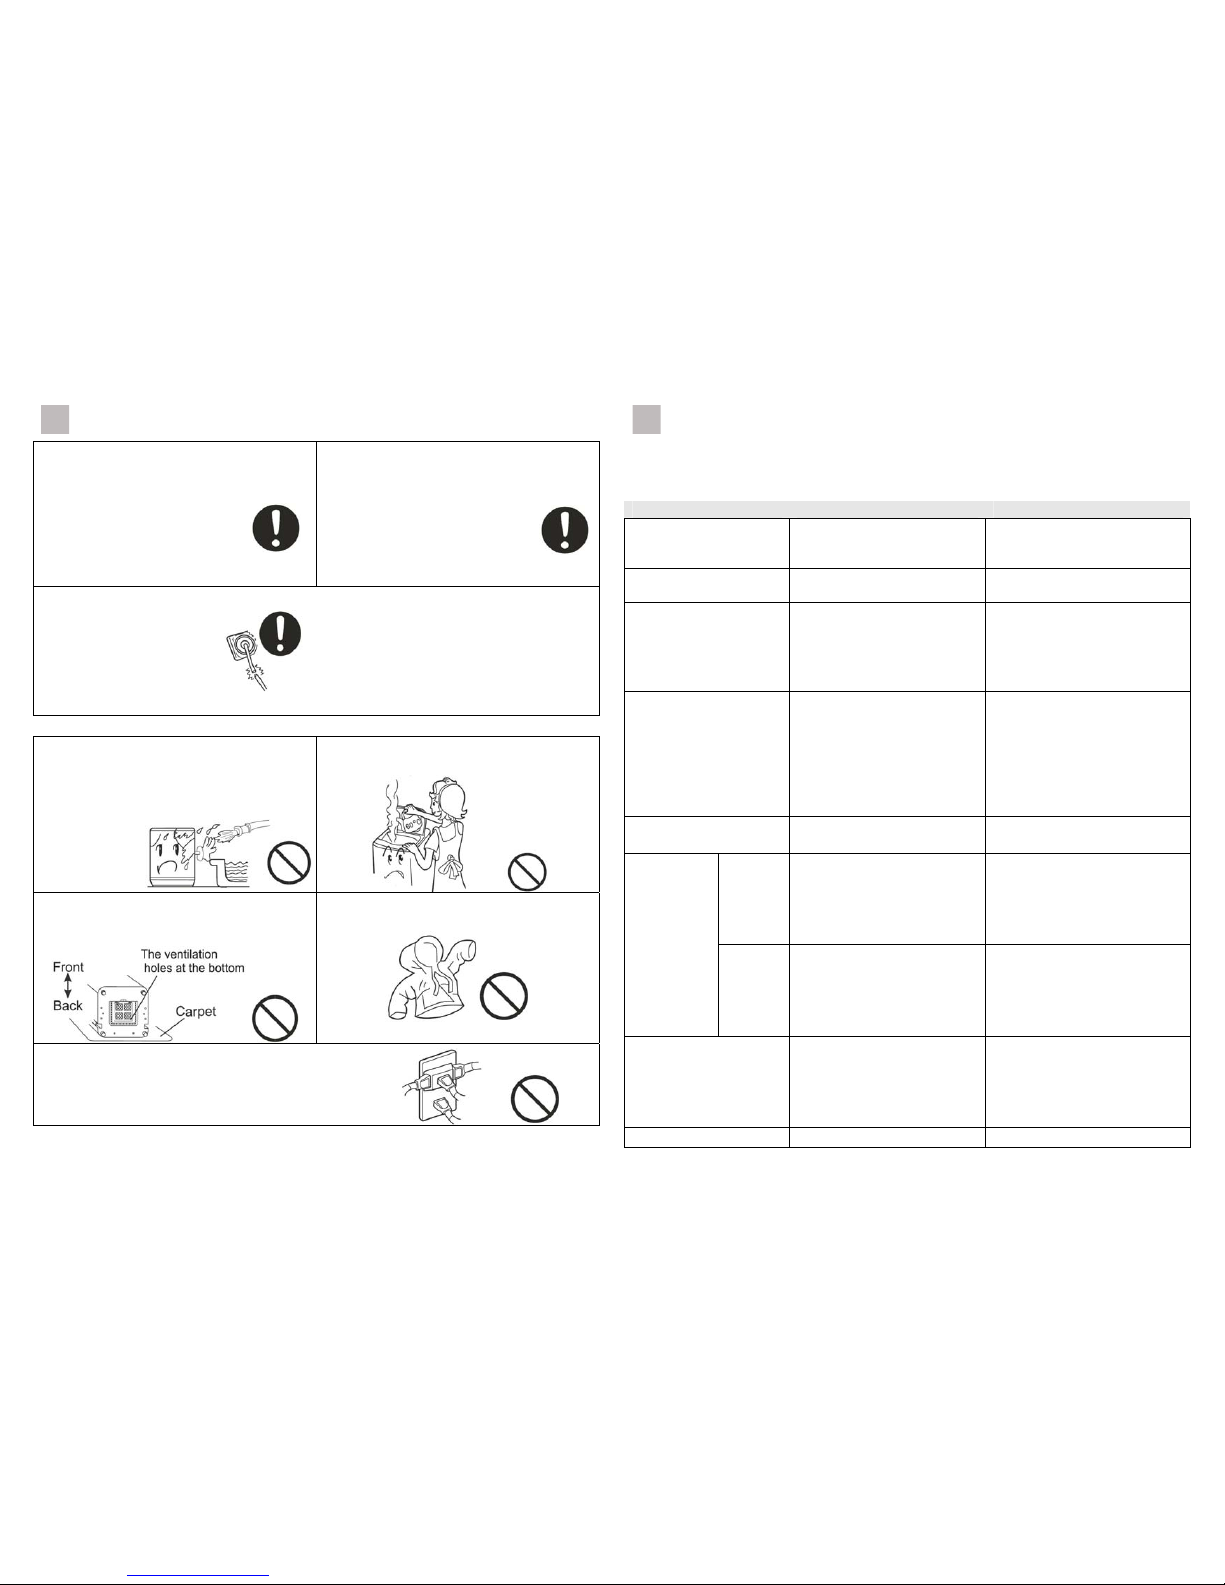
Do not install this appliance in a damp or wet
environment. Do not leave wet laundry on the
control panel or spray water directly on to this
appliance, as this may cause the washer to
malfunction or cause an electrical fault.
Do not connect to hot water higher than 65oC
temperature.
Do not block the ventilation holes with carpet.
Ensure carpet does not obstruct the opening
under the base of the cabinet.
Do not wash water-proof clothing as this may
affect load balance during spin cycle(s).
If you are using an extension cord or a portable electrical
outlet device (not recommended), ensure that it is
positioned so that it does not come into contact with water
or moisture.
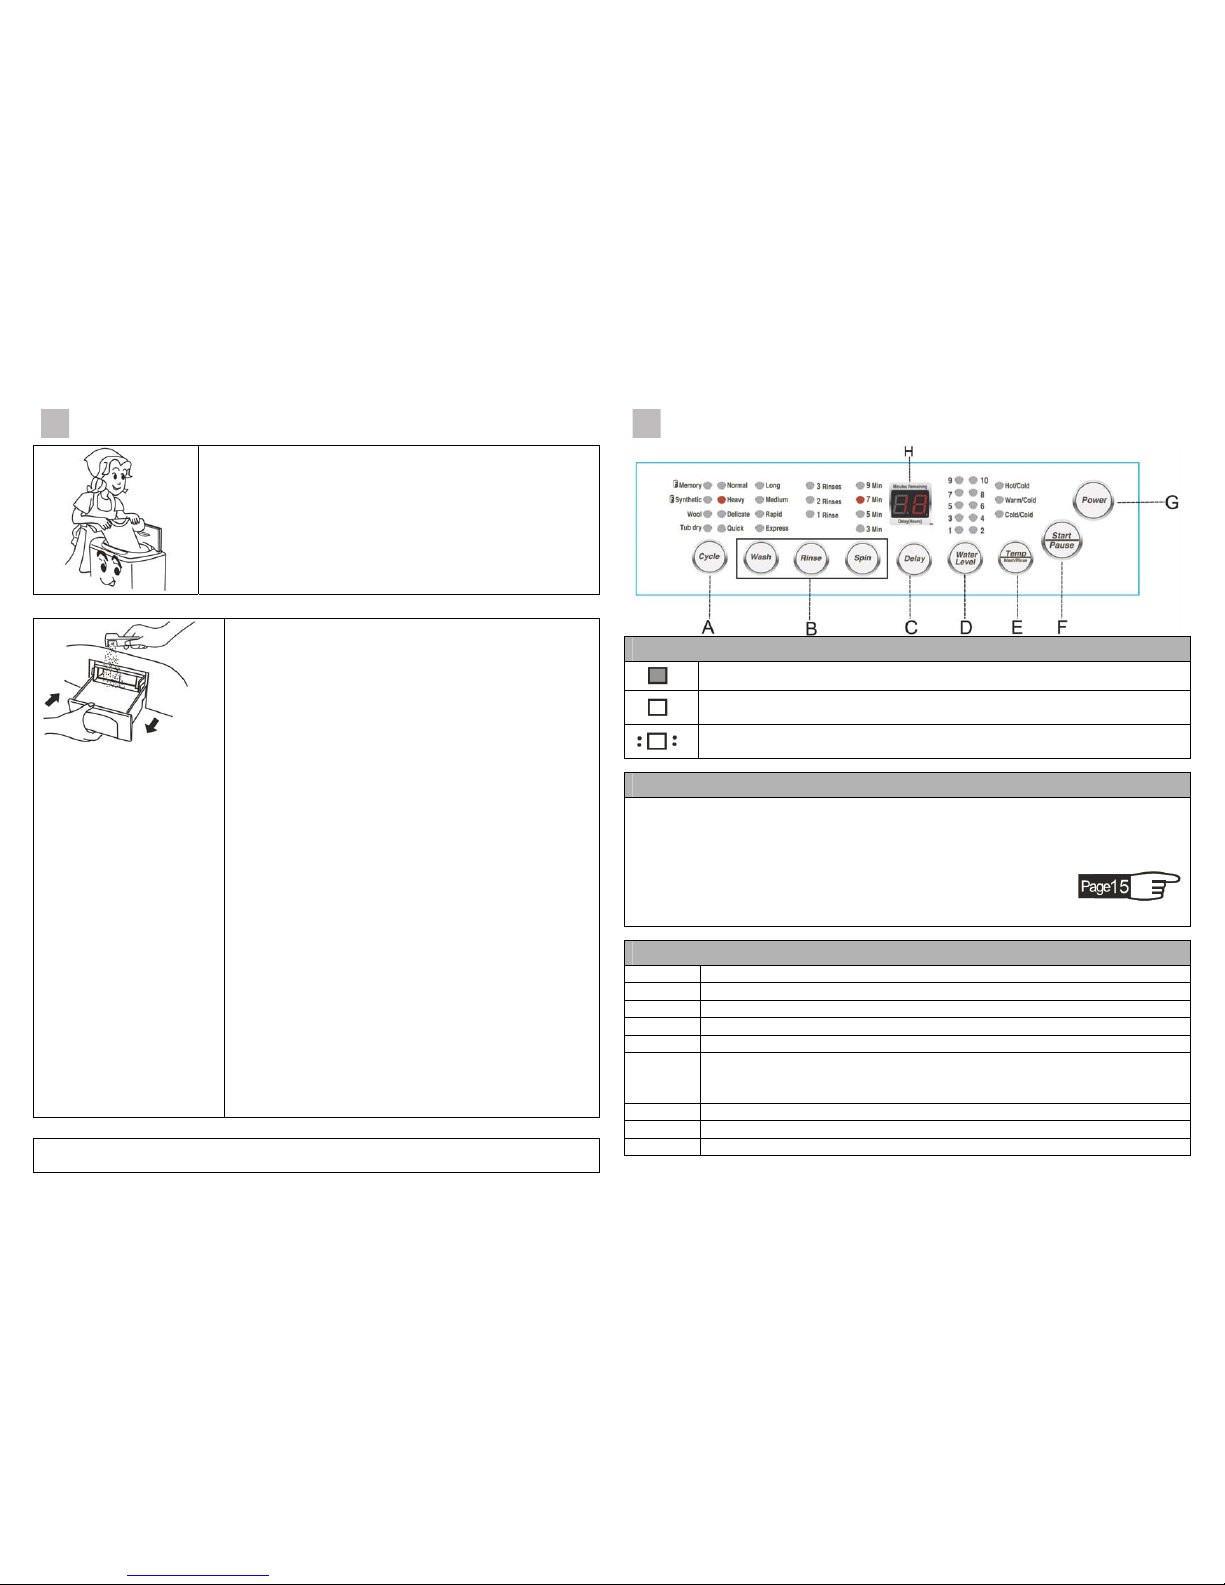
Troubleshooting
If there is a fault or the machine does not operate correctly, remove the power plug before
checking the machine. Using diagnostic list below, please check if the machine requires
repair. If a repair is required, please contact our Customer Care Team. Do not try to fix it
yourself.
Problem Possible causes What to do
The machine does not drain
or drains slowly.
The display shows E1.
Is the drain hose blocked ? Remove the blockage. Open
and close the top lid once.
The machine stops running.
The display shows E2. The top lid is not closed. Close the top lid
The machine does not spin.
The display shows E3.
Has the laundry been placed
unevenly in the machine ?
Is the machine level ?
Redistribute the load evenly.
Close the top lid.
Level the machine. The
machine will start 10 seconds
after being levelled correctly.
The display shows E4.
Is the water tap closed or has
the water supply been
interrupted ?
Is the water inlet valve
blocked ?
Is the water pressure too
low ?
Open the water tap. Push the
Start / Pause button once.
Clean the water inlet valve then
push the Start / Pause button
once.
Use after the water pressure is
normal.
The display shows E6 The water level sensor has
failed. Please contact Customer Care.
Will not
wash
Is there a power failure ?
Is the power plug inserted
tightly ?
Has the water level reached
preset position ?
Wait for the power supply to be
restored.
Insert the power plug tightly.
Wait for water to fill to the
preset level.
The machine
does not work.
Will not
spin
Is the power plug inserted
tightly ?
Is the top lid closed ?
Is the laundry distributed
unevenly in the machine ?
Insert the power plug tightly.
Close the top lid.
Redistribute the laundry.
There are abnormal sounds
inside the machine.
Is the machine level ?
Has the laundry been placed
unevenly in the machine ?
Are there any foreign objects
inside the bowl ?
Redistribute the load evenly.
Close the top lid.
Level the machine.
Remove the foreign object.
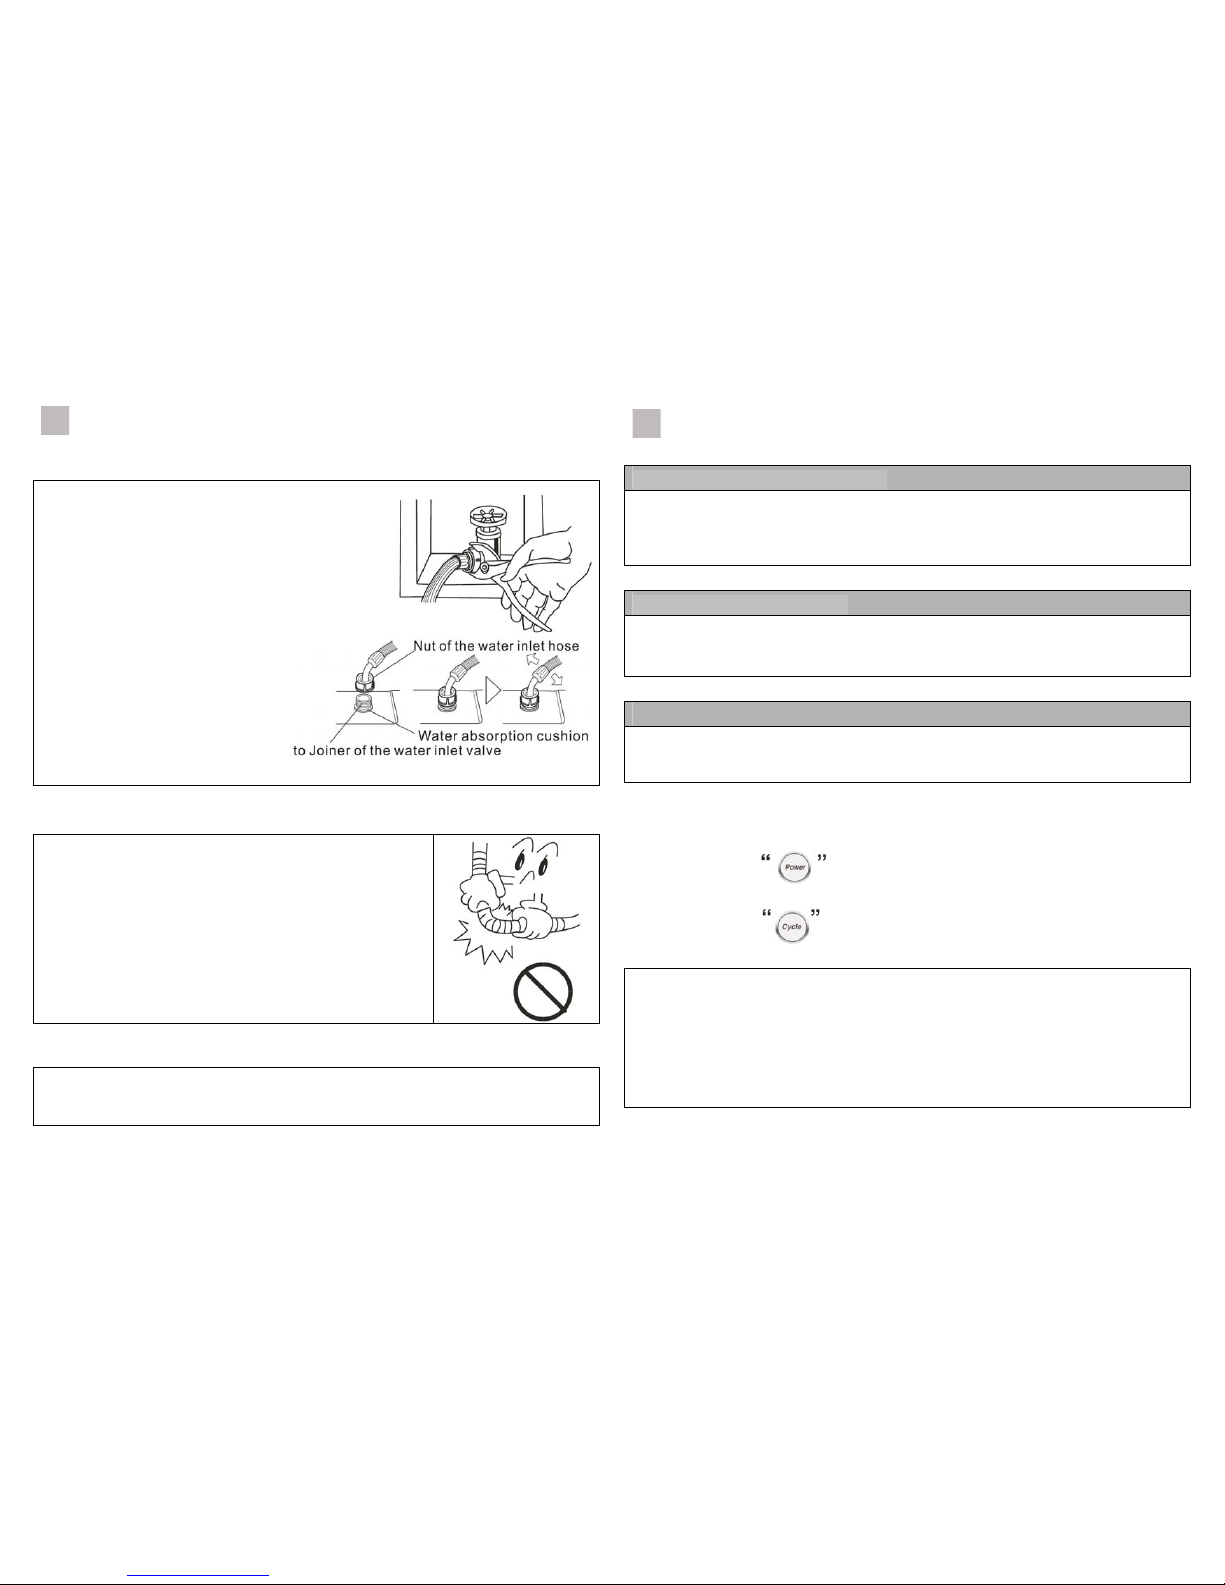
The water tap leaks. Is the water inlet hose loose ? Fasten the inlet hose.