3
Patent pending and/or patent www.assaabloydss.com/patents
Medeco is a brand associated with ASSA ABLOY High Security Group, Inc., an ASSA ABLOY Group company. Copyright © 2020. ASSA ABLOY High Security Group, Inc.
All rights reserved. Reproduction in whole or in part without the express written permission of ASSA ABLOY High Security Group, Inc. is prohibited.
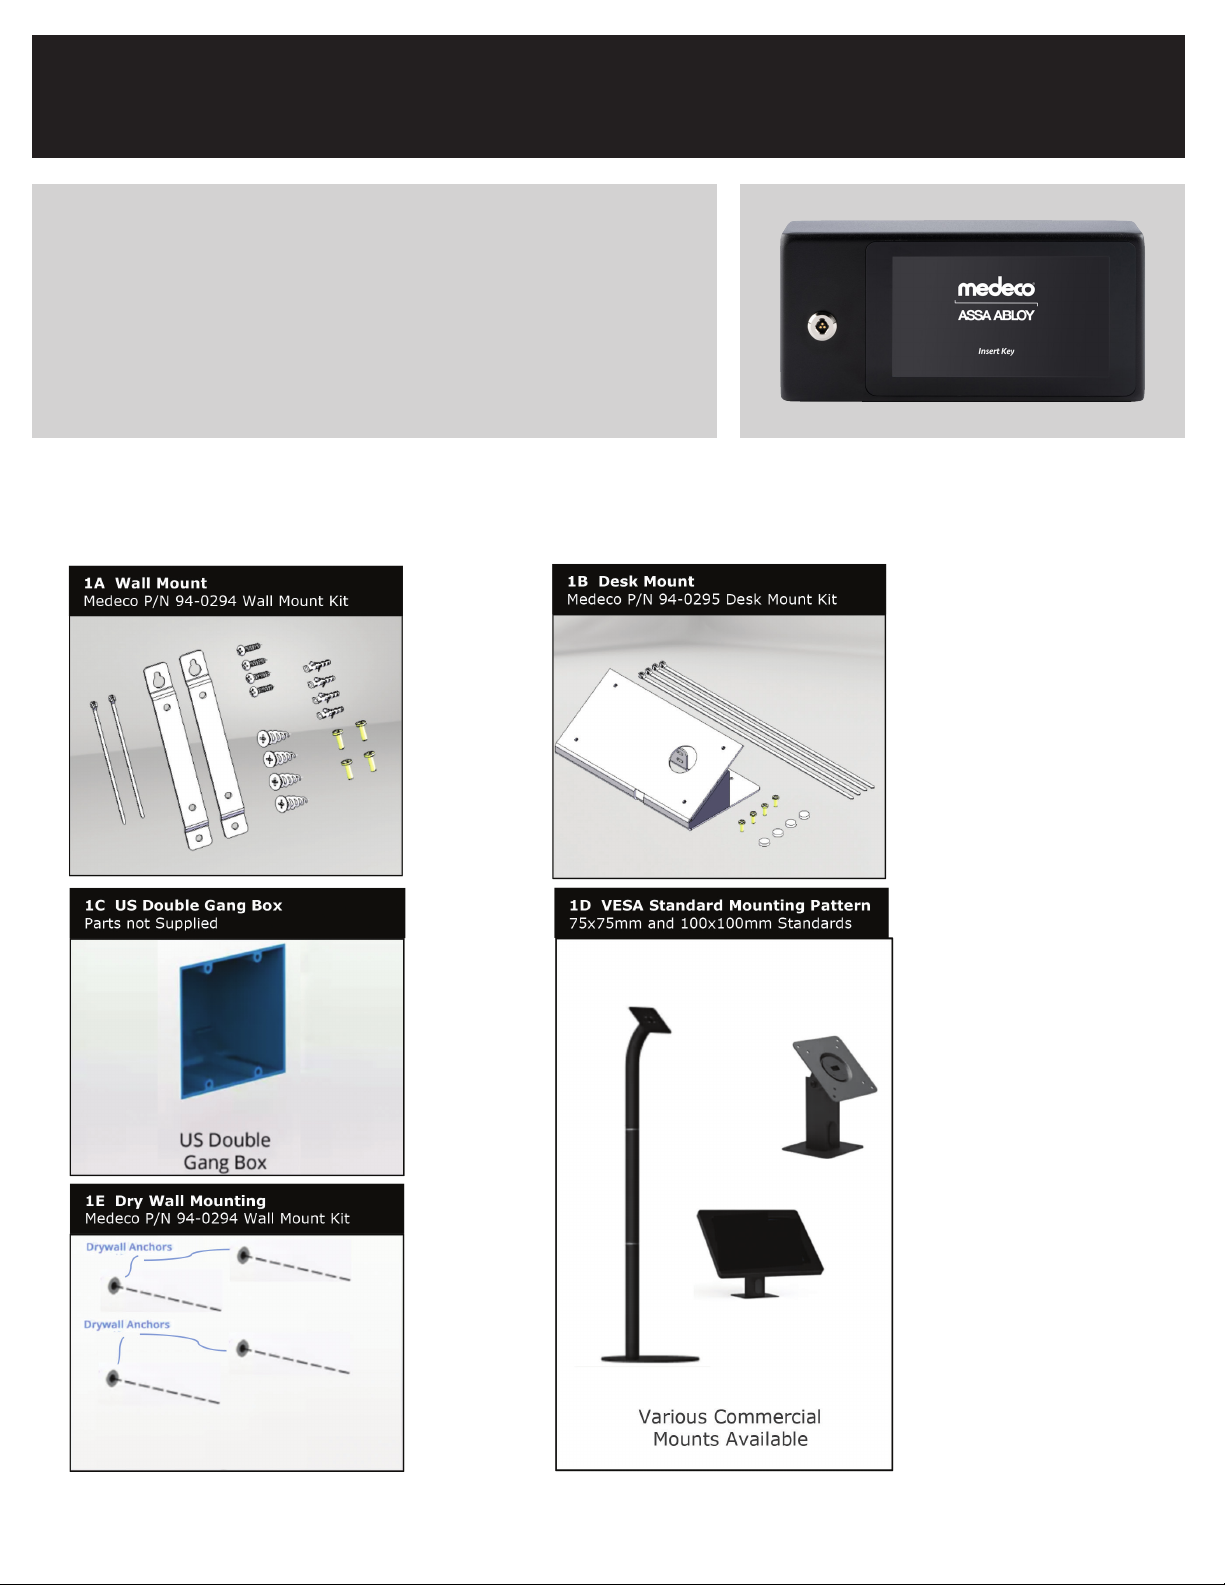
The XT IPD Mounting Bracket And Mounting Locations
THE XT IPD MOUNTING BRACKET AND MOUNTING LOCATIONS
INSTALLATION
Before setup of the IPD please ensure that you have the following items available or
completed.
• Admin user access to the XT Web Manager Software.
• The IPD to be installed has already been paired with the Medeco XT Web Manager
software.
Notes: XT IPD Pairing and XT Web URL Connectivity.
• An XT key that has a schedule with a Key Status of Pending or Active.
• Network cable with network access that when connected to the XT IPD will allow
connectivity to the XT Web Manager software.
• The tamper resistant enclosure assembly screws, 4pcs. (provided)
• The tamper resistant driver provided, 1pc. (provided)
• Bushings to insert into the two knock-out holes for alternate power and network
cable access, 2pcs. (provided)
• A power supply within 36” of the IPD mounting location.
• Philips screwdriver
Step 1
Remove the rear Mounting Bracket of the IPD and run the network and power cables
through the square hole in the center of the rear plate.
Note: Option Power and Network Cable Access
Double Gang Box
(4 Places)
VESA 75mm
(4 Places)
VESA 100mm
(4 Places)
Wall/Desktop Mount
(4 Places)
Tamper Proof Screws
(4 Places)
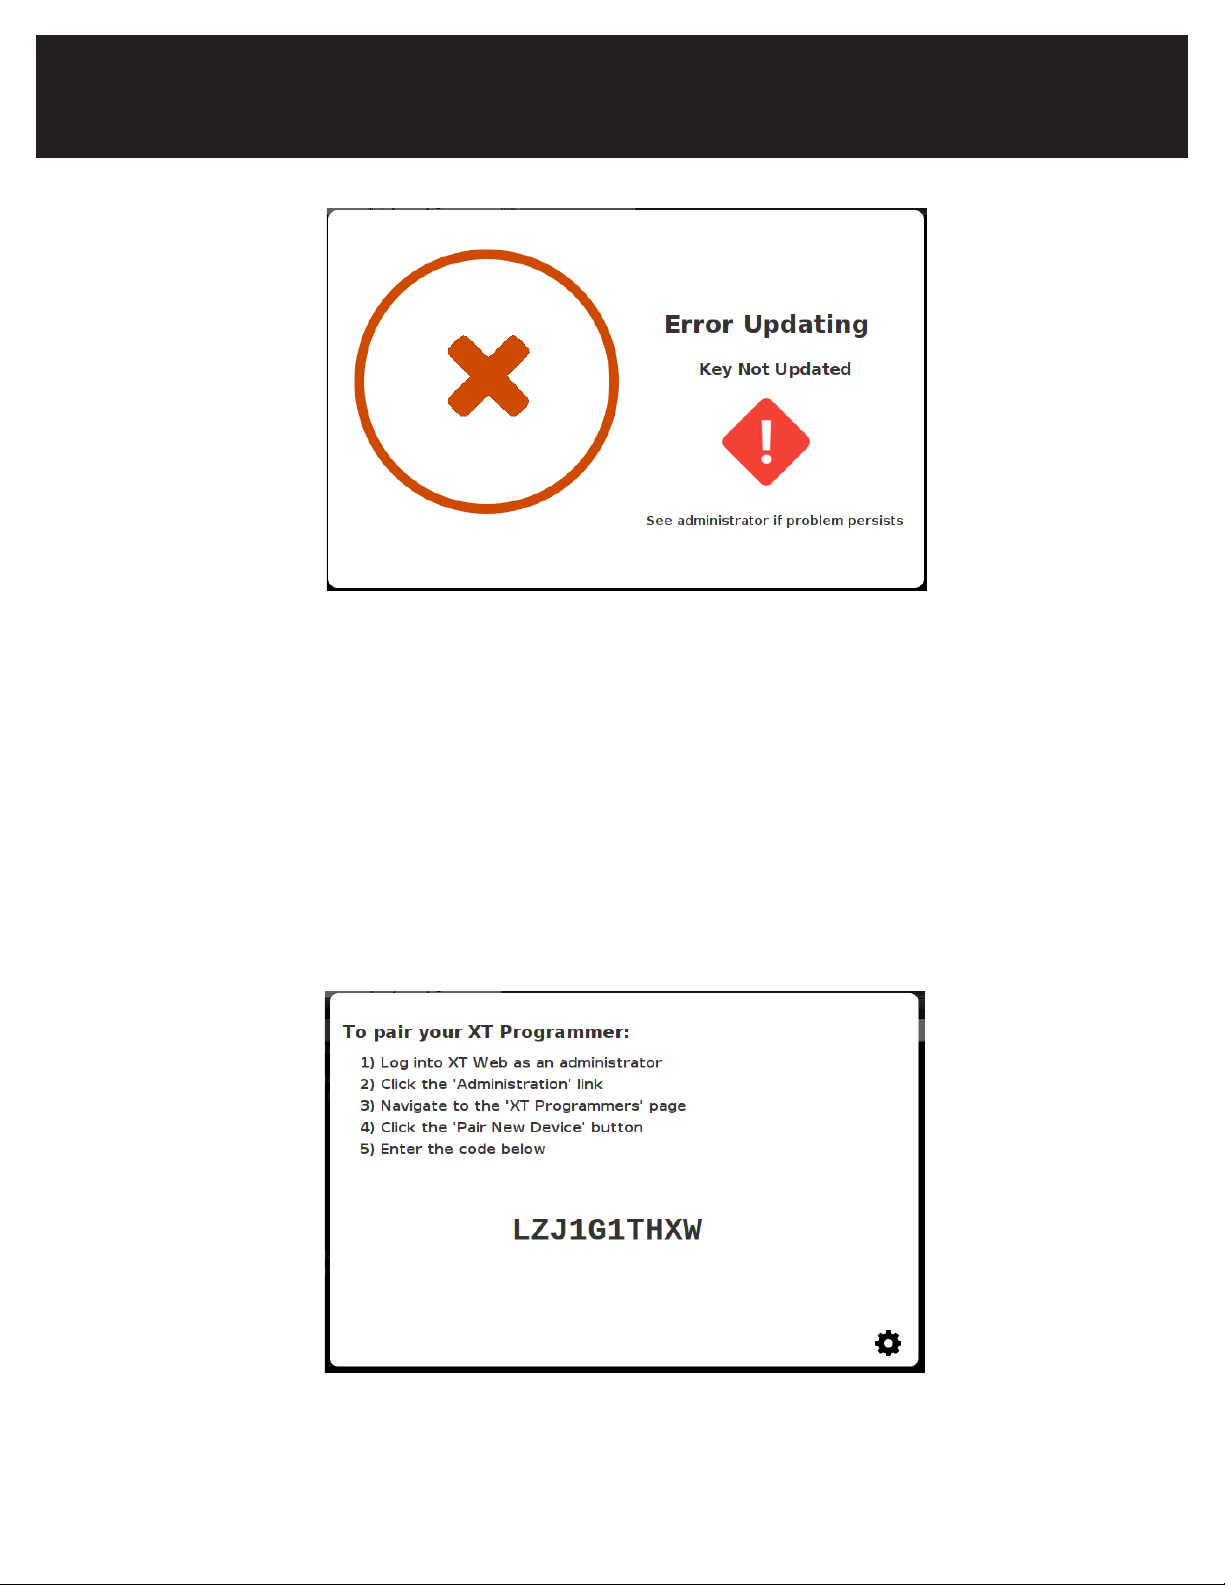
(1) Pairing the Medeco XT IPD is outlined in the User Guide for the Medeco XT Web Manager by selecting the HELP link at the top of
the XT Web software and browsing to the section on the XT Identification and Programming Device, Update Configuration Settings.
(2) If the IPD is being installed in a customer hosted solution, the URL should be changed to the URL of your XT Web Manager
Application Server as described in the XT Web Manager User Guide.
(1) Two knockout holes are located along the bottom surface of the XT IPD enclosure. These knockouts can be removed for optional
access of the power and network cables. After the cables are placed through the holes, insert the provided bushings to protect the
cables from the damage due to rubbing against the edges of the holes.
Installation
Before setup of the IPD please ensure that you have the following items available or completed.
• Admin user access to the XT Web Manager Software.
• The IPD to be installed has already been paired with the Medeco XT Web Manager software.
Notes: XT IPD Pairing and XT Web URL Connectivity.
• An XT key that has a schedule with a Key Status of Pending or Active.
• Network cable with network access that when connected to the XT IPD will allow connectivity to the XT Web Manager
software.
• The tamper resistant enclosure assembly screws, 4pcs. (provided)
• The tamper resistant driver provided, 1pc. (provided)
• Bushings to insert into the two knock-out holes for alternate power and network cable access, 2pcs. (provided)
• A power supply within 36” of the IPD mounting location.
• Philips screwdriver
(1) Pairing the Medeco XT IPD is outlined in the User Guide for the Medeco XT Web Manager by selecting the HELP
link at the top of the XT Web software and browsing to the section on the XT Identification and Programming
Device, Update Configuration Settings.
(2) If the IPD is being installed in a customer hosted solution, the URL should be changed to the URL of your XT Web
Manager Application Server as described in the XT Web Manager User Guide.
XT Identification and Programming Device (IPD)
Mounting and Installation