Page: 9 Version 3 : 01-04-2016
into the rivet body. This will require a firm push, the mushroom is fully seated once the base of
the mushroom head is flush with the cover.
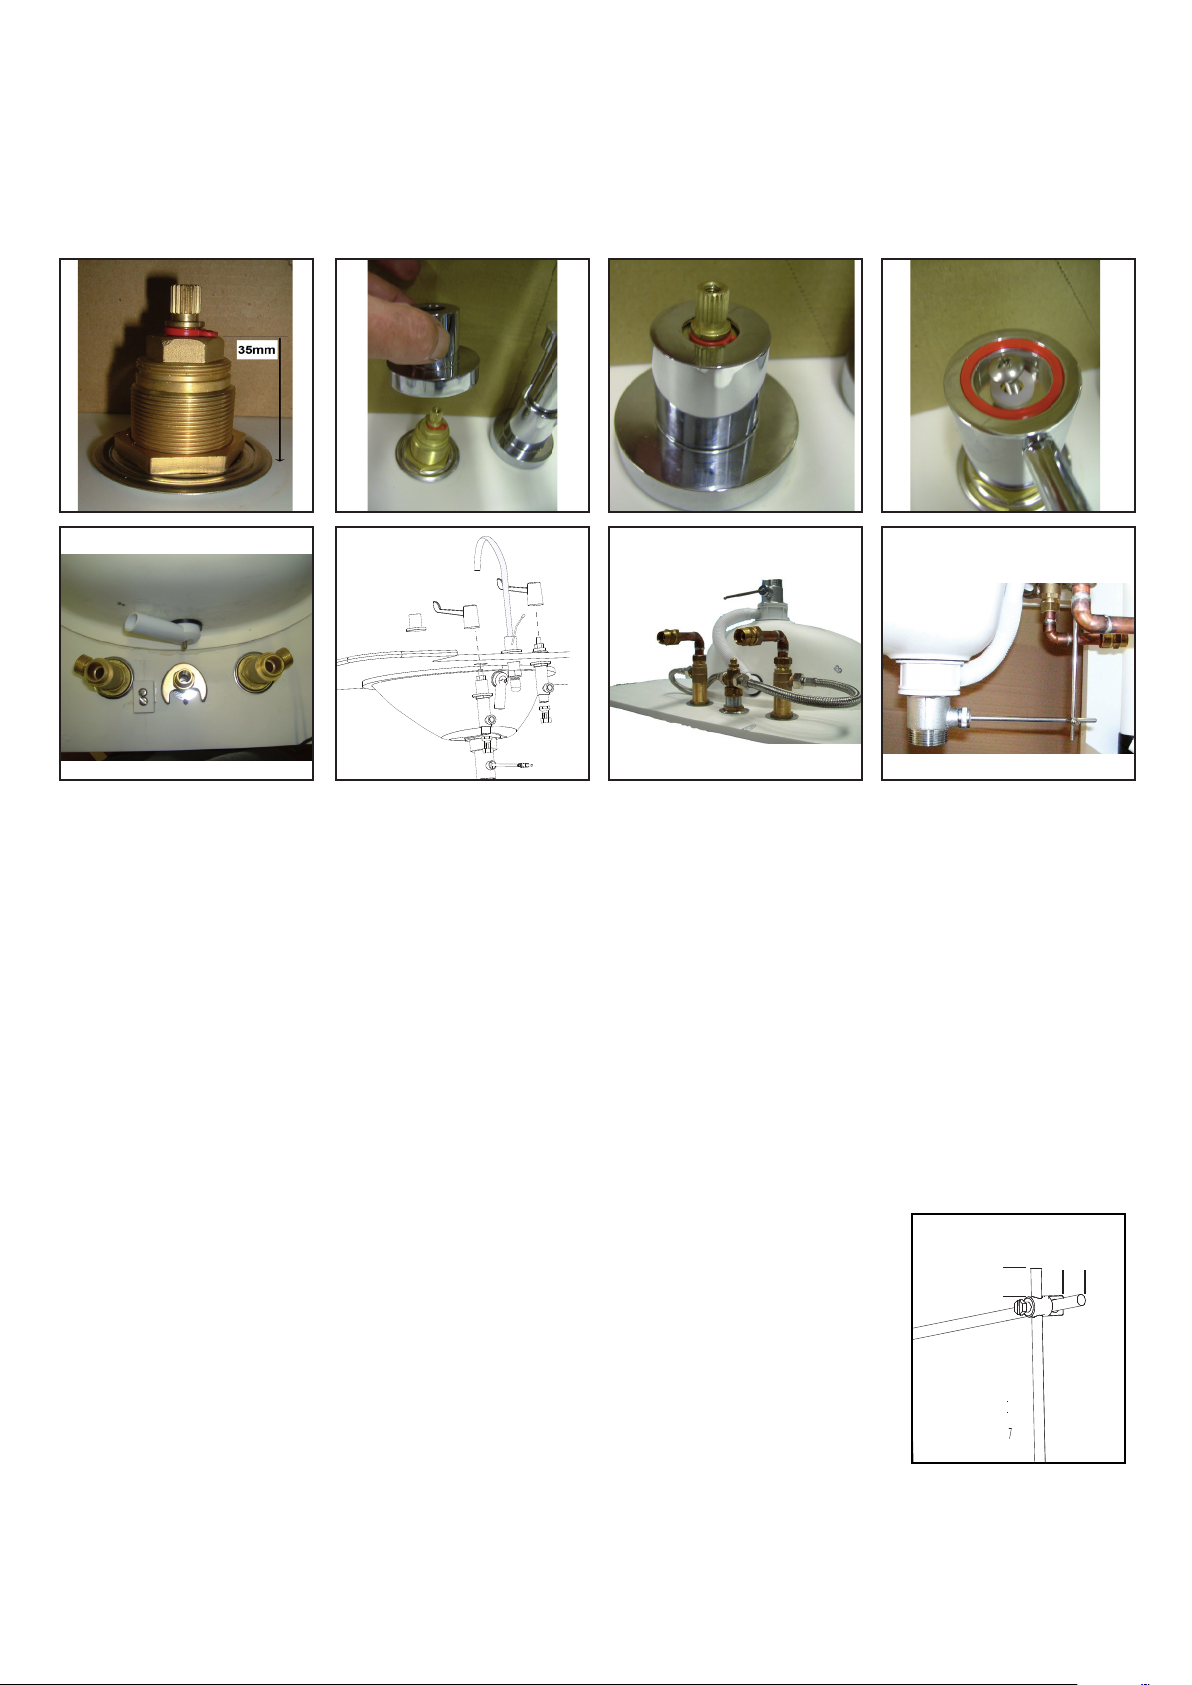
If not already in place, fit the horizontal waste plug operating rod so that the opposite end from
the ball passes through the lower slot in the plastic cover and then through the clamp on the
vertical operating rod.
Secure the horizontal rod by tightening the knurled nut onto the relevant fitting on the waste
assembly fitted to the basin, do not over tighten.
Working through the aperture in the base of the cover, support the waste assembly, fit the nut
and seals fitted to the P trap through the front hole in the cover and then connect to the P trap
Connect the P Trap to the underside of the basin.
Fit the free end of the flexible hose to the waste pipe fitted to the site as part of the pre
installation preparations. Secure the waste with a cable tie as shown in diagram on the previous
page.
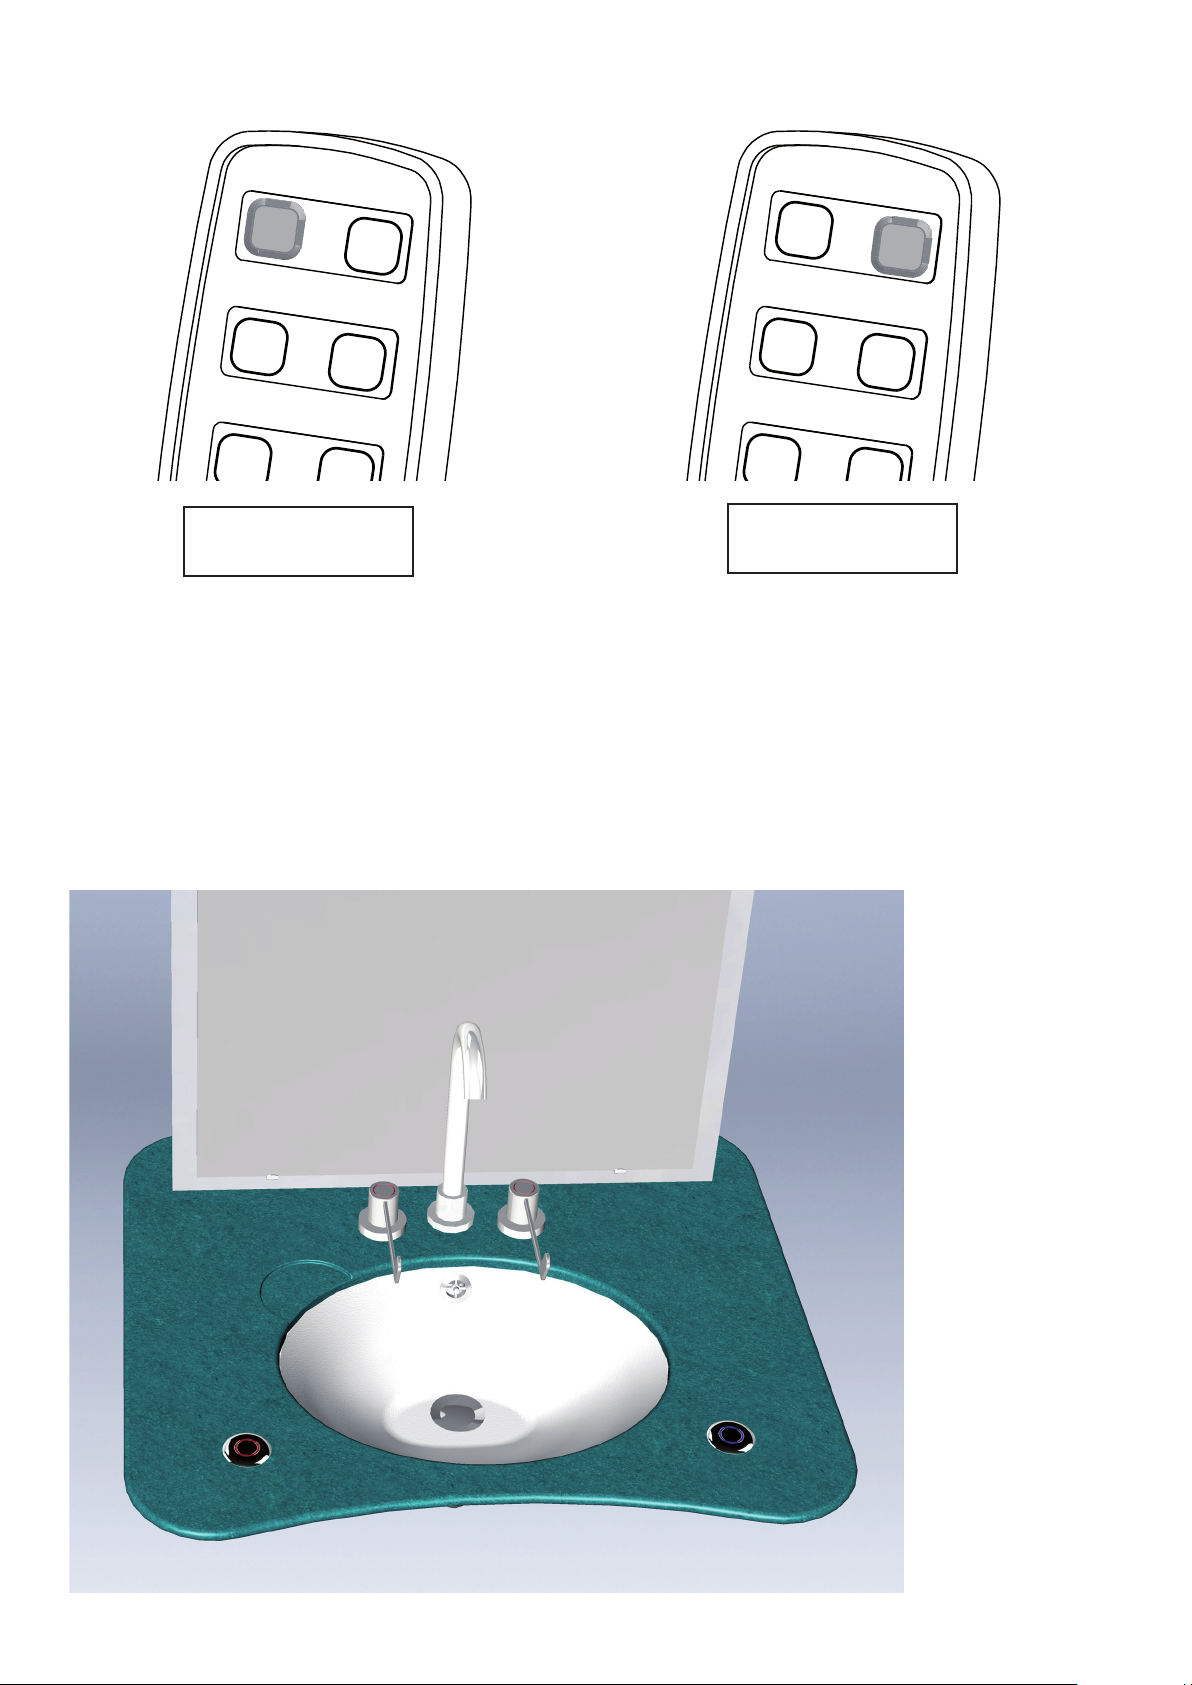
Rod
Adjuster
Basin viewed from below
Rod
Adjuster
Basin viewed from below
Adjustments to the screw on the pop-up waste plug
base and clamp for the rods may be necessary to ensure
maximum lift of the waste plug. Access to the clamp may
be gained through the aperture in the base of the white
plastic lower cover.
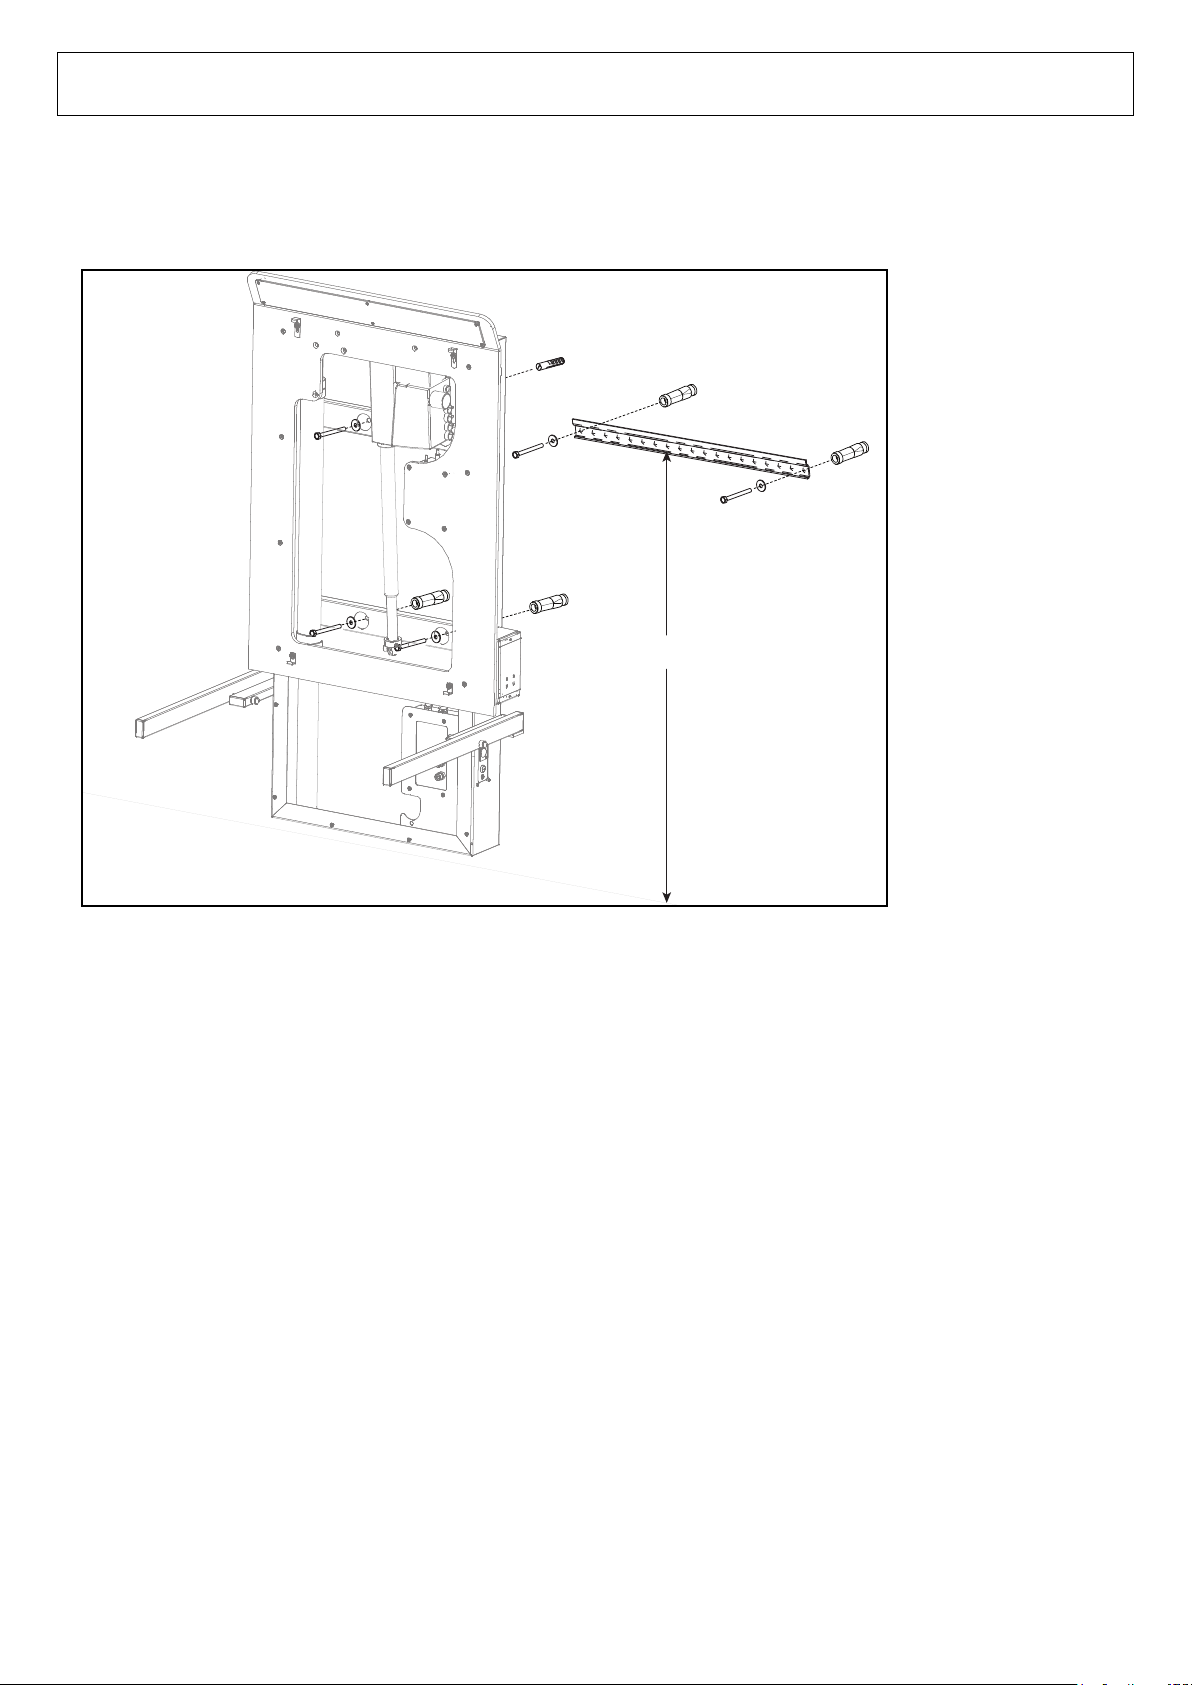
Fit the Trunking:
The hot and cold supply hoses need to be enclosed within
the white self adhesive trunking supplied.
Using the handset, raise the assembly to its highest
position.
Remove the capping from the front of the trunking.
Remove the protective film from the self adhesive tape
fitted to the rear of the trunking.
Pass the trunking behind the hot and cold supply hoses
taking care to ensure that the self adhesive tape is kept
away from the wall at this time. The top of the trunking
needs to be aligned with the recess in the bottom left hand
side of the rise and fall unit; through which were passed the
supply hoses earlier.
Using a level, ensure the trunking is vertical. Once aligned,
press the self adhesive tape against the wall to secure the
top of the trunking. Then press the entire length of the
trunking into position.
Fit the capping.
Fit the mirror:
Remove the two white plastic caps from above the top mirror clips and remove the screws.
Place the bottom edge of the mirror into the lower catches and hold in a vertical position. Ensure
the mirror is fitted centrally. Gently push the uppermost catches downwards into position such
that they retain the mirror in its correct position. Fit the 2 security scews .
Test the unit:
Operate the handset to raise and lower the basin over the full range of travel to ensure there
is clearance between all moving surfaces. Examine for evidence of leaks correct as necessary,
examine and clean the assembly.
Complete the warranty documentation and pass the completed warranty document to the client.
•
•
•
•
•
•
•
•
•
•
•
•
•
•
•
•
•