AstroSystems Heavy Duty Spider User manual

AstroSystems
Spider and Secondary Mirror Support System
The Newtonian telescope secondary mirror must be mounted, positioned and adjusted properly for optimum
telescope performance. Follow these instructions carefully and you will avoid the common problems
encountered when installing the secondary mirror. Proper installation of the secondary will eliminate
astigmatism from a pinched mirror, severe coma and diffraction from poor collimation and loss of image
illumination from improper mechanical layout.
Spider
The spider mounting holes must be located accurately to minimize diffraction. To position the four
mounting holes, wrap a piece of paper that is at least 1 1/2 times the circumference of the tube around the
tube (adding machine paper works great) and make sure the edges line up squarely where they overlap.
Mark the paper on the bottom layer at the end of the top layer where the paper overlaps. This will be an
accurate measure of the circumference of the telescope tube.
The portion of the paper representing the tube circumference can now be folded in half and then half again.
Each of the folds and the end mark will give the hole positions at 90 degree increments around the tube.
Wrap the paper around the tube at the proper distance from the front end of the tube. Using a 13/64" drill
bit, drill the holes at the marks on the paper. The holes should be positioned relative to the focuser as in
Figure 1 and Figure 2 (over).
Installation
Always thread a screw in each vane end before installing to clear any obstruction of the threads. After
the dry fit, apply a tiny drop of oil to the end threads of each screw before installing into vane end.
This insures a consistent "feel" so each vane is tightened equally.
Install the spider, tensioning it so that moderate pressure at the center body won't deflect any of the vanes.
If the telescope tube doesn't retain its shape after tensioning (often experienced with cardboard or other non-
metallic materials), it may be necessary to reinforce the tube with several layers of epoxy/fiberglass inside or
wood or metal end rings at the tube ends. The following drawing shows the correct installation of the spider.
The spider should be 0.1-0.15" smaller than the tube inside diameter to allow enough tension. A thin vane
spider offers the best optical performance and relies on tension for rigidity and holding proper collimation of
the secondary. If the spider touches the
tube wall it is too large or the tube is
too flexible and should be corrected.
Adjustment
Stand back a few feet from the front of
the telescope and check that the
reflection of the spider vanes in the
primary are as narrow a line as possible. As you are looking in the front of the tube you can rotate the vane
ends to accomplish this. Slight vane deformations will usually be pulled straight when the mounting screws
are tensioned. If some should remain they are easily worked out with some judicious adjustment by hand
while the spider is under tension.
Secondary Holder

The secondary mirror can be installed in the holder by first removing the four side screws holding the bezel.
Carefully slide the secondary into the bezel. The bezel is made from 0.030" aluminum to minimize
diffraction. Be careful when handling it to avoid bending.
Larger holders (>5") are supplied with a foam insert and some fiberfill. The fiberfill is placed against the
secondary and the foam plug is installed last. This supports heavier secondary mirrors properly and still
leaves some space if you use an Astrosystems Dew Guard.
Place enough fiber packing behind the secondary to hold it snugly in place but don't over-pack. Replace the
bezel on the back plate with the four screws and install the holder in the spider, orienting the collimation
screws so they are evenly centered between the vanes. Make sure that one of the collimation screws is
positioned at the top of the holder (towards the focuser).
This rotational alignment can be made by loosening all the collimating screws a small amount and rotating
the mirror, bezel and back plate relative to the adjustment plate and mounting stud. Retighten the
collimation screws to hold in place. The rotation of the entire holder assembly can now be done by
loosening the mounting nuts on the stud and rotating the entire unit. When adjusting tilt, loosen one screw
and then tighten the opposite screw. This "push - pull" will move the secondary accurately in increments
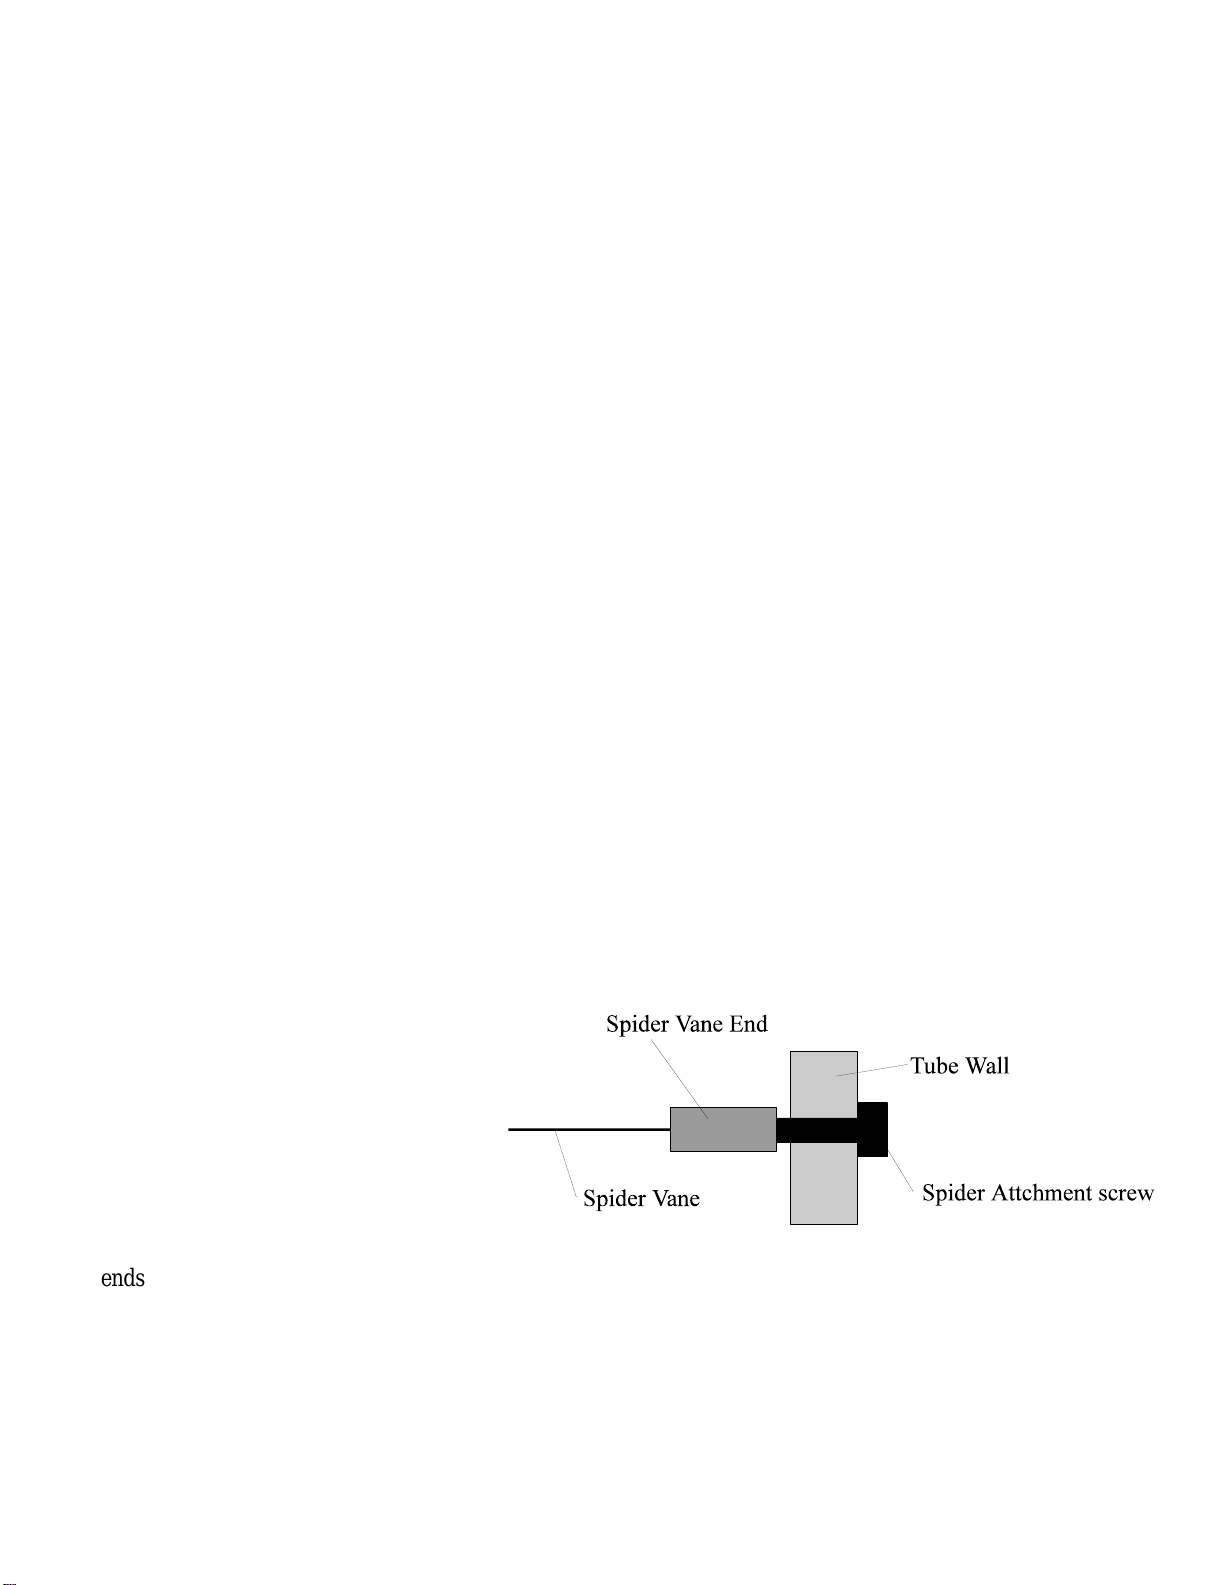
and make tightening after each adjustment minimal or unnecessary. Secondary Holders 2.14" and smaller
can mount into 1/4" or 3/8" ID spiders. Use the supplied phenolic tube in a 3/8" spider for a 1/4" secondary
holder shaft.
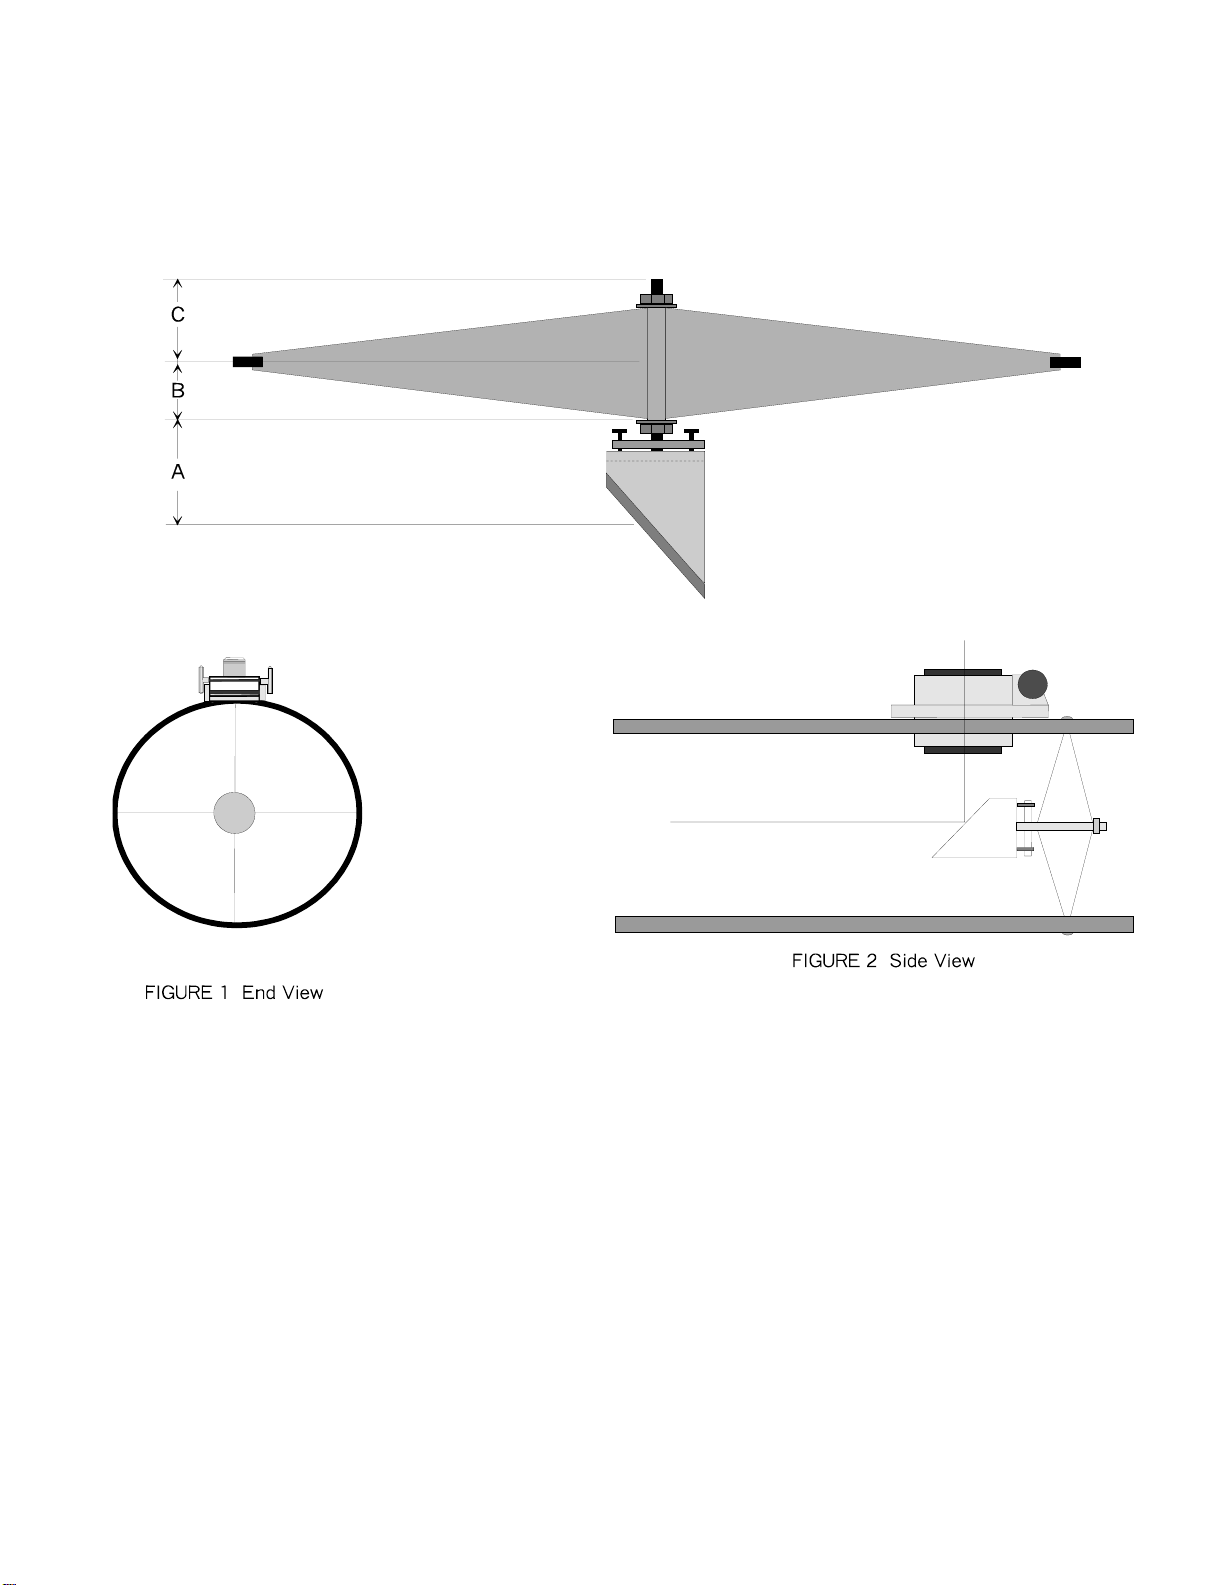
Minor A* B** C A+B A+B+C Weight
Axis (lbs.)
1.3 2.7 0.75 1.6 3.45 5.05 0.14
1.36 2.75 0.75 1.55 3.5 5.05 0.14
1.52 2.7 0.75 2.0 3.45 5.45 0.16
1.83** 2.9 0.75 2.75 3.65 6.4 0.19
1.83 2.9 1.25 2.25 4.15 6.4 0.19
2.14** 3.3 0.75 2.9 4.05 6.95 0.24
2.14 3.3 1.25 2.4 4.55 6.95 0.24
2.6 3.8 1.25 2.25 5.05 7.3 0.44
3.1 4.2 1.25 2.0 5.55 7.55 0.55
3.1 4.2 1.5 2.0 5.7 7.7 0.55
3.5 4.5 1.5 2.7 6.0 8.7 0.78
4.0 4.9 1.5 2.75 6.4 9.15 0.91
4.25 5.65 1.5 2.75 7.15 9.9 0.96
4.5 5.4 1.5 2.5 6.9 9.4 1.25
5.0 5.8 1.5 2.75 7.3 10.05 1.35
5.5 5.9 1.5 3.00 7.4 10.4 1.58
* This is the actual dimension plus 0.2" for 1.3 - 3.5" holders and plus 0.4" for 4" and larger holders,
allowing lateral adjustability to position the secondary mirror under the focuser.
** The half-width (B) of these two spider/secondary holder combinations is using the “A” spider with the
1.5" center body. AstroSystems spiders have a half-width of 0.75" for spiders up to 11" and 1.25" for larger
spiders. The table above reflects the most common size combinations used for visual telescopes. You may
have to modify the above dimensions before drilling mount holes if you use a relatively large secondary, for
say photography, or a small secondary as in a planetary or CCD scope. Just use the actual half-width of your
spider and change the other dimensions accordingly.

AstroSystems, Inc.
124 N. Second St.
LaSalle, Co. 80645 USA
970-284-9471 / 970-284-9473 fax www.astrosystems.biz
This manual suits for next models
2
Table of contents
Popular Accessories manuals by other brands

Veris
Veris HD series installation guide

Responsive Respiratory
Responsive Respiratory Purify O3 Elite Series quick start guide

SKD
SKD RAPIFLOW FSM3 Series instruction manual

Kenwood
Kenwood PG-5F instruction manual

MICRO-EPSILON
MICRO-EPSILON optoncdt 1700 Assembly instructions

Eaton
Eaton CEMU-01/03 Assembly instructions

Ellia
Ellia ARM-120 manual

Lightolier
Lightolier Lytespan 24MHT45RF specification

Skorpion Sports
Skorpion Sports SKORPION QUADLINES user manual

AlzaPower
AlzaPower INGOT PBI20Q Series user manual

Hathaway
Hathaway BG3143 Assembly manual

Motorline professional
Motorline professional WIWEATHER User's and installer's manual